Epson Stylus CX7300 User Manual
Hide thumbs
Also See for Stylus CX7300:
- Service manual (159 pages) ,
- Basic operation manual (24 pages) ,
- Instruction (8 pages)
Table of Contents
Advertisement
Copy a Document or Photo
You can copy documents or photos in color or black and white on your Epson Stylus CX7300
Series. You can also make quick draft copies.
Copy Documents
Copy Photos
Copy Draft Documents
Note:
Copies may not be exactly the same size as your original document.
Copy Documents
You can copy documents onto letter- or A4-size plain paper or Epson Bright White paper using
your Epson Stylus CX7300 Series just like you would on a copy machine.
1. Press the
Encender (On) button to turn on the Epson Stylus CX7300 Series.
2. Load letter- or A4-size plain paper or Epson Bright White paper in the sheet feeder.
Tip:
Load only the recommended number of sheets.
3. Place your original document on the document table.
4. Press the paper size button, if necessary, to select Carta/A4 Papel Normal (Letter/A4 Size
Plain Paper).
5. Press the Copias (Copies) button to select from 1 to 9 copies. The number is displayed in the
Copias window.
To make 10 to 100 copies, press the Copias (Copies) button until
(Copies) window. Then load only enough paper for the copies you want to make. For
example, for 12 copies load 12 sheets of paper. (Be sure to change this setting back to 1 when
you're finished.)
6. Press the
Iniciar
color documents) to start copying.
button (for black-and-white documents) or
appears in the Copias
Iniciar
button (for
1
Advertisement
Table of Contents

Related Manuals for Epson Stylus CX7300


Summary of Contents for Epson Stylus CX7300
- Page 1 Copy a Document or Photo You can copy documents or photos in color or black and white on your Epson Stylus CX7300 Series. You can also make quick draft copies. Copy Documents Copy Photos Copy Draft Documents Note: Copies may not be exactly the same size as your original document.
- Page 2 1. Press the Encender (On) button to turn on the Epson Stylus CX7300 Series. 2. Load 4 × 6-inch (10 × 15 cm) Epson photo paper (various types available) in the sheet feeder. Tip: Load only the recommended number of sheets.
- Page 3 Start B&W and Start Color buttons The Epson Stylus CX7300 Series automatically sizes your photo to fit on the 4 × 6-inch (10 × 15 cm) paper you loaded. If you need to cancel copying, press the Cancelar (Stop) button.
-
Page 4: Load Paper
Stop button Start Black and White and Start Color buttons If you need to cancel copying, press the Cancelar (Stop) button. Load Paper Before you copy or print, load paper for the type of printing you will do. Load Paper for Photos Load Paper for Documents Load Envelopes General Paper Information... - Page 5 5. Insert paper, glossy or printable side up, short edge first, against the right side and beneath the tab. Tip: Load only the recommended number of sheets. Load paper short edge first, no matter which way your photo faces. Do not load paper above the arrow on the edge guide. Check the photo paper package for any additional loading instructions.
- Page 6 Load Paper for Documents You can print documents on a variety of paper types and sizes. 1. Open the paper support and flip up the extension. 2. Open the output tray and pull out the extensions. 3. Flip the feeder guard up. 4.
- Page 7 6. Slide the edge guide to the edge of the paper, but not too tightly. 7. Flip the feeder guard down. See also: Load Paper for Photos Load Envelopes Load Envelopes You can print on plain paper or air mail envelopes in 4 1/8 × 9 1/2 inch (10.5 × 24.1 mm) (#10) size.
- Page 8 Bright White Paper Epson Presentation Paper Matte Epson Photo Paper Glossy 20 sheets Epson Premium Photo Paper Glossy Epson Ultra Premium Photo Paper Glossy Epson Premium Photo Paper Semi-gloss Epson Premium Presentation Paper Matte 1 sheet Epson Premium Presentation Paper Matte...
- Page 9 Available Epson Papers Paper type Size Part number Sheet count Epson Bright White Paper Letter (8.5 × 11 in. [21.6 × 28 S041586 cm]) Epson Photo Paper Glossy 4 × 6 in. (10.2 × 15.2 cm) S042038 S041809 S041809-20 Letter (8.5 × 11 in. [21.6 × 28...
- Page 10 Paper or Media Type Settings for Loaded Paper For optimal image quality, it is important to choose the correct Type or Media Type setting. It tells your Epson Stylus CX7300 Series what kind of paper you’re using and adjusts the ink coverage accordingly.
-
Page 11: Place Originals For Copying Or Scanning
For this paper Select this paper Type or Media Type setting Epson Premium Presentation Paper Matte Premium Presentation Paper Matte Epson Premium Presentation Paper Matte Double-sided Epson Photo Quality Self-adhesive Sheets Envelopes Envelope Place Originals for Copying or Scanning Before you copy or scan, place your documents or photos on the scanner. - Page 12 See also: Place Photos Place Photos Position your photos on the glass to copy or scan. 1. Open the document cover. 2. Place your original photo face-down on the glass with the top facing into the front right corner. 3. Close the document cover gently to keep your photo in place.
-
Page 13: Print From A Memory Card
Remove Memory Card Insert Memory Card Insert one card at a time in one of the Epson Stylus CX7300 Series memory card slots. Insert the type of card you have into the correct slot, as shown below. Compatible memory cards... - Page 14 Also consult your memory card and adapter documentation for any special use instructions for your card or adapter. If you will only be printing from your memory card, it is best if the Epson Stylus CX7300 Series is not connected to your computer (or your computer should be turned off).
- Page 15 Print Index Sheet Note: If you will only be printing from your memory card, it is best if the Epson Stylus CX7300 Series is not connected to your computer (or your computer should be turned off). 1. Load several sheets of plain letter- or A4-size paper.
- Page 16 Print Index Sheet button The most recent photos are printed on the first index sheet, up to 30 photos per page. Note: If you need to cancel printing, press the Cancelar (Stop) button. Now you can select your photos on the sheet, and scan and print them. Print Photos From Index Sheet Once you have printed an index sheet, you can mark the photos you want to print right on the sheet, scan the sheet, and print the photos automatically.
- Page 17 If your camera supports DPOF (Digital Print Order Format), you can select the photos you want to print while your memory card is still in your camera. Then you can insert the card in the Epson Stylus CX7300 Series and quickly print them.
-
Page 18: Print From Your Computer
Memory card access light Caution: Do not remove a card or turn off the Epson Stylus CX7300 Series when the memory card access light is flashing or you may lose photos on the card. If the Epson Stylus CX7300 Series is not connected to your computer, pull the memory card straight out of its slot. - Page 19 After you open a document or photo in a Windows program, follow these steps to access your print settings: 1. Open the File menu and select Print. 2. Select EPSON Stylus CX7300 Series. 3. Click Properties or Preferences. Note: If you don’t have these buttons, click Setup, Printer, or Options, then click Properties or Preferences on the next screen.
- Page 20 Follow the steps in these sections to select settings, print, and control printing: Select Basic Options Change Print Layout Select Advanced Options Print Your Document or Photo Check Printing Status See also: Print From Windows Photo Gallery in Windows Vista Print From the Picture and Fax Viewer in XP Change Default Print Settings Print From Windows Photo Gallery in Windows Vista...
- Page 21 3. Click the Print icon at the top of the screen, then select Print from the drop-down menu that appears. 4. Select EPSON Stylus CX7300 Series, then choose the size and type of paper that you loaded in the printer.
- Page 22 Letter (8.5 × 11 in. [21.6 × 28 cm]) Legal (8.5 × 14 in. [21.6 × 35.6 cm]) 4 × 6 in. (10.2 × 15.2 cm) 5 × 7 in. (12.7 × 17.8 cm) 8 × 10 in. (20.3 × 25.4 cm) Envelope #10 (4 1/8 ×...
- Page 23 Print From the Picture and Fax Viewer in XP With Windows XP, you can quickly print photos using the Picture and Fax Viewer. 1. Locate a photo on your computer. 2. Right-click the photo, highlight Open With, and select Windows Picture and Fax Viewer. 3.
- Page 24 6. Select EPSON Stylus CX7300 Series and click Printing Preferences. Your printer setting window opens: 7. Select your basic print options, layout, and advanced options as necessary. 8. When you’re ready to print, click OK. 9. Click Next. You see this screen:...
- Page 25 10. Select Full page photo print and click Next. Your photo prints. During printing, you can check the print status. See also: Print From a Program Change Default Print Settings Select Basic Options Click the Main tab on the top of the printer settings window to select your basic print options.
- Page 26 1. Select a Quality Option that matches your document or photo, and the print quality you want. Quality Option settings • Draft: for rough drafts with reduced quality • Text: for documents containing only text • Text & Image: for documents with text and images •...
- Page 27 You can select a variety of sizing and layout options on the Page Layout tab. 1. To rotate or flip the image you’re printing, click the Rotate 180 or Mirror Image checkboxes. (If you are printing on Epson Iron-on Cool Peel Transfer Paper, turn on Mirror Image.) 2.
- Page 28 3. To select multiple copies and their print order, use the Copies, Reverse Order, and Collate options. 4. To print multiple pages on one sheet, or one image across multiple sheets, click the Multi- Page checkbox and select multi-page options. Multi-Page Options •...
- Page 29 Click the Advanced tab on the top of the printer settings window to select Advanced options. 1. Select the paper type setting that matches the paper you loaded. 2. Select the print quality setting for your document or photo. Advanced Print Quality Settings Available print quality settings depend on the selected paper Type or Media Type setting.
- Page 30 Saturation, and individual Cyan, Magenta, and Yellow color tones. • Color Mode: when using Color Controls, selects the main method of printing colors for photos and graphics; EPSON Vivid or AdobeRGB. • Gamma: when using Color Controls, adjusts the midtone density in the print.
- Page 31 • Save all your selected settings for later use (click Save Setting and name the settings); to use saved settings later, select them from the Custom Settings list. • Return to the default settings (click Reset Defaults). • Select different print layout settings. •...
- Page 32 • To cancel printing, click Stop. • To pause printing, click Pause. • To resume printing after pausing it, click Resume. • For print information, click Tips. If you see an error during printing, see Solve Problems for solutions. Change Default Print Settings When you change your print settings from within a program, the changes apply only while you’re printing at that time.
- Page 33 You can still change the default settings from within a program as needed. Macintosh Printing ® You can print on your Epson Stylus CX7300 Series using any Macintosh OS X printing program. Follow the steps in these sections to print from your Macintosh:...
- Page 34 Open the Page Setup window to select your page options. 1. Open the File menu and select Page Setup. 2. Select Stylus CX7300 as the Format for setting. 3. Select the Paper Size setting for the paper you loaded. If you want to print a borderless photo, select the paper size with a Sheet Feeder - Borderless option.
- Page 35 After selecting your page options, open the Print window to select your print options. 1. Open the File menu and select Print. Pop-up menu 2. Select Stylus CX7300 as the Printer setting. 3. Select Print Settings from the pop-up menu.
- Page 36 4. Select the Media Type setting that matches the paper you loaded. 5. Select Color or Black ink printing in the Color pop-up menu. 6. Select Automatic as the Mode setting for basic printing. 7. Move the Quality/Speed slider as necessary to select higher quality or faster print speed. You can also: •...
- Page 37 Photo RPM: for the best print quality (and slowest print speed) 3. Click High Speed to speed up printing (may reduce print quality). 4. To flip the image you’re printing, click Mirror Image. (If you are printing on Epson Iron-on Cool Peel Transfer Paper, turn on Mirror Image.) 5.
- Page 38 3. To print on both sides of your paper, select one of the options under Two Sided Printing, either Long-Edged Binding or Short-Edged Binding. When you print, the Epson Stylus CX7300 Series will prompt you to reload the printed pages as necessary.
- Page 39 • Color Controls lets you select a color Mode that selects the main method of printing colors for photos and graphics: EPSON Vivid or AdobeRGB. Gamma adjusts the midtone density in the print. Advanced Settings adjust Brightness, Contrast, Saturation, and individual Cyan, Magenta, and Yellow color tones.
- Page 40 Note: This option is available only when you chose a Paper Size setting of Sheet Feeder - Borderless on the Page Setup window. 2. To adjust the borderless expansion, select Min, Mid, or Max in the pop-up menu. Note: You may see white borders on your printed photo if you use the Min setting. When you’re finished, you’re ready to print.
- Page 41 During printing, you can view the progress of your print job, control printing, and monitor ink levels. 1. Click the Stylus CX7300 or Print Center icon when it appears in the dock at the bottom of the screen. In Print Center, double-click Stylus CX7300 on the next screen.
-
Page 42: Scan To Your Computer
3. When you’re finished, close the window to exit the program. Scan to Your Computer You can scan original documents and photos on your Epson Stylus CX7300 Series and save them as digital files on your computer using the Epson Scan program. - Page 43 Camera/Scanner icon. Note: In some programs, you must select the Epson Stylus CX7300 Series as the “source” first. If you see a Select Source option, choose it and select your Epson Stylus CX7300 Series. 3. Select your Epson Stylus CX7300 Series. Epson Scan starts automatically.
- Page 44 Note: With Windows Vista or XP, do not choose a WIA option for your Epson Stylus CX7300 Series; it will not work correctly. Now you can select a scan mode. Select a Scan Mode Epson Scan provides a choice of scan modes with different levels of automatic settings. Select the...
- Page 45 Now you can view and print the image. Scan in Home Mode (Semi-Automatic) Start Epson Scan and make sure Home Mode is selected as the Mode setting. Follow the instructions in these sections to select settings as necessary for your type of original:...
- Page 46 1. Select the type of original you’re scanning as the Document Type, such as Photograph or Text. 2. Select whether your original is Color, Grayscale, or Black&White as the Image Type. 3. Now select the Destination setting. Select Scan File Destination 1.
- Page 47 You will enlarge the images as you scan them (increase the Target Size setting). If you will enlarge the images in Epson Scan so you can use them at a larger size, accept the Resolution setting selected by Epson Scan.
- Page 48 2. To zoom in on your preview image, double-click the thumbnail or click the thumbnail and click the Full Size tab. (In a normal preview, click the auto locate icon and click Zoom.) 3. To rotate or flip the image (thumbnail preview only), click the thumbnail and click the rotation or mirroring icon.
- Page 49 Marquee Normal preview: Click the auto locate icon to create a marquee. Marquee 2. To move a marquee, click inside the marquee and drag it where you want it. 3. To resize a marquee, place the cursor over a marquee edge or corner, click, and drag the edges where you want them.
- Page 50 Tip: To retain the marquee width/height proportions, hold the Shift key as you resize the marquee. 4. Normal preview: You can create up to 50 marquees at a time. Click the copy marquee icon to copy existing marquees, or click the delete marquee icon to delete the selected marquee.
- Page 51 2. Select the size you want your scanned image to be from the Target Size list. A dotted line (marquee) appears on your preview image proportioned for that size. Marquee Note: If you need to rotate the orientation of the scan area marquee, click the orientation icon.
- Page 52 Scan in Professional Mode (Fully Manual) Start Epson Scan and make sure Professional Mode is selected as the Mode setting. Follow the instructions in these sections to select settings as necessary for your type of original: Select Document or Image Type...
- Page 53 Adjust Image Quality Select Scanned Image Size Scan and View Image See also: Scan Automatically (Full Auto Mode) Scan in Home Mode (Semi-Automatic) Select Document or Image Type 1. Select the basic type of original you’re scanning as the Document Type. Select Reflective for documents or photos.
- Page 54 You will enlarge the images as you scan them (increase the Target Size setting). If you will enlarge the images in Epson Scan so you can use them at a larger size, accept the Resolution setting selected by Epson Scan.
- Page 55 2. To zoom in on your preview image, click the auto locate icon and click Zoom. (In a thumbnail preview, double-click the thumbnail or click the thumbnail and click the Full Size tab.) 3. To rotate or flip the image (thumbnail preview only), click the thumbnail and click the rotation or mirroring icon.
- Page 56 Marquee Normal preview: Click the auto locate icon to create a marquee. Marquee 2. To move a marquee, click inside the marquee and drag it where you want it. 3. To resize a marquee, place the cursor over a marquee edge or corner, click, and drag the edges where you want them.
- Page 57 Tip: To retain the marquee width/height proportions, hold the Shift key as you resize the marquee. 4. Normal preview: You can create up to 50 marquees at a time, click the copy marquee icon to copy existing marquees, or click the delete marquee icon to delete the selected marquee.
- Page 58 Histogram Provides a graphical interface for adjusting highlight, shadow, and gamma levels individually. For advanced users only. Click the histogram adjustment button to use the settings. Tone Correction Provides a graphical interface for adjusting tone levels individually. For advanced users only. Click the tone correction button to use the settings.
- Page 59 Scale: reduces or enlarges your image by the percentage you enter • Trimming: turns automatic image cropping on or off (see Epson Scan Help for details) • unlock icon: unlocks the width/height proportions of the scanned image size so you can adjust it without constraint 6.
- Page 60 You can restore the colors in faded photos as you scan them using the Color Restoration feature. 1. Place your faded original photo on the document table. 2. Start the Epson Scan program or open it from another TWAIN-compliant scanning program. 3. Select the scan mode you want to use.
- Page 61 3. If you need to remove dust marks from your original document or photo as you scan, click the Dust Removal checkbox. 4. The Epson Stylus CX7300 Series automatically detects the top of certain photos by analyzing the preview for human faces, the sky, or other orientation factors using Auto Photo Orientation.
- Page 62 Your color-restored scanned image file is shown in Windows Explorer or the Macintosh Finder. Note: If you started your scan from within a TWAIN-compatible scanning program, your scanned images open in the program window. Click Close to exit Epson Scan. Now you can view and print the image. Scan to a PDF File You can scan a multi-page document and save it in one PDF (Portable Document Format) file on your computer.
- Page 63 5. Click Scan. 6. In the scan file settings window, select a folder for your file and select PDF as the file Type setting. 7. Click OK. 8. The Epson Stylus CX7300 Series scans the first page and displays this window:...
- Page 64 If you want to delete or reorder any of the pages, click Edit Page, then use the icons on the bottom of the editing window. (Click Help for details.) When you’re finished, click Save File. 10. Click Close to exit Epson Scan. ®...
- Page 65 5. Click OK. Epson Scan starts scanning. View and Print Scanned Images When you finish scanning images in Full Auto, Home, or Professional Mode from Epson Scan, you see the scanned file in the Windows Explorer or Macintosh Finder window.
-
Page 66: Transfer Files To/From A Memory Card
Follow these instructions to view the image and print it on your Epson Stylus CX7300 Series: 1. Double-click the scanned file thumbnail or name. The scanned image opens in the program on your computer assigned to the scanned file type, such as Windows Vista Photo Gallery for JPEG images or Acrobat Reader for PDF images. -
Page 67: Print From A Connected Digital Camera
USB DIRECT-PRINT printing, you can connect it to the Epson Stylus CX7300 Series and print your photos directly from the camera. Check your camera manual to see if it is compatible. Your photos must be JPEG format and sized from 80 × 80 to 9200 × 9200 pixels. -
Page 68: Replace Ink Cartridges
When you finish printing, turn off your camera and disconnect it from the USB port on the Epson Stylus CX7300 Series. Replace Ink Cartridges Your Epson Stylus CX7300 Series and its software will let you know when an ink cartridge is low or expended. - Page 69 Follow the instructions in these sections to check and replace your ink cartridges: Check Cartridge Status Purchase Epson Cartridges Replace Cartridges Using the Printer Sofware Utility Remove and Install Cartridges Check Cartridge Status You can check the ink cartridge status using your Windows or Macintosh.
- Page 70 If you do not select the Do not display this message again, you may receive the on-line offers. These offers are not valid in Latin America. To disable checking for ink offers or updates from Epson, right-click the printer icon in the bottom right corner of your screen and select Monitoring Preferences.
- Page 71 Note: Make sure the Check for Promotional update from Epson checkbox is not selected. Promotional offers are not valid in Latin America. Macintosh: 1. Open the Applications folder on your hard drive. 2. Open the EPSON Printer Utility 2. 3. Select CX7300 Series and click OK.
- Page 72 3 hours before using them. Leave your old cartridges in the Epson Stylus CX7300 Series until you are ready to replace them to prevent the print head nozzles from drying out.
- Page 73 Do not open ink cartridge packages until you are ready to install the ink. Cartridges are vacuum packed to maintain reliability. 1. Turn on the Epson Stylus CX7300 Series. If a cartridge is expended, the ink light on the control panel stays on. You must replace the cartridge to be able to print.
- Page 74 3. Press the Cancelar (Stop) button. The print head moves to the position to indicate which cartridge is low or expended. If no other cartridges are low or expended, the print head moves to the replacement position on the right. Go to step 5. 4.
- Page 75 6. Squeeze the tab on the cartridge and lift the cartridge straight up to remove it. Dispose of it carefully. Do not take the used cartridge apart or try to refill it. Warning: If ink gets on your hands, wash them thoroughly with soap and water. If ink gets into your eyes, flush them immediately with water.
- Page 76 When the Encender (On) light stops flashing and remains on, ink charging is finished. Caution: Never turn off the Epson Stylus CX7300 Series while ink is charging or you’ll waste ink. If the ink light flashes, press the Cancelar (Stop) button and press down all the cartridges securely.
-
Page 77: Adjust Print Quality
Check the Print Head Nozzles Clean the Print Head Nozzles Check the Print Head Nozzles You can print a nozzle check pattern to check for clogged nozzles using the Epson Stylus CX7300 Series control panel or your software. From the Control Panel 1. - Page 78 (the taskbar) and select Nozzle Check. Macintosh: Open the Applications folder, open the EPSON Printer Utility 2, select CX7300 Series, and click OK. Then select Nozzle Check. 3. Click Print.
- Page 79 3. Run a nozzle check to confirm that the print head is clean. You may need to clean the print head up to 2 times. You can also turn the Epson Stylus CX7300 Series off and wait at least 6 hours. Then try printing again.
- Page 80 If there are gaps or the pattern is faint, click Clean to clean the print head again. You may need to clean the print head up to 2 times. You can also turn the Epson Stylus CX7300 Series off and wait at least 6 hours. Then try printing again.
- Page 81 (the taskbar) and select Print Head Alignment. Macintosh: Open the Applications folder, open the EPSON Printer Utility 2, select CX7300 Series, and click OK. Then select Print Head Alignment. 3. Follow the on-screen instructions to print an alignment sheet.
-
Page 82: Solve Problems
If the light status does not help you solve your problem, check for additional solutions. If you need to determine if the Epson Stylus CX7300 Series is operating properly, run a printer check. See also:... - Page 83 Light/Copies window status Problem and solution If the other lights are off and you cannot use the Epson Stylus Encender (On) light CX7300 Series, it may be in sleep mode. Press any button flashing (except the Encender (On) button) to wake it up.
- Page 84 Copias (Copias) window Run a Printer Check A printer check will help you determine if the Epson Stylus CX7300 Series is operating properly. 1. Turn off the Epson Stylus CX7300 Series and your computer, if connected. 2. Disconnect any connected USB cables.
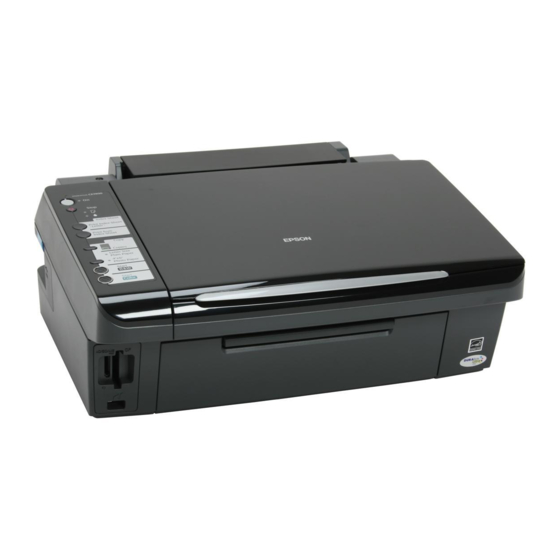
- Page 85 Product Parts Use these illustrations to identify the parts of your product. Edge guide Paper support Feeder guard Output tray and extensions Scanner lid Control panel buttons Document table Memory card slots USB port (for camera cable) Service only Power inlet USB port (do not open) (for power cable)
- Page 86 If the printer stops moving or making noise, but the Encender (On) light is still flashing after 5 minutes, turn off the Epson Stylus CX7300 Series. If the light is still flashing when you turn it back on, contact Epson.
- Page 87 Check to see if the print head nozzles are clogged. • The Epson Stylus CX7300 Series won’t operate properly if it’s tilted or at an angle. Place it on a flat, stable surface that extends beyond the base in all directions.
- Page 88 Cannot Transfer Files To/From Computer and Memory Card Cannot View or Print Photos on a Memory Card Mare sure you’re using a compatible memory card and have inserted only one card int the Epson Stylus CX7300 Series. Cannot Transfer Files To/From Computer and Memory Card Make sure the Epson Stylus CX7300 Series is securely connected to your computer and the card’s...
- Page 89 Check to see if the print head nozzles are clogged. • The Epson Stylus CX7300 Series won’t operate properly if it’s tilted or at an angle. Place it on a flat, stable surface that extends beyond the base in all directions.
- Page 90 • Make sure Quiet Mode is not selected. • If the Epson Stylus CX7300 Series is connected to a USB hub, disconnect unused USB devices. Cannot Print Over a Network You need to set up your software properly for network printing.
- Page 91 If you’re using a switch box or USB hub with your printer, connect the printer directly to your computer. • Turn the Epson Stylus CX7300 Series off, check that the cables are securely connected, and turn it back on again. Incorrect Image Size or Position •...
- Page 92 Use a support sheet with special paper, or try loading your paper one sheet at a time. • Make sure your paper meets the specifications. • Use Epson papers to ensure proper saturation and absorption of genuine Epson inks. • Align the print head. •...
- Page 93 Try using the ICM (Windows) or ColorSync (Macintosh) setting. • For best results, use genuine Epson ink and paper. Image Quality Problems (quality problem appears on screen) If a scanned image on your computer screen has a quality problem, check the solutions in this section.
- Page 94 Back of Original Image Appears in Scanned Image If your original is printed on thin paper, images on the back may be visible to the Epson Stylus CX7300 Series and appear in your scanned image. Try scanning the original with a piece of black paper placed on the back of it.
- Page 95 Note: With Windows Vista, click Continue, then go to the next step. 5. In the next window, select EPSON Stylus CX7300 Series and click OK. Then follow the on- screen instructions. 6. Open the Windows Control Panel, then click Uninstall a program under Programs (Windows Vista) or double-click Add or Remove Programs (other Windows versions).
- Page 96 11. Restart your Macintosh, then see the Start Here sheet to reinstall your software. Getting More Help If you need additional help with your Epson Stylus CX7300 Series or its software, contact Epson. For help with other software for your Epson Stylus CX7300 Series not made by Epson, contact the manufacturer.
-
Page 97: Clean And Transport Your Product
Online and E-mail ArcSoft PhotoImpression www.arcsoft.com support@arcsoft.com Clean and Transport Your Product If your Epson Stylus CX7300 Series gets dirty or you need to move it some distance, follow the instructions in these sections: Cleaning Transportation Cleaning To keep the Epson Stylus CX7300 Series working at its best, you should clean it several times a year. - Page 98 (Start) buttons. (Do not place an original on the document table.) This feeds paper through the printer to clean the rollers. Repeat if necessary. Transportation If you need to ship your Epson Stylus CX7300 Series or transport it a long distance, prepare it for transportation as follows: 1. Turn off the Epson Stylus CX7300 Series.
-
Page 99: Use Your Product On A Network
Use Your Product on a Network To use your Epson Stylus CX7300 Series over a small computer network, you need to install your printer software on the networked computer as necessary, and set up network printing. Note: If you want to print over a large network, consult your network administrator for setup instructions. - Page 100 7. Click the icon for the Epson Stylus CX7300 Series and click Next. 8. Follow the on-screen instructions to complete access to the shared printer. Note: You may need to insert the CD that came with the Epson Stylus CX7300 Series and click Have Disk. Macintosh Network Setup Install the Epson Stylus CX7300 Series software on the Macintosh to which you connected it.
-
Page 101: Specifications And Notices
Place the Epson Stylus CX7300 Series near a wall outlet where the plug can be easily unplugged. • If you won’t be using the Epson Stylus CX7300 Series for a long period, unplug the power cord from the electrical outlet. •... - Page 102 It will not operate properly if it is tilted or at an angle. • Make sure the back of the Epson Stylus CX7300 Series is at least 10 cm away from the wall. • Do not open the scanner section while the Epson Stylus CX7300 Series is copying, printing, or scanning.
- Page 103 If you remove an ink cartridge for later use, protect the ink supply area from dirt and dust and store it in the same environment as the Epson Stylus CX7300 Series. Note that there is a valve in the ink supply port, making covers or plugs unnecessary, but care is needed to prevent the ink from staining items that the cartridge touches.
- Page 104 Paper Memory Cards Ink Cartridges Size and Weight Electrical Environmental Standards Interface See also: Computer System Requirements Important Safety Instructions Printing Paper path Sheet feeder, top entry Sheet feeder capacity Approx. 120 sheets at 90 g/m (24 lb) Scanning Scanner type Flatbed color Photoelectric device Effective pixels...
- Page 105 Since the quality of any particular brand or type of paper may be changed by the manufacturer at any time, Epson cannot guarantee the quality of any non-Epson brand or type of paper. Always test a sample of paper stock before purchasing large quantities or printing large jobs.
- Page 106 Printable Area Note: When printing borderless, quality may decline in the expanded printable area. Single sheets Left Right Bottom Sheets with Borderless borders printing Top: 3 mm minimum Left: 3 mm minimum Right: 3 mm minimum Bottom: 3 mm minimum Envelopes Left Bottom...
- Page 107 Ink Cartridges Note: We recommend that you use genuine Epson cartridges and do not refill them. The use of other products may affect your print quality and could result in printer damage. For best printing results, use up a cartridge within six months of opening the package.
- Page 108 The printer ships with full cartridges and part of the ink from this first set of cartridges is used for charging the printer. Color Black Part number: 73 or 73H Cyan, Magenta, Yellow, Part number: 73 Cartridge life Opened package: 6 months at 25 °C Unopened package: do not use if the date on the package has expired Temperature Storage: -20 to 40 °C...
- Page 109 Rated frequency range 50 to 60 Hz Input frequency range 49.5 to 60.5 Hz Rated current 0.6 A Power consumption Copying: 12 W Low power: 3 W Sleep mode: 2.5 W Power off mode: 0.2 W Environmental Temperature Operation: 10 to 35 °C Storage: -20 to 40 °C 1 month at 40 °C Humidity...
- Page 110 Seiko Epson Corporation. The information contained herein is designed only for use with this Epson printer. Epson is not responsible for any use of this information as applied to other printers. Neither Seiko Epson Corporation nor its affiliates shall be liable to the purchaser of this product...
- Page 111 8/07...
Need help?
Do you have a question about the Stylus CX7300 and is the answer not in the manual?
Questions and answers