
Subscribe to Our Youtube Channel
Related Manuals for Goodmans GDVD67W4LCDK


Summary of Contents for Goodmans GDVD67W4LCDK
- Page 1 GDVD67W4LCDK Portable DVD Player with Remote Control User Guide Goodmans Product Information Helpline 0870-873-0080 82-182-00420...
-
Page 2: Table Of Contents
Table of Contents Remote Control Location of buttons................ 4 Front View Location of controls................5 Side View Location of controls................6 Power Supply....................7 Connection......................8 How to Use In a Vehicle..................9 Using the Battery Pack..................11 Chapter 1. DVD 1-1 DVD Playback.....................13 Basic Playback..........................13 Stopping Playback and Returning to The Menu Screen (If a Menu Is Available on The DVD)....... - Page 3 Table of Contents -continued Chapter 4. Setup 4-1 Language Setup..................24 On Screen Display (OSD) Language Setting..................24 DVD MENU Language Setting......................25 AUDIO Soundtrack Language Selection [DVD]..................26 SUBTITLE Language Selection [DVD]....................27 4-2 Screen Setup....................28 TV Type Setting.........................28 TV System Setting........................29 4-3 AUDIO Setup....................
-
Page 4: Remote Control Location Of Buttons
Remote Control Location of buttons SETUP button LCD button INFO. button ANGLE button PAUSE/UP button TITLE button MENU button AUDIO button F.BWD/LEFT button F.FWD/RIGHT button PLAY/SEL. button NEXT button PREVIOUS button A-B REPEAT button STOP/DOWN button 1/ALL REPEAT button NUMERICAL buttons MUTE button SUBTITLE button... -
Page 5: Front View Location Of Controls
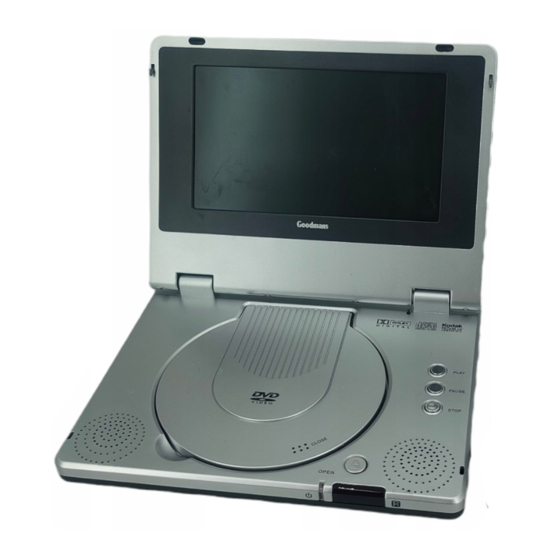
Front View Location of controls LCD screen SPEAKERS PLAY button PAUSE button STOP button Remote sensor Power indicator OPEN button... -
Page 6: Side View Location Of Controls
Side View Location of controls Right side Volume control Headphones socket Coaxial output socket (Digital Audio) Audio output socket Video output socket POWER switch DC IN Socket... -
Page 7: Power Supply
Power Supply Connecting the portable DVD player to Power. Connect the supplied AC power adaptor or 12 volt cigar adaptor plug to the DC IN socket on the player, the other end to the wall outlet or the cigar lighter socket. -
Page 8: Connection
Connection Connecting to a TV Note: Before connecting, make sure to turn the power off to your TV and portable DVD player. Video Audio Input Input (yellow) (white) (red) Video cable (supplied) Portable DVD player Audio cable (supplied) Connecting to external equipment Note: Before connecting, make sure to turn the power off to portable DVD player and external equipment. -
Page 9: How To Use In A Vehicle
How to Use In a Vehicle For using the portable DVD player in a vehicle, please read the following instructions: STEP 1. Unzip and open the carry bag. STEP 2. Pack your DVD player into the carrt bag. (a) Adjust the elastic straps and tighten it securely. (b) Fasten the straps with the velcro. - Page 10 How to Use In a Vehicle -continued STEP 4. Flatten this unit. Note: To place a disc, bend the base of the player upward at 90° angle. STEP 5. Connect the cigar adaptor plug to the power socket on the portable DVD player, the other end to the cigar lighter socket.
-
Page 11: Using The Battery Pack
Using the Battery Pack Battery charge indicator Battery release button Battery connectors DC IN jack Before using the battery pack, please ensure that it is fully charged. You can charge the battery pack directly or charge it while the battery pack attached to the portable DVD player. - Page 12 Using the Battery Pack -continued Charging the battery pack while the battery pack is at- tached to the portable DVD player STEP 1. Please align the portable DVD player’s battery connectors with the battery pack’s battery connectors. Then attach the battery pack to the portable DVD player.
-
Page 13: Chapter 1. Dvd
DVD Playback Preparation Please connect the portable DVD player to Power (using the supplied in car adaptor) and connect the earphones/ headphones. Basic Playback Turn the power on using the ON/OFF power switch. Press <OPEN> to open the DVD door. Hold the edge of the disc and push the disc gently until it clicks into place with the printed side up. -
Page 14: Stopping Playback
DVD Playback -continued Stopping Playback Press <STOP> once to stop the disc at its present position (PRESTOP). When the play button is pressed, the disc will start from the playback position. Press <STOP> twice to stop the disc when the play button is pressed, playback will resume from the beginning. -
Page 15: Repeat Viewing
DVD Playback -continued Repeat Viewing Press <1/ALL REPEAT> during playback. Press once: CHAPTER (The current chapter will be repeated.) Press twice: TITLE (The current title will be repeated.) Press three times: DISC (The whole disc will be repeated.) Press four times: OFF (Repeat cancelled) To return to normal playback <1/ALL REPEAT>... -
Page 16: Convenient Functions
Convenient functions Scene Information Press <INFO.> during playback. <INFO.> button repeatedly and the title number, chapter number, and other information will be shown Press on the screen. Stop Displaying the Scene Information Press <INFO.> repeatedly until the information disappears. Changing Audio Soundtrack Language The audio language can be changed from the one selected at the initial settings to a different language, if available. -
Page 17: Viewing From Another Angle
Convenient functions -continued Viewing From Another Angle Some DVD discs contain scenes which have been filmed simultaneously from a number of different angles. These <ANGLE> button. (The recorded angles scenes can be viewed from each of these different angles using the vary depending on the disc.) Press <ANGLE>... -
Page 18: To Mute The Dvd Player
Convenient functions -continued To Mute the DVD Player Press <MUTE> button during playback. “MUTE” will be shown on the screen, and the audio output will be muted. To unmute the sound, press the mute button and “MUTE OFF” will be shown on the screen. DVD Menu Some DVD discs have unique menu structures called DVD menus. -
Page 19: Chapter 2. Audio Cd
Audio CD Playback Preparation Please connect the portable DVD player to Power and connect the earphones/headphones. Basic Playback Turn the power on using the power switch. Press <OPEN> to open the DVD door. Hold the edge of the disc and push the disc gently until it clicks into place with the printed side up. -
Page 20: Skip To Previous Or Subsequent Tracks
Audio CD Playback -continued Skip to Previous or Subsequent Tracks Skip Ahead Press <NEXT> during playback. The next track will be played. Press the button repeatedly to select subsequent tracks. Skip Back Press <PREVIOUS> during playback. The previous track will be played. Press the button repeatedly to select eariler tracks. Pause Playback Press <PAUSE>... -
Page 21: Playing Kodak Picture Cds
Playing Kodak Picture CDs Basic Playback Insert a Kodak picture CD into the player. After few seconds, the portable DVD player will start to playback the pictures in slide show automatically. Enter the number of the picture to be shown using the numerical keys, then press <PLAY/SEL.>... -
Page 22: Playing Jpeg Picture Cds
Playing JPEG picture CDs Basic Playback JPEG pictures on a CD can be played back as a slide show. Load a JPEG picture CD. After few seconds, the portable DVD player will start to playback the pictures as a slide show automatically. Enter the number of the picture to be shown using the numerical keys, then press <PLAY/SEL.>. -
Page 23: File Manager
Playing JPEG picture CDs -continued Playback Press <NEXT> to view the next picture or <PREVIOUS> to view the previous picture. Press <RIGHT> button or <LEFT> button to rotate the picture. <RIGHT> button to rotate right by 90 degree. Press <LEFT> button to rotate left by 90 degree. Press To pause playback Press... -
Page 24: Language Setup
Language Setup On Screen Display (OSD) Language Setting Allows the default languages for the on screen display (OSD) to be set. (Default: English) Press <SETUP> when the disc is stopped. Press <UP> button / <DOWN> button to select “Language Setup”, and then press <PLAY/SEL.>. -
Page 25: Dvd Menu Language Setting
Language Setup -continued DVD Menu Language Setting Set the default language for the menu on the DVD. (Default: English) Press <SETUP> in the stop mode. Press <UP> button / <DOWN> button to select “Language Setup”, and then press <PLAY/SEL.>. Press <UP>... -
Page 26: Audio Soundtrack Language Selection [Dvd]
Language Setup -continued AUDIO Soundtrack Language Selection [DVD] Set the preferred audio language for playback. (Default: English) Press <SETUP> in the stop mode. Press <UP> button / <DOWN> button to select “Language Setup”, and then press <PLAY/SEL.>. Press <UP> button / <DOWN>... -
Page 27: Subtitle Language Selection [Dvd]
Language Setup -continued SUBTITLE Language Selection [DVD] Set the preferred language for the subtitles. (Default: Off) Press <SETUP> in the stop mode. Press <UP> button / <DOWN> button to select “Language Setup”, and then press <PLAY/SEL.>. Press <UP> button / <DOWN>... -
Page 28: Screen Setup
Screen Setup TV Type Setting Set the TV picture type that should be displayed on the LCD screen or the connected TV. (Default: 16:9) Press <SETUP> in the stop mode. Press <UP> button / <DOWN> button to select “Screen Setup”, and then press <PLAY/SEL.>. -
Page 29: Tv System Setting
Screen Setup -continued TV System Setting The player provides “PAL”, “NTSC” and “AUTO” settings for your selection. When connecting the portable DVD player to your TV, set the “TV SYSTEM” from the on-screen display to the format that is compatible with your TV’s system. -
Page 30: Audio Setup
Audio Setup Digital Out Setting Set the digital output depending on the amplifier connected. (Default: SPDIF/RAW) Press <SETUP> in the stop mode. Press <UP> button / <DOWN> button to select “Audio Setup”, and then press <PLAY/SEL.>. Press <UP> button / <DOWN>... -
Page 31: Analog Out Setting
Audio Setup -continued Analog Out Setting (Default: 2 Channel) Press <SETUP> in the stop mode. Press <UP> button / <DOWN> button to select “Audio Setup”, and then press <PLAY/SEL.>. Press <UP> button / <DOWN> button to select “Analog Out”, and then press <PLAY/SEL.>. -
Page 32: Custom Setup
Custom Setup Parental Control Setting [DVD] A built-in viewer rating setting enables you to lock the videos that you do not want children to view. For example, if you set it to PG-13, then the portable DVD player will not play the videos rated R, NC-17 or X unless the correct password is entered. -
Page 33: Password Setting [Dvd]
Custom Setup -continued Password Setting [DVD] You can change the password that protects the parental settings. (Default: 0000) Press <SETUP> in the stop mode. Press <UP> button / <DOWN> button to select “Custom Setup”, and then press <PLAY/SEL.>. Press <UP> button / <DOWN>... -
Page 34: Angle Mark Setting [Dvd]
Custom Setup -continued Angle Mark Setting [DVD] You can choose to display or hide the angle mark “ ” on the screen which will appear if there are multiple angle shot for the current scene. Press <SETUP> in the stop mode. Press <UP>... -
Page 35: Default Setting
Custom Setup -continued Default Setting Returns settings to factory set defaults. Press <SETUP> in the stop mode. Press <UP> button / <DOWN> button to select “Custom Setup”, and then press <PLAY/SEL.>. Press <UP> button / <DOWN> button to select “Default”, and then press <PLAY/SEL.>. -
Page 36: Lcd Setup
LCD Setup Panel Setting The portable DVD player provides three options about the panel adjustment: “Normal”, “16:9” or “4:3”. Press <LCD> repeatedly until “PANEL” is shown. Press <LEFT> button or <RIGHT> button to choose the preferred panel setting. P P P P P ANEL: ANEL: ANEL: ANEL:... -
Page 37: Bright Setting
LCD Setup -continued Bright Setting Increase or decrease the brightness. Press <LCD> repeatedly until “Bright” is shown. Press <LEFT> button or <RIGHT> button to choose the preferred bright setting. Bright: Bright: Bright: Bright: Bright: Bright: Bright: Bright: Bright: Bright: Bright: Bright: Bright: Bright:... -
Page 38: Important Safety Information
As the laser beam used in the DVD Player is harmful to eyes, and to avoid electrical hazards, do not attempt to disassemble the housing. Refer servicing to qualified personnel. Cleaning Unplug the unit and turn power off before cleaning this unit. Goodmans Product Information Helpline: 0870 873 0080... - Page 39 Use of this copyright protection technology must be authorized by Macrovision Corporation, and is intended for home and other limited viewing uses only unless otherwise authorized by Macrovision Corporation. Reverse engineering or disassembly is prohibited. Goodmans Product Information Helpline: 0870 873 0080...
-
Page 40: Disc Use And Care
Use of the in car power lead This lead is specially designed for the unit. DO NOT use it for other in car products as this may result in damage to lead or the other equipment. Goodmans Product Information Helpline: 0870 873 0080... -
Page 41: Precautions
Precautions Please read these precautions before operating this player. Placement Avoid placing the player in areas of: direct sunlight radiators, or closed automobiles high temperature (over 35 C) or high humidity (over 90%) large amounts of dust as the internal parts may be seriously damaged. Non-use periods When the player is not being used, turn it off. -
Page 42: Troubleshooting
Troubleshooting Before requesting service for the portable DVD player, check the chart below for a possible cause of the problem you are experiencing. Some simple checkups or a minor adjustment on your part may eliminate the problem and restore proper operation. SYMPTOM (COMMON) REMEDY No power. -
Page 43: Disc Handling And Maintenance
Disc Handling and Maintenance Handling Precautions Hold the disc by the edges so the surface will not be soiled with fingerprints. (A) Fingerprints, dirt and scratches can cause skipping and distortion. Do not write on the label side with a ball-point pen or other writing utensils. Do not use record cleaning sprays, benzene, thinner, static electricity prevention liquids or any other solvent. -
Page 44: Specifications
Specifications DVD VIDEO PLAYER/OUTPUTS DVD VIDEO PLAYER Power supply ~230V 50Hz Power consumption Weight 735 g External dimensions 212 x 158 x 41 mm (W/H/D) Signal system Laser semiconductor laser, wavelength 650 nm OUTPUTS Video output 1.0 V (p-p), 75 ohms, negative sync Audio output (digital audio) 0.5 V (p-p), 75 ohms Audio output (analog audio)
Need help?
Do you have a question about the GDVD67W4LCDK and is the answer not in the manual?
Questions and answers