Table of Contents
Advertisement
Advertisement
Table of Contents

Related Manuals for Alva GHP16


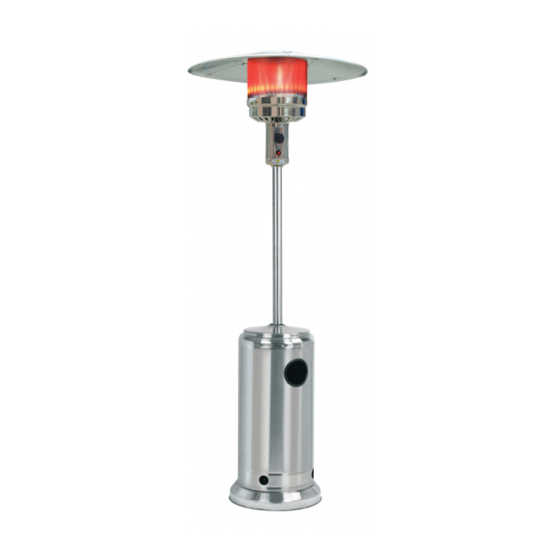
Summary of Contents for Alva GHP16
- Page 2 DO NOT use this patio heater if you do not clearly understand the instructions and/or how to operate the controls. • Phone the customer care line at 086 100 ALVA (2582) or email info@stingray.co.za for assistance. • DO NOT store flammable materials or another cylinder near the patio heater.
-
Page 3: Table Of Contents
PARTS LISTING AND TOOLS REQUIRED warnings. LEAK TEST USING YOUR HEATER FLASHBACK (flames in the burner tube) Danger CHANGING YOUR CYLINDER MAINTENANCE Contact an approved FREQUENTLY ASKED QUESTIONS ALVA technician. SPECIFICATIONS TROUBLESHOOTING GUIDE AFTER SALES SERVICE Do It Yourself Instructional video available... -
Page 4: Warranty
PLEASE RETAIN YOUR PROOF OF PURCHASE FOR WARRANTY CLAIMS. Thank you for your purchase of this ALVA warrants this appliance to be free of defects in material and instant infrared heater. quality for a period of 12 months from date of original purchase. Please read these This warranty covers the intended use of this appliance –... -
Page 5: Assembly
Assembly of the heater involves large components and it is advisable to have two people to assemble the unit. This patio heater makes use of an industrial cylinder (9kg ALVA cylin- der recommended) with a 5/8” BSP thread; horizontal exit valve. - Page 6 Nose cone sealing washer Fig.B Your heater should be checked once a year by a qualified technician. Take special care to retighten any fixtures or nuts and bolts that have come loose. Place the 3 post brackets into position on the base. Use three M8 x 16mm bolts to join the Square post brackets to the stand.
- Page 7 Place the tank housing over the stand and down onto the weighted foot piece. (Figure E) Tank Housing Fig.E Take the burner head with the attached hose and feed the supply hose through the hollow Bolt centre of the post. Tip: Secure the assembled burner Warm the hose by...
- Page 8 Tighten all loose nuts and bolts. Place a ø8mm on each Flat washer reflector support bolt. (Figure G). Do a final check to be certain that all nuts and bolts are securely fastened. Fig.G 10. Assemble the 4 piece reflector according to Figure H.
- Page 9 12. Lift up the tank housing and rest it on the post plate. Screw the regulator into the cylinder valve. DO NOT use a tool to tighten the regulator; it is to be hand-tightened only. Open the cylinder valve 1½ turns to the left (anti-clockwise).
-
Page 10: Parts Diagram
• PARTS DIAGRAM Reflector 813mm Flame Screen / Emitter Grid Burner base admitance fence Gas valve controller Base of control Housing Post Tank housing Tank housing support Stand Access and obser- vation port hole Refer to your ‘Key’ on the index page. -
Page 11: Parts Listing And Tools Required
PARTS LISTING AND TOOLS REQUIRED PARTS SUPPLIED QUANTITY Stand LPG cylinder housing Assembly post Post brackets Galvanized steel pipe 10mm x 86cm Reflector 813mm ø8mm washer M8 Castle nut M8 Burner/Reflector support bolt M6 x 10mm Bolt (for assembly of post and burner) M6 x 35mm Bolts and nuts (for post and post brackets) -
Page 12: Leak Test
DO NOT operate place the cylinder outside in a any electrical cool, well-ventilated area and appliances. contact Alva on 086 100 ALVA • Ventilate the (2582). area. Connections to be leak tested • A leak between the heater and •... -
Page 13: Flashback (Flames In The Burner Tube)
If the heater does not ignite the first time, wait for 5 minutes should dissipate within and repeat the lighting instructions. If you still experience 3 - 4 minutes. ignition problems, contact 086 100 ALVA (2582) for assis- tance. Turning the Patio Heater Off: Close the cylinder valve (clockwise). -
Page 14: Changing Your Cylinder
Your heater should be checked once a year by a qualified technician. • If faults are suspected or detected, stop using the heater and contact ALVA. • Clean the exterior and storage area of your heater when required to remove dust. -
Page 15: Frequently Asked Questions
Clean with a soft brush or blow clean with compressed air. If any part of the heater is in need of replacing, use only original Alva parts. Using any other spare parts is dangerous and will void the warranty. When the heater is not in use for extended periods ,always keep the burner head covered. -
Page 16: Specifications
(9kg) then return the cylinder to your gas supplier. http://www. youtube.com/ watch?v=Ya SPECIFICATIONS vsYE8nzCw &feature=plcp Model ALVA GHP16 Type of Gas Operating pressure 2.8kPa Injector size Identification marked Gas Consumption 870gr/hr at MAX Heat output 9000 - 43000 BTU /13kW This appliance operates with a Bullnose 5/8”... -
Page 17: Troubleshooting Guide
In poor location Position properly and retry AFTER SALES SERVICE MANUFACTURED AND DISTRIBUTED BY Alva Marketing (Pty) Ltd P.O. Box 30014 Tokai, 7966 Tel: 021 442 1540 E-mail: info@stingray.co.za www.alva.co.za @StingrayGroupSA www.facebook.com/AlvaGas TOLL FREE NUMBER 086 100 ALVA (2582)
Need help?
Do you have a question about the GHP16 and is the answer not in the manual?
Questions and answers