
Related Manuals for Kindcomfort KEL123


Summary of Contents for Kindcomfort KEL123
- Page 1 Manual de uso Sistema de retención infantil. Child safety seat. Instruction for use KEL123 LB517 Apto para Suitable for...
- Page 2 Si vous souhaitez consulter le manuel dans une autre langue, veuillez visiter notre site internet: IMPORTANTE Se você quiser o manual em outro idioma, por favor visite nosso website: IMPORTANTE Se desidera il manuale in un’altra lingua, si colleghi al nostro sito Internet: http://www.kindcomfort.com...
- Page 3 Instrucciones de uso - Sistema de retención infantil Grupo 1/2/3 de 9 a 36 kg. (de 9 meses a 12 años aprox.) Instruction for use - Child safety seat Group 1/2/3 from 9 kgs to 36 kgs (from 9 months to 12 Years aprox) www.kindcomfort.com...
- Page 5 www.kindcomfort.com...
- Page 7 www.kindcomfort.com...
- Page 8 5.10 5.11...
- Page 9 www.kindcomfort.com...
- Page 10 IMPORTANTE Lea cuidadosamente antes de instalar la silla infantil en el vehículo Por favor, lea minuciosamente el manual de instrucción ANTES de instalar el asiento infantil y consérvela para futuras consultas. AVISO 1. Esta silla infantil debe utilizarse Con el sistema de arnés para niños entre 9 y 18 Kg.
- Page 11 Cinturón abdominal y Instalación correcta / diagonal, 3 puntos. apropiada Cinturón abdominal, Instalación incorrecta / 2 puntos. Inapropiada Solamente debe ser utilizado en este asiento SI tiene Instalación opcional el cinturón abdominal y cinturón diagonal (3 puntos) Grupo 1/2/3 www.kindcomfort.com...
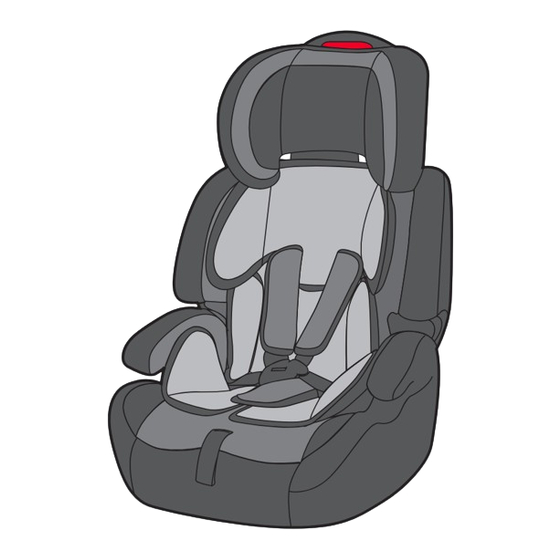
- Page 12 2. PARTES DE LA SILLA A. Reposacabezas. B. Ranuras para las cintas del arnés. C. Respaldo. D. Cinta del arnés. E. Protectores del arnés. F. Hebilla. G. Botón de ajuste del arnés. H. Protector de la hebilla. I. Cinta ajustadora del arnés. J.
- Page 13 Compruebe que los cinturones no están torcidos y tense tirando del cinturón diagonal hacia arriba (4.4). Grupo 1/2/3 www.kindcomfort.com...
- Page 14 5. Introduzca el cinturón diagonal por el regulador y compruebe que ha quitado toda la holgura del cinturón de seguridad del vehículo (4.5). 6. Asegúrese que el cinturón de seguridad del vehículo no esta torcido, también verifique que la funda no impide el movimiento del cinturón de seguridad del vehículo, ni impide la instalación de la silla de ninguna manera.
- Page 15 1. Gire las dos placas de ambas cintas del arnés de modo que coincidan con las ranuras más cercanas e insértelas en las ranuras de la base del asiento y luego a través de las ranuras de la funda (6.6 y 6.7). Grupo 1/2/3 www.kindcomfort.com...
-
Page 16: Limpieza Y Mantenimiento
7. LIMPIEZA Y MANTENIMIENTO Quitar la funda del respaldo 1. Primero tire del botón del respaldo de la silla. Retire el botón de la funda del respaldo, deslice la funda, y quítela del respaldo. Ahora puede lavar las fundas. Quitar la funda del elevador 1. - Page 17 8. GARANTIA KINDCOMFORT garantiza sus productos contra todo defecto de fabricación durante un período de 2 años a partir de la fecha de compra según la Ley 23/2003, de 10 de Julio, de Garantías de venta de bienes de consumo.
- Page 18 IMPORTANT INFORMATION Please read the following instructions carefully before installing the product. Please read this Instructions Manual BEFORE fitting the child seat and keep it for future reference. WARNING 1. This child seat must be used with a harness system suitable for children of 9kg to 18kg in weight (approx.
- Page 19 3-point lap and Correct installation / diagonal seat belt proper 2-point lap seat belt Incorrect installation / improper Only suitable for this particular seat WHEN having Optional installation a lap and diagonal seat belt (3 anchor points) Group 1/2/3 www.kindcomfort.com...
- Page 20 2. SEAT PARTS AND FITTINGS A. Headrest. B. Harness strap slot. C. Back of the seat. D. Harness straps. E. Protectores del arnés. F. Locking buckle. G. Harness adjustment button. H. Buckle pad. I. Harness adjuster strap. J. Ergo seat cushion. K.
- Page 21 You will hear a “click” when this is properly fastened. Ensure that the belts are not twisted and tighten by pulling the diagonal shoulder belt upwards (4.4). Group 1/2/3 www.kindcomfort.com...
- Page 22 5.Pass the diagonal seat belt trough Height adjuster lever K. Check that the seat belts are not twisted and tighten by pulling the diagonal seat belt upwards (4.5). 6. Make sure the vehicle’s safety belt is not twisted, also check that the seat cover does not impede the movement of the vehicle seat belt or prevent the installation of the seat in any way.
- Page 23 1. Turn the plate attached to the safety buckle so that they coincide with the nearest slot and insert into the slots of the seat base and then pass through the slots in the cover (6.6 y 6.7). Group 1/2/3 www.kindcomfort.com...
-
Page 24: Cleaning And Maintenance
7. CLEANING AND MAINTENANCE Remove the backrest cover 1. First pull the button of the seat backrest. Remove the button on the backrest cover, slide the cover, and remove it from the seat backrest. Now you can wash the covers. Removing the elevator cover 1. - Page 25 8. GUARANTEE KINDCOMFORT guarantees its products against all manufacturing faults for a period of 2 years as of the date of purchas, in accordance with Law 23/2003, of 10 July 2003, relating to Consumer Goods Sale Guarantees. 1.The guarantee does not include defects or disorders produced by...
- Page 27 www.kindcomfort.com...
- Page 28 (00 34) 943 833 013 (00 34) 943 833 004 info@kindcomfort.com www.kindcomfort.com...
Need help?
Do you have a question about the KEL123 and is the answer not in the manual?
Questions and answers