Table of Contents
Advertisement
Quick Links
Advertisement
Table of Contents

Related Manuals for Albrecht DB 271


Summary of Contents for Albrecht DB 271
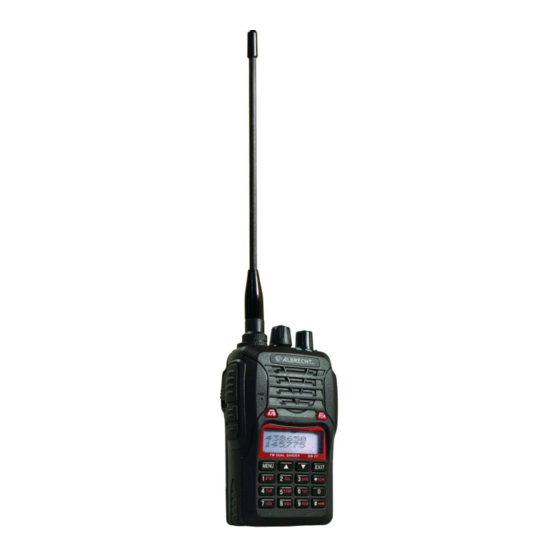
- Page 1 DB 271 Duo Band 2m / 70 cm Hand Held Transceiver...
-
Page 2: Hand-Held Radio Operation
BEFORE USING YOUR ALBRECHT DB 271 PORTABLE TWO-WAY RADIO. Compliance with RF Energy Exposure Standards Your ALBRECHT DB 271 two-way radio is designed and tested to comply with a number of national and international standards and guidelines (listed below) regarding human exposure to radio frequency electromagnetic energy. -
Page 3: Approved Accessories
Explosive environments (such as gases, dust, fumes, etc.). Turn off your transceiver while talking on fuel, or while parked in gasoline service stations. If you require this radio to be modified, please connect with your ALBRECHT DB 271 distributor. -
Page 4: Ce Conformity Declaration
CE Conformity Declaration Hereby, ALBRECHT DB 271 declares that this two-way radio is in compliance with the essential requirements and other relevant provisions of Directive 1999/5/EC. A copy of the DOC may be obtained through the following internet server: http://www.hobbyradio.de... - Page 5 Operation of the Radio Getting started LCD display On the display you will see various indicators that show what function you have selected. Sometimes you may not recall what those indicators mean, or how to select them, in such a case, you can refer to the table below.
-
Page 6: Speed Search
Speed Search Press UP or DOWN key to set each Function or Parameter, it can search quickly. Single/Dual Band Switch Press TDR key Single Band -------Dual Band Speedy Re-start Transceiver In standby, press MENU+ A/B key, then LCD displays Press MENU key to confirm, and then the transceiver re-starts. A/B Switch Press A/B key to select the master frequency. - Page 7 Shortcut operation sheet...
-
Page 8: How To Operate
How to operate Menu Locked function To avoid operating unnecessary menu items often, you can set Menu Locked function on through the programming software. This operation is proposed, if the radio shall be used by persons which are not familiar with the menu functions or in cases, where the radio shall be only used with restriction to most important functions to avoid risk of wrong adjustments. - Page 9 This transceiver with dual frequency and dual displaying function can display two different RX and TX frequencies at the same time under Frequency mode, while display two different channel frequencies and relative parameters at the same time under Channel mode. •...
- Page 10 power (switch between high and low power). Before powering off, the output power is the switched one. It will resume the previous power after powering on again. Setting Begin/End Transmitting Voice Prompt (ROGER Beep) --- MENU 5 This function means to select transmitting voice prompt way: •...
- Page 11 This transceiver can be set from 1 to 10 TOA level with 1 second each. 1 level means the transceiver prompt 1 second before transmitting reached to TOT. • In standby, press MENU+10 , the screen displays • Press MENU to enter, it shows "5", press UP / DOWN to select OFF/1~10 Level, then press MENU to confirm, press EXIT return to standby.
- Page 12 • In Frequency mode, press MENU+ 8 , the screen displays • Press MENU to enter, it shows "OFF", press UP / DOWN to turn OFF this function or select 67.0Hz to 254.1Hz CTCSS code, • then press MENU to confirm, •...
-
Page 13: Scan Function
• press UP / DOWN to select TO/CO/SE scan mode, • then press MENU to confirm, • press EXIT return to standby. Setting Scan / Lamp / SOS-CH / Radio Function on Side key 1 (PF1) -- MENU 20 There are four functions available on the side key 1 of this transceiver: SCAN: Scan function LAMP: Lamp function SOS-CH: SOS function... - Page 14 Through the above setting, in standby, press PF1 side key, to transmit SOS signal. 4. (FM BROADCAST-) RADIO function: • Turn on the Radio: In standby mode, press Side key 1 to turn on. The screen displays , it will search the radio stations automatically when the green light flashing, and will stop until searched.
- Page 15 To set the shift password via DB 271 programming software Valid or “unvalid” password can decide whether or not a user can select between the Frequency or Channel mode. With an “unvalid” password user can any time select between these modes, with a valid password user needs to know exactly this password, otherwise he cannot change the mode.
- Page 16 Setting frequency shift direction and offset frequency only in Frequency mode, as for receiving and transmitting in different frequencies. Operating steps: 1. Set the working frequency 2. Set the frequency shift direction and offset frequency. Example: In frequency mode, the transceiver needs to work on receiving frequency 450.025MHz and transmitting frequency 460.026MHz •...
- Page 17 It is recommended to let the service provider do these procedures with a programming cable (special version for DB 271 required!) and PC- it works much more easy and much faster than via display and key entries at the radio.
- Page 18 Deleting Channel (DEL-CH) ------ MENU 28 • In standby mode, press MENU + 28 , the screen displays • Press MENU to enter, then press UP / DOWN to select the desired deleted channel, then press MENU to confirm, the selected channel and message are deleted, •...
-
Page 19: Dtmf Encoding
between you and other members in the same group, you can use this function to find out CTCSS or DCS frequencies. • When the transceiver is in receiving, press MENU + 23 , the screen displays • Press MENU to enter, the arrowhead points to "CTCSS". Press UP / DOWN select to scan CTCSS or DCS. -
Page 20: Transmit Overtime Prompt
There are 4 options on setting sidetone: • Key Tone: In transmitting, press number key to open the sidetone. • ANI ID Code Transmit Sidetone: Opening sidetone when the transceiver transmits ANI ID code. • Key tone + ANI ID Code Transmit Sidetone: In transmitting, opening side tone by number key or during transmitting ANI ID code. -
Page 21: Troubleshooting
Working with Repeater This transceiver has two working modes while working with repeater. Frequency mode working with repeater or Channel mode working with repeater Frequency mode working with repeater • Press A/B key to choose band A, set the TX frequency and sub-tones which need to work with the repeater. - Page 22 Annex List of selectable parameters...
-
Page 23: Technical Data
136-174MHz & 400-480MHz (Rx / Tx), 136-174MHz & 420-520MHz (Rx / Tx), 136-174MHz & 400-470MHz (Rx / Tx), Microphone socket: .....2.5 mm conform to Albrecht/ Alan/ Midland Standard Speaker socket: ....3.5 mm conform to Albrecht/Alan/ Midland Standard Memorychannels: …………………………………………………..……128 channels Operating Voltage:………………………………………………………………….7.4V... -
Page 24: Optional Accessories
Optional accessories Disclaimer Alan Electronics GmbH endeavors to achieve best accuracy and completeness of this manual, but we are not liable for any possible omission and printing errors. All the above specifications are subject to change by our factory without prior notice. Legal Notes Legal notes and general information This amateur hand held radio complies to the minimum requirements of the EU directives 2004/108/EG... - Page 25 European warranty regulations The distributor, dealer or retail shop where You bought the radio warrants to the original retail purchaser of this product that should this product or any part of it, under normal use and conditions, be proven defective in material or workmanship within 2 years from the date of original purchase, such defect(s) will be repaired or replaced with new or reconditioned product without charge for parts and repair labour.
-
Page 26: Declaration Of Conformity
Declaration of Conformity We hereby declare that our product: 2m / 70 cm Hand Held Radio DB 271 incl. Battery/Charger/Power accessories satisfies all technical regulations applicable to the product within the scope of EU Council Directives and harmonized European Standards: EU- Directives : 73 / 23 / EEC, 2004 / 108 / EG and 99 / 5 EC ;... - Page 27 Where to find service hints and service documentation The complete technical documentation is updated regularly. You can download the latest versions of user manuals, technical documents and conformity declaration, as well as service hints or FAQ’s any time from our server under http://www.hobbyradio.de If you should have a problem, please have a look to the service hints or frequently asked questions (FAQ) before You send Your Hand held radio back to the service centre.
Need help?
Do you have a question about the DB 271 and is the answer not in the manual?
Questions and answers