Table of Contents
Advertisement
Advertisement
Table of Contents

Subscribe to Our Youtube Channel
Related Manuals for COMPRO TN30


Summary of Contents for COMPRO TN30
- Page 1 TN30 TN30W V1-130823...
- Page 2 The information in this document is subject to change without notice. COMPRO reserves the right to make revisions to this publication without obligation to notify any person or entity of any such changes.
-
Page 3: Table Of Contents
Contents Contents Chapter 1: Important Notices ............1-1 Regulatory Notice . - Page 4 TN30/TN30W Technical Specifications ........
-
Page 5: Chapter 1: Important Notices
Chapter 1: Important Notices Chapter 1: Important Notices Regulatory Notice This device complies with Part 15 of the FCC Rules. Operation is subject to the following two conditions: (1) This device may not cause harmful interference, and (2) This device must accept any interference received, including interference that may cause undesired operation. -
Page 6: About This Manual
Compro TN30/TN30W Network Camera About this Manual This manual is only intended for the users of Compro TN30/TN30W network camera. Conventions in this Manual While you are using this manual, pay attention to some symbols and notations that are used to draw... -
Page 7: Chapter 2: Product Overview
Chapter 2: Product Overview Key Features The small and compact Compro TN30 cloud network camera offers vividly clear image quality and a bounty of practical surveillance features. Its small size makes it an ideal choice for securing homes, restaurants, small offices, or any place where space is limited. -
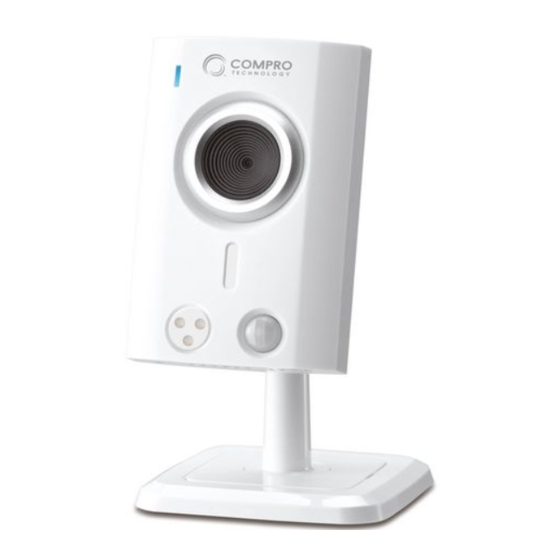
Page 8: Hardware Overview
Compro TN30/TN30W Network Camera Hardware Overview Figure 1-2. Front and rear view LED status indicator – For indicating system status. Lens Ethernet port – Connect to the Ethernet port of your network hub/switch. Power connector – DC 5V/2A power supply. -
Page 9: Led Status Indicator
Chapter 2: Product Overview LED Status Indicator When you power on the camera, it will start booting procedure. There are one blue LED and one red LED inside the camera case. Depending on the booting status, the LED indicator will be lit in the followings way: 1. - Page 10 Compro TN30/TN30W Network Camera...
-
Page 11: Chapter 3: Installation
Chapter 3: Installation Chapter 3: Installation Connect the Cables The illustration below shows the basic cabling of your network camera. Setup Network Camera from iPhone/Android phone or tablet Figure 3-1. Connection of cables Connect an Ethernet cable between your network camera and your network switch/router. Attach the power adapter to the camera’s power connector and connect the power plug to a power outlet. -
Page 12: Setup Tn30W Network Camera From Wps Connection
Compro TN30/TN30W Network Camera Login to the C4Home account and click "+" to add new camera, we provide 3 ways to add your camera: • Scan the QR code from the back side of camera, it will automatically add your camera to the list. - Page 13 IP camera in closer proximity to the wireless AP/router and then see if the situation improves. • Having more walls and ceilings between the wirelessly connected Compro camera and your wireless AP/router will negatively affect your wireless connection speed. Generally, the number of walls and ceilings shall be kept in minimum.
-
Page 14: Setup Network Camera From Pc And Installation Cd
• If the power cable and the network cable connected to the camera are not securely fastened, it could lead to unstable connection. Note: You can add more Compro cloud network camera to your account for management. C4Home app allow maximum 16 network cameras installed. 3-4 Connect the Cables... - Page 15 Chapter 3: Installation To begin setup, insert the installation CD into your CD-ROM drive, and the iWizard will start automatically. Note: If Autorun has been disabled in your computer, please browse the contents of the installation CD and double-click on the "iWizard.exe" file to run the setup wizard.
- Page 16 Compro TN30/TN30W Network Camera 4. Check the camera name, date and time setting. Figure 3-6. Camera configuration 5. Choose whether to use C4Home service to remotely access your camera. C4Home is a platform for viewing, managing and sharing network cameras over the internet.
- Page 17 Chapter 3: Installation 7. (For TN30W wireless connection setup) If you are using the TN30W, you can choose to connect wirelessly by default. The wizard will search for available access points. Then select one access point to use. Figure 3-9. Wireless connection setup 8.
- Page 18 Note: iDDNS is a free DDNS (Dynamic Domain Name Service) service offered by Compro. iDDNS service is not be available for use when C4Home service is enabled. If you are using floating IP address, you can use DDNS service to create a hostname that links to your home or office IP address. Having created the iDDNS address name, you can then enter `http://xxx (input by yourself ).iddns.org’...
- Page 19 Chapter 3: Installation 12. The iWizard performs system diagnosis based on your network settings and alert you for inappropriate settings (marked with a question mark icon). Figure 3-14. System Diagnostics 13. iWizard indicates the setup has completed successfully. You can click on the URL to view the live video now.
-
Page 20: Mount The Camera
Compro TN30/TN30W Network Camera Mount the Camera If desired, you can mount the camera on a wall or ceiling. The following section explains how to mount your camera. 1. Drill 2 mounting holes on the mounting surface. While you are at it, bear in mind that there will have to be STEP 1 a minimum space of 2.5 mm (0.098 inch) between the screw head and the mounting surface. -
Page 21: Chapter 4: Accessing The Camera
Ways of Viewing Live Video There are a number of ways to view the live video feed from your Compro IP camera, which are as follows. 1. Use the C4Home service to access your IP camera. C4Home is a platform for viewing, managing and sharing camera feed over the Internet. -
Page 22: Instant Monitoring
When you enable and register the C4Home service, you can use the C4Home app on your iPhone, Android phone or tablet to manage and watch live video of Compro cloud network cameras. The C4Home app is a safe and easy way to monitor your home, office and your valuable possessions from anywhere in the world. - Page 23 Chapter 4: Accessing the Camera Icon Name Description Edit Click here to remove the installed network camera from list. Add Camera Click here to add camera to the list. Here you can setup more details for each camera: Camera • Camera Settings: Setup the camera name and password Setup •...
-
Page 24: From Android Phone/Tablet App
Compro TN30/TN30W Network Camera Live Monitoring In camera page, you can click the camera on the list to watch live video for monitoring. Network connection quality indicator: In the live video screen, the network connection quality will shows on the upper-left: Green : The response time <... -
Page 25: Accessing Via Pc Web Browser
1. Open the Internet Explorer. 2. Enter the camera’s IP address in the address bar. (e.g. 192.168.0.100). If you don't know the IP address of your camera, use Compro iWizard to scan for your camera on your LAN network. 3. A dialog box that requests the user name and password appears; enter a valid user name and password, and then press OK. - Page 26 6. And then the reconfirmation dialog box will come up. Please press [Install] to install the `ComproClientActiveX.cab’ on your system. Note: Compro ActiveX components only support 32-bit Internet Explorer. Hence, if the viewing computer system is running 64-bit version of Windows, the 32-bit version of Internet Explorer must still be used to access the camera.
- Page 27 Chapter 4: Accessing the Camera Figure 4-7. Live view Note: If your IP camera falls behind a firewall, you will need to enable ports 80 and 554 (default HTTP/RTSP port used by the camera) in your firewall and link them to the internal IP address of the camera. Should you have more than one IP cameras, please increase the value of the above port by 1, e.g.
- Page 28 Compro TN30/TN30W Network Camera...
-
Page 29: Chapter 5: Live View (With Webvuer On Pc)
Chapter 5: Live View Chapter 5: Live View (With WebVUer on PC) Page Layout On the first page, you can see the basic control panel at the top and on the left-hand side, and the live video on the right-hand side. Click on the icon to hide or show the control panels. -
Page 30: Icons On Live View Page
Compro TN30/TN30W Network Camera Icons on Live View Page Top Panel Icons seen on the top control panel: Icon Name Description One of the view size button; the Fit Browser button resizes the live video Fit Browser pane to fit browser window size. One of the view size button; the Actual Size button resizes the live video Actual Size pane to original size. -
Page 31: Chapter 6: Configuration (From Webvuer)
Chapter 6: Configuration Chapter 6: Configuration (From WebVUer) Main Setup Page The main setup screen consists of all the basic settings options. To access the main setup page, click on the Setup button seen at the top-right location in the live view screen. Then the setup page as shown in the picture below will be displayed. -
Page 32: Camera Settings
Compro TN30/TN30W Network Camera Camera Settings Here you can control the image color and related settings as well. All the changes you have made with regard to video properties will be reflected in the preview window after you click [Save]. Preview Window Figure 6-3. Camera setting page Video Properties Here you can adjust the Brightness, Sharpness, Contrast and Saturation on your IP camera. -
Page 33: Ir Light Control
Chapter 6: Configuration IR Light Control The TN30 network camera is equipped with 3 IR LEDs, which makes it capable of fitting different lighting situations and providing 24/7 monitoring. IR LEDs x3 Normal lighting Without IR LEDs With IR LEDs... -
Page 34: User Settings
Compro TN30/TN30W Network Camera User Settings Here you can add, modify or remove viewers/administrators. The viewers are only allowed to view live video and can’t change any of the camera settings. On the flip side, the administrators have the rights to make any changes. Figure 6-6. Users Setting • Modify/Remove - Click here to Modify or Remove an existing viewer. -
Page 35: Network Diagnostic
Chapter 6: Configuration Figure 6-8. Wireless settings Network Diagnostic Here you can run the diagnostic tool for your current network settings and it will show error messages if any anomaly is detected. For further information on error messages, please refer to the FAQ section in this manual or visit www.comprosecurity.com for more information. -
Page 36: Advanced
If your operating system supports Universal Plug and Play (UPnP™) and DHCP is in use on current network, this Compro IP camera will be automatically detected and added to My Network Places on your Windows. If you want to use the IGD (Internet Gateway Device) protocol on your IP camera, please check the [Enable IGD] box to enable it. -
Page 37: Event Setup
Chapter 6: Configuration Event Setup When an event happens, a snapshot can be instantly sent to your E-mail account, ftp server, image server, or SMS server to warn you about what’s happened. In order to properly set up the event function, you must: 1. - Page 38 Compro TN30/TN30W Network Camera Image server This page allows you define the naming rules of the snapshots taken by the camera and saved to the server when an event is triggered. Figure 6-10. Image server setup example SMS server Here it provides the configuration for SMS notification feature that allows the camera to send a SMS (Short Message Service) alert message to one or more pre-defined recipients when a pre-defined event scenario is being triggered.
-
Page 39: Trigger Setup
Chapter 6: Configuration Trigger Setup You can create, modify, or delete event triggers and set the trigger mechanism to be by Schedule, Motion Detection, etc. When creating an event trigger by schedule, you can set up scheduled time and period. When setting event trigger as by Motion Detection, you can select the trigger area defined in the Motion Detection setting. - Page 40 Compro TN30/TN30W Network Camera 6-10 Event Setup...
-
Page 41: Chapter 7: Event Viewer
Chapter 7: Event Viewer Chapter 7: Event Viewer Here it displays the history of past events successfully triggered by motion, or schedule (the available types of event trigger depend on camera support). Click on any type of event trigger to view its history. Figure 7-1. - Page 42 Compro TN30/TN30W Network Camera...
-
Page 43: Chapter 8: Maintenance
Here you can check the system log of your network camera. Press [Clear Log] to clean up system log. Maintenance You can reboot your IP camera, change UI language, export/import user profile, reset to factory default settings, or update camera firmware (after you download the latest firmware from Compro’s website). Figure 8-1. Maintenance page Reboot Camera Press the [Reboot] button to reboot your camera system. -
Page 44: Reset All Settings To Default
Firmware Update You can download the latest firmware from Compro’s website (www.comprosecurity.com/en/supports.html). After downloading the firmware, please log in to the setup page of your IP camera and click [Maintenance] on the top menu and then look for firmware update section. Press the [Browse] button and locate the downloaded firmware file and press [Upgrade] button to update camera firmware. -
Page 45: Chapter 9: Troubleshooting
Chapter 9: Troubleshooting Chapter 9: Troubleshooting During the course of installation, you might encounter various issues in regard to the usage of the camera. The following section contains some troubleshooting procedures to help you solve the problems. Reset to Factory Default Settings If you forget your system password or if you feel your IP camera has been acting weird, you can follow the steps below to reset the camera to its default state in which it will be using the Ethernet port for network connection and obtaining IP address from the available local DHCP server. -
Page 46: Trouble With The Activex Client
When you launch the Internet Explorer and enter the camera’s IP address in the address field, you'll be asked for the user name and password combination (the default is admin/admin, case sensitive). After that, you will be prompted to install Compro ActiveX components required for accessing the camera. Note: Compro ActiveX components only support 32-bit Internet Explorer. - Page 47 If you’ve gone through all of the above steps but are still unable to obtain video/audio on the browser, please close all the browser windows and delete the "Compro Embedded" folder found under "(OS Drive):\ Program Files". (If you're using 64-bit windows, look for "(OS Drive):\Program Files (x86)".) And then open your web browser and log in to the IP camera again to reinstall the ActiveX client.
-
Page 48: Trouble With Remote Viewing On Browser
Compro TN30/TN30W Network Camera Trouble with Remote Viewing on Browser You can view your camera video remotely over the Internet. If you have problem in remote viewing, refer to the section below for preliminary troubleshooting. 192.168.0.1 61.220.20.16 Static IP (LAN) - Page 49 Chapter 9: Troubleshooting Figure 9-8. Port forwarding Having taken the above steps, you should be able to log in to the IP camera from a remote location by entering the DDNS address or the static IP address in the location field of a web browser (depending on your configuration).
-
Page 50: Ddns Configuration
Figure 9-9. DDNS setup in iWizard The iDDNS is a free DDNS service provided by Compro. If you are using dynamic IP, you may want to apply for DDNS (Dynamic Domain Name Server) service to create a hostname that links to the IP address on your home or office network. -
Page 51: Symptoms, Causes And Solutions
Chapter 9: Troubleshooting Symptoms, Causes and Solutions Listed below are some other frequently asked questions and their answers. Symptom Possible Cause / Solution The camera is not powered on. Make sure the camera has been powered on for over 1 minute and its LED status indicator is lit. - Page 52 When this happens, try waiting a few minutes for the new IP information to be updated onto DNS server and then retry connection, or try to decrease the TTL value. If it still doesn't work, refer to other possible causes and solutions, or contact Compro for technical support.
- Page 53 Chapter 9: Troubleshooting Symptom Possible Cause / Solution Network connection error. The network connection test verifies if the camera has successfully connected to the LAN network. When the diagnosis result shows a red exclamation mark icon ( ) for network connection, it means the camera fails to connect to LAN network.
- Page 54 The camera’s IP address is shown as “169.254.x.x” in iWizard. When Compro IP Camera fails to obtain an IP Address from a DHCP server (typically a network router, which has the ability to assign an IP address to IP camera automatically), the camera will generate an IP address itself so that it can be found on the network using Compro iWizard.
- Page 55 Chapter 9: Troubleshooting Symptom Possible Cause / Solution Video bit rate is set too low. Blocky video is usually caused by non-correspondence of video resolution and bit rate. Video appears very Simply put, the video bit rate is too low. Please try to set the bit rate to a higher one or blocky set the video resolution to a lower one.
-
Page 56: Contacting Compro Technical Support
Compro TN30/TN30W Network Camera Contacting Compro Technical Support Before you submit an email for support, please check the troubleshooting section in the user manual. You may fill out the form (http://comprousa.com/en/form.htm) or directly email to support@comprousa.com. Compro Technology, Inc. www.comprousa.com Tel. - Page 57 Chapter 9: Troubleshooting 9-13...
- Page 58 Compro TN30/TN30W Network Camera 9-14...
-
Page 59: Chapter 10: Technical Specifications
Chapter 10: Technical Specifications Chapter 10: Technical Specifications TN30/TN30W Technical Specifications Camera Image Sensor 1/7" progressive scan CMOS sensor Zoom 10x digital zoom Focusing Range 0.5 m ~ INF Minimum • IR mode: 0 lux, with 3 built-in IR LEDs in darkness (effective up to 6m) Illumination • Color mode: 1.0 lux... - Page 60 • Quick installation guide Package Contents • Ethernet cable • Screws for ceiling mounting • Screw anchor • Power adapter Dimensions 64 x 74.7 x 110 mm (including bracket) * Specifications are subject to change without prior notice. 10-2 TN30/TN30W Technical Specifications...
-
Page 61: Chapter 11: Appendix
Chapter 11: Appendix Chapter 11: Appendix Examples of Port Forwarding Setup on Routers The following are some examples of router configurations with reagrd to port forwarding / port mapping / virtual server on some popular router products. You can also log on to portforward.com for more port forwarding setup examples on other router products. -
Page 62: D-Link Dir-655 Virtual Serve Setup
Compro TN30/TN30W Network Camera D-Link DIR-655 Virtual Serve Setup 11-2 Examples of Port Forwarding Setup on Routers... -
Page 63: Tp-Link Wr1043N Virtual Server Setup
Chapter 11: Appendix TP-LINK wr1043n Virtual Server Setup Examples of Port Forwarding Setup on Routers 11-3... - Page 64 . c o m p r o s e c u r i t y . c o m Compro Technology Headquarters 4F, No.12, Alley 6, Lane 45, Pao Shin Road, Hsintien District, New Taipei City 231, Taiwan...
Need help?
Do you have a question about the TN30 and is the answer not in the manual?
Questions and answers