Table of Contents
Advertisement
Quick Links
Advertisement
Table of Contents

Related Manuals for Lava iris 350


Summary of Contents for Lava iris 350
- Page 1 User Guide iris 350 ...
-
Page 2: Table Of Contents
6.1. To configure your Internet: ....16 6.2. Access Internet via Wi-Fi ..... 16 7- Managing Notifications 17 7.1. Open the Notifications Panel ....17 7.2. Respond to Notifications ..... 18 7.3. Close Notifications Panel ..... 18 8- Messaging 18 iris 350... - Page 3 10.2. Connect to Internet ......25 10.3. Connect to Wi-Fi Networks ....25 10.4. Pair With Bluetooth Devices....25 10.5. Connect to Internet via your Phone..... 26 11- Download Applications 27 12- Phone Settings 28 13- Health and Safety Information 29 iris 350...
-
Page 4: 1- Welcome
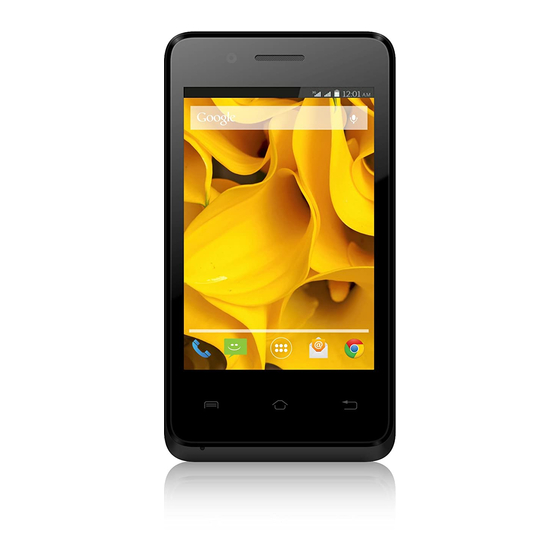
Congratulations on becoming a proud owner of iris 350 mobile phone. You have now joined the millions of satisfied customers spread across the Globe. Your iris 350 offers you these exciting features and much more: Android 4.4.2 3.5 inch Screen Cameras (front VGA and back 2MP) 1GHz Processor External Memory (Expandable to 32 GB) Dual SIM Multimedia player Gravity sensor Wi‐Fi Bluetooth 3.0 iris 350... -
Page 5: 2- Phone Layout
2.1. Keys and Parts 2.2. Icons and Indicators Icons Indicators Icons Indicators Signal strength Alarm has been indicator set New missed calls Wi‐Fi is activated USB is connected Bluetooth is on The headphone is Battery charging being used symbol New message Airplane mode is from SIM 1 activated iris 350... -
Page 6: 3- Getting Started
Switch off the mobile phone and remove the rear cover and battery. Insert the SIM card correctly in the card slot(s) (See figure below). WCDMA slot is for 3G network; GSM is for 2G. Insert SIM card carefully! Finally insert the battery and replace the rear cover of the mobile phone. 3.2. Insert Memory card The Iris 350 allows you to expand external memory with a micro SD card, up to 32GB. Power off the mobile phone, and then remove the rear cover and battery. Insert the memory card into the slot. Finally insert the battery and the rear cover of the mobile phone. iris 350... -
Page 7: Unlock The Phone
Incompatible memory cards may damage the card or the device will corrupt the data stored in the card. 3.3. Unlock the Phone You may need to provide PIN, Password, or draw a pattern to unlock your phone. To unlock the screen: Press the power key to wake up the phone. Hold and drag the unlock icon to the right to unlock. iris 350... -
Page 8: Using The Touch Screen
For example, double‐tap a section of a webpage in Browser to zoom that section to fit the width of the screen. You can also double‐tap to control t zoom, in Maps, and in other applications. Pinch: In some applications (Such as Maps, Browser, and Gallery) you can zoom in and out by placing two fingers on the screen at once and pinching them together (to zoom out) or spreading them apart (to zoom in). Rotate the screen: On most screens, the orientation of the screen changes as you rotate it. You can turn this feature on and off. iris 350... -
Page 9: Using The Phone's Buttons
Home: returns to Home screen. Hold it to access the list of last used applications. Back: returns to the previous screen you were working in, even if it was in a different application. Can be used to hide the keyboard. The phone provides you with Context menus and Options menus for accessing the features in an intuitive way. 3.6. Context Menus You can open context menu by touching key. Not all screens have context menus. If you touch key inside application that has no context menu, nothing happens. Examples of context menu from Contacts environment: iris 350... -
Page 10: Options Menus
When you touch and hold some items on a screen, an Options menu opens. 3.8. Menu Icons You have the following menu icons to easily let you access its important features: Opens the dialer Opens messaging Opens the main menu Opens the contacts list Opens the browser iris 350... -
Page 11: 4- Placing And Receiving Calls
While during a call, touch the icon to end a call. 4.2. Disable Phone Calls (Airplane mode) Some locations like airplanes may require you to turn off your mobile, Wi‐Fi, and Bluetooth wireless connections. Press and hold the Power button. Touch the Airplane mode. 4.3. Disable SIM card If you want to to close the SIM card, to do it go to: Settings > Dual SIM Settings > turn off SIM1/SIM2 iris 350... -
Page 12: 5- The Home Screen
5.1. Open and Close the Launcher Touch the Launcher Icon to open the main menu. You have access to all applications installed on your device and their widgets when available. Touch an application to open and launch it. iris 350... -
Page 13: Switch To Recently Used Application
Home screen. Place it and release your finger. Slide the Launcher left or right to bring more icons into view. As soon as you install a new application, it comes in this list. Widgets come at right of applications panel. You can directly touch WIDGETS at top of the screen You cannot launch widget like an application; you can only place it on desktop screen. Press and hold it until it vibrates and enters Home screen. Place it and release your finger. A context menu opens to configure the widget or resize it, naturally, it depends on the widget. Press Home icon or Back icon to close the Launcher. 5.2. Switch to Recently Used Application Press and hold the icon for a few seconds. iris 350... -
Page 14: Customize Home Screen
You may be asked to make further choices before the widget activates. If there isn’t room where you dropped it, the widget won’t get added to the Home Screen. Wallpapers: Wallpapers are images from Gallery, still images included with the system, and live images. They take the place of the default background for your Home Screen. iris 350... - Page 15 For set wallpaper, touch SET WALLPAPER at the top of the screen (for Gallery images) or set wallpaper. Folders: You can very easily regroup desktop icons in a folder on screen to save space and access more applications. Touch and hold any icon on desktop screen to move it. Go on another icon and release to create a folder containing both icons. Then add as many icons as folder can hold, give it a name, move it where you want. You have all the tools to customize your Iris 350 Smart Phone. iris 350...
-
Page 16: 6- Connect To The Internet
6.1. To configure your Internet: Go to Settings> Wireless & Networks >More > Mobile Networks >Tap Data Enabled. By default, your network provider sends the Access Point Name settings via SMS, or it comes automatically with your SIM card. You may need to install these settings. After this, you can choose from the listed access point names. If the access point names are not listed by default, please contact your network provider for the same. To add any operator Access point Name, go to settings > More > Mobile networks > Access Point Name. WARNING: to avoid any over cost contact your operator to know more about Access Point Name regarding your subscription. After you have selected or configured the access point name, go to Settings> Wireless & Networks >Data usage >Tap Mobile Data to enable Internet connection. add multiple tabs. Touch to 6.2. Access Internet via Wi-Fi To browse the Internet via Wi‐Fi: iris 350... -
Page 17: 7- Managing Notifications
ON, select the WIFI connection listed under Wi‐Fi networks with which you want to connect> Enter the password of Wi‐fi network with which you want to connect. Note: Make sure that Wi‐Fi network with which you want to connect is in range and is active. Notification icons inform you of new messages and events. When you receive a notification, its icon appears in the status bar, along with a summary that appears only briefly. 7.1. Open the Notifications Panel Drag the status bar down from the top of the screen as shown below: The Notifications panel displays your network provider name and a list of your current notifications. iris 350... -
Page 18: Respond To Notifications
Or just press the back button. The panel also closes when you touch a notification to respond to it. 8.1. Message environment & Settings You can use Messaging to exchange text messages and multimedia messages with your friends. Touch to compose a new text or multimedia message. Touch open messaging conversation You can also press the key and open the context menu to work on messages and their settings. iris 350... -
Page 19: Using The Onscreen Keyboard
The messages settings allow you to set SMS/MMS limits, notifications, vibrate or ringtones, delivery reports and many others. Take a tour and explore messages settings, you’ll find interesting things. 8.2. Using the Onscreen Keyboard Some applications display the keyboard by default. In others, you touch a text field where you want to enter text, to open the keyboard. iris 350... -
Page 20: Create And Send Multimedia Message
Chose the SIM card you want to send your message with. This is to erase characters This is enter key, press it then cursor move to next line 8.3. Create and Send Multimedia Message iris 350... -
Page 21: Operation On A Message
Touch Attach to attach various types of files. Send the MMS. 8.4. Operation on a message: Open the message thread containing the message your want to operate. Touch and hold this message until a context menu opens. Make your choice. To forward a message: Touch Forward in this menu. Add a contact. Touch Send to send the message. You can also Copy message text, Save message to SIM card, View message details and delete message. iris 350... -
Page 22: Lock A Message
Unlock a message by touching and holding it and then touch Unlock message. 9.1. Camera Your camera’s pictures and videos are stored in both the SD card and device. You can copy pictures and videos from both the SD card and device to a PC and vice versa. Change between front and back Change flash mode Touch take picture, video panorama. Touch to switch on more settings. Touch to change between photo, video or panorama. iris 350... -
Page 23: Gallery
(the wire is used as antenna). Touch the key or the intuitive buttons and icons on the phone in Radio interface to explore and enjoy the features of your inbuilt FM radio: Record sound iris 350... -
Page 24: Record Sounds
Your phone can connect to a variety of networks and devices, including Wi‐Fi, GPRS, Bluetooth, devices, such as headsets. You can also transfer files to/from your PC through the data cable. 10.1. Connect to PC Plug the phone to a computer with the supplied cable. Go to Notifications bar Touch "USB connected" This mounts the external SD card and internal memory as USB keys. Then you can manage your files directly from your computer. iris 350... -
Page 25: Connect To Internet
10.4. Pair With Bluetooth Devices Go to Settings > Wireless & networks> Bluetooth settings. If Bluetooth is off, check Bluetooth to turn it on. Your phone scans and displays the Bluetooth devices in range. If the device you want to pair with is not in the list, make it discoverable. If your phone stops scanning before you make the other device discoverable, touch Scan for devices. iris 350... -
Page 26: Connect To Internet Via Your Phone
You can browse the Internet on your PC using your mobile phone. This can be done in 2 ways: To access both the options make sure your phone has an active data plan and mobile data is “ ON”. USB Tethering: Connect your mobile phone to your PC via the USB cable. Go to Settings> Wireless & Networks>More >Tethering & portable hotspot> USB tethering. Your PC will then read the necessary y drivers of your phone and you can then access internet on your PC. Note: In case you are unable to connect to internet please get in touch with customer care executive. Wi-Fi Hotspot: Go to Settings> Wireless & Networks>More >Tethering & portable hotspot> Turn ON Wi‐Fi Hotspot. Once the device Wi‐Fi Hotspot is active you can see a grey icon denoting wireless network on the notification pane. Note: You can select the desired security settings for your hotspot network by following below steps: Go to Settings> Wireless & Networks>More >Tethering & portable hotspot> Set up Wi‐Fi hotspot> Security> Select desired security and configure your password. Now go to your PC and check for the Hotspot network created by your device. Select the network and input the password credentials. iris 350... -
Page 27: 11- Download Applications
The phone has a default configuration which includes some applications. Discover all others apps by using play store. You will be able to connect with 3G or Wi‐Fi for example, and by signing in the application with just an email. This is what it looks like: iris 350... -
Page 28: 12- Phone Settings
Lets you see and manage available space on your phone and on your SD card. Battery Lets you check the battery level and status. Apps Lets you view all applications downloaded or on SD card and mange all running applications in devices. Accounts & sync Lets you add, remove and manage your Google and other supported accounts. Location services Lets you set the location related settings like Wi‐Fi and mobile network, GPS settings for iris 350... -
Page 29: 13- Health And Safety Information
Certification Information (RoHS) We at LAVA take our social responsibility seriously and are committed to the cause of saving our environment, it is in keeping with these commitments that we are proud to state that LAVA phones are RoHS complaint. Certification Information (SAR) Your phone is designed not to exceed the limits of emission of ... - Page 30 Please keep your calls short and use SMS whenever more convenient. This advice applies especially to children, adolescents and pregnant women. Prefer to use your cell phone when the signal quality is good. People having active medical implants should preferably keep the cell phone at least 15 cm away from the implant. Maintain a preferable distance of 15 mm from the device. Safe Driving Do not use the phone while driving. When you have to use the phone, please use the personal hands‐free kit. Please do not put the phone onto any passenger seat or any place from which it may fall down in case of vehicular collision or emergency braking. iris 350...
- Page 31 Do not store the device in high or cold temperature. High temperatures can shorten the life of electronic devices and damage batteries. Do not use or store the device in dusty, dirty areas. Its moving parts and electronic components can be damaged. iris 350...
- Page 32 You are liable to dispose of all your electronic or electrical waste equipment by relocating over to the specified collection point for recycling. of such hazardous waste. Collection and proper recovery of your electronic waste iris 350...
- Page 33 Using the wrong type battery replacement there is a danger of explosion, be sure to follow the instructions disposal of used batteries. Copyrights All rights reserved. Reproduction, transfer, distribution or storage of part or all of the contents in this document in any form without the prior written permission of is strictly prohibited. To prevent possible hearing damage, do not listen at high volume levels of long periods. To use the device only with the earphones included, never change the earphones included for another one. iris 350...
- Page 34 Visit www.Lavamobiles.com additional information, downloads and services related to your LAVA product. To check for the nearest LAVA service center location for maintenance services, please visit www.lavamobiles.com/support-services Service Center number No.: 1860- 200-7500 Kindly note: Please send area code of your location through SMS to this No.
- Page 35 User Guide Lava warranty certificate Limited warranty: LAVA international Ltd. (LAVA) provides limited warranty for your mobile phone and original accessories delivered with your mobile phone (hereinafter referred to as “product”) The warranty period for the transceiver is one (1) year and for battery, charger and headset is six (6) months from the date of ...
- Page 36 ‐ All plastic surfaces and all other externally exposed part that is scratched or damaged due to normal use. To get maximum of your new product, we recommend you to: ‐ Read the guidelines for safe and efficient use as mentioned in the manual. ‐ Read the terms and conditions of your Lava warranty in the manual. ‐ Keep your original receipt; you will need it for warranty services if asked to produce. ‐ Present this Lava Warranty Certificate along with original proof of purchase whenever you require any warranty services. In case Lava product needs service, please visit the nearest Lava ...
Need help?
Do you have a question about the iris 350 and is the answer not in the manual?
Questions and answers