Table of Contents
Advertisement
Quick Links
Advertisement
Table of Contents

Subscribe to Our Youtube Channel
Related Manuals for Lava Iris405


Summary of Contents for Lava Iris405
- Page 1 User Manual Iris405...
-
Page 2: Table Of Contents
Content WAP-GPRS-MMS-Internet Settings…………………………………………………..1 Your phone & key parts………………………………………………………………11 Standby Screen & Icons………………………………………………………………12 Getting Started………………………………………………………………………….12 Inserting the SIM card and the Battery…………………………………...13 Inserting Micro SD card……………………………………………………...14 Switch On/Off………………………………………………………………….14 Unlock SIM Card………………………………………………………………14 Connection to Network………………………………………………………15 Charging the Battery................15 Basic Function………………………………………………………………………….15 Make Calls……………………………………………………………………...15 Make Domestic Calls…………………………………………………………16 Call Extension Phone………………………………………………………...16 Make International Calls……………………………………………………..16... - Page 3 E-mail……………………………………………………………………………18 Google…………………………………………………………………………..18 Browser.....................18 Calculator....................18 Calendar....................18 Clock......................18 Camera......................18 FM Radio....................19 Music Fusion Music Player)..............19 Sound Recorder..................20 Videos……...……………………………………………………………………20 You Tube………………………………………………………………………..20 Gallery…………………………………………………………………………..20 Files………...……………………………………………………………………21 Latitude…………………………………………………………………………Err or! Bookmark not defined. Local…………………………………………………………………………….21 Maps…………………………………………………………………………….21 News & Weather………………………………………………………………21 Play Store………………………………………………………………………21 Navigation……………………………………………………………………...21 SIM Toolkit……………………………………………………………………..22 Downloads……………………………………………………………………..22...
- Page 4 Settings…………………………………………………………………………22 Frequently Asked Questions and Troubleshooting……………………………..24 Safety Information and Notices................26 Emergency call………………………………………………………………..26 For your safety………………………………………………………………...26 Service center number………………………………………………………………...30...
-
Page 5: Wap-Gprs-Mms-Internet Settings
©2013. All rights are reserved. No part of this document may be reproduced without permission. While all efforts have been made to ensure the accuracy of all the contents in this manual, we assume no liability for errors or omissions or statements of any kind in this manual, whether such errors or omissions or statements resulting from negligence, accidents, or any other cause. - Page 6 Port: Check from detailed menu according to operator DNS: Primary DNS as mentioned in detail menu In case NA or Null in detailed menu– No need to enter any data EXAMPLE Changing Settings for Airtel Live Step1: Menu Settings More… Mobile Networks Access Point Names Step 2: Select Airtel Live or in case Airtel Live doesn’t exist to press “Option Key”’...
- Page 7 Homepage: Check from the row titled MMSC in table 1 according to operator Connection Type: Check from detailed menu according to operator Proxy: Check from detailed menu according to operator Port: Check from detailed menu according to operator DNS: Primary DNS as mentioned in detail menu In case NA or Null in detailed menu–...
- Page 8 Inte Inter Interne MMS- rnet MMS-G WAP-GP MMS-G Internet licat -GPR -GPR t-GPR GPRS -GPRS type airte airc airtelm airtelf aircel Imis mms interne rcomwap rcommm ms.co un.co gprs rcomnet gprs hent NONE NO NE NONE NONE NONE NONE NONE icati Line ed NA...
- Page 9 000.000. null null null null null null null null null null 000.000 000.000. null null null null null null null null null null dary 000.000 000.000. null null null null null null null null null null 000.000 ress 000.000. null null null null null null...
- Page 10 mtnl mtnl mtnl mtnl mtnl mtnl ed NA http: http:// http:// http://1 http:// http://mm http:/ http: http:// http: http://l http:// http:// //go wap.m wap.r 0.239. live.v s1.live.vo /goo //mt wap.g //mt ocalho wap.g wap.g ogle tnlmu world. 221.47 odafo dafone.in gle.c oogle st/hom...
- Page 11 null null null null null null null null null null null null null net null null null null null null null null null null null null null rato CELLO CELL CELL CELL CELL CELL CELL CELL NE-Nor ONE-N ONE- ONE-E ONE-E ONE-E ONE-...
- Page 12 p:// http:/ http://b http:// http:/ http:/ http:// http://bs www.b http://b /wap http://b http://b snlmm www.c /bsnl /bsnll wap.g nlmmsc. snl.co.i snllive. .goo snllive. snllive sc.in:8 ellone.i ive.n oogle. gle.c c.in c.in HTTP HTTP HTTP HTT HTTP HTTP HTTP Yes Yes 010.
- Page 13 rato Videocon TATA DOCOMO Uninor Loop Mobile ails Video TATA Prof TATA Unin UNIN Videoc Videoc DOCO Loop Unino Loop Loop INTE Intern r WAP Inter INTERN E-IN INTE INTE licat INTERN Intern MMS- WAP- MMS- WAP- MMS-G WAP-G ET-GPR et-GP GPRS T-GP...
- Page 14 000.0 010. 010. 000.0 10.20 010.1 000.000 010.0 010.00 000.0 10.202. 00.00 124. 058. 00.00 010.000. 2.5.14 24.02 .000.00 58.01 0.000.0 00.00 5.145 0.000 094. 010. 0.000 000.010 6.094 0.058 0.000 8799 8799 8080 8799 8080 8080 9401 9401 port null null Null...
-
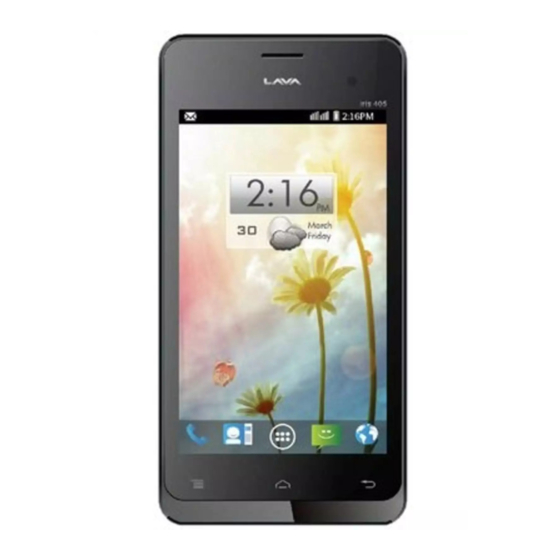
Page 15: Your Phone & Key Parts
Your phone & Key parts Label Description Volume Key Adjust the Volume Back key Press to back previous screen Home Key Return Home screen Option Key Obtain more opertions Press and hold to turn on/off phone Power Key/Lock key Press to lock/unlock the screen Camera Camera Lens... -
Page 16: Standby Screen & Icons
Standby Screen & Icons This phone provides multiple Standby screens. Through the instruction and various icons on the screen, you can have the operating information needed. Status Icon Description Signal indicator for SIM 1 Signal indicator for SIM 2 Using headset Mute Vibrate mode Alarm... -
Page 17: Inserting The Sim Card And The Battery
Inserting the SIM card and the Battery Remove the back cover Make sure the phone is switched off. You need to remove the back cover of your phone before you can insert the SIM card. Hold the phone with the front facing downwards;... -
Page 18: Inserting Micro Sd Card
Insert the battery With the metallic contacts of the battery facing the metallic contacts in the battery slot, press the battery down until it locks into place. Replace the back cover Align and hook the back cover to the top of the battery slot and then push the cover upwards until it locks into place. -
Page 19: Connection To Network
Input PIN code, press arrowhead icon to erase typing error and press OK to end typing. For example, if the PIN code is set as 1234, then type "1234" then press OK. The SIM card will be locked if you type in wrong code for three times continuously. The handset will inform you to type in PUK code. -
Page 20: Make Domestic Calls
Make Domestic Calls Use virtual keyboard to enter phone numbers and then press Dial icon to call. If you need to change the phone number, please press the delete key on the touch screen to delete. When the call is answered, the screen shall show the connection status. Call Extension Phone Some of the extension phones can't be directly connected to. -
Page 21: Answer Calls
You can call for emergency service as long as you are in the network coverage (check the signal strength indication bar on the upper right side of the handset screen). If your network provider doesn't provide roaming service in this area, there will be "Emergency Calls "... -
Page 22: E-Mail
icon to send the text. Press menu key to Add subject, Discard, Insert quick text and more operations. Message Settings Include storage settings, SMS settings, MMS settings, notification settings, service message setting and so on. E-mail First you need to set the E-mail account. Step 1: enter email address and password. -
Page 23: Fm Radio
1——Options icon. 2——Change the mode between camera mode , video mode or other mode. 3——Tap to switch the Capture mode. 4——Press the Capture icon to capture a picture. 5——Drag to change the focus. 6——Switch the camera between front and back. 7——Thumbnail icon shows the currently captured picture or video. -
Page 24: Sound Recorder
Tap Application Tab to enter Main Menu Select Fusion The main screen has songs categorized by Albums, Artists and Songs. Charts section provides weekly top charts and Radio provides access to wide range of internet radio stations. Song Search (Local and Online) Now playing list Visualizer Shuffle... -
Page 25: Files
In the gallery interface, there are different folders. Select a folder and press to enter it. Press image or video to view pictures or videos. When viewing the picture, if you press the screen, a menu with "share, delete " will pop out. -
Page 26: Sim Toolkit
SIM Toolkit The contents in this menu will differ according to different network providers. For detailed information, please check inside the menu. Downloads You can check the downloaded or being-downloaded contents. Settings SIM Management The contents in this menu will differ according to different network providers. For detailed information, please check inside the phone menu. - Page 27 This allows you to configure the power saving scheme. Controls include Low Battery mode, Sync Frequency for background data sync and Night Mode. Battery Estimation shows how long the battery will last for different functions.Apps Include the management of applications, the condition and development of the currently used service and storage space.
-
Page 28: Frequently Asked Questions And Troubleshooting
Frequently Asked Questions and Troubleshooting Cause and Solution Questions Press the power on key for over 1 second. Unable to turn on Check if the battery is properly connected. Please remove and phone install it again, retry to turn on ;... - Page 29 The standby duration is relative to the system setting of network. While the mobile phone is in an area with poor signal strength and can not receive the signal, the handset will continuously search for a Standby duration base station. This will significantly reduce battery charge. It is shortened recommended that you turn off your mobile in area with no signal reception to save battery.
-
Page 30: Safety Information And Notices
Clear statement of problems Then contact your local dealer or a LAVA authorized service center in your area. Safety Information and Notices Emergency call If any emergency arises, dial 112 (or other emergency call number) for emergency help. Note: Due to the nature of cellular networking, the success of emergency call is not guaranteed. - Page 31 passwords when necessary. Do not remove the battery without turning off the phone. Failure to follow this instruction may result in data loss. When you leave your vehicle, take the phone with you or place it in the glove compartment to avoid theft. Keep the phone, battery or charger out of reach of children.
- Page 32 vibrating. Use only the stylus approved by the phone manufacturer. Using stylus of unauthorized source will violate the terms and conditions of the warranty and may damage the touch screen. Handle the stylus with care. Place it back to its proper storing place when not in use.
- Page 33 Do’s: Ensure that an Authorized Person repairs your Lava products Call Our Local Authorized Collection Centers to Dispose Lava products Always drop your used electronic products, batteries or any accessories thereof after the end of their life at nearest Authorized Collection Point or Collection Center.
-
Page 34: Service Center Number
If the battery terminals are in contact with metal objects, it may cause a fire. For more details on how to dispose of your Lava products at the end of life, Please refer the list of our Services Centers on Pan India basis on our website www.lavamobiles.com or please view this link for the details of Service Centers... -
Page 35: Lava Warranty Certificate
The product has been used with or connected to an accessory (i) Not • supplied by Lava or its affiliates, (ii) Not fit for use with the product or (iii) Used otherwise than in manner intended. The seals of the product’s battery enclosure have been broken or shown •... - Page 36 Read the guidelines for safe and efficient use as mentioned in the manual. • Read the terms and conditions of your Lava warranty in the manual. • Keep your original receipt; you will need it for warranty services if asked to •...
Need help?
Do you have a question about the Iris405 and is the answer not in the manual?
Questions and answers