Table of Contents
Advertisement
Service
Manual
This manual is to be used by qualified appliance technicians only. Viking
does not assume any responsibility for property damage or personal
injury for improper service procedures done by an unqualified person.
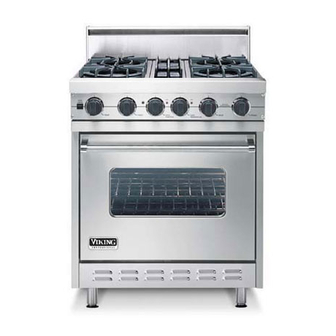
30 • 36 • 48 Inch
Dual Fuel range
All electric range
Preferred Service
This Base Manual covers general and
specific information including, but not
limited to the following models
VDSC305
VDSC365
VDSC485
VESC305
VESC305
Advertisement
Table of Contents

Related Manuals for Viking VDSC305


Summary of Contents for Viking VDSC305
- Page 1 Service Preferred Service Manual This manual is to be used by qualified appliance technicians only. Viking does not assume any responsibility for property damage or personal injury for improper service procedures done by an unqualified person. 30 • 36 • 48 Inch...
-
Page 2: Table Of Contents
TABLE OF CONTENTS VDSC305 – VDSC365 – VDSC 485 VESC305 – VESC306 COMPONENTS AND FUNCTIONAL PARTS: Control / Timer -------------------------------------------------------------------------------------------- Auto Reset Switch (Thermostat ) -------------------------------------------------------------------- High Limit Switch----------------------------------------------------------------------------------------- Cooling Fan Limit Switch ------------------------------------------------------------------------------ Selector Switch ------------------------------------------------------------------------------------------- Oven Thermostat ----------------------------------------------------------------------------------------... -
Page 3: Control / Timer
VDSC COMPONENTS WITH COLOR CODED WIRES) DOOR LOCK CONTROL / TIMER Function: The Door Lock Control / Timer is activated by the line voltage at the “ SEL” ( 1 ) contact. Relay “ RL1" ( 2 ) and “RL2" ( 3 ) close providing voltage to the Door Lock Motor. -
Page 4: High Limit Switch
VDSC COMPONENTS ( Con’t ) HIGH LIMIT SWITCH Function: The Switch has a ½ “ bi-metal disc. The two metals have different thermal coefficients of expansion which cause the disc to bow as it heats up. When it reaches the calibration temperature the disc snaps open, which opens the electrical contacts. -
Page 5: Door Lock Assembly
VDSC COMPONENTS ( Con’t) DOOR LOCK Function: When the Door Lock Motor is powered it turned a cam which pulls back a lever. As the lever moves back it allows a micro switch (SW1) to open. When the lever reaches the fully closed position it closes a double stacked micro switch (SW2 &... -
Page 6: Convection Fan
VDSC COMPONENTS ( Con’t ) CONVECTION FAN MOTOR Function: Provides an even flow of air in the oven cavity for more even baking. COOLING FAN MOTOR Function: Provides a continuous supply of cool air during self clean cycles to keep the Door Lock Motor and associated circuits cool. -
Page 7: Voltage And Resistance Checks (Self Clean Timer)
VOLTAGE READINGS MEASURED WITH DOOR OPEN 107VAC 70VAC 4VAC 16VAC 4VAC 16VAC 5VAC 1VAC MEASURED WITH DOOR LOCKED 80VAC 56VAC 85VAC 56VAC 90VAC 56VAC 93VAC 56VAC VC--4VDC SENSOR 3--3VDC SW2 closed in self clean (Locked). SENSOR 4--4VDC SW1 closed with clean lock open. -
Page 8: Voltage And Resistance Checks (Heating Elements)
VOLTAGE and RESISTANCE READINGS BAKE ELEMENT: “A” to “B” 21.1 Ohms “A” to “B” 240VAC during Bake and Convection Bake. BROIL ELEMENT: “A” to “D” ( outside element ) 32.6 Ohms “A” to “D” 50VAC during Bake and Convection Bake. 240VAC during Maxi Broil. -
Page 9: Selector Switch Contacts
8 POSITION SELECTOR SWITCH (With shaft position and internal connections SELF CLEAN Selector Switch closes Heating Element contacts 4-F, 1-N, 2-L2, 3-L2, and Door Lock Module /Timer contacts J-6 energizing Relay #1. Thermostat Clean Position closes Thermostat cycling contacts 1-2 and normally open (N) - common (C) energizing Relay #3. -
Page 10: Bake
BAKE Selector Bake position closes Switches 1-L2, 2-N, and 3-E. The Thermostat closes Switches Cy1-Cy2, which cycles with the oven temperature powering Relay 1 and the Oven cycle light. When Relay 1 closes, it powers the Bake Element (208 – 240). Both the Inner and Outer Broil Elements are in series across a 120v circuit. -
Page 11: Convection Bake
CONVECTION BAKE Selector Convection Bake position closes Switches 1-L2, 2-N, 3-E, and 6-1. 6-1 powers the Convection Fan through L-1 at 120v. The Thermostat closes Switches Cy1-Cy2, which cycles with the oven temperature powering Relay 1 and the Oven Cycle Light. When Relay 1 closes, it powers the Bake Element. -
Page 12: Convection Cook
CONVECTION COOK Selector Convection Cook position closes Switches 5-L2 and 6-1. 6-1 powers the Convection Fan through L1- at 120v. The Thermostat closes Switch Cy1-Cy2, which cycles with the Oven temperature, powering the R1 relay and the Oven Cycle Light. When Relay R1 closes, it powers the Convection Element (208 –... -
Page 13: Mini Broil
MINI BROIL Selector Mini Broil position closes Switches 3-L2. The Thermostat closes Switch Cy1-Cy2, powering the R1 relay and the Oven Cycle Light. When Relay R1 closes, it powers the inside Broil Element (208 – 240). 240 Volts 208 Volts 240v OHMS [R] WATTS [W] AMPS [I] 208v... -
Page 14: Maxi Broil
MAXI BROIL Selector Maxi Broil position closes switches 4-F, 2-L2, and 3-L2. The Thermostat closes Switch Cy1-Cy2, which cycles with the oven temperature, powering the R1 relay and the Oven Cycle Light. When Relay R1 closes, it powers the inside Broil Element (208 – 240) and the Outside Broil Element (208 –... -
Page 15: Convection Broil
CONVECTION BROIL Selector Convection Broil position closes switches 4-F, 2-L2, 3-L2, and 6-1. 6-1 powers the Convection fan through L1 at 120v. The Thermostat closes Switch Cy1-Cy2, which cycles the Oven temperature, powering the R1 relay and the Oven Cycle Light. When Relay R1 2 closes it powers the inside broil Element at 208v / 240v and the outside Broil Element at 208v / 240v. -
Page 16: Self Clean (Initiate Door Lock )
CLEAN INITIATE UNTIL DOOR LOCK Selector Clean position closes Heating Element circuits 4-F, 1-N, 2-L2, 3-L2 and Door Lock Module / Timer circuit J-6 switches Relay R2. Thermostat clean position closes the Cycle Switch and Thermostat Clean Switch MS1-MS2, which switches RelayR3. Switching Relay R3 allows circuit J-6 to turn on the Clean Indicator Light and enable the Door Lock Module / Timer which closes timer contacts LS1-L1 and LS2-M1. -
Page 17: Clean Door Lock Below 575
CLEAN DOOR LOCK BELOW 575 ° 10 seconds after the door motor begins to turn, Sensor 3 is activated from the signal being sent from VG on the Self Clean Timer and Switch LS2 to M1 is opened. This interrupts the power to the door lock motor. -
Page 18: Clean Door Lock Above 575
CLEAN DOOR LOCK ABOVE 575 ° Auto Reset switches to 1-3 which turns Door Lock Indicator Light on and disables Door Lock Motor circuit. 240 Volts 208 Volts 240v OHMS [R] WATTS [W] AMPS [I] 208v OHMS [R] WATTS [W] AMPS [I] Inner broil element 45.2 1275... -
Page 19: Clean Finished (Door Lock Above 575* )
CLEAN FINISHED ABOVE 575 ° Timer Switches T3-T4, T1-T2 open, turning off the Cooling Fan, which will then be powered at 120v by the Fan Limit Switch when needed, and opening the circuit to Relay R1 which disables the Heating Elements. Switch LS2-M1 closes in the Self Clean timer to power the Door Lock Motor once the Auto Reset closes between #1 ands #3. -
Page 20: Clean Finished (Door Lock Below 575* )
CLEAN FINISHED BELOW 575 ° Auto Reset closes between #1 (com) and #2 (N.C.) allowing L1 power to now flow to the Door Lock Motor. At the same time the Door Lock Light is switched off. The Door Lock Motor operates to unlock the door. -
Page 21: Clean Finished (Door Unlocked )
CLEAN FINISHED AND DOOR UNLOCKED Door Lock Motor begins to advance and opens SW2. After 2 seconds, Sensor 4 is activated from the signal being sent from VG on the Self Clean Timer through Door Lock switch SW1 which has been closed mechanically by the Door Lock bolt. -
Page 22: Electrical Connection
ELECTRICAL CONNECTION Use a 3 - wire power supply cord kit rated for 30 amps - 125/250 volts for Models VDSC and VERT or 50 amps - 240 volts for Model VESC with closed loop terminals and marked for use with ranges. Where local codes do not permit grounding through neutral, use a 4 - wire power supply cord. -
Page 23: Disassembly - Component Location
ELECTRICAL CONNECTIONS WITH CONDUIT Use ½" trade size conduit with a conduit clamp, 12 AWG /600 volt copper conductor colored red for line # 1 and black for line # 2 and 14 AWG /600 volt copper conductor colored white for neutral with closed loop terminals marked for use with ranges. - Page 24 VDSC 305 BACK COVER ASSEMBLY Remove the range from the cabinet and remove the back cover to service the electronic components for self clean. DISCONNECT THE VOLTAGE BEFORE REMOVING BACK COVER. (CAUTION 240 AC). A.C. Disconnect Cover. Back Cover VDSC 305 REAR PANEL ASSEMBLY Relay ( 2 ) Cooling Fan Auto Reset...
- Page 25 VDSC305 SELF CLEAN LOCK To replace the self clean lock mechanism you will need to remove: Burner Grates Burner bowls Center Work Space Burner Caps Grate Supports Grate Support Trims Access Panel Landing Ledge Control Panel Knob Bezels Knobs ( Continued on next page )
-
Page 26: Procedures To Unlock Door With Door Motor Failure
VDSC 305 SELF CLEAN LOCK ( Con’t ) Remove both side panels and insulation. Remove the 6 screws along the upper frame above the door that hold the burner box assembly to the oven body. Lift the front of the burner box high enough to gain access to the self clean lock and associated components ( High Limit Switch and Cooling Fan Switch ). -
Page 27: Vesc Top Removal
VDSC “ LOCKED “ DOOR In the unlikely event the door lock motor should fail in the “ Locked “ position you will need: To fashion a hook on the end of a 12" long stiff wire. Insert the hook between the door and the front frame assembly at the top, see “A”... -
Page 28: Vesc Voltage / Resistance / Current Checks
VERT AND VESC ( TOP ) TOP REMOVAL ILLUSTRATION “1" To remove the smooth glass top: ( A ) Pull the range (rang-top) forward to remove the screws holding the back-guard in place. ( B ) Remove the back-guard. ( C ) Remove the 3 screws “A” holding the top to the frame. ( D ) Remove the 4 screws “D”... - Page 29 Left Rear (Dual Element) Burner 2400W / 1000W @ 240vac 10A / 4.2A 1800W / 750W @ 208vac 8.7A / 3/6A Left Front Burner 1500W @ 240vac 6.3A 1125W @ 208vac 5.4A Right rear Burner 1800W @ 240vac 7.5A 1350W @ 208vac 6.5A Bridge Heater 800W @ 240vac...
Need help?
Do you have a question about the VDSC305 and is the answer not in the manual?
Questions and answers