Table of Contents
Advertisement
Available languages
Available languages
Quick Links
Download this manual
See also:
User Manual
This product can be set
up using any current web
browser, e.g., Internet
Explorer 6 or Netscape
Navigator 6.2.3.
Before You Begin
Make sure you have all the necessary information and equipment on hand before beginning the
installation.
Check Your Package Contents
If any of the above items are missing, please contact your reseller.
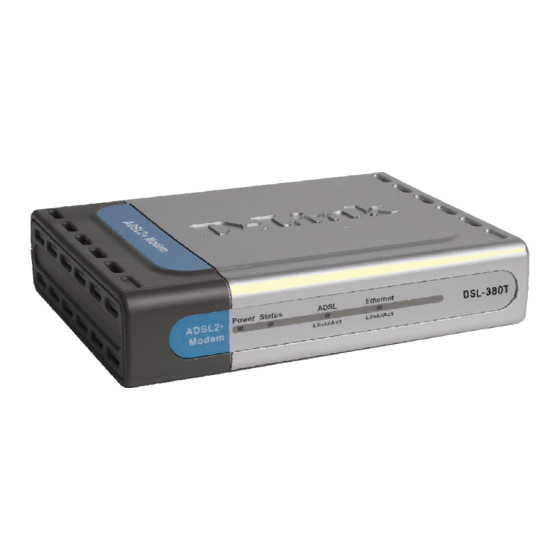
DSL-380T ADSL Modem
CD-ROM (containing Manual)
Ethernet (CAT5 UTP) Cable
Telephone Cable
Power Adapter
DSL-380T
ADSL Modem
Using a power supply
with a different voltage
rating will damage and void
the warranty for this product.
Advertisement
Table of Contents

Related Manuals for D-Link dsl-380t


Summary of Contents for D-Link dsl-380t
- Page 1 Navigator 6.2.3. Before You Begin Make sure you have all the necessary information and equipment on hand before beginning the installation. Check Your Package Contents DSL-380T ADSL Modem CD-ROM (containing Manual) Ethernet (CAT5 UTP) Cable Telephone Cable Using a power supply...
-
Page 2: Connecting The Modem To Your Computer
First, connect the power adapter to the receptor at the back panel of the DSL-380T and then plug the other end of the power adapter to a wall outlet or power strip. The Power LED will turn on to indicate proper operation. -
Page 3: Configuring The Modem
Configuring the Modem To use your Web browser to access the web pages used to set up the Modem, your computer must be configured to “Obtain an IP address automatically,” that is, you must change the IP network settings of your computer so that it is a DHCP Client. If you are using Windows XP and do not know how to change your network settings, skip ahead to Appendix A and read the instructions provided. - Page 4 Configuring the Modem (continued) Once you have logged in, the Home directory tab featuring the Setup Wizard window opens. Most users will be able to use the Setup Wizard to establish the ADSL connection to your ISP. To begin using the Setup Wizard, click on the Run Wizard button in the middle of the web page. The first pop-up Setup Wizard window opens.
- Page 5 Configuring the Modem (continued) The Setup Wizard procedure consists of two general steps: 1. Set the Internet connection 2. Restart the Modem When you setup the Internet connection, you will need to enter information provided by your ISP. If you have not been given information about the connection type, the VPI and VCI numbers, as well as other information related to the connection type, you will not be able to complete the setup.
- Page 6 Configuring the Modem (continued) The initial step is to Select the Internet Connection Type for the WAN interface. Your ISP has given this information to you. If you do not know what type of connection to use, exit the Setup Wizard and contact your ISP for the information.
- Page 7 Configuring the Modem (continued) PPPoE/PPPoA Connections If you selected the PPPoE/PPPoA connection type in the previous window, you will see the Setup Wizard window pictured here. Type in the Username and Password used to identify and verify your account to the ISP. If you have been instructed to change the VPI number and VCI number, type in the new values.
- Page 8 Configuring the Modem (continued) Static IP Address Connections If you selected the Static IP Address connection type, change the WAN IP Address, Subnet Mask, ISP Gateway Address, Primary DNS (Server IP) Address and (if available) Secondary DNS (Server IP) Address as instructed by your ISP. Select the Connection Type used for encapsulation.
- Page 9 Configuring the Modem (continued) Bridge Connections If you selected the Bridge connection type, select the Connection Type used for encapsulation. If you have been instructed to change the VPI number and VCI number, type in the new values. Click Next when you are ready to continue to the Setup Completed window. Change the VPI and VCI numbers as instructed by your ISP.
- Page 10 Configuring the Modem (continued) Setup Completed All the settings for the ADSL connection are now completed. Click the Restart button to save the new settings and restart the Modem. It will take about two minutes to restart the Modem. Click the Restart button. The window pictured on the right appears during the save and restart process.
-
Page 11: Configuring Ip Settings In Windows Xp
Appendix For additional settings or information, refer to the Advanced, Tools, or Status tabs on the Web Management interface; or to the manual located on the CD-ROM. Configuring IP Settings in Windows XP Use the following steps to configure a computer running Windows XP to be a DHCP client. 1. - Page 12 3. In the Network and Internet Connections window, click Network Connections. Click Network Connections. 4. In the Network Connections window, right-click on Local Area Connection, then click Properties. Right-click on the Local Area Connection icon and select the Properties option from the pull-down menu.
- Page 13 5. In the General tab of the Local Area Connection Properties window, highlight Internet Protocol (TCP/IP) under “This connection uses the following items:” by clicking on it once. Click on the Properties button. Click Properties. 6. Select “Obtain an IP address automatically” by clicking once in the circle. Click the OK button.
-
Page 14: Technical Support
Technical Support You can find software updates and user documentation on the D-Link websites. D-Link provides free technical support for customers within Canada, the United Kingdom, and Ireland. Customers can contact D-Link technical support through our websites, or by phone. - Page 15 Important Information Important information regarding your internet subscription Users who subscribe to limited or "pay as you use" broadband internet access. In the WAN configuration settings, there is a parameter called Maximum idle timer. This parameter controls how many seconds of inactivity before dropping connection to the internet. The default setting is "0"...
- Page 16 WICHTIGE Hinweise zur Internet-Verbindung Beachten Sie bitte, das bei dem Einsatz eines Routers hohe Verbindungskosten entstehen können. Sie müssen die Einstellungen des Routers Ihrem Tarif und Ihren Surfgewohnheiten anpassen, um zusätzliche Kosten zu vermeiden. Insbesondere dann, wenn sie einen Tarif nutzen, bei dem Ihnen die Kosten auf der Basis Ihrer Online-Zeit in Rechnung gestellt werden (zeitbasierend), müssen Sie Ihren Router durch korrekte Einstellung dazu veranlassen, die Verbindung bei Inaktivität zu trennen.
-
Page 17: Vor Dem Start
Netscape Navigator 6.2.3 (oder höher). ADSL-Modem Vor dem Start Stellen Sie vor der Installation sicher, dass Sie über alle notwendigen Informationen und Komponenten verfügen. Lieferumfang überprüfen DSL-380T ADSL-Modem CD-ROM (mit Handbuch) Ethernet-Kabel (CAT5 UTP) Telefonkabel Die Verwendung eines Netzteils mit abweichender Spannung führt... -
Page 18: Modem Mit Dem Computer Verbinden
Modem mit dem Computer verbinden Verbinden Sie das Netzteil zunächst mit der Buchse auf der Rückseite des DSL-380T, und schließen Sie das Netzteil danach an eine Steckdose an. Die LED-Betriebsanzeige leuchtet auf und zeigt damit den ordnungsgemäßen Betrieb des Geräts an. -
Page 19: Modem Konfigurieren
Modem konfigurieren Um über Ihren Webbrowser auf die Webseiten zum Einrichten des Modems zu gelangen, muss die Option „IP-Adresse automatisch beziehen“ aktiviert sein. Das bedeutet, dass Sie Ihren Computer über die IP-Netzwerkeinstellungen als DHCP-Client konfigurieren müssen. Falls Sie Windows XP verwenden und nicht wissen, wie Sie die Netzwerkeinstellungen ändern können, fahren Sie mit den Anweisungen im Anhang fort. -
Page 20: Modem Konfigurieren (Fortsetzung)
Modem konfigurieren (Fortsetzung) Nach der Anmeldung wird das Verzeichnis „Home“ (Startseite) mit dem Fenster „Setup Wizard“ (Setup-Assistent) angezeigt. In den meisten Fällen kann die ADSL-Verbindung zum Internetdienstanbieter mit dem Setup-Assistenten hergestellt werden. Um den Setup-Assistenten zu starten, klicken Sie in der Mitte der Webseite auf die Schaltfläche „Run Wizard“... - Page 21 Modem konfigurieren (Fortsetzung) Der Konfigurationsvorgang besteht aus zwei Schritten: Internetverbindung konfigurieren Modem neu starten Zur Herstellung der Internetverbindung müssen Sie die Informationen Ihres Internetdienstanbieters eingeben. Ein Abschluss der Konfiguration ist ohne Informationen zum Verbindungstyp, zu den VPI- und VCI-Werten oder anderen Informationen zum Verbindungstyp nicht möglich.
- Page 22 Modem konfigurieren (Fortsetzung) Legen Sie zuerst die Art der Internetverbindung für die zugehörige WAN-Schnittstelle fest. Diese Informationen werden von Ihrem Internetdienstanbieter bereitgestellt. Wenn Sie sich bei der Auswahl der Internetverbindung nicht sicher sind, verlassen Sie den Setup-Assistenten und wenden Sie sich an Ihren Internetdienstanbieter. Wenn Sie auf „Next“ (Weiter) klicken, wird eine Seite des Setup-Assistenten angezeigt, die je nach gewählter Verbindung unterschiedliche Informationen enthält.
- Page 23 Modem konfigurieren (Fortsetzung) PPPoE/PPPoA-Verbindungen Wenn Sie im vorherigen Fenster eine PPPoE/PPPoA-Verbindung gewählt haben, wird das hier abgebildete Fenster des Setup-Assistenten angezeigt. Geben Sie unter „Username“ den Benutzernamen und unter „Password“ das Kennwort ein, mit denen Sie sich bei Ihrem Internetdienstanbieter anmelden. Wenn Sie aufgefordert werden, Ihre VPI- oder VCI-Werte zu ändern, geben Sie die neuen Daten ein.
- Page 24 Modem konfigurieren (Fortsetzung) Verbindungen mit statischer IP-Adresse Wenn Sie die Verbindung mit statischer IP-Adresse gewählt haben, ändern Sie nach den Vorgaben Ihres Internetdienstanbieters unter „IP Address“ die WAN-IP-Adresse, unter „Subnet Mask“ die Subnetzmaske, unter „ISP Gateway Address“ die Gateway-Adresse Ihres Internetdienstanbieters und, unter „Primary DNS“...
- Page 25 Modem konfigurieren (Fortsetzung) Bridge-Verbindungen Wenn Sie die Bridge-Verbindung gewählt haben, wählen Sie unter „Connection Type“ den Verbindungstyp für die Kapselung aus. Wenn Sie aufgefordert werden, Ihre VPI- oder VCI-Werte zu ändern, geben Sie die neuen Daten ein. Klicken Sie auf „Next“ (Weiter), um zum Fenster „Setup Completed“...
- Page 26 Modem konfigurieren (Fortsetzung) Setup abgeschlossen Alle Einstellungen für die ADSL-Verbindung wurden vorgenommen. Klicken Sie auf die Schaltfläche „Restart“ (Neu starten), um die Einstellungen zu speichern und das Modem neu zu starten. Der Neustart dauert etwa zwei Minuten. Klicken Sie auf die Schaltfläche „Restart“...
- Page 27 Anhang Weitere Informationen, zum Beispiel zu zusätzlichen Einstellungen, finden Sie auf den Registerkarten „Advanced“ (Erweitert), „Tools“ (Extras) und „Status“ auf der webbasierten Verwaltungsoberfläche oder im Handbuch auf der CD-ROM. IP-Einstellungen unter Windows XP konfigurieren Führen Sie die folgenden Schritte aus, um einen Computer mit Windows XP als DHCP-Client zu konfigurieren.
- Page 28 Klicken Sie im Fenster „Netzwerk- und Internetverbindungen“ auf „Netzwerkverbindungen“. Klicken Sie auf „Netzwerkverbindungen anzeigen“. Klicken Sie im Dialogfeld „Netzwerkverbindungen“ mit der rechten Maustaste auf „LAN-Verbindung“ und anschließend auf „Eigenschaften“. Klicken Sie mit der rechten Maustaste auf das Symbol LAN-Verbindung“, und wählen Sie in der Dropdown-Liste die Option „Eigenschaften“.
- Page 29 Aktivieren Sie im Dialogfeld „Eigenschaften von LAN-Verbindung“ auf der Registerkarte „Allgemein“ unter „Diese Verbindung verwendet folgende Elemente:“ das Kontrollkästchen „Internetprotokoll (TCP/IP)“. Klicken Sie es dazu einmal an. Klicken Sie auf die Schaltfläche „Eigenschaften“. Klicken Sie auf „Eigenschaften“. Wählen Sie „IP-Adresse automatisch beziehen“, indem Sie einmal auf das Optionsfeld klicken.
-
Page 30: Technische Unterstützung
0,12€/Min aus dem Festnetz der Deutschen Telekom. Telefonische technische Unterstützung erhalten Sie Montags bis Freitags von 09.00 bis 17.30 Uhr. Unterstützung erhalten Sie auch bei der Premiumhotline für D-Link Produkte unter der Rufnummer 09001-475767 Montag bis Freitag von 6-22 Uhr und am Wochenende von 11-18 Uhr. -
Page 31: Avant De Commencer
Avant de commencer Avant de procéder à l'installation, vérifiez que vous disposez de toutes les informations et de l'équipement nécessaires. Vérification du contenu de l'emballage Modem ADSL DSL-380T CD-ROM (contenant le manuel utilisateur) Câble Ethernet (UTP CAT. 5) Câble téléphonique L'utilisation d'une alimentation électrique d'une tension différente... - Page 32 Connexion du modem à votre ordinateur Branchez d'abord l'une des extrémités de l'adaptateur secteur sur la prise située sur le panneau arrière du DSL-380T, puis l'autre sur une prise murale ou multiple. Le voyant d'alimentation s'allume pour indiquer que le système fonctionne correctement.
-
Page 33: Configuration Du Modem
Configuration du modem Pour accéder aux pages Web d'installation du modem via votre navigateur Web, vous devez configurer votre ordinateur sur Obtenir une adresse IP automatiquement. En d'autres termes, vous devez modifier les paramètres réseau IP de votre ordinateur pour qu'il devienne un client DHCP. -
Page 34: Configuration Du Modem (Suite)
Configuration du modem (suite) Une fois la connexion établie, l'onglet Home (Accueil) présentant la fenêtre Setup Wizard (Assistant de configuration) s'ouvre. La plupart des utilisateurs pourront établir la connexion ADSL à leur FAI grâce à cet Assistant. Pour le lancer, cliquez sur le bouton Run Wizard (Exécuter l'assistant) situé... - Page 35 Configuration du modem (suite) La procédure Setup Wizard (Assistant de configuration) comprend deux étapes principales : Définir la connexion Internet Redémarrer le modem Pour configurer la connexion Internet, vous devez saisir les informations de votre FAI. Si vous n'avez pas reçu d'informations relatives au type de connexion, entres autres les numéros VPI et VCI, vous ne pourrez pas procéder à...
- Page 36 Configuration du modem (suite) La première étape consiste à sélectionner le type de connexion Internet pour l'interface WAN. Pour ce faire, utilisez les informations de votre FAI. Si vous les ignorez, quittez l'assistant de configuration, puis contactez votre FAI. Dans le cas contraire, cliquez sur le bouton Next (Suivant).
- Page 37 Configuration du modem (suite) Connexion de type PPPoE/PPPoA Si vous avez sélectionné le type de connexion PPPoE/PPPoA dans la fenêtre précédente, la fenêtre ci-dessous s'affiche. Renseignez les champs User Name (Nom d'utilisateur) et Password (Mot de passe) à l'aide des informations permettant d'identifier et de vérifier votre compte auprès de votre FAI.
- Page 38 Configuration du modem (suite) Connexion de type Static IP Address (Adresse IP statique) Si vous avez sélectionné le type de connexion Static IP Address (Adresse IP statique), modifiez les champs IP Address (Adresse IP), Subnet Mask (Masque de sous-réseau), ISP Gateway Address (Adresse de la passerelle du FAI), Primary DNS Address (Adresse DNS principale) [adresse IP du serveur DNS principal] et (le cas échéant) Secondary DNS Address (Adresse IP secondaire) [adresse IP du serveur DNS secondaire] du WAN selon...
- Page 39 Configuration du modem (suite) Connexion de type Bridge (Pont) Si vous avez sélectionné le type de connexion Bridge (Pont), sélectionnez le type de connexion utilisé pour l'encapsulation. Si vous avez reçu l'instruction de modifier les numéros VPI et VCI, entrez les nouvelles valeurs. Cliquez sur Next (Suivant) lorsque vous êtes prêt à passer à...
- Page 40 Configuration du modem (suite) Setup Completed (Configuration terminée) Tous les paramètres de connexion ADSL sont à présent définis. Cliquez sur Restart (Redémarrer) pour enregistrer les nouveaux paramètres et redémarrer le modem. Cette dernière opération prend environ deux minutes. Cliquez sur Restart (Redémarrer). La fenêtre ci-contre s'affiche lors du processus d'enregistrement et de redémarrage.
-
Page 41: Configuration Des Paramètres Ip Sous Windows Xp
Annexe Pour savoir comment définir les autres paramètres ou pour obtenir des informations supplémentaires, reportez-vous aux onglets Advanced (Avancé), Tools (Outils) ou Status (État) sur l'interface de gestion Web, ou au manuel utilisateur disponible sur le CD-ROM. Configuration des paramètres IP sous Windows XP Sous Windows XP, les étapes de configuration d'un ordinateur comme client DHCP sont les suivantes : Dans le menu Start (Démarrer) sur le bureau, sélectionnez Control Panel (Panneau... - Page 42 Dans la fenêtre Network and Internet Connections (Connexions réseau et Internet), cliquez sur Network Connections (Connexions réseau). Cliquez sur Network Connections (Connexions réseau). Dans la fenêtre Network Connections (Connexions réseau), cliquez à l'aide du bouton droit de la souris sur Local Area Connection (Connexion au réseau local), puis cliquez sur Properties (Propriétés).
- Page 43 Dans l'onglet General (Général) de la fenêtre Local Area Connection Properties (Propriétés de connexion au réseau local), sous la zone This connection uses the following items: (Cette connexion utilise les éléments suivants :), cliquez sur Internet Protocol (TCP/IP) (Protocole Internet (TCP/IP)), puis sur le bouton Properties (Propriétés).
-
Page 44: Assistance Technique
Vous trouverez la documentation et les logiciels les plus récents sur le site web D-Link. Vous pouvez contacter le service technique de D-Link par notre site internet ou par téléphone. Support technique destiné aux clients établis en France: Assistance technique D-Link par téléphone :... -
Page 45: Antes De Empezar
Antes de empezar Asegúrese de que tiene a mano la información y el equipo necesarios antes de iniciar la instalación. Comprobación del contenido del paquete Módem ADSL DSL-380T CD-ROM (contiene Manual) Cable Ethernet (CAT5 UTP) El uso de una fuente de alimentación Cable telefónico... -
Page 46: Conexión Del Módem Al Ordenador
LED de alimentación se encenderá para indicar que la operación se ha realizado correctamente. Introduzca un extremo del cable Ethernet en un puerto Ethernet del panel trasero del DSL-380T, y el otro extremo del cable en un adaptador Ethernet o puerto Ethernet disponible del ordenador. Entrada de Puerto ADSL alimentación Para... -
Page 47: Configuración Del Módem
Configuración del módem Para usar el navegador web con el objetivo de acceder a las páginas web que permiten configurar el módem; su ordenador ha de estar configurado para obtener automáticamente una dirección IP («Obtain an IP address automatically»); por tanto, ha de cambiar los parámetros de red IP del ordenador para que sea un cliente DHCP. -
Page 48: Configuración Del Módem (Continuación)
Configuración del módem (continuación) Cuando haya entrado en el sistema, verá la ficha Home con el menú Setup Wizard. La mayoría de usuarios podrán usar el asistente de configuración para establecer la conexión ADSL al ISP. Para empezar a usar el asistente de configuración, haga clic en el botón Run Wizard, en el centro de la página web. - Page 49 Configuración del módem (continuación) El asistente de instalación le guiará en dos pasos principales: Definir la conexión a internet. Reiniciar el módem. Cuando haya configurado la conexión a internet, necesitará introducir la información que le haya proporcionado el ISP. Si no dispone de información sobre el tipo de conexión ni sobre los números VPI y VCI, no podrá...
- Page 50 Configuración del módem (continuación) El primer paso consiste en seleccionar el tipo de conexión a internet usado para la interfaz WAN. Su ISP le habrá proporcionado esta información. Si no sabe qué tipo de conexión usa, salga del asistente de configuración y contacte con su ISP para que le dé información al respecto.
- Page 51 Configuración del módem (continuación) Conexiones PPPoE/PPPoA Si en el menú anterior ha seleccionado el tipo de conexión PPPoE/PPPoA, verá la página de la imagen siguiente. Escriba el nombre de usuario (Username) y la clave de acceso (Password) usados para identificar y verificar su cuenta con el ISP. Si se le ha indicado que cambie el número VPI y el número VCI, escriba los nuevos valores.
- Page 52 Configuración del módem (continuación) Conexiones con dirección IP estática Si ha seleccionado el tipo de conexión con dirección IP estática, cambie los siguientes parámetros de la WAN: dirección IP (IP address), máscara de subred (Subnet Mask), dirección gateway del ISP (ISP Gateway Address), DNS primario (Primary DNS) y, si está disponible, dirección IP del servidor DNS secundario (Secondary DNS Server), como le haya indicado su ISP.
- Page 53 Configuración del módem (continuación) Conexiones bridge Si ha seleccionado el tipo de conexión bridge, seleccione el tipo de conexión usado para la encapsulación. Si se le ha indicado que cambie el número VPI y el número VCI, escriba los nuevos valores. Haga clic en Next cuando esté listo para continuar y vaya a la página Setup Completed.
- Page 54 Configuración del módem (continuación) Configuración completada Se ha completado la configuración de la conexión ADSL. Haga clic en el botón Restart para guardar los nuevos parámetros y reiniciar el módem. El módem tardará unos dos minutos en reiniciarse. Haga clic en Restart.
- Page 55 Apéndice En las fichas Advanced, Tools o Status de la interfaz de gestión basada en web o en el manual del CD-ROM, encontrará más información. Configuración de los parámetros IP en Windows XP Siga estos pasos a fin de configurar un ordenador con Windows XP para que sea un cliente DHCP.
- Page 56 En la ventana Network and Internet Connections, haga clic en Network Connections. Haga clic en Network Connections. En la ventana Network Connections, haga clic con el botón de la derecha en Local Area Connection, y luego en Properties. Haga clic con el botón de la derecha en el icono de Local Area Connection y seleccione la opción Properties en el menú...
- Page 57 En la ficha General del menú Local Area Connection Properties, haga clic en Internet Protocol (TCP/IP), bajo «This connection uses the following items:», para seleccionarlo. Haga clic en el botón Properties. Haga clic en Properties. Seleccione «Obtain an IP address automatically»; para ello, haga clic en el círculo. Haga clic en el botón OK.
-
Page 58: Asistencia Técnica
España durante el periodo de garantía del producto. Los clientes españoles pueden ponerse en contacto con la asistencia técnica de D-Link a través de nuestro sitio web o por teléfono. Asistencia Técnica de D-Link por teléfono: 902 304545... -
Page 59: Prima Di Cominciare
Prima di cominciare Prima di procedere con l’istallazione, verificare la disponibilità di tutte le informazioni e di tutti i componenti hardware necessari. Contenuto del pacchetto Modem ADSL DSL-380T CD-ROM (con manuale) Cavo Ethernet (CAT5 UTP) Cavo telefonico L’utilizzo di un trasformatore con... -
Page 60: Connessione Del Modem Al Computer
Connessione del modem al computer Collegare il trasformatore al relativo connettore sul pannello posteriore del dispositivo DSL-380T e alla presa di corrente. Il LED Power si accende per indicare il corretto funzionamento. Collegare le due estremità del cavo Ethernet rispettivamente alla porta Ethernet (LAN) sul pannello posteriore del dispositivo DSL-380T e all’adattatore/porta... -
Page 61: Configurazione Del Modem
Configurazione del Modem Per accedere alle pagine web di configurazione del Modem mediante un browser, è necessario configurare il computer in modo che ottenga automaticamente un indirizzo IP. In altre parole è necessario configurare il computer come client DHCP, selezionando l’opzione “Ottieni automaticamente un indirizzo IP”. - Page 62 Configurazione del modem (continua) Dopo il login, il sistema visualizza la scheda Home del programma Setup Wizard. In molti casi è possibile utilizzare il programma Setup Wizard per instaurare la connessione ADSL con il proprio ADSL Internet Service Provider (ISP). Per avviare il programma Setup Wizard, cliccare sul pulsante Run Wizard al centro della pagina web.
- Page 63 Configurazione del modem (continua) La procedura di configurazione del programma prevede due passi: 1. Impostazione della connessione 2. Riavvio Per configurare la connessione a Internet è necessario richiedere all’ISP alcuni dati tra cui il tipo di connessione e altre informazioni correlate e i valori dei parametri VPI e VCI. In mancanza di queste indicazioni non è...
- Page 64 Configurazione del modem (continua) IL primo passo consiste nel selezionare il tipo di connessione Internet per l’interfaccia WAN. Questo dato deve essere fornito dall’ISP. Se non si dispone di questa informazione, uscire dal programma Setup Wizard e contattare l’ISP. Cliccando sul pulsante Next, il programma Setup wizard visualizza la pagina successiva, in funzione del tipo di connessione selezionata.
- Page 65 Configurazione del modem (continua) Connessioni PPPoE/PPPoA Se nel precedente menu è stata selezionata una connessione di tipo PPPoE/PPPoA, il programma Setup Wizard visualizza la pagina illustrata nella figura. Nei campi Username e Password inserire il nome utente e la password utilizzati per l’identificazione e la verifica dell’account fornito dall’ISP.
- Page 66 Configurazione del modem (continua) Connessioni Static IP Address Se nel precedente menu è stata selezionata una connessione di tipo Static IP Address, modificare i campi IP Address, Subnet Mask, ISP Gateway Address, Primary DNS (Server IP) Address e (se disponibile ) Secondary DNS (Server IP), utilizzando i valori forniti dall’ISP per la connessione alla WAN.
- Page 67 Configurazione del modem (continua) Connessioni Bridge Se nel precedente menu è stata selezionata una connessione di tipo Bridge, utilizzare il campo Connection Type per selezionare il tipo di connessione per l’incapsulamento. Se richiesto, modificare i parametri VPI e VCI, digitando i valori corretti. Cliccare su Next per accedere alla pagina Setup Completed.
- Page 68 Configurazione del modem (continua) Menu Setup Completed Tutti i parametri relativi alla connessione ADSL sono impostati. Cliccare sul pulsante Restart per salvare le impostazioni e riavviare il modem, operazione che richiederà alcuni minuti. Cliccare sul pulsante Restart Durante la procedura di salvataggio e riavvio viene visualizzata la finestra illustrata in figura.
- Page 69 Appendice Maggiori informazioni o ulteriori parametri di configurazione sono disponibili nelle schede Advanced, Tools e Status dell’interfaccia di gestione basata sul Web o nel manuale utente contenuto nel CD-ROM. Configurazione delle impostazioni IP in ambiente Windows XP Per configurare come client DHCP un computer dotato di sistema operativo Windows XP, la procedura è...
- Page 70 Nella finestra Rete e Connessioni Internet cliccare su Connessioni di rete. Cliccare su Connessioni di rete. Nella finestra Connessioni di rete, cliccare su Connessioni alla rete Locale col tasto destro del mouse. Cliccare su Proprietà. Col tasto destro del mouse cliccare sull’icona Connessioni alla rete Locale e selezionare l’opzione Proprietà...
- Page 71 Nella scheda Generale del menu Proprietà Connessioni alla rete Locale, evidenziare con un clic la voce Protocollo Internet (TCP/IP) nel riquadro “La connessione utilizza i componenti seguenti:”. Cliccare sul pulsante Proprietà. Cliccare su Proprietà. Selezionare l’opzione “Ottieni automaticamente un indirizzo IP”. Cliccare sul pulsante Nella finestra Proprietà...
- Page 72 Supporto tecnico Gli ultimi aggiornamenti e la documentazione sono disponibili sul sito D-Link. Supporto tecnico per i clienti residenti in Italia D-Link Mediterraneo S.r.L. Via N. Bonnet 6/B 20154 Milano Supporto Tecnico dal lunedì al venerdì dalle ore 9.00 alle ore 19.00 con orario continuato...
Need help?
Do you have a question about the dsl-380t and is the answer not in the manual?
Questions and answers