Yamaha R-N301 Owner's Manual
Hide thumbs
Also See for R-N301:
- Owner's manual (64 pages) ,
- Owner's manual (382 pages) ,
- Owner's manual (116 pages)
Table of Contents
Advertisement
Available languages
Available languages
Advertisement
Chapters
Table of Contents

Related Manuals for Yamaha R-N301


Summary of Contents for Yamaha R-N301
- Page 1 Network Receiver OWNER’S MANUAL MANUAL DE INSTRUCCIONES...
- Page 2 12 Only voltage specified on this unit must be used. Using this unit with a higher voltage than specified is dangerous and may cause fire, damage to this unit, and/or personal injury. Yamaha will not be held responsible for any damage resulting from use of this unit with a voltage other than specified.
-
Page 3: Table Of Contents
Contents INTRODUCTION ADVANCED OPERATION What you can do with this unit ......... 2 Configuring playback settings for different Sources that can be played back on this unit ....2 playback sources (Option menu) ......31 Devices that can control this unit........3 Option menu items............ -
Page 4: Introduction
INPUT PUSH - ENTER Broadband router* PHONES SPEAKERS RETURN This unit (R-N301) CD player etc. iPod (AirPlay)* iPod/Android (Spotify)* * You need a commercially available Wi-Fi broadband router when you use an iPod/Android. 1 Play back the Internet radio (p.26) 4 Play back your iPod with AirPlay (p.28) -
Page 5: Devices That Can Control This Unit
What you can do with this unit Devices that can control this unit STANDBY/ON DISPLAY FM MODE MEMORY FM/AM PRESET TUNING VOLUME SELECT BASS TREBLE INPUT PUSH - ENTER PHONES SPEAKERS RETURN Broadband router* Mobile device* Remote control (iPod, Android) * You need a commercially available Wi-Fi broadband router when you use a mobile device. -
Page 6: Supplied Accessories
Supplied accessories Supplied accessories Check that the following accessories are supplied with the product. Remote control Batteries (x2) AM antenna FM antenna (AAA, R03, UM-4) DIMMER SLEEP SPEAKERS COAXIAL OPTICAL LINE 1 LINE 2 LINE 3 MODE TUNER TUNING PRESET POP-UP MENU HOME NOW PLAYING... -
Page 7: Controls And Functions
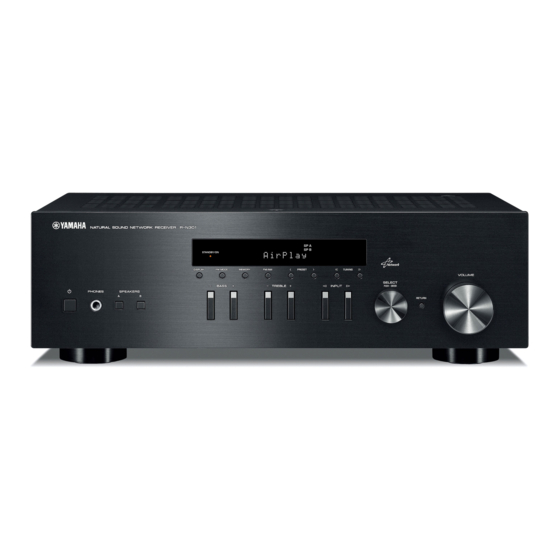
Controls and functions Controls and functions Front panel 4 5 6 7 8 9 : A STANDBY/ON DISPLAY FM MODE MEMORY FM/AM PRESET TUNING VOLUME SELECT BASS TREBLE INPUT PUSH - ENTER PHONES SPEAKERS RETURN 1 A (power) 9 FM/AM Turns on/off (standby) the unit. -
Page 8: Front Display
Controls and functions Front display STEREO SP MUTE TUNED SP SLEEP 1 Information display Displays the current status (such as input name sound mode name). You can switch the information that is displayed when you press DISPLAY (p.30). 2 STEREO Lights up when the unit is receiving a stereo FM radio signal. -
Page 9: Rear Panel
(General model) 1 ANTENNA terminals For connecting to FM and AM antennas (p.12). 2 DC OUT jack For supplying power to a Yamaha AV accessory. For details, refer to the instruction manual of the AV accessory. 3 NETWORK jack For connecting to a network (p.13). -
Page 10: Remote Control
Controls and functions Remote control Input selection keys Select an input source for playback. COAXIAL COAXIAL jack OPTICAL OPTICAL jack DIMMER SLEEP NETWORK jack (press repeatedly to select a desired network source) LINE 1-3 LINE 1-3 jacks SPEAKERS TUNER FM/AM tuner COAXIAL OPTICAL CD jacks... -
Page 11: Using The Remote Controls
Controls and functions Using the remote controls ■ Installing batteries Notes • Change all batteries if the operation range of the remote control narrows. • Before inserting new batteries, wipe the compartment clean. ■ Operation range The remote controls transmit a directional infrared beam. Be sure to aim the remote controls directly at the remote control sensor on the front panel of this unit. -
Page 12: Preparation
PREPARATION Connections Connecting speakers and source components CAUTION • Do not connect this unit or other components to the main power until all connections between components are complete. • All connections must be correct: L (left) to L, R (right) to R, “+” to “+” and “–” to “–”. If the connections are faulty, no sound will be heard from the speakers, and if the polarity of the speaker connections is incorrect, the sound will be unnatural and lack bass. -
Page 13: Connecting The Speakers
Connections ■ Bi-wire connection Connecting the speakers Bi-wire connection separates the woofer from the combined midrange and tweeter section. A bi-wire ■ Connecting speaker cables compatible speaker has four binding post terminals. These Speaker cables have two wires. One is for connecting the two sets of terminals allow the speaker to be split into two negative (-) terminal of the unit and the speaker, and the independent sections. -
Page 14: Connecting The Fm And Am Antennas
The antennas for receiving FM and AM broadcasts are included with this unit. In general, these antennas should provide sufficient signal strength. Connect each antenna correctly to the designated terminals. Note If you experience poor reception quality, install an outdoor antenna. Consult the nearest authorized Yamaha dealer or service center about outdoor antennas. Outdoor FM antenna... -
Page 15: Connecting To A Network
Connections Connecting to a network You can enjoy Internet radio or music files stored on media servers, such as PCs and Network Attached Storage (NAS), on the unit. Connect the unit to your router with a commercially-available STP network cable (CAT-5 or higher straight cable). Network Attached Storage Internet (NAS) -
Page 16: Connecting Power Cable
Connections Connecting power cable Before connecting the power cable (General model only) Set the switch position of VOLTAGE SELECTOR according to your local voltage. Voltages are AC 110–120/220–240 V, 50/60 Hz. Note Make sure you set VOLTAGE SELECTOR of the unit BEFORE plugging the power cable into an AC wall outlet. -
Page 17: Setup Of Your Network Devices
Connections Setup of your network devices Configure your devices connected to the network to play back music files stored on the devices, or configure your mobile device to control this unit. Use the following configurations to suit your needs. For details on Internet connection, please refer to the manual of your network devices. ❚... -
Page 18: Basic Operation
BASIC OPERATION Playback Playing a source Play the source. A (power) Rotate the VOLUME control on the front panel (or press VOLUME +/– on the remote control) to adjust the sound output level. STANDBY/ON DISPLAY FM MODE MEMORY FM/AM PRESET TUNING VOLUME SELECT... -
Page 19: Using The Sleep Timer
Playback ■ Adjusting the BASS and TREBLE Press D/E to adjust speaker balance. controls Control range: L+10 to R+10 To exit from the “Setup” menu, press SETUP STANDBY/ON DISPLAY FM MODE MEMORY FM/AM PRESET TUNING again. VOLUME SELECT BASS TREBLE INPUT PUSH - ENTER PHONES... -
Page 20: Listening To Fm/Am Radio
Listening to FM/AM radio Setting the frequency steps FM/AM tuning At the factory, the frequency step setting is set to 50 kHz for FM and 9 kHz for AM. Depending on your country or region, set the frequency steps to 100 kHz for FM and 10 DIMMER SLEEP kHz for AM. -
Page 21: Automatic Preset Tuning (Fm Stations Only)
Listening to FM/AM radio ■ Improving FM reception Automatic preset tuning If the signal from the station is weak and the sound quality (FM stations only) is not good, set the FM band reception mode to monaural mode to improve reception. You can use the automatic preset tuning function to automatically register FM stations as presets. -
Page 22: Manual Tuning Preset
Listening to FM/AM radio Recalling a preset station • Before scanning begins, you can specify the first preset number to be used by pressing PRESET j / i or cursor key (B/C) on the You can recall preset stations that were registered using remote control. -
Page 23: Clearing A Preset Station
Listening to FM/AM radio Clearing a preset station Clear radio stations registered to the preset numbers. MODE TUNER TUNER TUNING PRESET POP-UP MENU HOME NOW PLAYING Cursor keys B / C ENTER ENTER SETUP RETURN MUTE VOLUME OPTION OPTION Press TUNER to select “TUNER” as the input source. -
Page 24: Using The Spotify Service
Spotify gives you instant access to millions of songs on your mobile devices. Just hit play to stream anything you like. The Spotify Connect feature lets you choose music on your Spotify app and listen on your Yamaha home entertainment system. -
Page 25: Playing Back Music Stored On Media Servers (Pcs/Nas)
• For Windows Media Player 11 Start the Windows Media Player 11 on your PC. Select “Library” then “Media Sharing”. Check the “Share my media to” box, select the “R-N301” icon, and click “Allow”. Click “Turn on media streaming.” Click “OK” to exit. -
Page 26: Playback Of Pc Music Contents
Playing back music stored on media servers (PCs/NAS) The following icons are displayed on the front panel Playback of PC music contents display. Follow the procedure below to operate the PC music Icon Content contents and start playback. Displayed an audio contents can be selected. Note Displayed when there is upper level in the current “_”... - Page 27 Playing back music stored on media servers (PCs/NAS) ■ Repeat/shuffle settings You can configure the repeat/shuffle settings for the playback of PC music content. When the input source is “Server,” press REPEAT or SHUFFLE repeatedly to select the playback method. Item Setting Function...
-
Page 28: Listening To Internet Radio
Listening to Internet radio You can listen to Internet radio stations from all over the world. Notes Use the cursor keys to select an item and • To use this function, the unit must be connected to the Internet press ENTER. (p.13). -
Page 29: Registering Favorite Internet Radio Stations (Bookmarks)
Listening to Internet radio Registering favorite Internet radio stations (bookmarks) By registering your favorite Internet radio stations to “Bookmarks”, you can quickly access to them from the “Bookmarks” folder in the front display. Select any of Internet radio stations on the unit. -
Page 30: Playing Back Ipod/Itunes Music Via A Network (Airplay)
Playing back iPod/iTunes music via a network (AirPlay) The AirPlay function allows you to play back iPod/iTunes music on the unit via network. On the iPod/iTunes, click (tap) the AirPlay icon and select the unit (network name of the unit) as the audio output device. iTunes Example on iTunes Example on iOS... - Page 31 Playing back iPod/iTunes music via a network (AirPlay) Use the following remote control keys to control playback. Resumes playback from pause. Stops playback. Playback Stops playback temporarily. keys Skips forward/backward. Changes the Repeat settings REPEAT Changes the Shuffle settings SHUFFLE Note To control iTunes playback with the remote control of the unit, you need to configure the iTunes preferences to enable iTunes...
-
Page 32: Switching Information On The Front Display
Switching information on the front display When you select a network source as the input source, you can switch playback information on the front display. VOLUME OPTION DISPLAY REPEAT SHUFFLE DISPLAY Press DISPLAY. Each time you press the key, the displayed item changes. -
Page 33: Advanced Operation
ADVANCED OPERATION Configuring playback settings for different playback sources (Option menu) You can configure separate playback settings for different playback sources. This menu allows you to easily configure settings during playback. Option menu items TUNING PRESET POP-UP MENU HOME NOW PLAYING Available items vary depending on the selected input source. - Page 34 Configuring playback settings for different playback sources (Option menu) ■ AutoPowerStdby Sets the amount of time for the auto-standby function to each input. If you do not operate the unit for the specified time, the unit will automatically go into standby mode. Off (Default) Does not set the unit to standby mode automatically.
-
Page 35: Configuring Various Functions (Setup Menu)
Configuring various functions (Setup menu) You can configure the unit’s various functions. Setup menu items POP-UP MENU HOME NOW PLAYING Menu item Function Page Cursor keys ENTER B / C / D / E Displays the network Information ENTER information on the unit. SETUP RETURN RETURN... -
Page 36: Network Setup
Configuring various functions (Setup menu) Network Setup Use the Cursor keys (B / C) to change a value. Configures the network settings. ■ Information To exit from the menu, press SETUP. Displays the network information on the unit. ■ MAC Filter Appears if an update for this unit’s firmware is Sets the MAC address filter to limit access to the unit from NewFwAvailable... -
Page 37: Tone Control
Displays the system ID number. DC OUT Configures the DC OUT jack setting. PowerMode Selects how to supply power to the Yamaha AV accessory connected to the DC OUT jack. Supplies power through the DC OUT jack continuously regardless of the power state (on/ (default) standby) of the unit. -
Page 38: Configuring The System Settings (Advanced Setup Menu)
Configuring the system settings (ADVANCED SETUP menu) Configure the system settings of the unit while viewing the front display. Restoring the default settings (INIT) Turn off the unit. While holding down RETURN on the front panel, press A (power). INIT••••••CANCEL Restores the default settings for the unit. -
Page 39: Updating The Unit's Firmware Via The Network
Updating the unit’s firmware via the network New firmware that provides additional features or product improvements will be released as needed. When new firmware is available, “New Firm” is displayed for a while when the unit is turned on. Follow the steps below to update the firmware. -
Page 40: Additional Information
As a safety precaution, capability to turn on the power The power does not three times consecutively. If the unit is in is disabled. Contact your nearest Yamaha dealer or turn on. — this condition, the standby indicator on the service center to request repair. - Page 41 Troubleshooting Problem Cause Remedy page The + and – wires are connected in Connect the speaker wires to the correct + and – There is a lack of bass reverse at the amplifier or the speakers. phase. and no ambience. Incorrect cable connections.
- Page 42 Troubleshooting ■ Tuner Problem Cause Remedy page The particular characteristics of the FM Check the antenna connections. FM stereo stereo broadcasts being received may Try using a high-quality directional FM antenna. reception is cause this problem when the transmitter is noisy.
- Page 43 Troubleshooting ■ Network Problem Cause Remedy page The network parameters (IP address) have Enable the DHCP server function on your router and The network feature not been obtained properly. set “DHCP” in the “Setup” menu to “On” on the unit. does not function.
- Page 44 Troubleshooting ■ Remote control Problem Cause Remedy page Wrong distance or angle. The remote control will function within a maximum The remote control range of 6 m (20 ft) and no more than 30 degrees off- does not work nor axis from the front panel.
-
Page 45: Error Indications On The Front Display
Error indications on the front display Message Cause Remedy Access to the PC is denied. Configure the sharing settings and select the unit as a device to Access denied which music contents are shared (p.23). There is a problem with the signal path Make sure your router and modem are turned on. -
Page 46: Trademarks
Trademarks AirPlay works with iPhone, iPad, and iPod touch with iOS 4.3.3 or later, Mac with OS X Mountain Lion, and Mac and PC with iTunes 10.2.2 or later. AirPlay, iPad, iPhone, iPod touch, iTunes and Retina are trademarks of Apple Inc., registered in the U.S. and other countries. -
Page 47: Specifications
Specifications AUDIO SECTION FM SECTION • Minimum RMS Output Power • Tuning range (40 Hz to 20 kHz, 0.2% THD, 8 ) [U.S.A. and Canada models] ......87.5 to 107.9 MHz [U.S.A, Canada, General, Korea, Australia, U.K, Europe models] [Asia and General models] ..87.5/87.50 to 108.0/108.00 MHz ................100 W + 100 W [U.K., Europe, Korea, Australia models] .. -
Page 48: Index
Index Index ADVANCED SETUP menu.......... 36 Gateway ................. 34 AirPlay................28 AM antenna connection..........12 Headphones..............5 AM radio listening............18 HOME key (Internet radio)..........26 Audio device connection ..........10 HOME key (PC/NAS) ........... 24 Audio file format (PC/NAS) ......... 23 AUDIO jack............... - Page 49 Index Perform Update (Network Setup, Setup menu) ..... 35 PHONES jack ..............5 Playback device connection........... 10 Power cable connection ..........14 Power indicator (front panel)........... 5 Power Mode (DC OUT, Setup menu) ......35 Preset station selection (FM/AM radio) ......20 Rear panel (part names and functions) ......
- Page 50 Utilizar el aparato con una tensión superior a la especificada resulta peligroso y puede producir un incendio, daños en el aparato y/o lesiones a las personas. Yamaha no se hará responsable de ningún daño debido al uso de este aparato con una tensión diferente de la especificada.
- Page 51 Contenido INTRODUCCIÓN MANEJO AVANZADO Qué puede hacer con esta unidad......2 Configuración de ajustes de reproducción de Fuentes que pueden reproducirse en esta unidad... 2 diferentes fuentes de reproducción Dispositivos que pueden controlar esta unidad ..... 3 (menú Option)............31 Operaciones desde un dispositivo móvil ....... 3 Elementos del menú...
-
Page 52: Introducción
Enrutador de PHONES SPEAKERS RETURN banda ancha* Esta unidad (R-N301) Reproductor de CD, etc. iPod (AirPlay)* iPod/Android (Spotify)* * Necesitará un enrutador de banda ancha Wi-Fi de venta en el mercado si utiliza un iPod/Android. 1 Reproducción de la radio por Internet (pág.26) 4 Reproducción de un iPod con AirPlay (pág.28) -
Page 53: Dispositivos Que Pueden Controlar Esta Unidad
Qué puede hacer con esta unidad Dispositivos que pueden controlar esta unidad STANDBY/ON DISPLAY FM MODE MEMORY FM/AM PRESET TUNING VOLUME SELECT BASS TREBLE INPUT PUSH - ENTER PHONES SPEAKERS RETURN Enrutador de banda ancha* Dispositivo móvil* Mando a distancia (iPod, Android) * Necesitará... -
Page 54: Accesorios Suministrados
Accesorios suministrados Accesorios suministrados Compruebe que se suministran los siguientes accesorios con el producto. Mando a distancia Pilas (x2) Antena de AM Antena de FM (AAA, R03, UM-4) DIMMER SLEEP SPEAKERS COAXIAL OPTICAL LINE 1 LINE 2 LINE 3 MODE TUNER TUNING PRESET... -
Page 55: Controles Y Funciones
Controles y funciones Controles y funciones Panel delantero 4 5 6 7 8 9 : A STANDBY/ON DISPLAY FM MODE MEMORY FM/AM PRESET TUNING VOLUME SELECT BASS TREBLE INPUT PUSH - ENTER PHONES SPEAKERS RETURN 1 A (alimentación) 9 FM/AM Enciende y apaga (espera) la unidad. -
Page 56: Visor Delantero
Controles y funciones Visor delantero STEREO SP MUTE TUNED SP SLEEP 1 Visualización de información Indica el estado actual (como el nombre de entrada y el nombre de modo de sonido). Puede cambiar la información que se muestra pulsando DISPLAY (pág.30). 2 STEREO Se ilumina cuando la unidad está... -
Page 57: Panel Trasero
Para conectarse a antenas de FM y AM (pág.12). 2 Toma DC OUT Para el suministro de alimentación a un accesorio AV de Yamaha. Para obtener más información, consulte el manual de instrucciones del accesorio AV. 3 Toma NETWORK Para conectar a una red (pág.13). -
Page 58: Mando A Distancia
Controles y funciones Mando a distancia Teclas selectoras de entrada Seleccionan una fuente de entrada para su reproducción. COAXIAL Toma COAXIAL OPTICAL Toma OPTICAL DIMMER SLEEP Toma NETWORK (pulse la tecla varias veces para seleccionar la fuente de red que se desee) LINE 1-3 Tomas LINE 1-3 SPEAKERS... -
Page 59: Uso Del Mando A Distancia
Controles y funciones Uso del mando a distancia ■ Instalación de las pilas Notas • Cambie todas las pilas si se reduce el alcance operativo del mando a distancia. • Limpie el compartimento de las pilas antes de introducir las nuevas. -
Page 60: Preparación
PREPARACIÓN Conexiones Conexión de los altavoces y los componentes fuente PRECAUCIÓN • No conecte esta unidad ni otros componentes a la toma principal de alimentación hasta que haya finalizado todas las conexiones entre los componentes. • Todas las conexiones deben estar realizadas correctamente: L (izquierdo) con L, R (derecho) con R, “+” con “+” y “–”... -
Page 61: Conexión De Los Altavoces
Conexiones ■ Conexión de doble cable Conexión de los altavoces La conexión de doble cable separa el altavoz para graves del rango medio combinado y la sección de agudos. Un ■ Conexión de los cables de los altavoces altavoz compatible con doble cable tiene cuatro terminales Los cables de los altavoces tienen dos hilos. -
Page 62: Conexión De Las Antenas De Fm Y Am
Conecte cada antena correctamente a los terminales designados. Nota Si tiene problemas con calidad de la recepción, instale una antena exterior. Consulte al centro de servicio o concesionario Yamaha autorizado acerca de las antena exteriores. Antena de FM exterior... -
Page 63: Conexión A Una Red
Conexiones Conexión a una red Puede escuchar la radio de Internet o archivos de música almacenados en servidores multimedia, tales como PC y Network Attached Storage (NAS), en la unidad. Conecte la unidad al enrutador con un cable de red STP disponible en el mercado (cable recto CAT-5 o superior). Network Attached Storage Internet (NAS) -
Page 64: Conexión Del Cable De Alimentación
Conexiones Conexión del cable de alimentación Antes de conectar el cable de alimentación (solo modelo general) Ajuste la posición del conmutador VOLTAGE SELECTOR según su tensión local. Las tensiones son 110–120/220– 240 V CA, 50/60 Hz. Nota Asegúrese de que ajusta VOLTAGE SELECTOR en la unidad ANTES de enchufar el cable de alimentación a una toma de CA. -
Page 65: Configuración De Sus Dispositivos De Red
Conexiones Configuración de sus dispositivos de red Configure sus dispositivos conectados a la red para reproducir archivos de música almacenados en los dispositivos o configure su dispositivo móvil para controlar esta unidad. Utilice las configuraciones siguientes para adaptarse a sus necesidades. -
Page 66: Manejo Básico
MANEJO BÁSICO Reproducción Reproducción de una fuente Reproduzca la fuente. A (alimentación) Gire el control VOLUME en el panel delantero (o pulse VOLUME +/– en el mando a distancia) para ajustar el nivel de salida de STANDBY/ON sonido. DISPLAY FM MODE MEMORY FM/AM PRESET... -
Page 67: Uso Del Temporizador Para Dormir
Reproducción ■ Ajuste de los controles BASS y TREBLE Pulse D/E para ajustar el balance de altavoces. Rango de control: de L+10 a R+10 STANDBY/ON DISPLAY FM MODE MEMORY FM/AM PRESET TUNING VOLUME SELECT BASS TREBLE INPUT PUSH - ENTER PHONES SPEAKERS RETURN... -
Page 68: Escucha De Radio Fm/Am
Escucha de radio FM/AM Configuración de los pasos de Sintonización de FM/AM frecuencia En fábrica, el ajuste de paso de frecuencia se establece en DIMMER SLEEP 50 kHz para FM y 9 kHz para AM. Según la región o el país donde escuche la radio, establezca los pasos de SPEAKERS frecuencia en 100 kHz para FM y 10 kHz para AM. -
Page 69: Presintonización Automática (Solo Emisoras De Fm)
Escucha de radio FM/AM ■ Mejorar la recepción de FM Presintonización automática Si la señal de la emisora es débil y la calidad del sonido no (solo emisoras de FM) es buena, ajuste el modo de recepción de la banda de FM a monoaural para mejorar la recepción. -
Page 70: Presintonización Manual
Escucha de radio FM/AM Recuperación de una emisora • Antes de iniciar el barrido, puede especificar el primer número de presintonía que se utilizará pulsando PRESET j / i o la tecla presintonizada del cursor (B/C) en el mando a distancia. •... -
Page 71: Borrar Una Emisora Presintonizada
Escucha de radio FM/AM Borrar una emisora presintonizada Borre las emisoras de radio registradas en los números de preajuste. MODE TUNER TUNER TUNING PRESET POP-UP MENU HOME NOW PLAYING Teclas del cursor B / C ENTER ENTER SETUP RETURN MUTE VOLUME OPTION OPTION... -
Page 72: Uso Del Servicio Spotify
Enrutador inalámbrico Módem Esta unidad (R-N301) R-N301 XXXXXX Dispositivo móvil o tablet* * Las apps de iOS/Android™ están disponibles a partir de agosto de 2014. • La pantalla de reproducción se muestra en el visualizador Para obtener más información, visite Spotify.com delantero. -
Page 73: Reproducción De Música Almacenada En Servidores Multimedia (Pc/Nas)
Haga clic en “Activar la transmisión por multimedia”. secuencias de multimedia”. Marque la casilla “Compartir mi multimedia con”, seleccione el icono “R-N301” y haga clic en “Permitir”. Haga clic en “Aceptar” para salir. • Para un PC o NAS con otro software de servidor DLNA instalado Consulte el manual de instrucciones del dispositivo o software y configure el ajuste de uso compartido de medios. -
Page 74: Reproducción De Contenidos Musicales Del Pc
Reproducción de música almacenada en servidores multimedia (PC/NAS) Los iconos siguientes se muestran en el visualizador del Reproducción de contenidos panel delantero. musicales del PC Icono Contenido Mostrado cuando se puede seleccionar un Realice el procedimiento siguiente para controlar el contenido de audio. - Page 75 Reproducción de música almacenada en servidores multimedia (PC/NAS) ■ Ajustes de repetición/reproducción aleatoria Puede configurar la reproducción aleatoria o la repetición del contenido de música del PC. Si la fuente de entrada es “Server”, pulse REPEAT o SHUFFLE repetidamente para seleccionar el método de reproducción.
-
Page 76: Escucha De Radio De Internet
Escucha de radio de Internet También puede escuchar emisoras de radio de Internet de todo el mundo. Notas Pulse NET varias veces para seleccionar • Para usar esta función, la unidad debe estar conectada a Internet “NetRadio” como fuente de entrada. (pág.13). -
Page 77: Registro De Emisoras De Radio De Internet Favoritas (Bookmarks)
Escucha de radio de Internet Registro de emisoras de radio de Internet favoritas (Bookmarks) Al registrar sus emisoras de radio de Internet favoritas en “Bookmarks”, puede acceder a ellas rápidamente desde la carpeta “Bookmarks” en el visor delantero. Seleccione cualquiera de las emisoras de radio de Internet en la unidad. -
Page 78: Reproducción De Música De Ipod/Itunes A Través De Red (Airplay)
Reproducción de música de iPod/iTunes a través de red (AirPlay) La función AirPlay le permite reproducir música de iPod/ iTunes en la unidad a través de la red. En iPod/iTunes, haga clic en (pulse) el icono AirPlay y seleccione la unidad (nombre de red de la unidad) como dispositivo de salida iTunes de audio. - Page 79 Reproducción de música de iPod/iTunes a través de red (AirPlay) Utilice las siguientes teclas del mando a distancia para controlar la reproducción. Reanuda la reproducción desde la pausa. Detiene la reproducción. Teclas de Para la reproducción reproducción temporalmente. Salta hacia delante o atrás. Cambia los ajustes de REPEAT reproducción aleatoria...
-
Page 80: Cambio De La Información Del Visor Delantero
Cambio de la información del visor delantero Al seleccionar una fuente de red como la fuente de entrada, puede alternar la información de reproducción en el visor delantero. VOLUME OPTION DISPLAY REPEAT SHUFFLE DISPLAY Pulse DISPLAY. Cada vez que pulse la tecla, cambia el elemento que se muestra. -
Page 81: Manejo Avanzado
MANEJO AVANZADO Configuración de ajustes de reproducción de diferentes fuentes de reproducción (menú Option) Puede configurar los ajustes de reproducción de diferentes fuentes de reproducción. Este menú permite configurar con facilidad ajustes durante la reproducción. Elementos del menú Option TUNING PRESET POP-UP MENU HOME... - Page 82 Configuración de ajustes de reproducción de diferentes fuentes de reproducción (menú Option) ■ AutoPowerStdby Define el tiempo de la función de espera automática en cada entrada. Si no utiliza la unidad durante el tiempo especificado, ésta entrará automáticamente en modo de espera.
-
Page 83: Configuración De Varias Funciones (Menú Setup)
Configuración de varias funciones (menú Setup) Puede configurar las distintas funciones de la unidad. Elementos del menú Setup POP-UP MENU HOME NOW PLAYING Elemento de menú Función Página Teclas del cursor ENTER B / C / D / E Muestra la información de Information ENTER red sobre la unidad. -
Page 84: Network Setup
Configuración de varias funciones (menú Setup) Network Setup Utilice las teclas del cursor (B / C) para cambiar un valor. Configura los ajustes de la red. ■ Information Para salir del menú, pulse SETUP. Muestra la información de red sobre la unidad. ■... -
Page 85: Tone Control
Configura el ajuste de la toma DC OUT. PowerMode Selecciona el modo de suministro de energía al accesorio AV de Yamaha conectado a la toma DC OUT. Suministra energía a través de la toma DC OUT Con (prede- de forma continua, tanto si la unidad está... -
Page 86: Configuración De Los Ajustes Del Sistema (Menú Advanced Setup)
Configuración de los ajustes del sistema (menú ADVANCED SETUP) Configurar los ajustes de sistema de la unidad mientras visualiza el visor delantero. Restablecimiento de los ajustes Apague la unidad. predeterminados (INIT) Mientras mantiene pulsado RETURN en el panel delantero, pulse A (alimentación). INIT••••••CANCEL A (alimentación) RETURN... -
Page 87: Actualización Del Firmware De La Unidad A Través De La Red
Actualización del firmware de la unidad a través de la red Se lanzará nuevo firmware con funciones adicionales o mejoras de productos, según sea necesario. Cuando hay disponible un firmware más reciente, se muestra “New Firm” durante un rato si la unidad está encendida. Siga los pasos siguientes para actualizar el firmware. -
Page 88: Información Adicional
Yamaha autorizado más cercano. - Page 89 Resolución de problemas Vea la Problema Causa Remedio página Los circuitos de protección se han Ajuste la impedancia de los altavoces para que El sonido desaparece activado al detectar un cortocircuito, etc. coincida con la de sus altavoces. de repente. Compruebe que los cables del altavoz no se tocan y vuelva a encender la unidad.
- Page 90 Resolución de problemas ■ Sintonizador Vea la Problema Causa Remedio página Las características particulares de las Verifique las conexiones de la antena. La recepción de emisiones de FM estéreo que se están Intente utilizar una antena de FM direccional de alta FM estéreo tiene recibiendo pueden causar este problema calidad.
- Page 91 Resolución de problemas ■ Red Vea la Problema Causa Remedio página Los parámetros de red (dirección IP) no Active la función del servidor DHCP en su enrutador y La función de red no están bien configurados. ajuste “DHCP” en el menú “Setup” en “On” en la funciona.
- Page 92 Resolución de problemas ■ Mando a distancia Vea la Problema Causa Remedio página La distancia o el ángulo son incorrectos. El mando a distancia tiene un alcance máximo de 6 m El mando a distancia y una inclinación máxima de 30 grados con respecto al no funciona eje del panel delantero.
-
Page 93: Indicaciones De Error Que Se Muestran En El Visor Delantero
Indicaciones de error que se muestran en el visor delantero Mensaje Causa Remedio El acceso al PC se ha denegado. Configure los ajustes de uso compartido y seleccione la unidad Access denied como dispositivo en el que se comparte un contenido musical (pág.23). -
Page 94: Marcas Comerciales
Marcas comerciales AirPlay funciona con los iPhone, iPad y iPod touch con iOS 4.3.3 o una versión más reciente, Mac con OS X Mountain Lion, y Mac y PC con iTunes 10.2.2 o una versión más reciente. AirPlay, iPad, iPhone, iPod touch, iTunes y Retina son marcas comerciales de Apple Inc., registradas en los EE. UU. y en otros países. -
Page 95: Especificaciones
Especificaciones SECCIÓN DE AUDIO SECCIÓN DE FM • Potencia de salida RMS mínima • Gama de sintonización (de 40 Hz a 20 kHz, 0,2% THD, 8 ) [Modelos de EE. UU. y Canadá]....De 87,5 a 107,9 MHz [Modelos de EE. UU., Canadá, general, Corea, Australia, [Modelos de Asia y general] ...De 87,5/87,50 a 108,0/108,00 MHz Reino Unido y Europa] [Modelos de Reino Unido, Europa, Corea y Australia]... -
Page 96: Índice
Índice Índice Formato de archivos de audio (PC/NAS) ...... 23 Actualización del firmware ........... 37 Actualización del firmware (red)......36, 37 Gateway ................. 34 AirPlay................28 Ajuste de paso de frecuencia ........18, 36 Auriculares ..............5 ID (Network Setup, menú Setup) ........35 Auto Preset (radio FM, menú... - Page 97 Índice Reproducción de contenido de PC......... 23 Reproducción de contenido del iPod (AirPlay) ..... 28 Reproducción de contenido NAS ........23 Sampling (Signal Info, menú Option) ......31 Selección de emisora presintonizada (radio FM/AM)... 20 Selección de tensión ............14 Signal Info (menú...
-
Page 98: (Al Final De Este Manual) Información Sobre Licencias De Software De Terceros
❚ Information about third party THIS SOFTWARE IS PROVIDED BY THE COPYRIGHT HOLDERS AND CONTRIBUTORS “AS software licenses IS” AND ANY EXPRESS OR IMPLIED ❚ Información sobre licencias de WARRANTIES, INCLUDING, BUT NOT LIMITED TO, software de terceros THE IMPLIED WARRANTIES OF MERCHANTABILITY AND FITNESS FOR A This product incorporates the following third party PARTICULAR PURPOSE ARE DISCLAIMED. - Page 99 ■ About The Independent JPEG Group’s Software without restriction, including without limitation the rights to use, copy, modify, merge, publish, distribute, JPEG software sublicense, and/or sell copies of the Software, and to The Independent JPEG Group’s JPEG software permit persons to whom the Software is furnished to do Copyright ©...
- Page 100 contributors may be used to endorse or promote Authors products derived from this software without specific Cosmin Truta prior written permission. libpng versions 1.0.7, July 1, 2000, through 1.2.5 - THIS SOFTWARE IS PROVIDED BY THE REGENTS October 3, 2002, are Copyright © 2000-2002 Glenn AND CONTRIBUTORS “AS IS”...
- Page 101 warranties, expressed or implied, including, without THIS SOFTWARE IS PROVIDED BY THE limitation, the warranties of merchantability and of fitness COPYRIGHT HOLDERS AND CONTRIBUTORS “AS for any purpose. The Contributing Authors and Group 42, IS” AND ANY EXPRESS OR IMPLIED Inc.
- Page 102 so, subject to the following conditions: http://www.apache.org/licenses/LICENSE-2.0 The above copyright notice and this permission notice shall be included in all copies or substantial portions of the Unless required by applicable law or agreed to in writing, Software. software distributed under the License is distributed on an THE SOFTWARE IS PROVIDED “AS IS”, WITHOUT “AS IS”...
- Page 103 g. “Standard Version” refers to such a Work if it has not royalty-free, irrevocable (except as stated in this been modified, or has been modified in accordance section) patent license to make, have made, use, with the consent of the Author, such consent being in import, and otherwise transfer the Work.
- Page 104 MERCHANTABILITY, MERCHANTABLE Publisher makes no warranty whatsoever in QUALITY OR FITNESS FOR A PARTICULAR connection with the Work and shall not be liable to PURPOSE, OR ANY WARRANTY OF TITLE OR You or any party on any legal theory for any damages NON-INFRINGEMENT, OR THAT THE WORK whatsoever, including without limitation any general, (OR ANY PORTION THEREOF) IS CORRECT,...
- Page 105 WARRANTIES, INCLUDING, BUT NOT LIMITED TO, SOFTWARE, EVEN IF ADVISED OF THE THE IMPLIED WARRANTIES OF POSSIBILITY OF SUCH DAMAGE. MERCHANTABILITY AND FITNESS FOR A PARTICULAR PURPOSE ARE DISCLAIMED. IN NO ■ Tremolo EVENT SHALL THE FOUNDATION OR http://wss.co.uk/pinknoise/tremolo CONTRIBUTORS BE LIABLE FOR ANY DIRECT, INDIRECT, INCIDENTAL, SPECIAL, EXEMPLARY, Copyright ©...
- Page 106 – Redistributions in binary form must reproduce the THE IMPLIED WARRANTIES OF above copyright notice, this list of conditions and the MERCHANTABILITY AND FITNESS FOR A following disclaimer in the documentation and/or other PARTICULAR PURPOSE ARE DISCLAIMED. IN NO materials provided with the distribution. EVENT SHALL THE COPYRIGHT OWNER OR CONTRIBUTORS BE LIABLE FOR ANY DIRECT, –...
- Page 107 M.I.T. makes no representations about the suitability of this software for any purpose. It is provided “as is” without express or implied warranty. Do not disassemble, decompile, or reverse engineer the software included in Yamaha AV products.
- Page 108 © 2014 Yamaha Corporation Printed in Malaysia ZN43940...
Need help?
Do you have a question about the R-N301 and is the answer not in the manual?
Questions and answers