Table of Contents
Advertisement
Chapter 1
Description ...................................... 5
Chapter 2
Installation .................................... 18
Chapter 3
Start-Up ........................................ 30
Chapter 4
Troubleshooting ............................ 32
Chapter 5
Maintenance .................................. 35
Chapter 6
Warranty ....................................... 36
Parts List & Exploded Views .............................. 38
E-mail: marvairtech@airxcel.com • Internet: www.marvair.com
Manufactured By:
Marvair
Division of AIRXCEL
®
P.O. Box 400 • Cordele, Georgia 31010
156 Seedling Drive • Cordele, Georgia 31015
(229) 273-3636 • Fax (229) 273-5154
ComPac
®
Air Conditioner Product Manual
Vertical Wall-Mount Air Conditioners
with Front Control Box Panel
Models AVP24-30-36-42-48-60-72
, Inc.
®
I and ComPac
P/81024
supersedes 10/07-17
II
®
6/09-18
Advertisement
Table of Contents
Troubleshooting

Related Manuals for Marvair ComPac I AVP24


Summary of Contents for Marvair ComPac I AVP24
- Page 1 Parts List & Exploded Views ......38 Manufactured By: Marvair Division of AIRXCEL , Inc. ® ® P.O. Box 400 • Cordele, Georgia 31010 156 Seedling Drive • Cordele, Georgia 31015 (229) 273-3636 • Fax (229) 273-5154 E-mail: marvairtech@airxcel.com • Internet: www.marvair.com P/81024 6/09-18 supersedes 10/07-17...
-
Page 2: How To Use This Manual
How To Use This Manual This manual is intended to be a guide to Marvair's ComPac line of vertical air conditioners. It contains installation, ® troubleshooting, maintenance, warranty, and application information. The information contained in this manual is to be used by the installer as a guide only. This manual does not supersede or circumvent any applicable national or local codes. -
Page 3: Table Of Contents
WARNING • If the information in these instructions are not followed exactly, a fire may result causing property damage, personal injury or loss of life. • Read all instructions carefully prior to beginning the installation. Do not begin installation if you do not understand any of the instructions. •... - Page 4 able of onTenTs Chapter 5 Maintenance Scheduled Maintenance .........................35 Chapter 6 Warranty Limited Product Warranty ........................36 Optional Silver Service Program ......................37 Parts List and Exploded Views ........................38 Illustrations Figure 1a. ComPac I & II A/C Dimensions - Models 24-36 ..............7 ®...
-
Page 5: Chapter 1 Compac ® A/C Description & Specifications
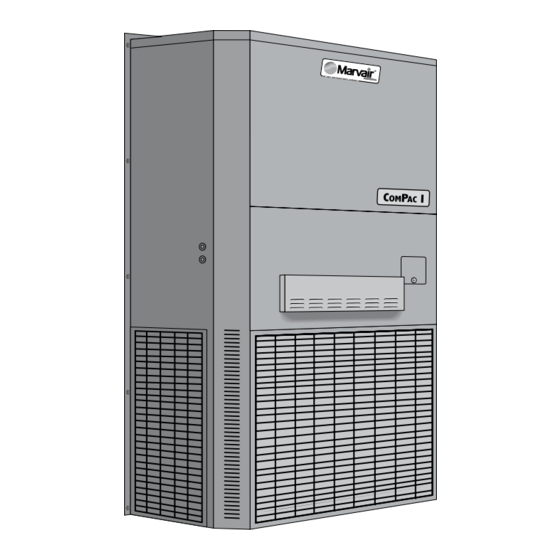
Chapter 1 Description & Specifications eneral esCripTion Marvair's ComPac lines are a series of vertical wall-mounted air conditioning systems that provide ® heating, cooling, and ventilation for electronic equipment shelters, process control centers, and other applications with high internal heat gains. The series includes multiple sizes and nominal cooling capacities from 24,000 to 72,000 BTUH. -
Page 6: Ratings And Specifications
Ratings & Specifications MODEL 0.10 0.20 0.25 0.30 0.40 0.50 1100 1000 1310 1220 1185 1150 1060 1650 1585 1520 1450 1360 1900 1830 1760 1700 1620 1900 1830 1760 1700 1620 2100 1950 1800 1730 1660 Table 1. CFM @ External Static Pressure (Wet Coil) (IWG) 30/36 MODEL LBS/KG... -
Page 7: Figure 1A. Compac ® I & Ii A/C Dimensions - Models 24-36
Figure 1a. ComPac I & ComPac II A/C Dimensions- Models AVP20-36 ® ® (in inches) Figure 1b. ComPac I A/C & ComPac II A/C Dimensions- Models AVP42-60 ® ® (in inches) ComPac 6/09-18... -
Page 8: 1C. Compac ® I & Ii A/C Dimensions - Model 72
Figure 1c. ComPac I A/C & ComPac II A/C Dimensions- Models AVP72 ® ® (in inches & mm) ComPac 6/09-18... -
Page 9: General Operation
General Operation Refrigerant Cycle (Cooling Mode) The ComPac I & ComPac II A/C use R-22 refrigerant in a conventional vapor-compression refrigera- ® ® tion cycle to transfer heat from air in an enclosed space to the outside. A double blower assembly blows indoor air across the evaporator. -
Page 10: Electronic Control Board Mode Of Operation
(aVp24-72) leCTroniC onTrol oarD oDe of peraTion Normal 24 VAC power must be continuously applied to “R” and “C”. Upon a call for cooling “Y” and with the high pressure switch (HPS) closed, the compressor will be energized. (Note: See the delay on make feature.) The compressor will remain energized during the 3 minute timed low pressure by-pass cycle. - Page 11 Low Ambient Control The low ambient control permits cooling when outdoor ambient temperatures are low. The control uses a reverse-acting high pressure switch to cycle the condenser fan motor according to liquid refrig- erant pressure conditions. Switch closure and fan operation occurs when the pressure reaches 250 PSIG.
-
Page 12: Optional Controls
20°F (-7°C) or minus 20°F (-29°C). Please refer to Hot Gas Bypass Application Bulletin for details. Electric Reheat Dehumidification A humidity controller (p/n 50057) allows electric heat and cooling to operate simultaneously. Marvair ® air conditioners equipped with the dehumidification option allow the indoor humidity of the controlled environment to be maintained at or below a certain humidity set point. -
Page 13: Electrical Diagrams
In applications where a shelter has redundant air conditioning units and is controlled by a lead lag controller (Marvair's LL357D4 or CommStat3™ Controller), most times the dehumidification option is only necessary on one of the two units. It is possible for one unit to be operating in the cooling mode while the unit with dehumidification is operating at the same time. -
Page 14: Figure 3A. Typical Electrical Schematic-Compac ® I A/C Models 24-72 W/ Electronic Control Board
TRANSFORMER Figure 3a. Typical Electrical Schematic - ComPac I A/C, Models AVP24-72 ® with Electronic Control Board ComPac 6/09-18... - Page 15 TRANSFORMER OPTIONAL FIELD INSTALLED 270 OHMS MINIMUM POSITION POTENTIOMETER. Figure 3b. Typical Electrical Schematic - ComPac II A/C, Models AVP24-72 ® with Electronic Control Board ComPac 6/09-18...
-
Page 16: Economizer Components
ii a/C o ® ConoMizer oMponenTs Damper Actuator: The damper actuator is a 24V motor that modulates the position of the damper blade. It is capable of driving a full 90 degrees within 90 seconds. The assembly has a spring return to close the damper during power outage. -
Page 17: Figure 5. H205A Control Point Adjustment
The controller modulates the position of the outside air damper in response to input from the enthalpy and mixed air sensors. The controller is designed to maintain the supply air temperature between 50° to 56°F by mixing warm indoor air with cooler outdoor air. On a call for cooling from the wall-mounted thermostat, if outdoor conditions are suitable, the controller will open the damper and admit outside air (i.e., economizer cooling). -
Page 18: Chapter 2 Installation
Failure to observe and follow Warnings and Cautions and these Instructions could result in death, bodily injury or property damage. Read this manual and follow its instructions and adhere to all Cautions and Warnings in the manual and on the Marvair unit.. quipMenT... -
Page 19: Installation Materials
Duct work should be designed and installed in accordance with all applicable safety codes and standards. Marvair strongly recommends referring to the current edition of the National Fire ® Protection Association Standards 90A and 90B before designing and installing duct work. The duct system must be engineered to insure sufficient air flow through the unit to prevent over-heating of the heater element. - Page 20 Start Relay and Capacitor for AVP24-36 (Field Installed) (Not recommended for scroll compressors.) Additional Items Needed: Additional hardware and miscellaneous supplies (not furnished by Marvair ) are needed for installation. ® For example, the list below contains approximate quantities of items typically needed for mounting a unit on a wood frame wall structure.
-
Page 21: Porting And Duct Work
Note: The following instructions are for general guidance only. Due to the wide variety of installa- tion possibilities, specific instructions will not be given. When in doubt, follow standard and accepted installation practices, or contact Marvair for additional assistance. ®... -
Page 22: Fresh Air Hood Installation
BASIC MODEL MAXIMUM TOTAL STATIC MINIMUM FILTER AREA 2.25 sq. ft. 30/36 3.00 sq. ft. 42/48/60/72 3.90 sq. ft. Table 6. Maximum Static Pressure (For units with 2" Pleated Filters) Fresh Air Hood Installation (AVP24-30-36) 1. Cut and remove insulation on the inside of the lower front access panel in the shape of the rectan- gular opening. -
Page 23: Mounting The Unit
Mounting The Unit (AVP24-72) 1. For wiring into the back of unit, locate the lower of the two knockouts on the wall side of the unit. Drill a one inch hole in the shelter wall to match this opening. Allow sufficient clearance to run 3/4"... -
Page 24: Electrical Connections
Reverse rotation also results in a substantially reduced current draw when compared to tabulated values. Marvair units have either a reciprocating or scroll compressor. A reciprocation compressor is standard on the AVP24, 30 & 36 units. However, a scroll compressor is an option on these ComPac I and ®... - Page 25 NOT blow directly on to the thermostat. Connect the thermostat to the terminal block in the ComPac air conditioner as shown in Figures 8a and 8b. 3. On dual units, refer to the Marvair LL357D4 Lead/Lag Controller Specification Sheet or Com- ®...
- Page 26 It can be used with Marvair’s ComPac I or II unique vertical packaged wall mount air conditioners ® or Marvair’s environmental control units. See CommStat 3 Product Data Sheet for installation and programming instructions. LL357D4 Lead/Lag Controller (See Figure 8b)
-
Page 27: Figure 8A. Thermostat Wiring Details
5 WIRE WALL THERMOSTAT Five (5) Conductor Color- Coded 18 Gauge Thermostat Cable (Field Supplied) NOTE: Terminals 5 & 7 are normally open dry contacts and close to indicate lockout. Terminals 6 & 7 are normally closed dry contacts and open to indicate lockout. COMPAC ®... -
Page 28: Figure 8B. Thermostat Connection Diagram
® MARVAIR /SIMPLE COMFORT THERMOSTAT CONNECTION DIAGRAM FOR MARVAIR MODPAC II™, XCELPAC™ & ALL COMPAC ® AIR CONDITIONERS THERMOSTAT PART NUMBER 50121/ SC2010-SL 50124/ SC3001 50123/ SC5011-SL 50107/ SC5811-SL MODPAC II LOW VOLTAGE TERMINAL BOARD LOW VOLTAGE ALL COMPAC TERMINAL BOARD UNITS Figure 8b. -
Page 29: Figure 8D. Commstat 3™ Wiring Detail
COMMSTAT 3™ LOR G W C Y R LOR G W C Y R POWER ALARM CONTACTS LOW BLDG TEMP OUTPUT CONTACTS HIGH BLDG TEMP ALARM CONTACTS HP/LP LOCKOUT #4 (FACTORY INSTALLED) CONTACTS CONNECT TO NORMALLY CLOSED DRY CONTACTS FROM SMOKE SMOKE ALARM SMOKE ALARM... -
Page 30: Chapter 3 Start-Up
Chapter 3 Start-Up heCk uT of oolinG yCle Important: Be sure that the crankcase heater (if used) has been energized for at least 24 hours before starting the unit(s). Double-check all electrical connections before applying power. ComPac air conditioners with scroll compressors running on 3Ø power must be checked for ®... -
Page 31: A/C Testing With Ll357D4
a/C T ll357D4 esTinG WiTh Note: The LL357D4 does not require the units to be in phase. Procedure: (A/C Testing with LL357D4 Lead/Lag Control for Two Units) Prior to testing the air conditioners, the LL357D4 must be correctly configured. Please refer to the LL357D4 Product Data Sheet for instructions on installing and configuring the unit. -
Page 32: Chapter 4 Troubleshooting
A/C is a prerequisite to troubleshoot- ® ing. Please read the Chapter 1 for basic information about the unit. Marvair's ComPac air conditioners are thoroughly tested before they are shipped from the factory. ® Of course, it is possible that a defect may escape undetected, or damage may have occurred during transportation. -
Page 33: Compressor Troubleshooting
PROBLEM/SYMPTOM LIKELY CAUSE(S) CORRECTION C. Unit cycles on high/low pressure 1. Loss or restriction of airflow. 1. Check blower assembly for proper operation. Look limit. for airflow restrictions, e.g.. the air filter. Check blower motor and condenser fan. 2. Restriction in refrigerant circuit. 2. -
Page 34: Control Board Diagnosis
NOTE: Feel the top of the compressor to see if it has overheated. If it is hot, the internal overload may be open. You may have to wait several hours for it to reset. 3. Motor Winding Resistances: Using a digital volt-ohm meter (VOM), measure the resistance across the compressor windings as shown below. -
Page 35: Chapter 5 Maintenance
Chapter 5 Maintenance CheDuleD ainTenanCe Marvair strongly recommends that the air conditioner be serviced a minimum of twice a year – once ® prior to the heating season and once prior to the cooling season. At this time the filters, evaporator coil, condenser coil, the cabinet, and condensate drains should be serviced as described below. -
Page 36: Chapter 6 Warranty
Marvair will honor its warranty and furnish the required replacement part. All costs for shipment and risk of loss during shipment of the product to Marvair and back to the owner shall be the responsibility and liability of the owner. Upon written request by an owner, Marvair may... -
Page 37: Optional Silver Service Program
Marvair will honor its warranty and furnish the required replacement part. All costs for shipment and risk of loss during shipment of the product or part to Marvair and back to the owner shall be the responsibility and liability of the owner. Upon written request by an owner, Marvair may arrange for remote diagnosis of the allegedly defective or malfunctioning product or part but all costs for transportation, lodging and related expenses with regard to such diagnostic services shall be the responsibility and liability of the owner. -
Page 38: Parts List And Exploded Views
EXPLODED VIEWS AND PARTS LISTS Current parts lists and exploded views of the unit can be found on our web site at www.marvair.com. Click on the Service and Parts in the menu on the left hand side of the Home page. From the drop down menu, select Exploded Views. Once here, you can select your air conditioner or heat pump. The units are grouped by model and by the refrigerant – R-22 or R-410A. ComPac 6/09-18...
Need help?
Do you have a question about the ComPac I AVP24 and is the answer not in the manual?
Questions and answers