Advertisement
Quick Links
Instructions for Use
Installation and Servicing
To be left with the user
HIGH EFFINCENCY
CONDENSING
PRIMARY BOILER
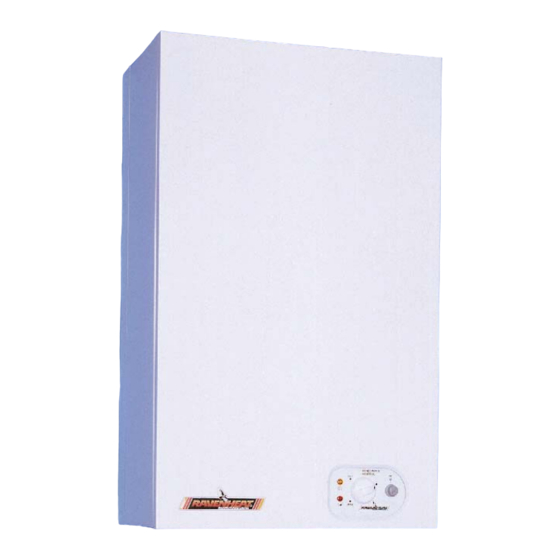
HE Primary AAA
HE Primary AAA
Natural Gas (G20) I
G.C. No. 47-581- 05
LPG (G30-G31) I
G.C. No. 47-581- 06
Technical and illustative data are not binding and can be modifi ed without prior notice.
The descriptions and illustrations in the present booklet are for guideline purposes only.
RAVENHEAT MANUFACTURING LTD, CHARTISTS WAY, MORLEY, LEEDS, LS27 9ET
TEL. 0044( 0)113 252 7007
Website : www.ravenheat.co.uk - E-mail : sales@ravenheat.co.uk
Supplied By www.heating spares.co Tel. 0161 620 6677
- II
2H
2H3+
05
- II
3+
2H3+
06
-
FAX: 0044 (0)113 238 0229
Advertisement

Related Manuals for Ravenheat HE Primary AAA


Summary of Contents for Ravenheat HE Primary AAA
-
Page 1: Instructions For Use
Technical and illustative data are not binding and can be modifi ed without prior notice. The descriptions and illustrations in the present booklet are for guideline purposes only. RAVENHEAT MANUFACTURING LTD, CHARTISTS WAY, MORLEY, LEEDS, LS27 9ET TEL. 0044( 0)113 252 7007 FAX: 0044 (0)113 238 0229 Website : www.ravenheat.co.uk - E-mail : sales@ravenheat.co.uk... - Page 2 When servicing avoid inhalation by using a vacuum cleaner or in conjunction with other tools . After handling wash hands and other exposed parts. RAVENHEAT use only high quality material for production of this product, in an effort to protect the environment components should be re-cycled.
- Page 3 TABLE OF CONTENTS SECTIONS PAGE INTRODUCTION DESIGN PRINCIPLES AND OPERATING SEQUENCE TECNICAL DATA GENERAL REQUIREMENTS INSTALLATION COMMISSIONING SERVICING INSTRUCTIONS FAUL FINDING ELECTRICAL SYSTEM DIAGRAM EXPLODED PARTS DIAGRAM LIST OF SPARE PARTS GENERAL LAYOUT Fig.1 1 - Heat exchanger 36 - Fan 15 - Heat control thermostat 38 - Overheat cut off thermostat 3 - Burner...
- Page 4 OPERATING SCHEME Fig.2 1 - Heat exchanger 8 - Condensing trap 28 - Air Pressure switch 3 - Burner 9 - Ignition electrode 36 - Fan 4 - Sensing electrode 18 - Overheat cut-off thermostat 38 - Sealed chamber 5 - Flue restriction rin 22- C.H.
- Page 5 If you need advice on any points factory settings your Ravenheat Technical Services Offi ce would be pleased to help It is recommended that tools suitable Supplied By www.heating spares.co Tel. 0161 620 6677...
- Page 6 Detailed recommendations are contained in the and air circulation around boiler must following British Standard Codes of Practice be allowed for. The Ravenheat HE Primary must be fi tted BS 6891 Low pressure installation pipes on a fl at and vertical wall capable of ade-...
- Page 7 TECHNICAL DATA SECTION 3 HE PRIMARY AAA TABLE 1 NATURAL GAS (G 20) І - П 2H3+ NOMINAL HEAT INPUT NET QMS 22.6 kW MINIMUM HEAT INPUT NET 11.6 kW NOMINAL HEAT OUTPUT 22.3 kW MINIMUN HEAT OUTPUT CONDENSING 23.9 kW NOMINAL HEAT OUTPUT 11.4 kW...
- Page 8 HE PRIMARY AAA TABLE 1/A LPG (G 30 - G 31) І - П 2H3+ NOMINAL HEAT INPUT NET QMS 22.6 kW MINIMUM HEAT INPUT NET 11.6 kW NOMINAL HEAT OUTPUT 22.3 kW MINIMUN HEAT OUTPUT CONDENSING 23.9 kW NOMINAL HEAT OUTPUT 11.4 kW...
- Page 9 18 inches (450 mm) in front A smaller size than the boiler inlet gas connection should not be used The 5 inches (125 mm) above complete installation must be tested for 6 inches (150 mm) below soundness as described in the above Code 0 2 inches (5 mm) on each side 1 inch (25 mm) in front when installed in N B: if the gas supply for the boiler serves...
- Page 10 Fig 6 NOTE The fl ue must be terminated in a place not likely to cause a nuisance 4.6.2 A concentric vertical fl ue kit is available, for fl ueing applications up to a maximun height of 40 metres. For further details see vertical fl ue installation instructions.
- Page 11 WATER SYSTEM 4.8.2.1 WATER SYSTEM For an open (vented) system the boiler must be supplied from an unrestricted water supply taken from a feed and expan- sion tank (minimum 22 litre 5 gall) capacity situated maximum height of 27 5 metre (90ft) above the boiler The cold feed supply must be 15 mm minimum size It is impor- tant that the relative positions of the...
- Page 12 controls Therefore a by-pass must be fi t- ted to the system (15 mm min) (Fig. 6A). If the volume of circulating water is too low, the boiler water temperature will rise too rapidly This could cause noise in the system or evene cause the safety thermostat to trip The sta tic head available from the cistern should be adequate to provide...
- Page 13 A non return valve of an accepted a service pipe or cold water distributing type pipe The unit may remain permanently con- We recommend use of a Ravenheat nected to the heating system to provide lim- Filling Loop designed...
- Page 14 Central Heating and Hot Water» Draining current I.E.E. Regula tions and local taps should be at least 1/2” in BSP regulations which apply The Ravenheat nominal size and be in accordance with boiler is supplied for con nection BS 2879.
- Page 15 DELIVERY Horizontal HE fl ue kit carton 5.2.1 The appliance carton containing (Fig.15) containing (Optional) (Fig 12) a) boiler fully assembled b) installation instructions and 57- Flue bend assembly user instructions 58- Header gasket c) white paper template 59- Rubber seal Ø 60 d) terminal cover plate 60- Air intake duct Polythene bag containing...
- Page 16 Fig. 18 Supplied By www.heating spares.co Tel. 0161 620 6677...
- Page 17 POSITIONING OF THE BOILER Fig. 20 5.41 Remove the 4 screws that secure the upper and the lower part of the casing(Fig.19-20). 5.4.2 Unscrew the 4 screws that fasten the lower grating on the casing and remove it from the sides of the casing (Fig.20) 5.4.2.1 Carefully slide the casing forward to lift off.
- Page 18 - Cut the inner fl ue duct (60 mm) at right 5.5.2 Locate the rubber Ø 100 and Ø 60 into the fl ue - angles to a length equal to W + 264 mm elbow header (Fig 30). Insert from cut end Reassemble the two tubes Insert centering spring 65 Must IMPORTANT be de-burred...
- Page 19 5.5.3 If the standard duct furnished with the boiler is too long (the wall to go through is less than Fig.35 680 mm thick) it can be shortened as follows - Remove the centering spring 65, the fl ue terminal to disengage inner fl ue duct - Measure the thickness W of the wall - Cut the outer fl...
- Page 20 NOTE: A suitable support bracket is availa ble from Ravenheat Manufacturing and should be used to support fl ue length at least every 1.8 metre preferably at each joint this bracket should be secured to wall and fl...
- Page 21 IN LINE FLUE BEND AND FLUE EXTENSION Fig.39 63 - Air intake duct extension 56 - Sample point 64 - Flue Exhaust duct extension 57 - Elbow Header 65 - Pipe centering spring 59 - Rubber seal Ø 60mm 128 - In Line Bend 5.7.2 Positioning the elbow towards the required direction 5.7.5...
- Page 22 10 mm out from the wall to Before proceeding with installation check the contents of enable the boiler to be located on the wall. the RAVENHEAT VERTICAL FLUE KIT, comprising of the following pieces - Position the straight header on the top of...
- Page 23 Fit a roof fl ashing sleeve (Fig. 43) to the roof, available Do not overtighten and use another spanner from Ravenheat Manufacturing. as a counter force to avoid straining internal connections. Important consult (sect 4.5.1).
- Page 24 (supply cord available from Ravenheat should the cable slip from the anchorage Manufecturing Ltd). the current carrying conductors become taut before the earthing conductor .
- Page 25 COMMISSIONING SETTING THE SYSTEM DESIGN SECTION 6 PRESSURE Each boiler has been through a rigorous operational procedure at our factory and 6.5.1 The design pressure must be a min 1 bar should not require any further adjustment. and max 1.5 bar These fi gures are read off If in the unlikely event of the appliance not the pressure gauge.
- Page 26 Power Indicator On/Off and INSTRUMENT PANEL Light Reset Switch Fig. 50 Boiler Overheat and/or Thermostat Flame Failure Indicator Light GAS VALVE Fig. 51 77 - Upstream pressure inlet 81 - Downstream pressure outlet 104 - Gas valve modulator 110 - min. regulator nut 111 - Max regulator nut 114 - Electrical connections modulator 115 - Electrical connections...
- Page 27 CHECK THE GAS PRESSURE AT THE CHECKING THE FLUE SYSTEM BURNER Now check the gas pressure at the burner is 6.9.1 The fl ue system should be visually checked equal to 10.5 ± 0.5 mbar . for soundness. Check all connections and LPG check gas pressure inlet (37mbar fi...
- Page 28 Before carrying out cleaning operation, cover the electrical control panel with a piece of waterproof material to protect it from debris. Ravenheat are a member of the Benchmark initia- 7.2.2 Inspect the heat exchanger for any blockage tive and fully supports the aims of the programme...
- Page 29 7.2.6.1 To remove condensate trap (sect 5.4) Pull forward the trap (Fig 90). 7.6.5 TO REMOVE/REPLACE CONDENSING Unscrew the earth wire, and the sensor Replace HEAT EXCHANGER Fig. 55-56 in reverse order 7.6.5.1. Remove front casing (sect. 7.3). Remove depression chamber front cover as in 7.2.7 Examine the fan for any mechanical damage, (sect.7.4).
- Page 30 TO REMOVE/REPLACE COMBUSTION CHAMBER INSULATION PANELS (Fig.63) 7.9.1 Remove front casing (sect 7.3) . Remove depression chamber front cover (sect 7.4). 7.9.2 Remove fan (sect. 7.6). 7.9.3 Remove condensing heat exchanger Fig. 54 (sect. 7.6.5) 7.9.4 Remove the fl ue hood (sect 7.7). 7.9.5 Remove burner (sect.
- Page 31 Fig. 56 Fig. 57 Fig. 58 Supplied By www.heating spares.co Tel. 0161 620 6677...
- Page 32 Fig. 59 7.15.6 Pull the burner forward and remove (Fig.64). 7.15.7 Replace in reverse order. IMPORTANT: When refi tting the burner make sure that the pins at the rear of the combustion chamber locate into the slots made on the rear of the burner 7.16 TO REMOVE/REPLACE THE GAS VALVE (Fig.
- Page 33 Fig. 60 Fig. 61 Fig. 62 Fig. 63 Supplied By www.heating spares.co Tel. 0161 620 6677...
- Page 34 7.22 TO REMOVE/REPLACE THE OVERHEAT 7.25 TO REMOVE/REPLACE THERMOSTAT (Fig. 78,79) THE IGNITION/CONTROL BOARD 7.22.1 Remove the front casing (sect. 7.3) 7.25.1 Remove front casing (sect. 7.3 and lower gratin panel. 7.22.2 Remove the depression chamber cover. 7.25.2 Remove 2 screw to instrument panel. 7.22.3 Unscrew the 2 wires that connect to the overheat termostat, macking sure these 7.25.3 Remove the plastic box protection by unclip...
- Page 35 FAULT FINDING SECTION 8 Stat to maximum Ensure external controls calling for heat (Room Stat/Time Clock/TRV) Supplied By www.heating spares.co Tel. 0161 620 6677...
- Page 36 Section 9 ELECTRICAL SYSTEM DIAGRAM Fig. 94 Supplied By www.heating spares.co Tel. 0161 620 6677...
- Page 37 9.0 GENERAL SCHEMATIC DIAGRAM WIRING TO EXTERNAL SWITCHES AND THERMOSTATS VOLT FREE Fig. 95 Fig. 95.1 Supplied By www.heating spares.co Tel. 0161 620 6677...
- Page 38 WIRING TO “Y” AND “S” PLAN INSTALLATIONS USING AN EXTERNAL PROGRAMMER Fig.96 “ Y “ PLAN Fig.97 “ S “ PLAN Supplied By www.heating spares.co Tel. 0161 620 6677...
- Page 39 INSTALLATION INSTRUCTIONS FOR TWIN FLUE PIPE (ECCENTRIC FLUE DUCT SYSTEM) 10 - air intake bend 90° 13 - 45° fl ue exhaust bend 10 - fl ue exhaust bend 90° 14 - fl ue exhaust duct IMPORTANT 11 - air inlet terminal 14 - air intake duct These instructions...
- Page 40 Discard this orifi ce plate and re-fi t the F1 ori- fi ce plate ensuring that the venturi tube has been re-fi tted, making sure this is securely lo- cated into the locating peg Locate the sealing washer fi xing the twin fl ue header as illustrated making sure that the in- ner aluminium exhaust locates fi...
- Page 41 PART NO ITEM DESCRIPTION screws CSI fl ue adaptor gasket and screws Available on request from: Straight pipe 30005 RAVENHEAT MA NUFACTURING LTD Eccentric vertical terminal Chartists Way 90º slow bend 30001 Morley, Leeds, West Yorkshire 45º bend 30003 ENGLAND LS27 9ET - U.K...
- Page 42 section 10 EXPLODED PARTS DIAGRAM Supplied By www.heating spares.co Tel. 0161 620 6677...
- Page 43 RAVENHEAT HE PRIMARY AAA CONDENSING BOILER SHORT LIST OF SPARE PARTS Ravenheat G.C. Pos. Part. No. Part. No. Description 0001COP01010/0 Depression chamber cover 0012VEN03005/1 0002SCA06006/0 Condensing heat exchanger 0001COP06005/0 Flue gas exhaust hood cover 0001CAP06005/0 E23-733 Flue gas exhaust hood...
- Page 44 Ravenheat G.C. Pos. Part. No. Part. No. Description 0012CAV06020/0 Cable for spark-sensing electrode 0003UGE03005/0 371297 Nozzle Ø 1,25 for natural gas 32.1 0003UGE01011/0 E23-755 Nozzle Ø 0.75 for LPG 0013GUA03035/0 371273 Gasket 32 x 32 x 2 gas valve 5018025 372851 Gasket 18.5 x 11.6 x 2...
- Page 45 Website : www.ravenheat.co.uk E-mail : sales@ravenheat.co.uk Ravenheat reserves the right to make changes and improvements in our products which may affect the accuracy of the information contained in thi leafl et. COD 0017LIB06016/2 - 11/2006 Supplied By www.heating spares.co Tel. 0161 620 6677...
- Page 46 The code of practice for the installation, commissioning & servicing of gas central heating Installation, Commissioning and Service Record Log Book CUSTOMER DETAILS NAME ADDRESS TEL No. IMPORTANT 1. Please keep the Log Book in a safe place for future reference. 2.
- Page 47 For the domestic hot water mode, measure and record: HEAT INPUT MAXIMUM BURNER OPERATING PRESSURE mbar MAXIMUM OPERATING WATER PRESSURE COLD WATER INLET TEMPERATURE °C HOT WATER OUTLET TEMPERATURE °C WATER FLOW RATE AT MAXIMUM SETTING Its/min FOR CONDENSING BOILERS ONLY HAS THE CONDENSATE DRAIN BEEN INSTALLED IN ACCORDANCE WITH THE MANUFACTURER’S INSTRUCTIONS? FOR ALL INSTALLATION DOES THE HEATING AND HOT WATER SYSTEM COMPLY WITH THE APPROPRIATE BUILDING REGULATIONS?
Need help?
Do you have a question about the HE Primary AAA and is the answer not in the manual?
Questions and answers