
Subscribe to Our Youtube Channel
Related Manuals for Tomcat 200


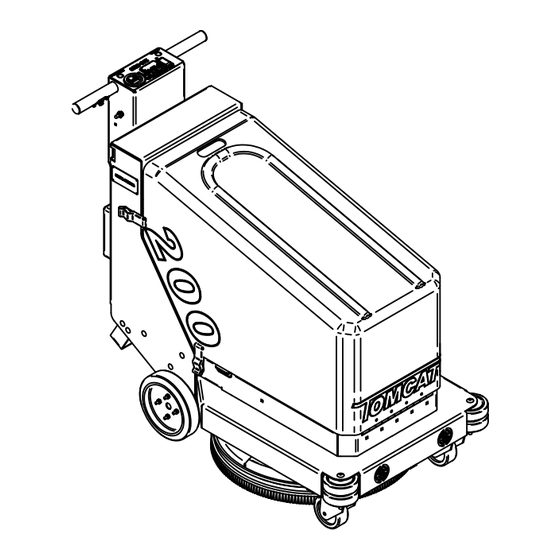
Summary of Contents for Tomcat 200
- Page 1 Model 200 Operator Manual 200 Walkie Burnisher 2010 Edition: 1 R.P.S. Corporation Phone: 1-800-450-9824 P.O. Box 241 Fax: 1-866-632-6961 Racine, Wisconsin 53401...
-
Page 3: Warranty Registration Form
How to use this manual This manual contains the following sections: The SAFETY section contains important information regarding hazard or unsafe practices of the - HOW TO USE THIS MANUAL machine. - SAFETY - OPERATIONS Levels of hazards are identified that could result - MAINTENANCE in product or personal injury, or severe injury - PARTS LIST... -
Page 4: Table Of Contents
This operator and parts manual should be considered a permanent part of the unit and should remain with the unit at all times. This operator and parts manual covers all the Tomcat 200 Series burnishers. You may find descriptions and features that are not on your particular model. -
Page 5: Common Wear Parts
Common wear parts 200 Part Function Results Number Image ultra high Ultra high speed For high speed buffing 20-4221 speed - beige High speed buffing and burnishing. For And burnishing. frequent burnishing on soft to medium finishes. Luster lite - blue... -
Page 6: Safety Messages
Safety Messages Your safety, and the safety of others, is very important and operating this unit safely is an important responsibility. To help you make informed decisions about safety, we have provided operating procedures and other safety information in this manual. This information informs you of potential hazards that could hurt you or others. It is not practical or possible to warn you of all the hazards associated with operating this unit. -
Page 7: Safety Precautions
!! Safety Precaution!! WARNING: Always use the charger provided by Hazardous voltage. Shock, burns or WARNING: the maufacurer to charge the machine. electrocution can result. Always disconnect the It is an automatic charger, specifically designed batteries before servicing machine. to charge at the appropriate rate. If you must use a different charger, disconnect the batteries Batteries emit hydrogen gases. -
Page 8: Machine Controls And Features
Machine Controls and Features 29 30 PAGE 7... -
Page 9: Controls And Fuctions
Controls and Fuctions See figures (1-6) on page 7 helps prevent damage to machine when cleaning close to walls and other objects. 1. Corner roller bumpers: 2. Rear tires: Non-marking and extra wide tires for stability. 3. Rear transaxle: Provides propulsion for machine. Increases or decreases the pad pressure. -
Page 10: Machine Preparation
Machine Preperation Uncrating machine Carefully check the crate for any sign of Damage. Batteries are in the unit. To uncrate the machine, remove banding from around the crate. Take off the top and sides And dispose of properly. Remove banding from machine. Remove the chocks around the drive wheels. -
Page 11: Machine Setup
MACHINE SETUP ATTACHING PAD 1. Turn machine power off. 2. Tip machine back until the tip back bar is resting safely on floor. TIP BACK BAR FLOOR BLUE PAD RETAINER CLIP 3. Remove blue pad retainer clip from pad holder. 4. -
Page 12: Operation
Operation Operating hints Read and understand the safety section on page 5 and 6 before operating machine. Pre- burnishing One Pass Check list Burnishing 1. Check battery condition gauge on the hour Steps: (see below) meter/battery gauge. (See below) Make sure batteries are fully charged before using. -
Page 13: Charging Batteries
Battery charging CAUTION: The following instructions are intended for the 36v charger supplied with the machine. Do not use any other charger with this machine. Charger speccifications Output voltage of 36 volts. Output current of 25 amps max. Input voltage of 110 volts/60 Hz. Automatic shut off circuit. -
Page 14: Onboard Charger
Onboard battery charger display PAGE 13... - Page 15 Onboard battery charger display General information and warnings Electronic automatic battery charger with microprocessor suitable for any battery type. Fully automatic charging cycle with electronic setting protected against overload, short-circuit at clamps and reversed polarity. Never disconnect the battery while charging: this could cause sparks. Never use the equipment in the rain, in areas used for washing or damp areas.
-
Page 16: Maintenance
Maintenance Daily Maintenance Monthly Maintenance 1. Check pad condition. (Replace if necessary) 2. Check battery charge. 1. Check flex driver 3. Clean dust control filters. 2. Check to see if battery cables are tightened and clean. (Tighten if needed) 4. Check hoses and verify there are no clogs. 3. -
Page 17: Preventative Maintenance Records
Preventative maintenance records CUSTOMER INFORMATION CUSTOMER ADDRESS CITY STATE ZIP CODE MACHINE INFORMATION MODEL # SERIAL # WORK ORDER# HOUR METER: BATTERY CONDITION Cell #1 Cell #2 Cell #3 Battery # 1 Hydrometer Reading Battery # 1 Water Condition Battery # 2 Hydrometer Reading Battery # 2 Water condition Battery # 3 Hydrometer Reading Battery # 3 Water Condition... - Page 18 Preventative maintenance records CLEAN AND/OR LUBRICATE IN SPEC REPAIR PROBLEM Burnishing Deck Linkage VISUALLY INSPECT: IN SPEC REPAIR PROBLEM Vacuum Motor Brushes Vacuum Hoses Brush skirts Pad Motor Brushes Pad Driver Condition Drive Wheel Condition Front Caster Condition All Rollers COMMENTS Technician's Name Technician's Signature...
-
Page 19: Troubleshooting
Trouble Shooting Problem Cause Solution No power, nothing operates. Faulty key switch. Contact local servicing dealer. Batteries need charging. See charging batteries. Faulty battery. Replace battery. Loose battery cable. Tighten loose cable. Main circuit breaker tripped. Wait 5 minutes for auto reset. determine cause and correct. - Page 20 Trouble Shooting Problem Cause Solution Poor dust control. Main vacuum hose disconnected. Reconnect hose. Burnishing deck hose disconnected. Reconnect hose. Burnishing deck hose clogged. Remove debris. Damaged main vacuum hose. Contact local servicing dealer. Damaged burnishing deck hose. Contact local servicing dealer. Filter clogged.
Need help?
Do you have a question about the 200 and is the answer not in the manual?
Questions and answers