
Related Manuals for Shinko CHC-S1245

Summary of Contents for Shinko CHC-S1245
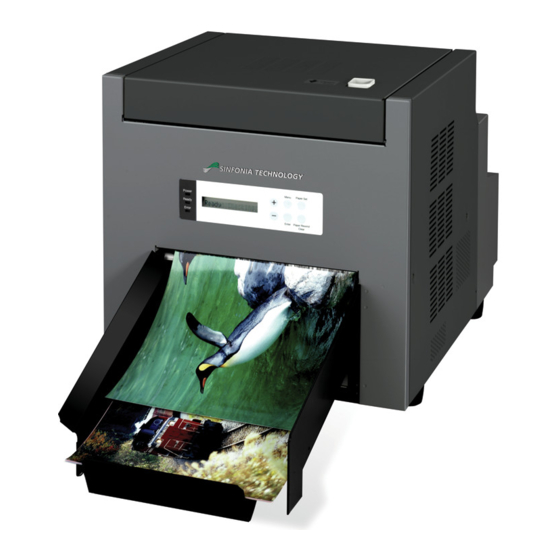
- Page 1 Digital Photo Printer CHC-S1245 Operation Manual First edition January 25, 2005 : Latest edition : May 10, 2007 Revision Revision 4 : SHINKO ELECTRIC CO.,LTD...
- Page 2 1. All rights reserved. No part of this operation manual covered by the copyright herein maybe reproduced or copied in any form or by any means, including translation, without the written permission of Shinko Electric Co., Ltd. 2. The specifications in this operation manual are subject to change without prior notice.
- Page 3 Introduction This manual describes detailed instructions for handling of and basic operation of Digital Photo Printer CHC-S1245. We will describe this product as “the printer” in the manual. Read this manual thoroughly to understand how to install and operate the printer before using it.
-
Page 4: Table Of Contents
CONTENTS PREFACE Chapter 1. Important Safety Instruction ・・・・・・・・・・・・・・・ Environments ・・・・・・・・・・・・・・・・・・・・・・・・・・・・・・・・・・・・・・・・・・・・・・ Handling Instruction ・・・・・・・・・・・・・・・・・・・・・・・・・・・・・・・・・・・・・・・・ Handling Instruction - Continued from previous page ・・・・・・・・・・・・・・・ Handling Instruction for Consumable and Printed Output ・・・・・・・・・・・・・・・・・・ Chapter 2. Installing and Set Up ・・・・・・・・・・・・・・・・・・・・・・ Procedure for Unpacking and Set up・・・・・・・・・・・・・・・・・・・・・・・・・・・・ Unpacking ・・・・・・・・・・・・・・・・・・・・・・・・・・・・・・・・・・・・・・・・・・・・・・・・・・... - Page 5 Chapter 4. Routine Maintenance ・・・・・・・・・・・・・・・・・・・・・・ Cleaning of Thermal Head, Platen, Cleaning Roller ・・・・・・・・・・・・ Cleaning of Outer Cabinet ・・・・・・・・・・・・・・・・・・・・・・・・・・・・・・・・・・・ Cleaning of Filter ・・・・・・・・・・・・・・・・・・・・・・・・・・・・・・・・・・・・・・・・・・・ Chapter 5. Error Handling ・・・・・・・・・・・・・・・・・・・・・・・・・・・ Error Message and Corrective Action ・・・・・・・・・・・・・・・・・・・・・・・・・ Paper Jam ・・・・・・・・・・・・・・・・・・・・・・・・・・・・・・・・・・・・・・・・・・・・・・・・・ Streaking in the Printed Output ・・・・・・・・・・・・・・・・・・・・・・・・・・・・・ Ink Ribbon and Paper Not Detected Correctly ・・・・・・・・・・・・・・・・・...
-
Page 6: Chapter 1. Important Safety Instruction
Chapter 1. Important Safety Instruction This manual provides detailed instructions for the safety use of the printer. Read this manual before operating the printer to ensure to have proper use. ◆In this manual, there are notes that require special attention. For your safety operation, Safety notices are separated as follows;... -
Page 7: Environments
Chapter 1. Important Safety Instruction Environments To use the printer safety, please pay attention to the followings: Caution: Do not let children to touch the printer or the cables. It can cause accidents or electric shock. Caution: Do not place the printer under humid or dusty place. It can cause a fire, electric shock or printer problem. -
Page 8: Handling Instruction
Chapter 1. Important Safety Instruction Handling Instruction In handling the printer, please pay attention to the followings; Warning: Lift the printer from its box and put it onto a flat table or desk. Warning: At nearly 28Kg, the printer is too heavy to be lifted by one person. Also please take a good care of your hands and fingers when lifting the printer from the box. -
Page 9: Continued From Previous Page
Chapter 1. Important Safety Instruction Handling Instruction - Continued from previous page Warning: Secure the power cable firmly. Warning: The thermal head reaches high temperature during operation but this is normal. Do not touch the thermal head. Attention: Touching the surface of the thermal directly can cause the damage to thermal head. When a hard object get into the printer, it can cause the damage to the printer mechanism. - Page 10 - Do not touch the paper surface before printing to avoid the fingerprints. Attention: Ink Ribbon Handling - Use the ink ribbon specified by Shinko Electric. - Store the ink ribbon in cool place to avoid the direct sunlight. (Temperature less than 30°C, Humidity: lass than 60%) Attention: Printed Output Handling - Store the printed output in a dark place to avoid the direct sunlight.
- Page 11 Chapter 1. Important Safety Instruction (MEMO)...
-
Page 12: Chapter 2. Installing And Set Up
Chapter 2. Installing and Set Up Procedure for Unpacking and Set up This chapter explains the unpacking and set up of the printer. Before proceeding to this chapter, please make sure to read Chapter 1. Important Safety Instruction. Unpacking Procedure 1. -
Page 13: Unpacking
Chapter 2. Installing and Set Up Unpacking At first, check the contents of the printer box. Dust box Paper Flange (with gear, blue) Print Catcher Paper Flange (without gear, gray) Operation Manual Cushionin Power cord Printer Cushioning Cardboard box Attention: Do not throw away the packing materials. You can use them again to transport the printer in its original box. -
Page 14: Finding Accessories
Chapter 2. Installing and Set Up Finding Accessories Take out the accessories from inside the carton box and printer to make sure the following items are included. Paper flange Paper flange Dust box (with gear, blue) (without gear, gray) Power cord Print catcher Operation manual... -
Page 15: Parts Name And Function
Chapter 2. Installing and Set Up Parts Name and Function <Front View> Filter Upper Cover Upper Cover Open Lever Operation Panel Filter Dust Box Print Catcher <Rear View > Paper Cover Power Switch Power Connector USB Connector... - Page 16 Chapter 2. Installing and Set Up <Internal View> Thermal Head Cleaning Roller (Paper Supply Side) Platen Roller Cleaning Roller (Paper Roll Up Side)
- Page 17 Chapter 2. Installing and Set Up Function of Each Part Name Function This cover may be opened to exchange the ink ribbon inspect and clean the thermal head and to remove the jammed paper. Upper Cover <Caution> Upper cover must be opened and closed gently. Thermal head is mounted inside this upper cover.
-
Page 18: Removing The Protective Materials For Transportation
Chapter 2. Installing and Set Up Removing the Protective Materials for transportation To avoid the vibration and shock during the transportation, protective materials are attached to the printer. Attention: Please keep these protective materials. When transporting the printer, make sure to attach these materials to avoid the damage for the printer. - Page 19 Chapter 2. Installing and Set Up 3. Take away the thermal head protective air cushion. Protective air cushion 4. Peel off the two tapes that fix the paper cover. 5. Take away silica gel. Silica gel...
- Page 20 Chapter 2. Installing and Set Up 6. Install the dust box. Dust box 7.Install the print catcher. Hook the lugs of the print catcher on the paper ejection slot to install it. Attention: The printer can be used without installing the print catcher. Install Print Catcher your...
-
Page 21: Loading Ink Ribbon
Chapter 2. Installing and Set Up Loading Ink Ribbon 1.Open the upper cover. Pull the upper cover open lever. Attention: Do not open the upper cover abruptly or forcefully past the 90° angle. 2. Remove used ink ribbon. The ink ribbon can be removed by pushing it to the right. - Page 22 Chapter 2. Installing and Set Up 3. Load a ink ribbon into the printer. Set the supply side (in which unused ribbon is rolled up) of the ink ribbon to the front side. If the ink ribbon is not set in correct orientation, it cannot be loaded into the printer.
- Page 23 Chapter 2. Installing and Set Up 6. Close the upper cover. Pressing the center, close the upper cover slowly and confirm it cricks. Caution: Take care not to put the fingers when you close upper cover. 2-12...
-
Page 24: Loading Paper
Chapter 2. Installing and Set Up Loading Paper 1. Rewind the paper into the paper box. If the paper is set inside the printer, push the PAPER REWIND button on the operation panel. The printer automatically rewinds the paper into the paper box.(this step is not PAPER REWIND necessary at the first set up procedure) button... - Page 25 Chapter 2. Installing and Set Up 4. Prepare the new paper. Take away the vinyl cover for the protection. 5. Insert the paper flange (with gear, blue) into the paper. Align the notch of the paper with the projection of the paper fFlange.
- Page 26 Chapter 2. Installing and Set Up 7. Load the new paper into the paper cassette. With gear, blue Without gear, gray 8. Peel of the sticker, which is fixing the edge of paper. 9. Set the edge of the paper along with the mark on the paper guide.
- Page 27 Chapter 2. Installing and Set Up 10. Using the paper feeding Knob, set the paper edge to the red line. Attention: Make sure to dispose the dust every time exchange the paper. Paper Feeding Knob Red line 11. Close the paper cover slowly. 12.
-
Page 28: Connecting Power Cord
Chapter 2. Installing and Set Up Connecting Power Cord Connect the power cord according to the safety instructions below. Insert the power cord attached to the printer into the power connector located on the rear of the printer. Warning: Make sure to turn off the power of the printer before inserting the power cord. Warning: Must use the power cord attached with the printer. - Page 29 Chapter 2. Installing and Set Up Warning: When moving the printer, make sure to turn off the power of the printer, remove the power cord in order to have no connection with other devices. Otherwise, the power cord might be damaged and it can cause the fire and electric shock.
-
Page 30: Connecting Usb Cable
Chapter 2. Installing and Set Up Connecting USB Cable Connect the USB cable from the personal computer to the USB connector located on the left rear side of the printer. Be sure to insert the USB cable all the way. Attention: To remove the USB cable, make sure that the printer is in the waiting status. - Page 31 Chapter 2. Installing and Set Up (MEMO) 2-20...
-
Page 32: Chapter 3. Operation Panel
Chapter 3. Operation Panel Power Switch Power Switch is located on the right rear and turn on when press to upper (“|”) and turn off when press to lower (“○”). | | | | ○ ○ ○ ○ Operation Panel The buttons, LEDs and LCD display on the operation panel are shown below. -
Page 33: Operation Panel
Chapter 3. Operation Panel LED Display The LED Display has the following meanings. Name Color Description Power Lamp Orange Light when power is ON. Ready Lamp Green Light when ready to print. Error Lamp Light when error occurs. Operation Button Individual Operation Buttons have the following function. - Page 34 Chapter 3. Operation Panel...
-
Page 35: Lcd Display
Chapter 3. Operation Panel LCD Display The LCD Display indicates the following printer status. LCD Display Description Printable status Ready:8×10 Display is changed depending on ink ribbon being set in the printer. Ready:8×12 Initializing Printer is in initialization. Winding Ribbon Winding the ink ribbon. -
Page 36: Set Up Mode
Chapter 3. Operation Panel Set Up Mode With Set Up Mode, following test print and printer situation and print mode and Gloss/Matte mode, and cleaning print can be checked. ・Performing test print ・Check the number of remaining paper ・Check the number of total print ・Check the revision number of printer control firmware ・Set the Print Mode ・Set the Gloss/Matte Mode... - Page 37 Chapter 3. Operation Panel (from the previous page) Printed = XXXXXX This figure shows the total number of the copies after the shipment from the factory. Press MENU button to shift the next menu. MAIN Firm = XXXX This figure shows the revision number of main control firmware mode.
- Page 38 Chapter 3. Operation Panel (from the previous page) ※Displayed from firmware revision [ MAIN Firm = 4、DSP Firm = 2 ] Print Mode This figure shows the menu of Print Mode. Press ENTER button to shift the menu of change setting of Print Mode. Press MENU button to shift the next menu.
- Page 39 Chapter 3. Operation Panel (from the previous page) ※Displayed from firmware revision [ MAIN Firm = 11、DSP Firm = 7 ] Gloss/Matte Mode This figure shows the menu of Gloss/Matte Mode. Press ENTER button to shift the menu of change setting of Gloss/Matte Mode.
- Page 40 Chapter 3. Operation Panel (from the 3-6 page or the previous page) ※Displayed from firmware revision [ MAIN Firm = 10、DSP Firm = 6 ] Cleaning Print Pressing Enter Button, Cleaning print will start. Now Cleaning After Cleaning Print is done, Initializing automatically starts, and move into Ready status.
-
Page 41: Chapter 4. Routine Maintenance
Chapter 4. Routine Maintenance Cleaning of Thermal Head, Platen, Cleaning Roller By using thermal transfer technology, daily maintenance is not really necessary if the printer is being use properly. However, in order to keep the best print quality, it is recommended to do the cleaning of Thermal Head, Platen and Cleaning Roller once in a month. - Page 42 Chapter 4. Routine Maintenance 3. Using gauze, clean the edge of Peeling Plate with isopropyl alcohol or ethyl alcohol. 4. Using gauze, clean the rubber part of Platen with isopropyl alcohol or ethyl alcohol. Attention: Dirt or ink on Platen can cause mis-registration.
- Page 43 Chapter 4. Routine Maintenance 6. Using gauze, clean the rubber part of each Cleaning Roller with isopropyl alcohol or ethyl alcohol. 7. After the cleaning, insert the Rollers back to the original position and push the black knob until confirm it clicks. Attention: If the dirt stick around Cleaning Roller, it can cause the lack of printing.
-
Page 44: Cleaning Of Outer Cabinet
Chapter 4. Routine Maintenance Cleaning of Outer Cabinet Wipe the printer outer cabinet with a soft cloth. If the stains are not removed, wet the cloth and apply weakened neutral Detergent to Warning: In case, the foreign substance get into the printer, turn off the power of printer, remove the power cord and contact the dealers or service center. -
Page 45: Chapter 5. Error Handling
Chapter 5. Error Handling Error Message and Corrective Action When the error happens, error message will be displayed on LCD on the operation panel. Table below shows the status and how to handle it. LCD Message Status Corrective Action Printer is out of paper or Insert the paper when the printer Paper Empty paper is not inserted. -
Page 46: Paper Jam
Chapter 5. Error Handling Paper Jam 1. Turn off the power of the printer. 2. Open the upper cover. Pull Upper Cover Open Lever Attention: Do not open the Upper Cover abruptly or forcefully past the 90° angle. 3. Check whether the printer has some paper left. - Page 47 Chapter 5. Error Handling [In the case of no paper] [In the case of no paper] [In the case of no paper] [In the case of no paper] 4. Close the upper cover. Pressing the center, close the upper cover slowly and confirm it cricks.
- Page 48 Chapter 5. Error Handling 7. Open the paper cover to confirm that the paper tip is not off the paper roller, and then load the paper again. [In the case of unused paper] the case of unused paper] the case of unused paper] the case of unused paper] 8.
- Page 49 Chapter 5. Error Handling 10. Use the scissors to cut the winkles or printed portion of the paper. Caution: ・Thermal head reaches high temperature just after printing. Do not touch directly by hand. ・When fingerprint stick to the heat element, it can damage the Thermal head. Do not touch directly by hand.
- Page 50 Chapter 5. Error Handling 12. Turn on the power switch. 13. Rewind the paper into the paper box. Push the "PAPER REWIND" button on the operation panel. The printer automatically rewinds the paper into the paper box. If PAPER REWIND the message "Paper Jam"...
-
Page 51: Streaking In The Printed Output
Chapter 5. Error Handling Streaking in the Printed Output -Straight line for the printing direction ・Can be happened due to the dirt on Thermal Head. Clean the Thermal Head according to the instruction in Chapter 4. Routine Maintenance. ・In case, the line will not disappear after the cleaning of Thermal Head, please contact the dealers or service center. -
Page 52: Ink Ribbon And Paper Not Detected Correctly
Chapter 5. Error Handling Ink Ribbon and Paper Not Detected Correctly -In the case that the printed color is not match to the required color. -In the case that Incorrect Ribbon message appear on LCD. -In the case that Ribbon Empty appeared on LCD though ink ribbon is correctly inserted. -In the case that the error message "Paper Empty"... - Page 53 Chapter 5. Error Handling 3. Remove the ink ribbon. 4. Wipe the ribbon mark sensor using cotton bud with isopropyl alcohol or ethyl alcohol soaked. Ribbon Mark Sensor 5 . Wipe the ribbon mark sensor reflection sticker by soft cloth. Reflection Sticker...
- Page 54 Chapter 5. Error Handling 6. Insert Ink Ribbon again. Follow the instruction of Loading Paper in Chapter 2. 7. Close Upper Cover. Pressing the center, close the Upper Cover slowly and confirm it cricks. Caution : Take care not to put the fingers when you close upper cover.
-
Page 55: Power Supply Interrupted During Printing
Chapter 5. Error Handling Power Supply Interrupted during Printing In case, power supply interrupted during the printing, Thermal Head will be kept pushing to Platen. Laving this situation for a long time, shape of Platen can be warped. In order to avoid this situation, please follow the instruction below. - Page 56 Chapter 5. Error Handling 3. Open the upper cover. Pull the upper cover open lever. Attention: Do not open the Upper Cover abruptly or forcefully past the 90° angle. 4. Remove the ink ribbon. Caution: ・Thermal head reaches high temperature just after printing. Do not touch directly by hand.
- Page 57 Chapter 5. Error Handling 5. Pulling the front side of the paper and cut off the printed are by scissors. (Refer to Paper Jam in this Chapter.) 6. Close the upper cover and turn on the power of the printer, then rewind the paper to Paper Cassette.
- Page 58 Chapter 5. Error Handling 8. Close the upper cover. Pressing the center, close the upper cover slowly and confirm it cricks. Caution: ・Take care not to put the fingers when you close upper cover. ・If the electric power failure will go on for a long time, keep upper cover open until it will recover from the electric power failure.
-
Page 59: Chapter 6. After-Sales Service
Chapter 6. After-sales Service Contact your dealers or service center for the details about after-sales service. - Page 61 YTE8-J0124E Revision:Fourth edition...
Need help?
Do you have a question about the CHC-S1245 and is the answer not in the manual?
Questions and answers