Table of Contents
Advertisement
Available languages
Available languages
WARNING
For Outdoor Use Only (outside any enclosure)
WARNING
1. Improper installation, adjustment, alteration,
service or maintenance can cause injury or
property damage.
2. Read this instruction manual thoroughly
before installing or servicing this equipment.
3. Failure to follow these instructions could
result in fire or explosion, which could cause
property damage, personal injury or death.
4. This instruction manual contains important
information necessary for proper assembly and
safe use this appliance.
WARNING
1. Do not store or use gasoline or other
flammable vapors and liquids in the vicinity of
this or any other appliance.
2. An LP tank not connected for use should not
be stored in the vicinity of this or any other
appliance.
DANGER
If you smell gas:
1. Shut off gas to the appliance.
2. Extinguish any open flames.
3. Open the lid.
4. If the odor continues, keep away from the
appliance and immediately call your gas
supplier or fire department.
DANGER
Never operate this appliance unattended.
Save these instructions for future reference.
If you are assembling this unit for someone else,
give this manual to him or her to read save for
future reference.
Questions, Problems, missing parts? Don't return the grill to stores, please call our customer service
department at 1 - 855 - CHANTS - US (1-855-242-6887) from 8:00am to 5:00pm Eastern time, Monday
through Friday for assistance. Chant Kitchen Equipment (H.K.)Ltd / Suit 706, Rightful Centre, 11-12
Tak Hing Street, Jordan, Kowloon, HongKong
ITEM#BH1310109902
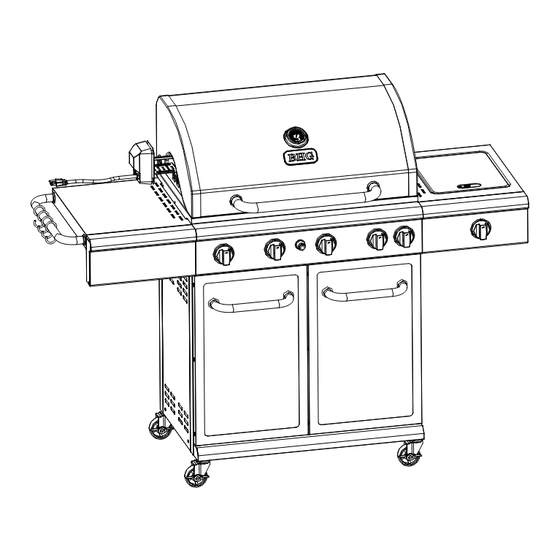
OUTDOOR 5 BURNER GAS GRILL
MODEL #BG1755B
1
Advertisement
Chapters
Table of Contents

Related Manuals for better homes BG1755B


Summary of Contents for better homes BG1755B
-
Page 1: Cover
ITEM#BH1310109902 OUTDOOR 5 BURNER GAS GRILL WARNING For Outdoor Use Only (outside any enclosure) MODEL #BG1755B WARNING 1. Improper installation, adjustment, alteration, service or maintenance can cause injury or property damage. 2. Read this instruction manual thoroughly before installing or servicing this equipment. - Page 2 DANGER WARNING If you smell gas: 1. Do not store or use gasoline or other flammable liquids or vapors in the 1. Shut off gas to the appliance vicinity of this or any other appliance. 2. Extinguish any open flame 3.
-
Page 3: Table Of Contents
TABLE OF CONTENTS Cover …………….…………………………………….………...….………….………….…. ………1 Table of contents…………………………………….………...….………….………….…. ………3 Safety Information…………………………………….………...….………….………….…. ………4 Exploded View……………….………………………………………………………………………..6 Parts list….……………..…..….……...…....……………..………………..7 Hardware Contents……………………………………………………………….……………………8 Assembly Instructions……………………..……………….………………………………………..9 Operating Rotisserie Instructions…………….……………………………………………… ….18 Operation Instructions…………………………….……...………………………….....21 L.P. Tank information…………….....................23 Care and Maintenance……………………………….………………………………………………29 Troubleshooting …………………………………………………………………..….……………...32 Warranty………………………………………………………………………………………………..34... -
Page 4: Safety Information
SAFETY INFORMATION Please read and understand this entire manual before attempting to assemble, operate or install the product. If you have any questions regarding the product, please call our customer service at 1-855-CHANTS-US(1-855-242-6887) from 8:00am to 5:00pm Eastern time, Monday through Friday for assistance. 1. - Page 5 SAFETY INFORMATION 16. The cylinder used must include a collar to protect the cylinder valve. 17. Do not store a spare LP-gas cylinder under or near this appliance. 18. Never fill the cylinder beyond 80 percent full. 19. If the information in “17” and “18” is not followed exactly, a fire causing death or serious injury may occur.
-
Page 6: Exploded View
EXPLODED VIEW... -
Page 7: Parts List
PARTS LIST PART DESCRIPTION PART DESCRIPTION ※Lid Assy. Left side shelf front panel Assy. ※Temperature gauge Left grease tray slide way Lid handle bezel Grease cup Lid handle Grease tray assembly Warming rack Right grease tray slide way ※Left Leg Assy. Cooking grate ※Left side panel Heat tent A... -
Page 8: Hardware Contents
HARDWARE CONTENTS... -
Page 9: Assembly Instructions
Assembly instructions Step 1:Attach left side panel (36) and right side panel (45) on bottom panel assy.(40) Note: Assemble on flat box or soft surface to avoid scratching BB M6X12mm Screw... - Page 10 Assembly instructions Step 3 :Attach Upper front door brace(with Step 2 Attach Rear panel (39) magnet)(43). AA M4X12mm Screw AA M4X12mm Screw Step 4 :Attach Left/right grease tray slide way (31)/(34) and baffle plate bracket (38). AA M4X12mm Screw AA M4X12mm Screw...
- Page 11 Assembly instructions Step 5 :Attach Grease tray assembly (33) and 4 Casters (37). AA M4X12mm Screw HH. Wrench CC M4 NUT Step 7 : Attach 5 knobs (12), lid handle (4) Step 6 :Attach Grease cup(32). with 2 Lid handle bezels (3). M6X16mm Screw...
- Page 12 Assembly instructions Step 8:Attach Lid Assy. (1). BB M6X12mm Screw Ⅰ Attach Left side shelf front Ⅱ Attach Side shelf handle(27) and tool Step 9: panel Assy. (30) with Left side shelf hook(26) with Handle bezel(28). Assy.(29). M6X16 mm Screw JJ M5X10 mm Screw Masher 6...
- Page 13 Assembly instructions Ⅲ, Attach 4pcs BB, do not tighten screws completely. Attach Left side shelf Assy.(29) to Lid Assy.(1). And tighten the BB screw, and then tighten 1 AA screw. BB M6X12mm Screw AA M4X12mm Screw Step 10: Ⅰ, Attach Side burner front panel Assy.(52) to Side burner shelf Assy.(49). JJ M5X10 mm Screw...
- Page 14 Assembly instructions Ⅱ Attach 4pcs BB, do not tighten screws completely. Attach Side burner shelf Assy.(49) to Lid Assy.(1). And tighten the BB screw, and then tighten 1 AA screw. BB M6X12mm Screw AA M4X12mm Screw Ⅲ Open the Side burner lid (1), remove Side burner trivet (48) and Side burner Assy.(51)
- Page 15 Assembly instructions Ⅳ Attach knob (12) to Knob bezel (11). KK M4X8mm Screw Ⅵ,Insert regulator/Control Valve (19) Ⅴ Attach light wire and Side burner Assy. (51). through the hole of right side panel (45).
- Page 16 Assembly instructions Step 11: Ⅰ, Attach Door handle (54) with Handle bezel (28) and Screw sleeve(53) in Left Ⅱ Attach doors door Assy.(55) and Right door Assy.(56). Step13: Insert Cooking grate (6) and Step 12: Insert Heat tents A+B (7+8). Warming rack(5).
- Page 17 Attaching Rotisserie Kit Step 15: Ⅰ,Remove Warming rack(5). Ⅱ, Assemble Rotisserie rod(22) with Rotisserie fork(23), Rotisserie fork support (24), Rotisserie counterweight (25). Ⅲ, Attach Rotisserie Motor Support(22) Ⅳ, Insert rotisserie rod (22). and Rotisserie Motor(20). DD M5X16 X2 EE Washer5 FF M5 Nut GG Spring Washer5...
-
Page 18: Operating Rotisserie Instructions
OPERATING ROTISSERIE INSTRUCTIONS Operating Rotisserie WARNING: When using electrical appliances, basic safety precautions should always be used, including the following: 1. Always attach Rotisserie to grill first, then plug cord into a grounded outlet. To disconnect, turn Rotisserie “OFF” then remove plug from outlet. 2. - Page 19 OPERATING ROTISSERIE INSTRUCTIONS WARNING: Do NOT operate the Rotisserie with a damaged cord or plug, or if the Rotisserie malfunctions or has been damaged in any manner. Call our Customer Care at 1-855-CHANTS-US (1-855-242-6887) for replacement. WARNING: The power supply cord has a 3-prong grounded plug. For your personal safety do not remove the grounding prong.
- Page 20 OPERATING ROTISSERIE INSTRUCTIONS WARNING: USE ONLY ON PROPERLY GROUNDED OULTET. Attaching Meat or Poultry Attach rotisserie motor per “Attaching Rotisserie Kit” instructions. (See page 17) Insert and secure rotisserie counterweight and Rotisserie handle onto rotisserie rod( Fig. 10) Insert one rotisserie fork onto rotisserie rod (Fig.
-
Page 21: Operation Instructions
OPERATING INSTRUCTIONS L.P. GAS INSTALLATION Gas grills that are set to operate with L.P. gas come with a high capacity hose and regulator assembly. (Note: Only use the pressure regulator and hose assembly supplied with the grill or a replacement pressure regulator and hose assembly specified by the manufacturer). This assembly is designed to connect directly to a standard 20 lb. - Page 22 OPERATING INSTRUCTIONS 6. Connect the hose and regulator assembly to the tank valve(See Fig. 2)Hand tighten the quick coupling nut clockwise to a full stop. DO NOT use a wrench to tighten because it could damage the quick coupling nut and result in a hazardous condition. 7.
-
Page 23: L.p. Tank Information
OPERATING INSTRUCTIONS Disconnecting A Liquid Propane Fig. 5 Gas (LP Gas) Tank From Your Grill: 1. Turn the burner knobs and LP gas tank valve to the full OFF position. (Turn clockwise to close.) 2. Detach the hose and regulator assembly from the LP gas tank valve by turning the quick coupling nut counterclockwise. - Page 24 OPERATING INSTRUCTIONS • Cylinders must be stored outdoors out of the reach of children and must not be stored in a building, garage or any other enclosed area. WARNING DO NOT store a spare L.P. gas cylinder under • Only a qualified gas supplier should refill or near the grill.
- Page 25 OPERATING INSTRUCTIONS L.P. gas supply cylinder has been disconnected. Please refer to diagram for proper installation (see Fig. 8 and Fig. 9). Visually check the connection between the burner venture pipe and orifice. Make sure the burner venture pipe fits over the orifice.
- Page 26 OPERATING INSTRUCTIONS Storage of an outdoor gas cooking appliance indoor is permissible only if the cylinder is disconnected and removed from the appliance. Heat& WARNING Heat and smoke exhaust out of the Smoke back of the grill hood opening. Make sure not to have the Exhaust grill back facing your home or anything that could be damaged by heat or smoke.
- Page 27 Checking orifices alignment with burners Orifices may shift during assembly and movement. Check the orifices alignment with the burners according to the following illustrations before lighting. Main Burner and Orifice Relationship Searing Burner and Orifice Relationship Side Burner and Orifice Relationship...
- Page 28 GRILL BURNER LIGHTING Warning: Do not lean over grill when lighting. Turn off LP supply at cylinder when appliance is not in use. Main Burner Lighting Illustration: 1. Check that the control knobs are in the OFF position. 2. Open valve at tank fully by turning counterclockwise. 3.
-
Page 29: Care And Maintenance
OPERATING INSTRUCTIONS If ignition does not take place within 5 seconds, immediately turn the control knob to the OFF position. Wait 5 minutes and repeat step 4 above or refer to match lighting instructions in manual. If the igniter does not function, the burner can be lit by holding a lit match to the burner while the control knob is turned counter-clockwise to “HIGH.”... - Page 30 CARE AND MAINTENANCE However, there are steps you must take to prevent cracking of the burner's ceramic surfaces, which will cause the burners to malfunction. The following are the most common causes of cracks and the steps you must take to avoid them. Damage caused by failure to follow these steps is not covered by your grill warranty.
- Page 31 CARE AND MAINTENANCE Important: Do not leave the grill outside during inclement weather unless it is covered. Rain water can collect inside of the grill, the grill cart or the drip tray if left uncovered. If the drip tray is not cleaned after use and the grill is left uncovered, the drip tray will fill with water causing grease and water to spill into the grill cart.
-
Page 32: Troubleshooting
TROUBLESHOOTING Many solutions given here can make your grilling experience safer and more enjoyable. You can also call customer service department at 1-855-CHANTS-US(1-855-242-6887) from 8:00am to 5:00pm Eastern time, Monday through Friday for assistance. PROBLEM POSSIBLE CAUSE CORRECTIVE ACTION 1. The ignition wire came off the 1. -
Page 33: Knob
TROUBLESHOOTING PROBLEM POSSIBLE CAUSE CORRECTIVE ACTION Low heat with the knob 1. Ports are blocked. 1. Clear ports of any obstructions. in “HIGH” 2. LP tank has run out. 2. Refill the LP tank. position. The propane regulator assembly Please follow these instructions: incorporates an excess flow device 1. -
Page 34: Warranty
WARRANTY Proof of purchase is required to access this warranty program, which is in effect from the date of purchase. Customers will be subject to parts, shipping, and handling fees if unable to provide proof of the purchase or after the warranty has expired. If you have any questions or problems, you can call our customer service department at 1-855-CHANTS-US(1-855-242-6887) from 8:00am to 5:00pm Eastern time, Monday through Friday for assistance. -
Page 35: Cubierta
PARRILLA DE GAS DE 5 ADVERTENCIA: QUEMADORES PARA EXTERIOR Sólo para uso en exteriores (fuera de cualquier carcasa) MODELO Nº BG1755B ADVERTENCIA: 1. La instalación, ajuste, modificación, reparación o mantenimiento inadecuados pueden provocar lesiones o daños en la propiedad. 2. Lea detenidamente este manual de instrucciones antes de instalar o reparar este equipo. - Page 36 PELIGRO ADVERTENCIA Si nota olor a gas: 1. No almacene ni use gasolina ni otros vapores o líquidos inflamables en las 1. Corte el suministro de gas del aparato cercanías de este u otros aparatos. 2. Extinga cualquier llama 3. Abra la cubierta 2.
-
Page 37: Tabla De Contenidos
TABLA DE CONTENIDOS Cubierta …………….…………………………………….………...….………….……. .…….…. 35 Tabla de contenidos…………………………….………...….………….…………………. ….…. 37 Información deSeguridad…………………….………...….………….…………………….…. …38 Vistadedespiece…….…………………………………….………...….………….……. .…….….40 Listadepiezas……….…………………………………….………...….………….……. .…….…. 41 ContenidodeHardware………………………………….………...….………….……. .…….…. 42 Instrucciones dmontaje……………………………….………...….………….……. .…….…. 43 Instrucciones deusodelasador……………………….………...….………….……. .…….…. 52 Instrucciones de uso………………………………….………...….………….……. . .…….…. 55 InformacióndelTanqueLP…………………………….………...….………….……. . .…….…. 57 Cuidados ymantenimiento………………………….………...….………….……. -
Page 38: Información Deseguridad
INFORMACIÓN DE SEGURIDAD Por favor, lea y comprenda todo este manual antes de intentar montar, utilizar o instalar el producto. Si tiene alguna pregunta respecto al producto, por favor llame a nuestro departamento de atención al cliente al 1-855-CHANT-US(1-855-242-6887) de 8:00 AM a 5:00 PM, hora Este, de lunes a viernes, para pedir asistencia. - Page 39 INFORMACIÓN DE SEGURIDAD 16. El cilindro utilizado debe incluir un collar para proteger la válvula del cilindro. 17. No almacene un cilindro de gas LP de repuesto bajo o cerca de este aparato. 18. Nunca rellene el cilindro más del 80 % 19.
-
Page 40: Vistadedespiece
VISTA DE DESPIECE... -
Page 41: Listadepiezas
LISTA DE PIEZAS PIEZA DESCRIPCIÓN CANT. PIEZA DESCRIPCIÓN CANT. ※Conjunto de la Cubierta onjunto del panel frontal del estante lateral uierdo ※Termómetro Carril izquierdo de la bandeja de grasa Bisel del tirador de la Contenedor de grasa cubierta Tirador de cubierta Conjunto de la bandeja de grasa Rejilla calentadora Carril derecho de la bandeja de grasa... -
Page 42: Contenidodehardware
CONTENIDO DE HARDWARE Tornillo M4X12mm Tornillo M6X12mm Tuerca M4 Tornillo M5X16mm Arandela 5 Tuerca M5 Arandela elástica Llave Batería AA Tornillo Tornillo M4X8mm... -
Page 43: Instrucciones Dmontaje
Instrucciones de montaje Paso 1 : Fije el panel lateral izquierdo (36) y el panel lateral derecho (45) al conjunto del panel inferior (40) Nota: Móntelo sobre una caja plana o una superficie suave para evitar arañazos BB Tornillo M6X12mm... - Page 44 Instrucciones de montaje Paso 3_: Fije el apoyo superior de la puerta Paso 2 Fije el panel posterior (39) frontal (con imán) (43). AA Tornillo M4X12mm AA Tornillo M4X12mm Paso 4 : Fije los carriles izq./dcho de la bandeja de grasa (31)/(34) y el soporte del deflector (38).
- Page 45 Instrucciones de montaje Paso 5_ : Fije el conjunto de la bandeja de grasa (33) y las 4 ruedas (37). AA Tornillo M4X12mm HH. Llave CC TUERCA M4 Paso 7_: Fije los 5 mandos (12), el Paso 6_ : Fije el contenedor de grasa (32). tirador de la cubierta (4) con los 2 biseles Tornillo M6X16mm...
- Page 46 Instrucciones de montaje Paso 8 : Fije el Conjunto de la cubierta (1). BB Tornillo M6X12mm Paso 9: I, Fije el conjunto del panel II, Fije el asa del estante lateral (27) y el frontal del estante lateral izquierdo (30) gancho para utensilios (26) con el bisel con el conjunto del estante lateral del asa (28).
- Page 47 Instrucciones de montaje III, Fije 4 unidades BB, no apriete los tornillos completamente. Fije el conjunto del estante lateral izquierdo (29) al conjunto de la cubierta (1). Apriete el tornillo BB, y después apriete 1 tornillo AA. BB Tornillo M6X12mm AA Tornillo M4X12mm Paso 10: I, Fije el conjunto del panel frontal del quemador lateral (52) al conjunto del estante del quemador lateral (49).
- Page 48 Instrucciones de montaje II, Fije 4 unidades BB, no apriete los tornillos completamente. Fije el conjunto del estante del quemador lateral (49) al conjunto de la cubierta (1). Apriete el tornillo BB, y después apriete 1 tornillo AA. BB Tornillo M6X12mm AA Tornillo M4X12mm III, Abra la cubierta del quemador lateral (1), retire la rejilla del quemador lateral (48) y el conjunto del quemador lateral (51).
- Page 49 Instrucciones de montaje IV, Fije el mando (12) al bisel del mando (11). Tornillo KK M4X8mm V, Fije el cable de luz y el conjunto Inserte válvula del quemador lateral (51). control/regulador (19) a través del orificio del panel lateral derecho (45).
- Page 50 Instrucciones de montaje Paso 11: I, Fije el pomo de la puerta (54) con el bisel del pomo (28) y la guía del tornillo (53) en el conjunto de la puerta izquierda (55) y conjunto de la puerta derecha (56). II, Fije las puertas Paso 13: Inserte la parrilla de cocinado (6) Paso 12: Inserte las campanas de calor...
- Page 51 Fijar el Kit del Asador Paso 15: I, Retire la rejilla calentadora (5). II, Ensamble la varilla del asador (22) con el tenedor del asador (23), el soporte del tenedor del asador (24), y el contrapeso del asador (25). III, Fije el soporte del motor del asador (22) IV, Inserte la varilla del asador (22).
-
Page 52: Instrucciones Deusodelasador
INSTRUCCIONES DE USO DEL ASADOR Funcionamiento del Asador ADVERTENCIA: Al utilizar aparatos eléctricos, siempre se deben tomas las precauciones básicas de seguridad, incluyendo las siguientes: 1. Siempre conecte primero el asador a la parrilla, y después conecte el cable a una toma de corriente con toma de tierra. - Page 53 INSTRUCCIONES DE USO DEL ASADOR ADVERTENCIA: NO utilice el asador con un cable o enchufe dañado, ni si el asador no funciona correctamente o ha sido dañado de alguna manera. Llame a nuestro servicio de Atención al Cliente al 1-855-CHANT-US (1-855-242-6887) para sustituirlo.
- Page 54 INSTRUCCIONES DE USO DEL ASADOR ADVERTENCIA: UTILIZAR EXCLUSIVAMENTE CON UNA TOMA DE CORRIENTE CONECTADA A TIERRA. Colocar carne o aves 1. Fijar el motor del asador según las instrucciones "Fijar el Kit del Asador" (Ver página 17) 2. Inserte y asegure el contrapeso del asador y el mando del asador en la varilla del asador (Fig.
-
Page 55: Instrucciones De Uso
INSTRUCCIONES DE USO INSTALACIÓN DE GAS L.P. Las parrillas de gas que estén establecidas para funcionar con gas L.P. vienen con un conjunto de manguera de alta capacidad y regulador. ( Nota: Utilice sólo el conjunto de regulador de presión y manguera suministrado con la parrilla o el conjunto de regulador de presión y manguera de repuesto especificado por el fabricante). - Page 56 INSTRUCCIONES DE USO 6. Conecte el conjunto de la manguera y el regulador a la válvula del tanque (Ver Fig. 2). Apriete a mano la tuerca de acoplamiento rápido en sentido de las agujas del reloj para una detención total. NO utilice una llave para apretarla porque podría dañar la tuerca y provocar una condición peligrosa.
-
Page 57: Informacióndeltanquelp
INSTRUCCIONES DE USO Desconectar un tanque de Gas Propano Líquido (Gas LP) de su parrilla: Fig. 5 1. Gire los mandos de quemador y la válvula del tanque de gas LP a la posición OFF. (Gire en sentido de las agujas del reloj para cerrar.) 2. - Page 58 INSTRUCCIONES DE USO • Los cilindros deben almacenarse en el exterior, fuera del alcance de los niños y no deben almacenarse en edificios, garajes ni otras áreas cerradas. ADVERTENCIA No almacene un cilindro de gas L.P. de • Sólo deberá rellenar el tanque L.P. un proveedor repuesto bajo o cerca de la parrilla.
- Page 59 INSTRUCCIONES DE USO el cilindro de suministro de gas L.P. ha sido desconectado como si no. Por favor consulte el diagrama para la instalación correcta (ver Fig. 8 y Fig. 9). Revise visualmente la conexión entre la tubería Venturi del quemador y el orificio. Asegúrese de que la del tubo blando del tubería Venturi encaje en el orificio.
- Page 60 INSTRUCCIONES DE USO El almacenamiento en interiores de un aparato de cocina con gas para exteriores sólo está permitido si el cilindro está desconectado y extraído del aparato. Heat& Salida de ADVERTENCIA El calor y el humo salen de la Smoke calor y parte posterior de la abertura de la campana de la...
- Page 61 Comprobar la alineación de los orificios con los quemadores Los orificios pueden desplazarse durante el montaje y el movimiento. Compruebe la alineación de los orificios con los quemadores de acuerdo a las siguientes ilustraciones antes del encendido. Pasador orificio dentro del obturador de Relación entre el quemador principal y el orificio Pasador del orificio dentro del obturador de aire...
- Page 62 ENCENDIDO DEL QUEMADOR DE LA PARRILLA CERRADO Advertencia: No se incline sobre la parrilla al encenderla. Corte el suministro de LP en el cilindro cuando el aparato no esté en uso. Ilustración del Encendido del Quemador Principal: ALTO BAJO 1. Compruebe que los mandos de control estén en la posición OFF.
-
Page 63: Cuidados Ymantenimiento
INSTRUCCIONES DE USO CERRADO Si la ignición no tiene lugar en 5 segundos, gire inmediatamente el mando de control ala posición OFF. Espere 5 minutos y repita el anterior paso 4 o consulte las instrucciones de encendido con cerillos en el manual. ALTO Si el encendedor no funciona, el quemador puede encenderse sosteniendo un cerillo encendido en el... - Page 64 CUIDADOS Y MANTENIMIENTO Sin embargo, hay pasos que debe seguir para evitar romper las superficies cerámicas del quemador, lo que causaría que los quemadores fallen. Lo siguiente son las causas más comunes de rotura y los pasos a seguir para evitarlas. Los daños causados por no seguir estos pasos no están cubiertos por la garantía de su parrilla.
- Page 65 CUIDADOS Y MANTENIMIENTO Importante: No deje la parrilla en el exterior en caso de mal tiempo a menos que esté cubierta. El agua de lluvia puede entrar en la parrilla, en el carrito o en la bandeja antigoteo si se deja sin cubrir. Si la bandeja antigoteo no se limpia tras el uso y la parrilla queda al descubierto, la bandeja se llenará...
-
Page 66: Solución De Problemas
SOLUCIÓN DE PROBLEMAS Muchas soluciones dadas aquí pueden hacer más segura y más placentera su experiencia con la parrilla. Usted puede también llamar al departamento de servicio al cliente al 1-855-CHANTS-US(1-855-242-6887) de 8:00am a 5:00pm, hora Este, de lunes a viernes para pedir asistencia. - Page 67 SOLUCIÓN DE PROBLEMAS PROBLEMA POSIBLE CAUSA ACCIÓN CORRECTIVA Poco calor con el 1. Limpie los puertos de cualquier 1. Los puertos están bloqueados. mando en la obstrucción. 2. El tanque LP se ha agotado. posición 2. Rellene el tanque LP. "ALTO".
-
Page 68: Garantía
GARANTÍA La prueba de compra es necesaria para acceder este programa de garantía, que tiene efecto desde la fecha de compra. Los clientes estarán sujetos a las tarifas de piezas, envíos y manipulación si no es posible proporcionar una prueba de compra o tras expirar la garantía. Si tiene alguna pregunta o problema, puede llamar a nuestro departamento de atención al cliente al 1-855-CHANT-US(1-855-242-6887) de 8:00 AM a 5:00 PM, hora Este, de lunes a viernes, para pedir asistencia.
Need help?
Do you have a question about the BG1755B and is the answer not in the manual?
Questions and answers