
Subscribe to Our Youtube Channel
Related Manuals for Farberware FP3200FBS

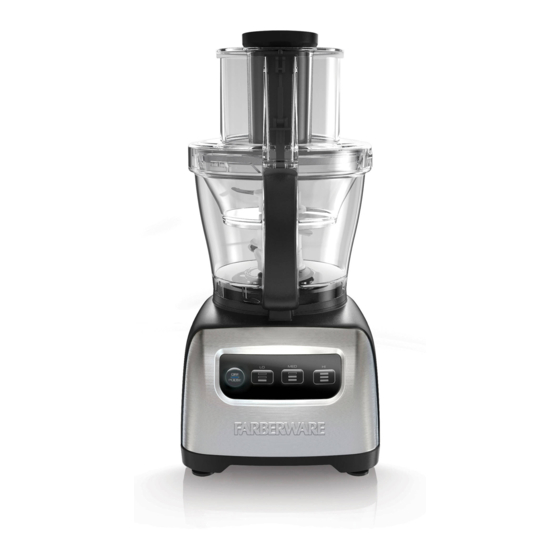
Summary of Contents for Farberware FP3200FBS
- Page 1 12-Cup Food Processor with 4-Cup Nested Workbowl Procesador de alimentos para 12 tazas con tazón de 4 tazas MODEL/MODELO FP3200FBS...
-
Page 2: Important Safeguards
PLEASE READ AND SAVE THIS USE AND CARE BOOK. IMPORTANT SAFEGUARDS. When using electrical appliances, always follow basic safety precautions to reduce the risk of fire, electric shock, and/or injury, including the following: • Read all instructions. processing to reduce the risk of severe injury to •... - Page 3 Getting To Know Your Farberware® 12-Cup Food Processor 1. Large food pusher (Part # FP3000FBS-11) 8. Small food pusher (Part # FP3000FBS-01) 2. Lid (with large feed chute) 9.
-
Page 4: How To Use
HOW TO USE This product is for household use only. GETTING STARTED • Remove all packing material, any stickers, and the plastic band around the power plug. • Remove and save literature. • Please visit www.prodprotect.com/applica to register your warranty. •... -
Page 5: Using The Feed Chute And Pushers
Note: Be sure to lock the workbowl in place before attaching the blades or discs and lid. 4. Attach your selected blade or disc to the blade shaft in the bottom of the large workbowl (instructions for individual discs/blades follow in this manual). 5. - Page 6 1. Plug in the appliance to turn it on. 2. Select low, medium or high speed depending on what task you are completing. Press and release PULSE button to pulse. 3. To stop, press OFF|PULSE. 4. Always unplug the appliance when not in use. PULSE LOW - SPEED 1 MED - SPEED 2...
- Page 7 7. When finished, press OFF|PULSE and allow the disc to stop revolving and unplug appliance before removing lid. Twist lid clockwise to unlock and remove. 8. Carefully remove slicing/shredding disc using the finger holes to lift straight up. Pull blade shaft out of the workbowl.
-
Page 8: Using The S Blade In The Large Workbowl
• To slice cooked meat, including salami and pepperoni, food should be very cold. Cut in pieces to fit feed chute and process food using firm, even pressure. • Remove the slicing/shredding disc before removing the workbowl from the processor. USING THE S BLADE IN THE LARGE WORKBOWL 1. -
Page 9: Using The Mini S Blade In The Small Workbowl
USING THE MINI S BLADE IN THE SMALL WORKBOWL 1. Lock large workbowl into position on food processor base. 2. Place blade shaft onto center post in large workbowl. 3. Place small workbowl in large workbowl, fitting the tabs on the outside of the small bowl into the notches on the large workbowl. -
Page 10: Helpful Tips When Using The Dough Blade
USING THE DOUGH BLADE Important: The dough blade can only be used with the large workbowl. Only run the processor on LOW speed when using the dough blade. 1. Lock large workbowl onto base. 2. Place dough blade on blade shaft and turn it clockwise to lock it onto bottom of shaft. -
Page 11: Care And Cleaning
• Apply light pressure on the pusher for soft foods (berries and tomatoes) and slightly more pressure for hard foods (onions and potatoes). • Do not process foods that are so frozen or hard that the tip of a knife cannot be inserted into the food. -
Page 12: Cleaning Tips
CLEANING TIPS • For quick clean up, combine 1 cup warm water and a drop of liquid dish soap in the food processor workbowl. • Cover and process on MEDIUM speed for about 30 seconds. • Discard liquid, rinse and dry parts thoroughly. Important: Do not place the processor parts in boiling liquids. -
Page 13: Troubleshooting
TROUBLESHOOTING PROBLEM SOLUTION Food Processor • Make sure the large work bowl and lid are properly aligned doesn’t run and locked in place and the large food pusher is inserted in the feed chute. • Check to make sure the food processor is plugged in. •... - Page 14 WA R R A N T Y A N D C U S TO M E R S E R V I C E I N F O R M AT I O N For support or any questions regarding your appliance, call the appropriate 800 number listed within this section.
-
Page 15: Instrucciones Importantes De Seguridad
POR FAVOR LEA ESTE INSTRUCTIVO ANTES DE USAR EL PRODUCTO. INSTRUCCIONES IMPORTANTES DE SEGURIDAD Cuando se utilizan aparatos eléctricos, siempre se debe respetar ciertas medidas de seguridad, incluyendo las siguientes: • Lea todas las instrucciones. • Nunca introduzca los alimentos con la mano. •... -
Page 16: Características De Seguridad
CONSERVE ESTAS INSTRUCCIONES Este aparato eléctrico es para uso doméstico únicamente. CARACTERÍSTICAS DE SEGURIDAD ENCHUFE POLARIZADO (Solamente CABLE ÉLECTRICO para los modelos de 120V) 1. El producto se debe de proporcionar con un cable eléctrico corto, a fin de reducir el riesgo de tropezar Este aparato cuenta con un enchufe polarizado o de enredarse en un cable más largo. - Page 17 Conozca su Procesador de Alimentos de 12 Tazas de Farberware® 1. Empujador de alimentos grande 8. Empujador de alimentos pequeño (pieza no. FP3000FBS-11) (pieza no. FP3000FBS-01) 2. Tapa (con tubo de alimentación grande) 9.
-
Page 18: Primeros Pasos
CÓMO USAR Este producto es para uso doméstico solamente. PRIMEROS PASOS • Retire todo material de empaque, cualquier etiqueta y la tira plástica alrededor del enchufe. • Retire y conserve la literatura. • Por favor, visite www.prodprotect.com/applica para registrar su garantía. •... -
Page 19: Uso De Los Controles De Velocidad
Nota: Asegúrese de asegurar el recipiente en su lugar antes de conectar las cuchillas o los discos y la tapa. 4. Conecte la cuchilla o el disco seleccionado al vástago de la cuchilla en el fondo del recipiente grande (instrucciones para discos y cuchillas individuales se encuentran a continuación en este manual). - Page 20 1. Enchufe el aparato para encenderlo. 2. Seleccione la velocidad baja, mediana o alta dependiendo de la tarea que vaya a realizar. Para utilizar la función de pulso (PULSE), presione y suelte el botón. 3. Para parar, presione apagado/pulso (OFF/PULSE). 4.
- Page 21 Nota: Ejercer presión fuerte sobre el empujador no hará el trabajo más rápido; utilice el empujador solo como una guía. Deje que el procesador hada el trabajo. 7. Cuando haya terminado, presione el botón de apagado/pulso (OFF/PULSE) y permita que el disco pare de girar, luego desenchufe el aparato antes de retirar la tapa. Gire la tapa hacia la izquierda para abrir y retirarla.
-
Page 22: Uso De La Cuchilla S En El Recipiente Grande
• Los quesos blandos o semiduros deben enfriarse bien antes de desmenuzar. Para obtener mejores resultados con los quesos suaves como el queso mozzarella, congélelo por 15 a 20 minutos antes de procesarlo. Córtelo para que se acomode en el tubo de alimentación y procéselo utilizando presión uniforme. -
Page 23: Uso De La Cuchilla S Mini En El Recipiente Pequeño
10. Para liberar el recipiente, gírelo hacia la izquierda y sáquelo de la base. 11. Cuidadosamente retire la cuchilla S, tirando del vástago de la cuchilla directo hacia arriba y vaciando el recipiente. Nota: para retirar la cuchilla S del vástago de la cuchilla, gírela hacia la izquierda y hale el vástago de la cuchilla para sacarlo del fondo. -
Page 24: Uso De La Cuchilla Para Masa
• Puede utilizar líquido caliente pero no hirviendo. • El recipiente grande tiene una capacidad de 4 tazas (32 onzas) para líquido y 10 tazas (80 onzas) para alimentos secos; el recipiente pequeño puede procesar hasta 3 tazas. USO DE LA CUCHILLA PARA MASA Importante: La cuchilla para masa sólo debe ser utilizada con el recipiente grande. -
Page 25: Consejos Generales Para Utilizar El Procesador De Alimentos
CONSEJOS GENERALES PARA UTILIZAR EL PROCESADOR DE ALIMENTOS • Organice las tareas de procesado para evitar que el recipiente se limpie varias veces; procese los alimentos secos antes que los húmedos. • El procesador será más eficiente si se llena a no más de de su capacidad completa. -
Page 26: Consejos De Limpieza
LIMPIEZA Importante: Las cuchillas están afiladas. Maneje las cuchillas y los discos cuidadosamente. • Desarme por completo las piezas del procesador antes de lavarlas. • Para facilitar la limpieza, enjuague las piezas del aparato inmediatamente después de procesar los alimentos. •... -
Page 27: Resolución De Problemas
ALMACENAMIENTO Almacene todos sus accesorios en el procesador de alimentos. (Q). 1. Asegure el recipiente grande en posición sobre la base del procesador de alimentos. 2. Cuidadosamente inserte el vástago de la cuchilla dentro de la cuchilla S. Cuando la cuchilla S llegue al fondo del vástago, gírela hacia la derecha para asegurarla. - Page 28 I N F O R M A C I Ó N D E G A R A N T Í A Y S E R V I C I O A L C L I E N T E Para servicio, reparaciones o preguntas relacionadas al producto, por favor llame al número del centro de servicio que se indica para el país donde usted compró...
- Page 29 P Ó L I Z A D E G A R A N T Í A (Válida sólo para México) DURACIÓN Rayovac de México SA de CV garantiza este producto por tres años a partir de la fecha original de compra. ¿Qué...
- Page 30 ¿ N E C E S I TA AY U D A ? Para servicio, reparaciones o preguntas relacionadas al producto, por favor llame al número del centro de servicio que se indica para el país donde usted compró su producto. NO devuélva el producto al fabricante.
- Page 31 Por favor llame al número correspondiente que aparece en la lista a continuación para solicitar que se haga efectiva la garantía y donde Ud. puede solicitar servicio, reparaciones o partes en el país donde el producto fué comprado. Servicio Técnico LRM ELECTRONICA Monroe 3351 Managua - Sinsa Altamira 1.5...
- Page 32 © 2015 Farberware Licensing Company, LLC. All Rights Reserved. Copyrights and Trademarks of Farberware Licensing Company, LLC, including FARBERWARE™ and FARBERWARE®, are used under license from Farberware Licensing Company, LLC. T22-5002716 Copyrights y marcas registradas de Farberware Licensing Company, LLC, incluyendo FARBERWARE™...
Need help?
Do you have a question about the FP3200FBS and is the answer not in the manual?
Questions and answers