Table of Contents
Advertisement
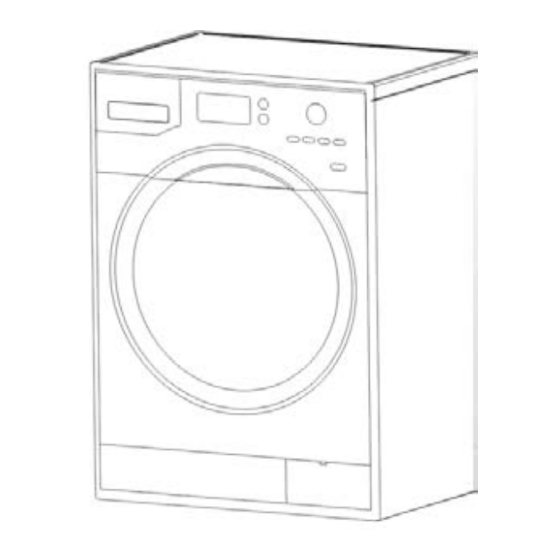
Washer/Dryer
Instruction Manual
Model number:
RHWD861400 (B)
For Customer Services & Spare Parts please call 0345 208 8750
Opening times: Monday - Friday 8am – 6pm & Saturday 9am – 1pm
www.productcareuk.com
or visit us at
IMPORTANT:
Before using your appliance, please read this
manual carefully and keep it for future reference.
Advertisement
Table of Contents
Troubleshooting

Subscribe to Our Youtube Channel
Related Manuals for Russell Hobbs RHWD861400

Summary of Contents for Russell Hobbs RHWD861400
- Page 1 Washer/Dryer Instruction Manual Model number: RHWD861400 (B) For Customer Services & Spare Parts please call 0345 208 8750 Opening times: Monday - Friday 8am – 6pm & Saturday 9am – 1pm www.productcareuk.com or visit us at IMPORTANT: Before using your appliance, please read this...
-
Page 2: Table Of Contents
Contents Safety Instructions 3 - 6 …………………………………………………… Product Fiche …………………………………………………… Savings & Efficiency Information …………………………………………………… Before using the Appliance 9 - 10 …………………………………………………… Installation …………………………………………………… 11 - 15 First Wash …………………………………………………… How to Use ………………………………………………….. 17 - 41 Program Table ……………………………………………………... -
Page 3: Safety Instructions
Safety Instructions Important note: Please read this booklet before installing and switching on this appliance. The manufacturer assumes no responsibility for incorrect installation and usage as described in this booklet. • This appliance can be used by children aged from 8 years and above and persons with reduced physical, sensory or mental capabilities or lack of experience and knowledge if they have been given supervision or instruction concerning use of the appliance in a safe way and... - Page 4 Safety Instructions • Your appliance should only be used by adults in line with the information provided in this user’s manual. • Your machine is designed to be used domestically. Commercial use will cause your warranty to be cancelled. • Anyone’s intervention to your machine except for a qualified engineer, in anyway will cause your warranty to be invalid.
-
Page 5: Child Safety
Safety Instructions As there is a drying function on your machine, make sure that materials like • stain removing chemicals you might have applied on your laundry earlier are properly rinsed and purged. There might be a risk of explosion when you run your machine with the drying function. -
Page 6: Safety Instructions
Safety Instructions Laundry must not be dried in the machine under the conditions specified below due to the risk of fire: If laundry is not washed. • If oil stains and other stains on the laundry (food oils, balms and cosmetic •... -
Page 7: Product Fiche
Product Fiche Brand: Russell Hobbs Model: RHWD861400 (B) Rated capacity: 8.0 / 6.0kg Energy efficiency class: A Washing performance class: A (A: Higher G: Lower) Energy consumption (to wash and dry a full capacity wash load at 60°C) • (washing, spinning, drying) (kWh/cycle): 5.44 Energy consumption (actual energy consumption will depend on how the appliance is used) •... -
Page 8: Savings & Efficiency Information
Savings & Efficiency Information Some important information to get more efficiency out of your appliance: The amount of laundry you put in your washing machine should not exceed • the maximum amount indicated in the programme table. By avoiding overloading, your machine should run more efficiently. See pages 42-49 Not using the pre-wash feature for normal and lightly soiled laundry •... -
Page 9: Before Using The Appliance
Before using your Appliance • Transportation screws which are located at the back of the machine, must be removed before using or running the machine. You will void the manufacturer’s guarantee if these are not removed before using or running the machine •... - Page 10 Before using your Appliance The Back of the machine Water inlet valve Transport bolts Outlet hose Power cable For Customer Services & Spare Parts please call 0345 208 8750 Opening times: Monday - Friday 8am – 6pm & Saturday 9am – 1pm www.productcareuk.com or visit us at...
-
Page 11: Installation
Installation Before operating the washing machine, remove the 4 transportation screws and rubber spacers from the back of the machine. If the screws are not removed, it may cause heavy vibration, noise and product malfunction (voiding the guarantee). Unscrew the 4 screws with a wrench, spanner or cross-tip screwdriver. Keep the four screws as they will need to be re-used if the machine has to be transported. - Page 12 Installation Feet adjustment • Adjust the level of washing machine by the adjustable feet. Please check if there is a gap between the four adjustable feet and the floor. If there is then adjust the level of the washing machine by turning the adjustable feet. Make sure that the machine does not sway and that it is completely level.
- Page 13 Installation Electrical connection • Your washing machine is set to 220-240V and 50Hz. • The mains cord of your washing machine is equipped with a specific earthed plug. This plug should always be inserted to a earthed socket of 13 amps.
- Page 14 Installation Ordinary tap (not included) Screw-shaped tap (not included) For Customer Services & Spare Parts please call 0345 208 8750 Opening times: Monday - Friday 8am – 6pm & Saturday 9am – 1pm www.productcareuk.com or visit us at...
-
Page 15: Installation
Installation Water drainage • The water outlet hose should be mounted at a height of minimum 60 cm, maximum 80 cm from the ground. • The end of the water outlet hose can be fitted directly to the drainage hole on the back side of the washer. •... -
Page 16: First Wash
First Wash Before using the appliance for laundry, ensure you run the machine on a program of 90°C (Cotton program), with detergent and without laundry. Before Use • Ensure the inlet hose is connected correctly and turn the inlet valve from its closed position to the open position. -
Page 17: How To Use
How to Use To obtain the best washing results, you must operate your appliance properly. This section gives you this important information. Preparing clothes for washing • Close zippers, snaps, and hooks to avoid snagging on other items. Remove pin, buckles, and other hard objects to avoid scratching the washer interior. - Page 18 How to Use Loading clothes for washing • Drop items into the appliance loosely. Items should move easily through wash water for the best cleaning and wrinkle-free results. • Load appliance properly. • You should not load your appliance with an amount of laundry that will exceed the maximum laundry amount specified in the washing or drying program you have chosen.
- Page 19 How to Use While in the drying process, please do not stop your appliance before • the program ends. • If you have to do this, remove all your laundry fast as it may be hot and could crease, spread them over an appropriate place immediately to allow them to cool down.
-
Page 20: Detergent Compartment
How to Use Detergent drawer general view Your appliance is designed to use both powder and liquid detergent. When using liquid detergent, use the liquid detergent apparatus supplied with the appliance. You can use liquid detergent for all programs without pre-wash. For this, inserted the liquid detergent apparatus into the slots located in the main detergent compartment. -
Page 21: Detergent Drawer Compartments
How to Use Detergent drawer compartments Main wash detergent compartment: In this compartment, use only substances like detergent (liquid or powder) or anti-lime. You can find the liquid detergent apparatus for your liquid detergent inside your machine. Slots for liquid detergent apparatus Softener, starching compartment: In this compartment, substances like softener for your laundry can be used, it is advised that you... -
Page 22: Choice Of Detergent And Placing Into The Machine
How to Use Choice of detergent and placing into the machine The amount of detergent you will put in your machine will depend on the following criteria: The amount of detergent needed is based on how dirty the laundry is. •... -
Page 23: Placing Laundry Into The Machine
How to Use Placing laundry into the machine Open the loading door of your machine. Check inside the drum of your machine. There might be laundry left inside from previous washes. If there is, empty your machine before selecting your program. Place your laundry into the machine by spreading them well. -
Page 24: Control Panel
Control Panel Detergent Draw Program knob: You may select the programme you wish to use via the program knob. You may set the program selection operation by rotating the programme knob in both directions. Ensure that the programme knob is exactly on the programme you want to select. - Page 25 How to Use Main symbol explanations Start/Standby symbol Doorlock active/ Door lock not active Washing Programme remaining duration and delayed start remaining duration Delayed Start symbol Extra rinsing and anti-allergic auxiliary function symbol Pre-washing indicator symbol Pump malfunction symbol Water cut off malfunction symbol Stain level symbol Spin speed indicator symbol Economic washing temperature indicator symbol...
- Page 26 How to Use Auxiliary Functions Before starting the program, you can optionally select an auxiliary function. Press the button of the auxiliary function you would like to select. • If auxiliary function symbol flashes continuously on the electronic display, • the auxiliary function you have selected will be activated.
- Page 27 How to Use Temperature selection You can select the washing water temperature with the washing water temperature adjustment button. Whenever you select a new programme, the maximum washing water temperature is shown on the washing water temperature display. You can gradually decrease the washing water temperature between the maximum temperature and cold washing (- -) by pressing the washing water temperature...
- Page 28 How to Use Spin speed selection You can select the spin speed for your laundry via the spin speed setting button. When you select a new programme, the default spin speed will be displayed on the display. You can gradually reduce or increase the spin speed between cancel spinning (-) option through to the maximum spin speed.
- Page 29 How to Use Auxiliary function for delay timer By using this auxiliary function, you can Delay the start of your wash by 30 minutes to 23 hours. To use auxiliary function of delay timer: Press the time delay button once. •...
- Page 30 How to Use Pre-wash function You can give your heavily soiled laundry a pre- wash before the main wash using this function. When using this function, you should put detergent in the front washing compartment of the detergent drawer. Touch the symbol button to activate the Pre-wash additional function.
-
Page 31: Extra Rinse Function
How to Use Extra rinse function You can add an additional rinse or rinses to your laundry by using this function. Your machine offers you 3 rinsing options for this additional feature. One additional rinse is made at the end of washing. : Two additional rinses are made at the end of washing. - Page 32 How to Use Stain level selection You can change the wash settings according to how dirty your laundry is and have the laundry washed in less or more time, lower or higher temperature. The stain levels are automatically set in certain programmes.
- Page 33 How to Use PROGRAMMES DIRTINESS FACTORY SELECTABLE LEVELS SELECTION PRESET Cotton Dirty Very dirty Less dirty Cotton eco Dirty Very dirty Less dirty *Cotton 60 e Dirty Very dirty Less dirty *Cotton 20 e Less dirty Synthetics Very dirty Less dirty Dirty Wool Less dirty...
- Page 34 How to Use Drying level selection: If you would like to dry your laundry after washing. You can select the drying level you desire by touching the drying level selection button once you have selected your washing programme, prior to starting the washing programme. ”, Level 2 “...
- Page 35 How to Use If you want to apply duration drying to your laundry at the end of the washing: You can select the drying duration you want by touching the level-drying • button. When you touch the level-drying button, the screen of your machine will •...
- Page 36 How to Use Level-drying selection: Refer to the selectability chart for level and duration drying. Programs Dry option Drying Factory Selectable Dry Levels profile Default Cotton Cotton Dry Level 1 Level 2 Level 3 Cotton eco Cotton Dry Level 1 Level 2 Level 3 Eco 20°C...
- Page 37 How to Use Table: Recomended drying levels according to load amount 1 - 2 kg 3 - 4 kg 5 - 6 kg Dry Level 1 Dry Level 2 Dry Level 3 Child Lock To avoid the programme cycle from being affected if buttons are pressed or the program dial is turned when performing a washing operation, a child lock is available.
- Page 38 How to Use Cancelling Programme If you want to cancel any programme running: Switch the programme knob to the “Stop” position. Your machine will stop the washing operation and the programme will be cancelled. To get rid of the water accumulated in the machine switch the programme knob to any programme.
- Page 39 How to Use Finishing Programme Your machine will stop by itself as soon as the programme you have selected finishes. - “END” will be displayed on the display for 2 minutes. Door lock open symbol shall be displayed on the screen. You can open the machine’s door and remove the laundry after 2 •...
- Page 40 How to Use WARNING SYMBOLS; WARNING OF WATER CUT-OFF / LOW MAINS WATER PRESSURE If symbol flashes on the electronic display: Water faucet may be closed. Check. • Mains water may be cut-off. Check. If so, switch the programme knob to •...
- Page 41 How to Use WARNING SYMBOLS; WARNING OF CLOGGED PUMP FILTER If symbol flashes on the electronic display: Pump filter may be clogged. Clean the pump filter. (*) • Discharging hose may be clogged or twisted. Check the • discharging hose. Warning of clogged pump filter...
-
Page 42: Program Table
Program Table Important note: Maximum loading capacity may vary based on the laundry type you wash, degree of contamination and the program you have chosen. Do not exceed maximum dry loading capacity indicated in the program table for washing programs. The following tables of laundry weights should be used as an indication of what you are loading into the machine. -
Page 43: Cotton Eco
Program Table COTTON ECO Washing temperature (℃ ) Maximum washing / drying capacity (kg) 8.0 / 6.0 Detergent compartment Programme duration (min) Cotton and linen textile (Underwear, bed sheet, Laundry type / Descriptions table cloth). Towel maximum 4.0 kg. ECO 20 ℃ Washing temperature (℃... - Page 44 Program Table SYNTHETICS Washing temperature (℃ ) Maximum washing / drying capacity (kg) 3.5 / 3.5 Detergent compartment Programme duration (min) Synthetic and synthetic mix textiles (synthetic content shirt, Laundry type / Descriptions Blouse, socks etc.). WOOL Washing temperature (℃ ) Maximum washing (kg) Detergent compartment Programme duration (min)
- Page 45 Program Table DUVET Washing temperature (℃ ) Maximum washing/drying capacity (kg) Detergent compartment Programme duration (min) You can wash your fibre duvet that have machine washable label Laundry type / Descriptions with this programme. RINSE Washing temperature (℃ ) Maximum washing/drying capacity (kg) 8.0 / 6.0 Detergent compartment Programme duration (min)
- Page 46 Program Table ANTI-ALLERGY Washing temperature (℃ ) Maximum washing / drying capacity (kg) 4.0 / 4.0 Detergent compartment Programme duration (min) This programme can be used for washing baby wear and laundry Laundry type / Descriptions for persons with allergies. SPIN Washing temperature (℃...
- Page 47 Program Table RAPID 15 MIN. Washing temperature (℃ ) Maximum washing / drying capacity (kg) 2.0 / 2.0 Detergent compartment Programme duration (min) You can wash your less dirty, cotton, coloured and linen textiles on this programme. Note: As the washing period is short, less Laundry type / Descriptions detergent is required for this programme compared to other programmes.
-
Page 48: Cotton Dry
Program Table GENTLE DRY Washing temperature (℃ ) Maximum drying capacity (kg) 3.5 kg Detergent compartment Programme duration (min) Laundry type / Descriptions Gentle / Delicate laundry with machine dryable label. COTTON DRY Washing temperature (℃ ) Maximum drying capacity (kg) Detergent compartment Programme duration (min) Laundry type / Descriptions... - Page 49 Program Table QUICK WASH & DRY Washing temperature (℃ ) Maximum washing/drying capacity (kg) 0.5 kg (3 shirts) (33 minutes) Detergent compartment Programme duration (min) Cotton, coloured and linen laundry with machine dryable label. Note: It determines the duration of the programme itself Laundry type / Descriptions according to the amount of laundry you will load into the machine.
-
Page 50: Trouble Shooting
Trouble Shooting All repairs to your machine should be carried out by a qualified engineer or contact • Product Care on 0345 208 8750. Before contacting a qualified engineer or Product Care, please see if the problem your machine • has developed can be solved with the help of the below: Fault Possible cause... - Page 51 Trouble Shooting Fault Possible cause Removing methods Your appliance does Water tap has been turned off. Turn the faucet on. • • not fill with water. Water inlet hose may be twisted. Check water inlet hose and • • untwist. Water inlet hose clogged.
-
Page 52: Trouble Shooting
Trouble Shooting Fault Possible cause Removing methods As soon as the The end of the water drain hose is too Set the water drain hose to an • • appliance fills with low for the machine. appropriate height. See page water, water discharges. -
Page 53: Error Codes
Error Codes Display Description Solution The door of your machine is left open. Close the machine door. • If the problem persists, unplug your machine, turn off your tap and contact Customer Services on 0345 208 8750 Water cut-off or low mains water Water tap may be closed. -
Page 54: Automatic Fault Warnings
AUTOMATIC FAULT WARNINGS AND WHAT TO BE DONE FAULT POSSIBLE CAUSE WHAT TO DO Water cut-off or low mains Water faucet may be closed. Check. • water pressure. Mains water may be cut-off. • Check. If so, switch the programme knob to •... -
Page 55: Maintenance
Maintenance The correct care of your appliance can extend its life. This section explains how to care for your washer properly and safely. When cleaning your machine, ensure that the machine is unplugged and the water supply is closed off. Cleaning your Machine Exterior Wipe up detergent, bleach and other spills with a soft, damp cloth or... - Page 56 Maintenance Non-use or vacation care Operate your washer only when you are at home. If you are on vacation or don’t use your washer for an extended period of time, you should: • Unplug the power supply cord or turn off electrical power to the washer. •...
- Page 57 Maintenance • Please Note: Unplug the appliance before cleaning the filter for your own safety . PUMP FILTER • A filter system which avoids threads remaining from your laundries and tiny materials from entering into the pump during water discharging operation carried out by your machine after completing washing so prolonging the lifecycle of your pump is available.
- Page 58 Maintenance PUMP FILTER Clean the foreign materials in the filter with a brush. • After cleaning the filter, fit the filter cover and tighten it • by rotating it in clockwise direction. While closing the pump cover, ensure that the parts on •...
- Page 59 Maintenance DETERGENT DRAWER Your detergents may deposit residue in the detergent drawer and housing over time. To clean the residue formed, remove the detergent drawer from the detergent housing. To eject the detergent drawer: • Pull the detergent drawer up to the end. Press down on the release lever and pull the draw.
- Page 60 Maintenance Flush stopper • Remove the detergent drawer. • Disassemble the flush stopper and clean the softener residues completely. • Refit the flush stopper after cleaning. • Check that the flush stopper is correctly positioned after replacing. For Customer Services & Spare Parts please call 0345 208 8750 Opening times: Monday - Friday 8am –...
-
Page 61: Stain Removal Information
Stain Removal Information Fruit: Stretch the stained area and pour on cold water. Apply glycerine and wipe over the stain. Wait 1 – 2 hours and rinse after wiping the stained area with a few drops of white vinegar. Grass stain: Rub over the stained area with detergent before washing. - Page 62 Stain Removal Information Alcoholic drinks: Wash the stained area under cold water, wipe with glycerine, then rinse with a solution of water and white vinegar. Shoe polish: Scratch out the stain taking care not to damage the material, rub over the stained area with a solution of detergent and water and rinse.
- Page 63 Stain Removal Information Blood stain: Leave to soak in cold water for about 30 minutes and hand wash with detergent. Cream, ice cream and milk: Leave to soak in cold water for about 30 minutes and hand wash with detergent. Mould: Clean the stained area as soon as possible and hand wash with detergent.
-
Page 64: Specification
Specification Maximum washing capacity (dry laundry) (kg) * Maximum drying capacity (kg) Spin speed (rev / min) 1400 Number of programs Operating voltage / frequency (V/Hz) 220-240 / 50 Water pressure (Mpa) Maximum:1 Minimum:0.1 Dimensions (HxWxL) (mm) 845x597x582 * Unwashed dry laundry must not be dried in your machine. Energy consumption (washing, spinning, drying) (kWh/cycle) 5,44 1,06... -
Page 65: Connection To The Mains Supply
Connection to the Mains Supply For UK use only – Plug fitting details (where applicable): As the colours of the wires in the mains lead of this appliance may not correspond with the coloured markings identifying the terminals in your plug, proceed as follows: The GREEN/YELLOW wire is the EARTH and must be connected to the terminal which is marked with the letter E or by the earth symbol or coloured... -
Page 66: Warranty
Warranty This product is guaranteed for 12 months from the date of the original purchase. If any defect arises due to faulty materials or workmanship the faulty product must be returned to the place of purchase. Refund or replacement is at the discretion of the retailer. The following conditions apply: •... -
Page 67: Notes
Notes: For Customer Services & Spare Parts please call 0345 208 8750 Opening times: Monday - Friday 8am – 6pm & Saturday 9am – 1pm www.productcareuk.com or visit us at... - Page 68 For Customer Services & Spare Parts please call 0345 208 8750 Opening times: Monday – Friday 8am – 6pm & Saturday 9am – 1pm or visit us at www.productcareuk.com Revision 1A This symbol is known as the 'Crossed-out wheelie bin Symbol'. When this symbol is marked on a product/batteries, it means that the product/batteries should not be disposed of with your general household waste.
Need help?
Do you have a question about the RHWD861400 and is the answer not in the manual?
Questions and answers