Table of Contents
Advertisement
Quick Links
Advertisement
Table of Contents

Related Manuals for AudioArts Engineering D-75


Summary of Contents for AudioArts Engineering D-75
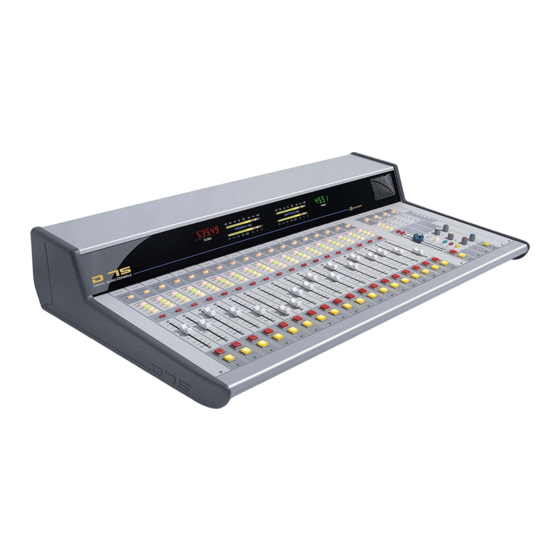
- Page 1 D-75 Digital Audio Console ECHNICAL ANUAL September 2004...
- Page 2 D-75 Digital Audio Console Technical Manual - 1st Edition D-75 Digital Audio Console Technical Manual - 1st Edition D-75 Digital Audio Console Technical Manual - 1st Edition D-75 Digital Audio Console Technical Manual - 1st Edition D-75 Digital Audio Console Technical Manual - 1st Edition ®...
- Page 3 Audioarts could void the user's authority to operate this equipment. R R R R R M M M M M ! ! ! ! ! D-75 / Ap 2008 E A D E A D E E E E E...
- Page 4 Again, to avoid ANY possibility of this damage, whenever possible we strongly recommend powering down the console before replacing any modules. R R R R R M M M M M ! ! ! ! ! D-75 / Sep 2004 E E E E E...
- Page 5 IMPORTANT! D-75 A D-75 A udio Levels D-75 A udio Levels udio Levels udio Levels D-75 A D-75 A udio Levels General General General General General All professional digital audio broadcast consoles manufactured by Wheatstone are hybrid in nature. That is, they allow the user to connect both analog and digital domain sources and provide both analog and digital outputs.
- Page 6 Since the D-75 console meters are true digital reading meters, they will always show the console's digital levels, and whether there are any "overs"...
-
Page 7: Table Of Contents
Unbalanced Connections (analog audio) ............... 1-7 Modules Layout ................1-7 Input Daughter Cards Installation .......... 1-7a Hand Crimp Tool Wiring Insrtuctions ........1-8 D-75-26 Modules Layout Drawing ........... 1-10 D-75-18 Modules Layout Drawing ........... 1-11 Chapter 2 - Quad Mic Preamp (QMP-4) Overview ..................2-2 Internal Programming Options .......... - Page 8 Cue Interrupt ......................5-3 CR/Cue Mute ......................5-3 On-Air Tally Follows Program ................... 5-3 Hook-ups ..................5-4 Left DB-25 “B” Connector — Audio ................5-4 Right DB-25 “A” Connector — Audio and On-Air Tally ..........5-4 page Contents – 2 D-75 / Sep 2004...
- Page 9 Left DB-25 “B” Connector — Audio Outputs ............8-3 Right DB-25 “A” Connector — Audio Inputs ............. 8-3 DB Connector Pinout Drawing ............. 8-5 Line Preselect Module Signal Flow ..........8-6 page Contents – 3 D-75 / Sep 2004 D-75 / Jan 2008...
- Page 10 ......................11-11 load sheet ......................11-14 Control Room Module (CR-75) schematic ......................11-15 load sheet ......................11-19 Studio Control Module (SC-75) schematic ......................11-20 load sheet ......................11-24 page Contents – 4 D-75 / Sep 2004 D-75 / Nov 2009...
- Page 11 ......................11-39 load sheet ......................11-41 Processor Board (PR-75) load sheet ......................11-42 Power Supply (SPS-100) schematic ......................11-43 load sheet ......................11-44 Appendix Replacement Parts List ............. A-2 page Contents – 5 D-75 / Sep 2004 D-75 / Nov 2007...
- Page 12 Unbalanced Connections (analog audio) ............... 1-7 Modules Layout ................1-7 Input Daughter Cards Installation .......... 1-7a Hand Crimp Tool Wiring Insrtuctions ........1-8 D-75-26 Modules Layout Drawing ........... 1-10 D-75-18 Modules Layout Drawing ........... 1-11 page 1 – 1 D-75 / Sep 2004...
-
Page 13: Unpacking The Console
The hinged meterbridge will require 14” above the countertop surface and 4 3/4” behind the rear meterbridge to open freely. Do not connect the D-75 console to its power supply (and do not connect the power supply to the AC power line) until instructed to do 7.6341... -
Page 14: System Ground
The first step is to ground the console. Note that as supplied from the factory, console rackmount power supply common, audio ground, and the D-75 mainframe are connected together at the console, but are NOT connected to electrical ground and the chassis of the power supply. - Page 15 10-32 screws and insulating washers between rails and faceplates. Once the system is properly grounded, proceed with the console power supply installation and connection (next section). page 1 – 4 D-75 / Sep 2004 D-75 / Nov 2005...
-
Page 16: Power Supply
Rear view of the SPS-100 rackmount power supply The D-75 console is powered by an Audioarts Model SPS-100 rackmount power supply. This unit occupies two 19” wide rack spaces (total height 3-1/2”). Convection cooled, it requires ample ventilation space above and below it. -
Page 17: Energizing
Audio and Control Wiring All audio and control I/O connections to the D-75 console are made through multipin DB-25 connectors located on the top of each module. The factory supplied hand crimping tool is used for all I/O wiring connections to and from the console (see instruction on the page 1-8). -
Page 18: Unbalanced Connections (Analog Audio)
HIGH to feed your unbalanced equipment.) Modules Layout The D-75 console’s mainframe comes supplied with 20 (for 26 pos. frame) or 12 (for 18 pos. frame) input modules along with an output module, a control room module, and a studio control module. Each module type has its assigned slot (see drawings on pages 1-10 and 1-11). -
Page 19: Input Daughter Cards Installation
ON position for a SPDIF input or to the OFF position for an AES input. In addition to using the switch, the input must be wired correctly — see Digital Audio Connections on page 1-6 and 1-7. page 1 – 10 page 1 – 7a D-75 / Sep 2004 D-75 / Apr 2008... -
Page 20: Hand Crimp Tool Wiring Instructions
(see next page). Note that metallized plastic hoods for each connector are also supplied with the console. (4) Final step: jaws fully closed; the insulation tabs have been crimped. page 1 – 8 D-75 / Sep 2004... - Page 21 Then pull out the terminal pin from Housing. It should never be necessary to discard a con- nector due to a wiring error. (5) Place extractor tip over pin terminal to be removed. page 1 – 9 D-75 / Sep 2004...
- Page 22 2. MASTER OUTPUT, CONTROL ROOM, STUDIO CONTROL AND OPTIONAL SUPERPHONE MODULES HAVE THEIR DEDICATED SLOTS (AS SHOWN). 3. LAST TWO SLOTS AT THE RIGHT END OF THE FRAME SHOULD BE USED FOR OPTIONAL LINE PRESELECT AND TAPE REMOTE MODULES. D-75-26 CONSOLE - MODULES LAYOUT page 1 – 10...
- Page 23 2. MASTER OUTPUT, CONTROL ROOM, STUDIO CONTROL AND OPTIONAL SUPERPHONE MODULES HAVE THEIR DEDICATED SLOTS (AS SHOWN). 3. LAST TWO SLOTS AT THE RIGHT END OF THE FRAME SHOULD BE USED FOR OPTIONAL LINE PRESELECT AND TAPE REMOTE MODULES. D-75-18 CONSOLE - MODULES LAYOUT page 1 – 11...
- Page 24 Hook-ups ..................2-3 Audio Input Connections ..................2-3 Audio Output Connections ..................2-4 Power Connections ....................2-5 Plug Terminal Pinout Drawing ..........2-6 Installing the Optional Second QMP-4 Mic Preamp ....2-7 page 2 – 1 D-75 / Sep 2004...
-
Page 25: Chapter 2 - Quad Mic Preamp (Qmp-4)
The IN-75 must be provided with an ADC-75 daughter card. Phantom power is available at each input port; it may be selectively activated by a dipswitch SW1 (the factory default is OFF). page 2 – 2 D-75 / Sep 2004... -
Page 26: Internal Programming Options
Pin 3 – Mic 1 In HI Pin 4 – Mic 2 In SH Pin 5 – Mic 2 In LO Typical 12-position Pin 6 – Mic 2 In HI plug terminal page 2 – 3 D-75 / Sep 2004 D-75 / Aug 2006... -
Page 27: Audio Output Connections
Pin 23 - Line A Rt In LO Pin 24 - Line A Lt In HI Pin 10 – Mic 1 Out HI wires to Pin 10 - Line A Rt In HI page 2 – 4 D-75 / Sep 2004... -
Page 28: Power Connections
Pin 4 – +Phantom V Pin 5 – +V In Pin 6 – +V In Pin 7 – -V In Pin 8 – -V In Pin 9 – Analog Ground Pin 10 – Analog Ground page 2 – 5 D-75 / Sep 2004... - Page 29 MIC 3 OUT LO OUTPUT PORTS MIC 3 OUT SH ANALOG MIC 2 OUT HI MIC 2 OUT LO MIC 2 OUT SH MIC 1 OUT HI MIC 1 OUT LO MIC 1 OUT SH page 2 – 6 D-75 / Sep 2004...
-
Page 30: Installing The Optional Second Qmp-4 Mic Preamp
• connect the required audio wiring to the 12-pin plug terminals on the QMP-4 card, referring to the “Hook-Ups” chart (see pages 2-3 - 2-5); • close the meterbridge. This completes the optional QMP-4 installation procedure. page 2 – 7 D-75 / Sep 2004 D-75 / May 2008... -
Page 31: Module Overview
Talkback to Control Room ................. 3-6 On Tally ......................3-6 Tally B ........................ 3-6 DB Connector Pinout Drawings Analog Inputs - ADC-75 ..................3-7 Digital Inputs - SRC-75 ................... 3-8 Stereo Line Input Signal Flow ........... 3-9 page 3 – 1 D-75 / Sep 2004... -
Page 32: Chapter 3 - Stereo Line Input (In-75)
All audio and control input and output signals are made via the multi- pin DB-25 connector mounted on the top of the module and located underneath the hinged meterbridge. page 3 – 2 D-75 / Feb 2005 D-75 / Sep 2004... -
Page 33: Internal Programming Options
Mutes An IN-75 module can be programmed to mute speakers when the channel is ON. The D-75 console has two mute control lines: control room and studio. Each of these is activated by an A input source. SW1 position 6 mutes the control room when source A is ON... -
Page 34: Attenuation
Pin 9 – Line B Lt In LO Pin 8 – Line B Rt In SH Pin 7 – Line B Rt In HI Typical DB-25 Pin 20 – Line B Rt In LO connector page 3 – 4 D-75 / Sep 2004 D-75 / Jan 2014... -
Page 35: Control Connections
Pin 1 (Cough) and Digital Ground (Pin 19). This will turn the module OFF. Note this is a non-latching mode; the module will turn ON again as soon as the closure stops. (User-supplied momentary contact switch required.) page 3 – 5 D-75 / Jan 2008 D-75 / Sep 2004... -
Page 36: Ready
Note that this output always functions regardless of the REM B setting on the PR-75. However, you will most likely want to enable B remote logic if you are using the B Tally. page 3 – 6 D-75 / Sep 2004 D-75 / Jan 2008... -
Page 37: Analog Inputs - Adc-75
LINE B RT IN LO LINE B RT IN HI LOGIC DIGITAL GROUND TALLY B +5V DIGITAL START/STOP COMMON TB TO CR STOP REMOTE OFF START ON TALLY READY REMOTE ON COUGH page 3 – 7 D-75 / Feb 2005 D-75 / Sep 2004... -
Page 38: Digital Inputs - Src-75
AES B IN LO AES B IN HI I/O PORTS DIGITAL LOGIC DIGITAL GROUND TALLY B +5V DIGITAL START/STOP COMMON TB TO CR STOP REMOTE OFF START ON TALLY READY REMOTE ON COUGH page 3 – 8 D-75 / Sep 2004... - Page 39 Analog TRIM MIC PREAMP DAUGHTER CARD SAMPLE Digital RATE INPUT RECEIVER Digital CONVERTER (SRC) STEREO LINE INPUT SRC-75 ANALOG OR DIGITAL DAUGHTER CARD IN-75 Stereo Line Input Module - Signal Flow Diagram page 3 - 9 D-75 / Jan 2008...
- Page 40 Left DB-25 “B” Connector — Digital Audio Outputs, External Analog Inputs ..4-4 Right DB-25 “A” Connector — Analog Audio Outputs ........... 4-4 DB Connector Pinout Drawing ..........4-6 Output Module Signal Flow ............4-7 page 4 – 1 D-75 /Sep 2004...
-
Page 41: Chapter 4 - Output Module (Om-75)
Auxiliary, and Utility outputs. All analog outputs are calibrated with recessed front panel multi-turn trimpots. The D-75 console has two pairs of left-right VU meters, PGM and SWT (switched), located on the console’s meterbridge. The switched meter follows the SELECT switching, allowing the console operator to... -
Page 42: Internal Programming Options
SW4 on the PR-75 board to correctly embed the sample rate information in the output AES data stream. Table 2 shows the dipswitch settings. TABLE 2 FREQUENCY 48 kHz *default setting *44.1 kHz 32 kHz page 4 – 3 D-75 /Nov 2009 D-75 /Sep 2004... -
Page 43: Hook-Ups
Pin 10 – PGM Rt Out HI Pin 23 – PGM Rt Out LO Pin 22 – AUD Lt Out SH Pin 21 – AUD Lt Out HI Pin 9 – AUD Lt Out LO page 4 – 4 D-75 /Sep 2004... - Page 44 Pin 15 – UTIL Lt Out HI Pin 3 – UTIL Lt Out LO Pin 2 – UTIL Rt Out SH Pin 1 – UTIL Rt Out HI Pin 14 – UTIL Rt Out LO Typical DB-25 connector page 4 – 5 D-75 /Sep 2004...
- Page 45 AUX RT OUT SH AUX RT OUT LO AUX RT OUT HI UTIL LT OUT SH UTIL LT OUT LO UTIL LT OUT HI UTIL RT OUT SH UTIL RT OUT LO UTIL RT OUT HI page 4 – 6 D-75 /Sep 2004...
-
Page 46: Output Module Signal Flow
UTIL EXT2 UTIL MONITOR CUE LT MONITOR UTIL CUE LOGIC CUE RT MONITOR FROM CONSOLE CONTROL BUSSES OM-75 FRONT PANEL TEL MONITOR TEL MONITOR SWITCHES OM-75 Output Module - Signal Flow Diagram page 4 - 7 D-75 / Sep 2004... -
Page 47: Db Connector Pinout Drawing
Left DB-25 “B” Connector — Audio ................5-4 Right DB-25 “A” Connector — Audio and On-Air Tally ..........5-4 DB Connector Pinout Drawing ............. 5-5 Control Room Module Signal Flow ..........5-6 page 5 – 1 D-75 / Sep 2004... -
Page 48: Chapter 5 - Control Room Module (Cr-75)
Control Room Module (CR-75) Module Overview The CR-75 module is the D-75 console operator’s monitor module. It allows the operator to listen to the console’s four stereo outputs (PGM, AUD, AUX, & UTIL) and two external stereo line level inputs brought directly into the module. -
Page 49: Internal Programming Options
PGM assign dependence (the module must still have CR mute enabled and be turned on to activate the air tally). SW1 position 6 defeats the air tally dependence on PGM assign page 5 – 3 D-75 / Sep 2004... -
Page 50: Hook-Ups
Pin 5 – CR Rt Out SH Pin 4 – CR Rt Out HI Pin 17 – CR Rt Out LO Pin 2 – SH Pin 1 – On-Air Relay N.O. Pin 14 – On-Air Relay COM page 5 – 4 D-75 / Sep 2004... - Page 51 CR LT OUT SH CR LT OUT LO CR LT OUT HI CR RT OUT SH CR RT OUT LO CR RT OUT HI AUDIO GROUND AUDIO GROUND ON-AIR RELAY COM ON-AIR RELAY N.O. page 5 – 5 D-75 / Sep 2004...
-
Page 52: Control Room Module Signal Flow
SW1 POS 2 INTERRUPT CR OUT MONO FET SW CUE TO UTIL LT CR SW1 POS 5 CONTROL CUE TO RT CR ROOM SW1 POS 4 CR-75 Control Room Module - Signal Flow Diagram page 5 - 6 D-75 / Sep 2004... - Page 53 Left DB-25 “B” Connector — Audio ................ 6-4 Right DB-25 “A” Connector — Audio and Tally 2 ........... 6-4 DB Connector Pinout Drawing ..........6-5 Studio Control Module Signal Flow .......... 6-6 page 6 – 1 D-75 / Sep 2004...
-
Page 54: Chapter 6 - Studio Control Module (Sc-75)
2 relay. All audio connections are stereo line level analog signals. A pinout drawing on page 6-5 shows all wiring connections at a glance. page 6 – 2 D-75 / Sep 2004... -
Page 55: Internal Programming Options
(that is, the main studio out will always mute, never dim when studio pre mute is activated). SW1 position 4 causes studio pre to mute page 6 – 3 D-75 / Sep 2004 D-75 / Dec 2008... -
Page 56: Hook-Ups
Pin 4 – ST Rt Out HI Pin 17 – ST Rt Out LO Pin 2 – SH Pin 1 – Tally 2 Relay N.O. Pin 14 – Tally 2 Relay COM page 6 – 4 D-75 / Sep 2004... - Page 57 ST LT OUT LO ST LT OUT HI ST RT OUT SH ST RT OUT LO ST RT OUT HI AUDIO GROUND AUDIO GROUND TALLY 2 RELAY COM TALLY 2 RELAY N.O. page 6 – 5 D-75 / Sep 2004...
-
Page 58: Studio Control Module Signal Flow
LOW VOLTAGE TALLY 2 RELAY CONTACTS FROM CONSOLE CONTROL LOGIC EXT 1 MUTE INTRPT ST OUT EXT 2 ST PRE OUT EXT1 EXT2 UTIL UTIL STUDIO SC-75 Studio Control Module - Signal Flow Diagram page 6 - 6 D-75/Sep 2004... -
Page 59: External Start & Stop
Left DB-25 “B” Connector—Audio & Control ............7-5 External START & STOP .................. 7-5 Right DB-25 “A” Connector—Audio ................ 7-6 DB Connector Pinout Drawing ..........7-7 Superphone Input Module Signal Flow ........7-8 page 7 – 1 D-75 / Sep 2004... -
Page 60: Module Overview
DJ microphone QMP-4 channel both to the IN-75 input and the SP-75 external input. If the SP-75 dipswitch is set to enable the external input the DJ’s voice is always sent to the callers. page 7 – 2 D-75 / Mar 2009 D-75 / Sep 2004... -
Page 61: Automatic Features
SW1 position 6 mutes the control room and activates the air tally when the phone module is ON* *factory default settings SW1 position 5 mutes studio when the phone module is ON page 7 – 3 D-75 / Mar 2009 D-75 / Sep 2004... -
Page 62: Timer Restart
CR9 – sets the module’s output level to Hybrid 1 CR10 – sets the module’s output level to Hybrid 2 The first two trimpots are accessible through holes in the module faceplate. page 7 – 4 D-75 / Sep 2004... -
Page 63: Hook-Ups
EXTERNAL STOP — Hook up the remote machine’s Stop control pins to the SP-75 module’s DB-25 connector control pins: for STOP wire to pins 3 (16) and 4 (17). page 7 – 5 D-75 / Sep 2004 D-76 / June 2015... -
Page 64: Right Db-25 "A" Connector-Audio
Pin 21 – Caller 1 In HI Pin 9 – Caller 1 In LO Typical DB-25 Pin 8 – Caller 2 In SH connector Pin 7 – Caller 2 In HI Pin 20 – Caller 2 In LO page 7 – 6 D-75 / Sep 2004... - Page 65 CALLER 1 IN LO CALLER 1 IN HI CALLER 2 IN SH I/O PORTS CALLER 2 IN LO (Right DB-25"A") CALLER 2 IN HI AUDIO GROUND AUDIO GROUND AUDIO GROUND AUDIO GROUND page 7 – 7 D-75 / Sep 2004...
- Page 66 ENABLE MICS FET SW TRIM TEL MONITOR SUM OF CALLERS TRIM TO HYBRID 1 TB TO CALLER TB MONITOR TRIM TO HYBRID 2 SUPERPHONE INPUT SP-75 Superphone Module - Signal Flow Diagram page 7 - 8 D-75 / Sep 2004...
- Page 67 Left DB-25 “B” Connector — Audio Inputs ................. 8-3 Left DB-25 “B” Connector — Audio Outputs ..............8-3 Right DB-25 “A” Connector — Audio Inputs ............... 8-3 DB Connector Pinout Drawing ............8-5 Line Preselect Module Signal Flow ........... 8-6 page 8 – 1 D-75 / Sep 2004...
-
Page 68: Module Overview
All audio input and output signals are made via two DB-25 multi-pin connectors mounted at the top of the module and located underneath the hinged meterbridge. Internal Programming Options There are no internal programming options on the LS-75 module. page 8 – 2 D-75 / Sep 2004... -
Page 69: Hook-Ups
Pin 6 – Line 3 Lt In LO Pin 5 – Line 3 Rt In SH Pin 4 – Line 3 Rt In HI Pin 17 – Line 3 Rt In LO page 8 – 3 D-75 / Sep 2004 D-75 / Jan 2010... - Page 70 Pin 3 – Line 4 Lt In LO Pin 2 – Line 4 Rt In SH Pin 1 – Line 4 Rt In HI Pin 14 – Line 4 Rt In LO Typical DB-25 connector page 8 – 4 D-75 / Sep 2004 D-75 / Jan 2010...
- Page 71 LINE 3 RT IN HI LINE 4 LT IN SH LINE 4 LT IN LO LINE 4 LT IN HI LINE 4 RT IN SH LINE 4 RT IN LO LINE 4 RT IN HI page 8 – 5 D-75 / Sep 2004...
-
Page 72: Line Preselect Module Signal Flow
LINE 1 LINE 2 LINE 3 LINE 4 LINE 5 LINE 6 LINE PRESELECT MODULE LS-75 Line Preselect Module (analog) - Signal Flow Diagram page 8 - 6 D-75 / Sep 2004... -
Page 73: Module Overview
T A P E R E M O T E M O D U L E Tape Remote Module (TR-75; optional) Chapter Contents Module Overview ................. 9-2 DB Connector Pinout Drawings START/STOP Function Control I/O ..................9-3 Full-Function Control I/O ....................9-4 page 9 – 1 D-75 / Sep 2004... - Page 74 STOP, REC, and PLAY buttons for a single machine. LED indicators in each switch function as tallyback indicators and are powered by the source machine. There are no internal connections between the tape remote panel and the console’s power rails. page 9 – 2 D-75 / Sep 2004...
- Page 75 SW3 (START) N.O. SW3 (START) LED- SW3 (START) LED+ SW2 (STOP) COMMON SW2 (STOP) N.O SW2 (STOP) LED- SW2 (STOP) LED+ SW1 (START) COMMON SW1 (START) N.O. SW1 (START) LED- SW1 (START) LED+ page 9 – 3 D-75 / Sep 2004...
- Page 76 SW3 (REW) N.O. SW3 (REW) LED- SW3 (REW) LED+ SW2 (FF) COMMON SW2 (FF) N.O SW2 (FF) LED- SW2 (FF) LED+ SW1 (RTZ) COMMON SW1 (RTZ) N.O. SW1 (RTZ) LED- SW1 (RTZ) LED+ page 9 – 4 D-75 / Sep 2004...
- Page 77 24 Hour Mode ...................... 10-3 External Sync ....................... 10-4 Dim ........................10-4 UTIL Pre-Fade / Pre-On Defeat ........... 10-4 B Source Logic Options ............. 10-5 External AES Sync Input ............10-5 page 10 – 1 D-75 / Sep 2004 D-75 / Nov 2009...
-
Page 78: Overview
HOLD button allows you to hold the display for a longer viewing duration, while still allowing the counter to continue in the background. Releasing the button will then display the current count. page 10 – 2 D-75 / Sep 2004... -
Page 79: Console Clock
However, some operational features can be modified using programmable dipswitch SW1 on the VU-75 PCB. 24 Hour Mode The clock can be made to run in 24 hour mode. SW1 position 1 enables 24 hour mode page 10 – 3 D-75 / Sep 2004... -
Page 80: External Sync
SW1 position 4 enables clock and timer display dimming UTIL Pre-Fade / Pre-On Defeat As shipped from the factory, D-75 input modules feed the UTIL bus pre- fade, pre-on. This feature can be defeated for all input modules via position... -
Page 81: B Source Logic Options
CT-12 Female DB-9 ANALOG GROUND AES SYNC IN SH AES SYNC IN LO AES SYNC IN HI page 10 – 5 D-75 / Sep 2004 D-75 / Nov 2009... -
Page 82: Quad Mic Preamp (Qmp-4)
....................... 11-38 Mother Board—Extender (MBE-75) schematic ........................ 11-39 load sheet ....................... 11-41 Processor Board (PR-75) load sheet ....................... 11-42 Power Supply (SPS-100) schematic ........................ 11-43 load sheet ....................... 11-44 page 11 – 1 D-75 / Sep 2004 D-75 / Nov 2007... -
Page 83: Schematic
600 Industrial Drive POLYSW New Bern, NC 28562 CHECKED ISSUED SIZE FSCM NO. DWG. NO. 16S0026 W# 700768 SCALE QMP-4 PCB SHEET 1 OF 1 QMP-4 Quad Mic Preamp Schematic - Sheet 1 of 1 page 11 - 2 D-75/Sep 2004... -
Page 84: Load Sheet
S C H E M A T I C D R A W I N G S QMP-4 Quad Mic Preamp - Load Sheet page 11 – 2 page 11 – 3 D-75 / Sep 2004... - Page 85 0.1uF 0.1uF 0.1uF 0.1uF 0.1uF 0.1uF 0.1uF CR MUTE 0.1uF 0.01uF 0.01uF 0.01uF 0.01uF 0.01uF DSW7 TIMER RESTART ISSUED SIZE FSCM NO. DWG. NO. 16S1002 W# 700801 IN-75B PCB 1 OF 2 SCALE SHEET D-75/May 2010 page 11 - 4...
- Page 86 - SA UR US - Sergey Averin - APPROVALS DATE DRAWN 600 Industrial Drive 9-11-13 New Bern, NC 28562 CHECKED SIZE FSCM NO. DWG. NO. 16S1003 ISSUED W# 700801 SCALE IN-75B PCB SHEET 2 OF 2 page 11 - 5 D-75/May 2010...
-
Page 87: Load Sheet
IN-75 Input Module - Load Sheet page 11 – 6 D-75 / Sep 2004... -
Page 88: Schematic
New Bern, NC 28562 DIGITAL COMMON CHECKED ISSUED SIZE FSCM NO. DWG. NO. 16S100x W# 700802 ADC-75B PCB 1 OF 1 SCALE SHEET ADC-75 A to D Converter Schematic - Sheet 1 of 1 page 11 - 7 D-75 / Mar 2010... -
Page 89: Load Sheet
S C H E M A T I C D R A W I N G S ADC-75 A to D Converter - Load Sheet page 11 – 3 page 11 – 8 D-75 / Sep 2004 D-75 / Mar 2010... - Page 90 8-4-09 600 Industrial Drive New Bern, NC 28562 DIGITAL COMMON CHECKED 0.1uF 0.1uF 0.1uF 0.1uF 0.1uF ISSUED SIZE FSCM NO. DWG. NO. 16S1002 W# 700803 SRC-75C PCB 1 OF 1 SCALE SHEET page 11 - 9 D-75 / Sep 2010...
-
Page 91: Schematic
S C H E M A T I C D R A W I N G S SRC-75 Sample Rate Converter - Load Sheet page 11 – 4 page 11 – 10 D-75 / Sep 2004 D-75 / Sep 2010... - Page 92 C105 C123 C138 CHECKED 74ACT02 3.3V 2.5V RESET_I 4.7uF 4.7uF 0.1uF 0.1uF 0.1uF 0.1uF RESET ISSUED SIZE FSCM NO. DWG. NO. 16S1006-1 74ACT02 W# 700804 OM-75E PCB 1 OF 3 SCALE SHEET page 11 - 11 D-75 / Oct 2010...
- Page 93 0.1uF 5.1V 0.1uF 22uF 4.7uF 4.7uF 4.7uF 4.7uF 22uF 4.7uF 4.7uF 4.7uF 4.7uF ISSUED SIZE FSCM NO. DWG. NO. 16S1006-2 R119 1.30K W# 700804 OM-75D PCB 2 OF 3 AGND SCALE SHEET page 11 - 12 D-75 / Oct 2010...
- Page 94 - SA UR US - Sergey Averin - APPROVALS DATE DRAWN 600 Industrial Drive 10-22-10 New Bern, NC 28562 CHECKED SIZE FSCM NO. DWG. NO. 16S1006-3 ISSUED W# 700804 SCALE OM-75E PCB SHEET 3 OF 3 page 11 - 13 D-75 / Oct 2010...
-
Page 95: Load Sheet
OM-75 Output Module - Load Sheet page 11 – 14 D-75 / Oct 2010... - Page 96 0.1uF 0.1uF 0.1uF 0.1uF 0.1uF 0.1uF 0.1uF 0.1uF 0.1uF 0.1uF 0.1uF 0.1uF 4148 4.99K R143 40.2K ISSUED SIZE FSCM NO. DWG. NO. 16S100x W# 700805 CR-75D PCB 1 OF 4 SCALE SHEET page 11 - 15 D-75 / July 2010...
- Page 97 0.1uF 0.1uF 0.1uF 0.1uF 0.1uF 0.1uF 0.1uF 0.1uF 0.1uF 0.1uF 5.1V 0.1uF 22uF 22uF 1.30K ISSUED SIZE FSCM NO. DWG. NO. 16S100x AGND W# 700805 CR-75D PCB 2 OF 4 SCALE SHEET page 11 - 16 D-75 / July 2010...
- Page 98 - SA UR US - Sergey Averin - APPROVALS DATE DRAWN MM/WWP 6-24-10 600 Industrial Drive New Bern, NC 28562 CHECKED CUEMUTE ISSUED SIZE FSCM NO. DWG. NO. 16S100x W# 700805 CR-75D PCB 3 OF 4 SCALE SHEET page 11 - 17 D-75 / July 2010...
- Page 99 - SA UR US - Sergey Averin - APPROVALS DATE DRAWN 600 Industrial Drive MM/WWP 6-24-10 New Bern, NC 28562 CHECKED SIZE FSCM NO. DWG. NO. 16S100x ISSUED W# 700805 SCALE CR-75D PCB SHEET 4 OF 4 page 11 - 18 D-75 / July 2010...
-
Page 100: Load Sheet
CR-75 Control Room Module - Load Sheet page 11 – 19 D-75 / July 2010... - Page 101 0.1uF 0.1uF 0.1uF 0.1uF 0.1uF 0.1uF 0.1uF 0.1uF 0.1uF 0.1uF 0.1uF 0.1uF 4148 4.99K R115 40.2K ISSUED SIZE FSCM NO. DWG. NO. 16S100x W# 700806 SC-75C PCB 1 OF 4 SCALE SHEET page 11 - 20 D-75 / July 2010...
- Page 102 0.1uF 0.1uF 0.1uF 0.1uF 0.1uF 0.1uF 0.1uF 0.1uF 0.1uF 0.1uF 5.1V 0.1uF 22uF 22uF 1.30K ISSUED SIZE FSCM NO. DWG. NO. 16S100x AGND W# 700806 SC-75C PCB 2 OF 4 SCALE SHEET page 11 - 21 D-75 / July 2010...
- Page 103 - SA UR US - Sergey Averin - APPROVALS DATE AGND DRAWN 6-23-10 600 Industrial Drive New Bern, NC 28562 CHECKED ISSUED SIZE FSCM NO. DWG. NO. 16S100x W# 700806 SC-75C PCB 3 OF 4 SCALE SHEET page 11 - 22 D-75 / July 2010...
- Page 104 - SA UR US - Sergey Averin - APPROVALS DATE DRAWN 600 Industrial Drive 6-23-10 New Bern, NC 28562 CHECKED SIZE FSCM NO. DWG. NO. 16S100x ISSUED W# 700806 SCALE SC-75C PCB SHEET 4 OF 4 page 11 - 23 D-75 / July 2010...
-
Page 105: Load Sheet
SC-75 Studio Control Module - Load Sheet D-75 / July 2010 page 11 – 24... - Page 106 600 Industrial Drive New Bern, NC 28562 "OFF"SW CHECKED 0.1uF 0.1uF 0.1uF 0.1uF 0.1uF 0.1uF 0.1uF 0.1uF 0.1uF ISSUED SIZE FSCM NO. DWG. NO. 16S10xx W# 700814 SP-75D PCB 1 OF 3 SCALE SHEET page 11 - 25 D-75 / Dec 2010...
- Page 107 0.1uF 0.1uF 0.1uF 0.1uF 0.1uF 0.1uF 5.1V 0.1uF 0.1uF 22uF 22uF 150uF 0.1uF 1.30K ISSUED SIZE FSCM NO. DWG. NO. 16S10xx AGND AGND W# 700814 SP-75D PCB 2 OF 3 SCALE SHEET page 11 - 26 D-75 / Dec 2010...
- Page 108 - SA UR US - Sergey Averin - APPROVALS DATE DRAWN 600 Industrial Drive 9-11-13 New Bern, NC 28562 CHECKED SIZE FSCM NO. DWG. NO. 16S10xx ISSUED W# 700814 SCALE SP-75D PCB SHEET 3 OF 3 page 11 - 27 D-75 / Dec 2010...
-
Page 109: Load Sheet
SP-75 Superphone Module - Load Sheet page 11 – 28 D-75 / Apr 2008... -
Page 110: Schematic
600 Industrial Drive New Bern, NC 28562 CHECKED ISSUED SIZE FSCM NO. DWG. NO. 16S0025 W# 700679 SCALE LS-2600 PCB SHEET 1 OF 1 LS-75 Line Select Module Schematic - Sheet 1 of 1 page 11 - 29 D-75/Sep 2004... -
Page 111: Load Sheet
LS-75 Line Select Module - Load Sheet page 11 – 30 D-75 / Sep 2004... -
Page 112: Schematic
600 Industrial Drive New Bern, NC 28562 CHECKED ISSUED SIZE FSCM NO. DWG. NO. 16S0022 W# 700658 SCALE TR-2000 PCB SHEET 1 OF 1 TR-75 Tape Remote Module Schematic - Sheet 1 of 1 D-75/Sep 2004 page 11 - 31... -
Page 113: Load Sheet
TR-75 Tape Remote Module - Load Sheet page 11 – 32 D-75 / Sep 2004... - Page 114 - SA UR US - Sergey Averin - APPROVALS DATE 220 R130 DRAWN 12-17-07 600 Industrial Drive New Bern, NC 28562 CHECKED ISSUED SIZE FSCM NO. DWG. NO. 16S1011-1 W# 700807 VU-75C PCB 1 OF 2 SCALE SHEET page 11 - 33 D-75 / Dec 2007...
- Page 115 0.1uF 0.1uF 47uF 0.1uF 0.1uF 0.1uF 0.1uF 0.1uF 0.1uF CHECKED PQ05D 1N4002 330uF 330uF 0.1uF 0.1uF ISSUED SIZE FSCM NO. DWG. NO. 16S1011-2 W# 700807 SCALE VU-75C PCB SHEET 2 OF 2 page 11 - 34 D-75 / Dec 2007...
-
Page 116: Load Sheet
VU-75 VU Card - Load Sheet page 11 – 35 D-75 / Dec 2007... -
Page 117: Schematic
DWG. NO. 16S100x AGND AGND AGND AGND AGND AGND AGND AGND AGND SYNC OUT W# 700799 MBR-75B PCB 1 OF 2 SCALE SHEET MBR-75 8 Position Mother Board (Right) Schematic - Sheet 1 of 2 page 11 - 36 D-75/Dec 2005... - Page 118 AGND [00006] [00007] PWR TO QMP ISSUED SIZE FSCM NO. DWG. NO. 16S100x W# 700799 MBR-75B PCB 2 OF 2 SCALE SHEET MBR-75 8 Position Mother Board (Right) Schematic - Sheet 2 of 2 page 11 - 37 D-75/Dec 2005...
-
Page 119: Load Sheet
MBR-75 8 Position Mother Board (Right) - Load Sheet page 11 – 38 D-75 / Dec 2005... -
Page 120: Schematic
600 Industrial Drive New Bern, NC 28562 CHECKED ISSUED SIZE FSCM NO. DWG. NO. 16S1004 W# 700800 SCALE MBE-75B PCB SHEET 1 OF 2 MBE-75 8 Position Mother Board (Extender) Schematic - Sheet 1 of 2 page 11 - 39 D-75/Dec 2004... - Page 121 600 Industrial Drive New Bern, NC 28562 CHECKED ISSUED SIZE FSCM NO. DWG. NO. 16S1005 W# 700800 SCALE MBE-75B PCB SHEET 2 OF 2 MBE-75 8 Position Mother Board (Extender) Schematic - Sheet 2 of 2 page 11 - 40 D-75/Dec 2004...
-
Page 122: Load Sheet
MBE-75 8 Position Mother Board (Extender) - Load Sheet page 11 – 41 D-75 / Dec 2004... -
Page 123: Load Sheet
PR-75 Processor Board - Load Sheet page 11 – 42 D-75 / Nov 2010... - Page 124 - SA UR US - Sergey Averin - APPROVALS DATE DRAWN SA/WWP 1-5-09 600 Industrial Drive New Bern, NC 28562 CHECKED SA/MM ISSUED SIZE FSCM NO. DWG. NO. 00S0041 W# 700915 SPS-100B PCB 1 OF 1 SCALE SHEET page 11 - 43 D-75 / Jan 2009...
-
Page 125: Load Sheet
SPS-100 Power Supply Load Sheet page 11 – 44 D-75 / Jan 2009... -
Page 126: Replacement Parts List
Replacement Parts List ............... A-2 For the most part there are no user-replaceable parts in the D-75 console. Exceptions are those controls and components that in the course of normal use may need maintenance (i.e., faders, pots, ON/OFF switches, indicator lamps, etc.). A complete list of available components follws. - Page 127 A P P E N D I X REPLACEMENT PARTS — D-75 DIGITAL AUDIO CONSOLE WS P/N COMPONENT DESCRIPTION "002900" "002901" "002902" "002903" "002904" "002905" TR-75/FF MODULE COMPLETE FULL-FUNCTION TAPE REMOTE CONTROL MODULE "002906" "002907" TR-75/SS MODULE COMPLETE START/STOP TAPE REMOTE CONTROL MODULE "005549"...
- Page 128 A P P E N D I X REPLACEMENT PARTS — D-75 DIGITAL AUDIO CONSOLE WS P/N COMPONENT DESCRIPTION "200018" I/O CONNECTOR 25 PIN CONNECTOR FOR MODULE I/O CONNECTIONS REPLACEMENT SWITCH "ON/OFF" SWITCH "510063" REPLACEMENT RED BUTTON MODULE "ON" BUTTON "530057"...
Need help?
Do you have a question about the D-75 and is the answer not in the manual?
Questions and answers