Table of Contents

Subscribe to Our Youtube Channel
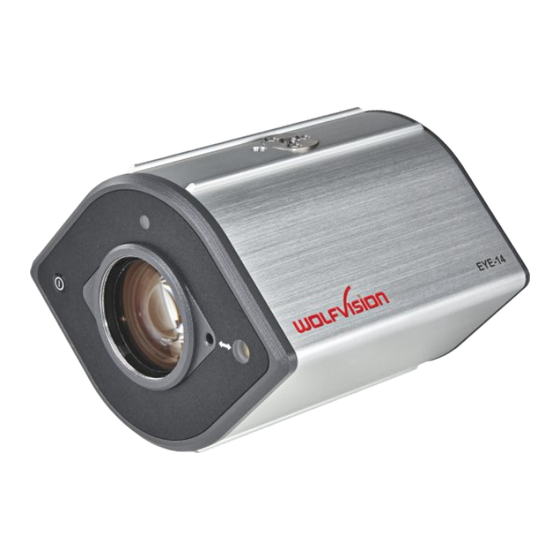
Related Manuals for WolfVision EYE-14


Summary of Contents for WolfVision EYE-14
- Page 1 INSTRUCTIONS INSTRUCTIONS BEDIENUNGSANLEITUNG BEDIENUNGSANLEITUNG EYE-14 EYE-14 ENGLISH / DEUTSCH Check out our Internet Homepage for additional information www.wolfvision.com/support...
-
Page 2: Please Observe The Following
Make sure that sufficient air circulation for cooling the unit is possible! If there is any abnormality (abnormal noise, smell, smoke etc.) disconnect the unit from mains immediately and contact your WolfVision partner! Do not use a damaged power cord. This may cause short circuits or electrical shocks! To prevent danger, do not modify the unit or operate without the cover panel firmly in place! Do not expose the unit to water, metallic objects or any flammable material. -
Page 3: Worldwide Patents
No part of this document may be copied, reproduced, or transmitted by any means, without prior written permission from WolfVision. Except documentation kept by the purchaser for backup purposes. In the interest of continuing product improvement, WolfVision reserves the right to change product specifications without notice. - Page 4 #4 Power Button (see page 7 and 16) #5 IR-receiver (see page 21) #6 Tripod Mount 1/4" UNC-20 to attach the EYE-14 to tripod or wall/ceiling mount (top and bottom) (see pages 20, 21 and 22) #7 Connectors (shown on next page)
- Page 5 Connectors (#7) #9 RGB OUTput (15pin) (see page 16) #10 AUDIO Line Out for audio signals (see page 17) #11 AUDIO Line In for audio signals (see page 17) IR-EXTERN input for additional IR-sensor (see page 21) #13 USB port to Computer (to host) (see pages 18 and 19) #14 HDMI OUTput (see page 16) #15 LAN port 10/100 BASE T/TX...
- Page 6 Infrared Remote Control (#8) Different IR Codes If you want to work with more than one WolfVision unit in the same room, the units should be set to different infrared codes, in order to control them all individually. The IR code of the EYE-14 has to match the code of the remote control.
- Page 7 Keys on the IR-Remote Control #19 Manual EXPOSURE keys (brightness adjustment) When the EXPOSURE keys are pressed, the unit changes the image brightness (see page 9). #20 ? HELP / RESET key for on-screen menu (double function) Shows the info screen to inform you about current state of recording and audio (see page 9). While you are in the on-screen menu you can activate the on-screen help by pressing the HELP key.
-
Page 8: Basic Preparations
The IP-address, Subnet Mask and Gateway IP-address can be set automatically by a DHCP-server or manually. Time Settings The EYE-14 offers the possibility to use the internal clock or an external time server (a time valid time server IP address and internet connection are required). Audio Settings Set up audio configuration. - Page 9 Due to the oblique mounting of the laser module, the laser beam shifts to the left or right edge of the pick-up area when the distance between the EYE-14 and the scanned object is changed (e.g. when capturing tall objects).
-
Page 10: Status Icons
However please be aware that when the digital zoom is used, the resolution of the picture is not as good as before. The behavior of the EYE-14 in the digital zoom mode can be changed in the on-screen menu (see page 15). Automatic / Manual Exposure EYE-14 is equipped with an auto exposure to control gain, shutter and mechanical iris. -
Page 11: White Balance Adjustment
Please note: False colors can also be caused by incorrect color settings on a connected projector or monitor. It is recommended to adjust the white balance of the EYE-14 at first and if the results are still not satisfactory, the monitor or projector should be checked. - Page 12 (WVxxxxxx_JJJJMMDD_hhmm). Example: WV000001_20140806_0247.jpg An on-screen message will tell you the file name. Pictures (and videos) can be viewed in the USB mode of the EYE-14, or on a computer when respective picture viewing software is installed. The properties of the USB functions can be changed in the on-screen menu (Advanced Settings - USB Stick Settings), like default folder (document directory) and the file names ("WV"...
-
Page 13: Mem Mode
To select one of the currently displayed pictures move the picture bar with the Backward/Forward keys (#21) and confirm it with the OK key (#22). Use Backward/Forward keys to show the previous/next picture. Use the OK key to return to the split view. WOLFVISION (1/9) (1/2) - Page 14 (tablet) and images from a connected USB-stick automatically to the current output mode of the unit (For example: If the EYE-14 is set to output an 1080p (FullHD) to the projector but the image from the USB-stick has just 720p resolution, the scaler of the EYE-14 converts the 720p image to 1080p. As a result the projector does not readjust the input mode when switching between the live camera and other content).
- Page 15 However as many routers do not support Multicast, UDP Unicast can be used instead for point- to-point connection (one client is possible). In TCP Singlecast mode each computer opens a separate connection to the EYE-14, which requires a lot of bandwidth if many clients are connected (max. 128 connections). Audio is not supported.
- Page 16 The following chapter is for experienced users only: ON-SCREEN MENU / ON-SCREEN HELP For regular use of the WolfVision EYE-14, it is not necessary to go into the unit's menu and change settings. Inexperienced users should not make any adjustments here.
- Page 17 POWER key (#4) pressed for more than 4 seconds will activate XGA at 60Hz In order to achieve the best picture quality you must set the outputs of the EYE-14 to match the native resolution of your display unit (e.g. LCD or DLP projector or monitor).
- Page 18 Audio Line In and Line Out (#11 and #10) The EYE-14 can handle different audio sources and different audio outputs. Enter the on- screen menu Advanced Settings / Audio Settings and select the desired settings. Line In: max. 1V @ 10kOhm (stereo, unbalanced) Line Out: max.
- Page 19 Administrators of a larger number of WolfVision units can use the LAN port to support all of their units from their local desktop PC. The list of applications for the LAN port of the EYE-14 is constantly increasing. It can be used for controlling, capturing still images, viewing live video streams, firmware updates, adjustments, menu settings and maintenance purposes (some functions are supported by vSolution Link only).
-
Page 20: Power Over Ethernet Plus (Poe+)
Security The Ethernet functionality of the EYE-14 can be limited and the access can be protected with a password. Select ”Security Settings” in the on-screen menu Advanced Settings / Ethernet Settings. Input the valid admin password to change the settings to restrict the functionality of Ethernet. Also the admin password can be changed afterwards. - Page 21 1.89"] 124.55mm [4.904"] Anti-Theft Device - T-bar lock ® The EYE-14 can be fixed with a security cable T-bar lock (Kensington Lock) , so that it cannot be stolen. Follow the instructions from the cable lock manual. slot for lock...
- Page 22 For wireless LAN connection use the optional BYOD Pack. More information at: www.wolfvision.com (Products / Accessories) Accessories from other manufacturers Information on some accessories from other manufacturers which can be used with the EYE-14 is available at: www.wolfvision.com (Products / Accessories)
-
Page 23: Installation
This could be helpful e.g. when the picked-up object would be very close to the lens, a close-up lens can be attached. When the EYE-14 is mounted into a housing (or ceiling) make sure to reserve space for the connected cables (about 50 to 100 mm, depending on the cable used). - Page 24 181 x 102 2698 x 1517 Picture Size Chart (Regular Distance From 1 to 10 Meters [3.28' to 32.81']) The following chart shows the connection between distance from the EYE-14 to the table and image size (optical zoom range): [0.00'] [3.28'] [6.56']...
- Page 25 EYE-14 The illustration on the right shows the recommended position of lighting for the EYE-14. The distance from the center of the unit to the center of the light should be identical to the Ceiling MAXIMUM image size (e.g.
-
Page 26: Maintenance
Alternatively, the firmware update can be started in the on-screen menu (Advanced Settings / Device Info), provided the EYE-14 is connected to the Internet and a nameserver IP address is assigned (Advanced Settings / Ethernet Settings). By selecting the line ”Check For FW Update”, the EYE-14 checks the WolfVision server for newer firmware files. -
Page 27: Technical Data
SVGA (800x600), XGA (1024x768), SXGA (1280x1024), UXGA (1600x1200) Output signals 16:9 and 16:10 720p HD (1280x720), WXGA (1280x800), 1080p HD (1920x1080), WUXGA (1920x1200) WolfVision image processing engine "YSOP1" Resolution (measured) 980 lines Vertical image-frequency Progressive Scan: 30Hz and 60Hz (switchable) -
Page 28: Ir Remote Control
CODES - Short Keys Unit Resetting the output mode to the default of "XGA at 60Hz": Keeping the POWER key (#4) pressed for more than 4 seconds. IR-Remote Control Storing presets: Press the desired PRESET key (#27) for 2 seconds. Recalling presets: Press the desired PRESET key (#27) quickly. - Page 29 Bitte darauf achten, dass eine ausreichende Luftzirkulation zur Kühlung des Gerätes möglich ist ! Bei jeder Art von Störungsanzeichen (abnormale Geräusche, Geruch, Rauchentwicklung, etc.) das Gerät abschalten. Setzen Sie sich bitte in solchen Fällen umgehend mit Ihrem WolfVision-Händler in Verbindung! Niemals ein beschädigtes Netzkabel verwenden.
- Page 30 Warenzeichen der WolfVision Holding AG, Austria. Dieses Dokument darf ohne vorherige schriftliche Zustimmung von WolfVision weder als Ganzes noch in Teilen mit irgendwelchen Mitteln kopiert, reproduziert oder übertragen werden. Ausgenommen sind Kopien, die vom Benutzer zu Sicherungszwecken aufbewahrt werden.
- Page 31 Teile der EYE-14 #1 Laser-Zentrumsmarkierung (siehe Seite 7 und 8) Wichtig: Nicht direkt in den Laserstrahl blicken! Dies kann Ihre Augen schädigen! #2 Einstellschraube der Laser-Zentrumsmarkierung (siehe Seite 7) #3 Kamera Linse Anschluss für Zubehörlinse (M41x0,75mm) #4 Power Taste (siehe Seite 7 und 16) #5 IR-Empfänger (siehe Seite 21)
- Page 32 Anschlüsse (#7) #9 RGB OUT Ausgang (15-Pin) (siehe Seite #10 AUDIO Line Out Ausgang für Audio Signale (siehe Seite #11 AUDIO Line In Eingang für Audio Signale (siehe Seite IR-EXTERN Eingang für zusätzlichen IR-Sensor (siehe Seite 21) #13 USB Anschluss zum Computer (zum Host) (siehe Seiten 18 und 19) #14 HDMI OUT Ausgang (siehe Seite 16) #15 LAN Anschluss 10/100 BASE T/TX mit PoE+ Funktionalität...
- Page 33 Infrarot Fernbedienung (#8) Verschiedene IR-Codes Wenn Sie mit mehreren EYE-14 (bzw. Visualizern) im selben Raum arbeiten möchten, dann sollten die Geräte auf unterschiedliche IR-Codes gestellt werden, um die Geräte einzeln ansteuern zu können. Der IR-Code des Gerätes muss mit dem der Fernbedienung übereinstimmen.
- Page 34 Tasten auf der Infrarot Fernbedienung #19 Manuelle HELLIGKEITS Tasten (manuelle Blende) Wenn die HELLIGKEITS-Tasten gedrückt werden, ändert die EYE-14 die Bildhelligkeit (siehe Seite 9). #20 ? HILFE / RESET Taste (Doppelfunktion) Zeigt Informationen über den aktuellen Aufnahmestatus, verbleibende Aufnahmezeit und Audio Einstellungen (siehe Seite 9).
- Page 35 Power-On Preset: Automatisches Zoomen auf eine mittlere Zoomposition auf der Arbeitsfläche (die Aufnahmegröße ist abhängig von der Montagehöhe der EYE-14). Sobald die POWER LED durchgehend grün leuchtet, ist die EYE-14 betriebsbereit. Das Verhalten des Gerätes beim Einschalten oder nach dem Drücken der POWER-Taste kann im On- Screen Menü...
- Page 36 Durch die schiefwinklige Montage des Lasermoduls bewegt sich der Laserzentrumspunk nach rechts oder links im Aufnahmebereich sobald sich der Abstand des aufgenommenen Objektes zum Gerät ändert (z.B. Aufnahme hoher Objekte). Das bedeutet, dass der Laserstrahl nicht mehr exakt das Zentrum des Aufnahmebereiches zeigt. EYE-14 Aufnahmebereich Decke Laserstrahl...
- Page 37 FOKUS Tasten (#31) verwendet wird. Zoom optisch / digital Die EYE-14 verfügt über ein optisches 14-fach Zoom, der Zoombereich wird durch ein digitales 4-fach Zoom auf ein 56-fach Zoom erweitert. Die Größe des Aufnahmebereiches ist abhängig von der Distanz zwischen Kamera und aufgenommenen Objekt.
- Page 38 Resultat liefert, die Einstellungen des Monitors oder Projektors zu überprüfen. Für Spezialisten: Im On-Screen Menü der EYE-14 (siehe Seite 15) kann zwischen den Weißabgleichs- Arten "Auto Tracking", "One Push" und "Manual" umgeschaltet werden. Wenn Sie mit Negativfilmen auf...
- Page 39 Hinweis: Ein entsprechendes Symbol in der linken unteren Ecke informiert über eine aktive Aufnahme. Die EYE-14 schaltet automatisch auf den Codec H.264 um sobald die Aufnahme von Video Clips gestartet wird (Erweiterte Einstellungen / Stream/Aufnahme-Einstellungen). Die Video Dateien werden im internen Speicher oder auf dem externen USB Speichermedium, wenn angeschlossen, gespeichert.
-
Page 40: Usb Modus
Um den MEM Modus zu starten, drücken Sie die MEM Taste (#28), die Schnellansicht wird dargestellt. Zusätzlich wird eine Statuszeile mit Bildinformationen am unteren Bildrand angezeigt. Durch Drücken der LIVE Taste (#29) wechselt die EYE-14 zurück zum Livebild. Die Präsentation bleibt beim zuletzt gezeigten Bild stehen, für eine Fortsetzung drücken Sie die MEM Taste. - Page 41 Eingebauter Scaler (USB-Stick und vSolution Connect) Die EYE-14 hat einen eingebauten digitalen Scaler zur Anpassung des empfangenen Stream-Signals der vSolution Connect (Tablet) und Bildern/Videos angeschlossener USB-Sticks an den aktuell eingestellten Ausgangsmodus (Beispiel: Wenn die EYE-14 eingestellt ist, ein 1080p (FullHD)-Bild auszugeben, aber das Bild vom USB-Stick mit 720p erstellt wurde, dann wandelt der Scaler das 720p-Bild in1080p um.
- Page 42 Da viele Router UDP Multicast jedoch nicht unterstützen, kann UDP Unicast als Punkt-zu- Punkt Verbindung verwendet werden (nur ein Empfänger ist möglich). Im TCP Singlecast Modus baut jeder Computer einzeln eine Verbindung mit der EYE-14 auf. Wenn viele Computer verbunden sind benötigt dies jedoch eine hohe Bandbreite (max. 128 Verbindungen). Audio wird nicht unterstützt.
- Page 43 Die nachfolgenden Kapitel sind nur für technisch versierte Anwender: ON-SCREEN MENÜ (Kamera Menü) / ON-SCREEN HILFE Für normale Standard Anwendungen der WolfVision EYE-14 ist es nicht notwendig, im On-Screen Menü Einstellungen vorzunehmen. Unerfahrene Anwender sollten hier keine Änderungen durchführen. Drücken Sie die MENU Taste (#43) um in das On-Screen Menü...
- Page 44 - WUXGA (16:10 Widescreen - 1920x1200 Pixel) bei 60Hz Ab Werk ist die "Auto Resolution" Funktion aktiviert. Hier prüft die EYE-14 ständig, welche Geräte am HDMI- (#14) und RGB-Ausgang (#9) angeschlossen sind und stellt automatisch den am besten geeigneten Standard für die Ausgänge ein.
- Page 45 Audio-Leitungen hinzugefügt werden (LineIn und LineOut). Übertragungsbereich: 20Hz~20kHz bei / 3dB / 300Hz~10kHz bei / 1dB Übertragungsrate: 1:1 Audio Konzept Das Audio Konzept zeigt das Verhalten der EYE-14 mit verschiedenen Einstellungen im On-Screen Menü. Fernbedienung Fernbedienung Alles / Mik / Aus...
- Page 46 Administratoren einer größeren Anzahl von EYE-14 / Visualizern schätzen besonders die Möglichkeit, über den LAN-Anschluss alle EYE-14 in ihrem Netzwerk von einem Desktop PC in ihrem Büro aus zu warten. Die Liste der Anwendungsmöglichkeiten des LAN-Anschlusses wächst ständig: Steuerung, Übertragung /Speicherung von Standbildern und Video Streams, Firmware Updates, Menü...
- Page 47 Power over Ethernet plus (PoE+) Der LAN Anschluss (#15) der EYE-14 verfügt über Power over Ethernet (PoE+) Funktionalität. Power over Ethernet ist eine populäre Methode, um Kabel- und Installationskosten zu sparen. Die EYE-14 ist kompatibel mit PoE+ Power Injectors und PoE+ Switches gemäß Industriestandard IEEE 802.3at -2009.
- Page 48 Abmessungen M41x0,75 Ø 48mm 124,55mm Diebstahlschutz - T-Lock ® Die EYE-14 kann mit einem Kabel T-Lock (Kensington Lock) vor Diebstahl geschützt werden. Folgen Sie den Anweisungen des Schloss-Herstellers. Schlossöffnung...
- Page 49 Höhe: 10-40 mm bei 12° Optional: Tile Bridge - Deckenhalterung Die Tile Bridge ist eine Halterung, um die EYE-14 in ein Standard Deckenelement mit 60 x 60 cm oder 60 x 120 cm einzubauen. Sie ist aus Aluminium gefertigt und somit sehr leicht und robust.
- Page 50 An der Front der EYE-14 kann eine Zubehörlinse (M41x0.75mm) angebracht werden. Diese sind z.B. für kurze Objektabstände nötig. Bei Einbau der EYE-14 in ein Gehäuse oder in die Decke muss der für die Kabel benötigte Platz berücksichtigt werden (ca. 50 bis 100 mm, hängt von den verwendeten Kabeln ab).
- Page 51 45 x 25 181 x 102 2698 x 1517 Bildgrößen Chart (Regulärer Abstand von 1 m bis 10 Die folgende Tabelle zeigt den Zusammenhang zwischen dem Abstand der EYE-14 zum Tisch und der Bildgröße (optischer Zoombereich): Tele Wide Zoombereich Horizontale Bildgröße (Breite) Horizontale Größe...
- Page 52 Wenn es zu weit entfernt ist, ist die Schattenbildung zu groß. EYE-14 Die rechts abgebildete Grafik zeigt die empfohlene Lichtposition für die EYE-14. Die Distanz von der Mitte der EYE-14 zur Mitte des Lichtes Decke Licht sollte mit der MAXIMALEN Bildgröße (z.B.
-
Page 53: Wartung
Alternativ kann die Firmware auch im On-Screen Menü (Erweiterte Einstellungen / Geräte Info) aktualisiert werden - Internetverbindung und zugewiesene Name Server IP-Adresse vorausgesetzt. Wählen Sie die Zeile „Prüfe FW” und die EYE-14 prüft den WolfVision Server auf neuere Firmwaredateien. Folgen Sie den Anweisungen am Bildschirm um den Updateprozess zu starten. -
Page 54: Technische Daten
Ausgangssignal 4:3 und 5:4 SVGA (800x600), XGA (1024x768), SXGA (1280x1024), UXGA (1600x1200) Ausgangssignal 16:9 und 16:10 720p HD (1280x720), WXGA (1280x800), 1080p HD (1920x1080), WUXGA (1920x1200) WolfVision Bildbearbeitungsprozessor "YSOP1" Auflösung (gemessen) 980 Linien Vertikale Bildfrequenz Progressive Scan: 30Hz und 60Hz (schaltbar) (abhängig vom gewählten Ausgangsmodi) -
Page 55: Ir-Fernbedienung
CODES - Tastenkombinationen am Gerät Zurücksetzen des Ausgangsmodus auf “XGA bei 60Hz”: Halten Sie die POWER Taste (#4) für mehr als 4 Sekunden gedrückt. IR-Fernbedienung Preset speichern: Halten Sie die gewünschte PRESET Taste (#27) für 2 Sekunden gedrückt. Aufrufen von Presets: Drücken Sie die gewünschte PRESET Taste (#27) kurz. - Page 56 Ottawa Tel: +1(613)741-9898, Toll free: 877-513-2002, Fax: +1(613)741-3747 E-Mail: wolfvision.canada@wolfvision.com United Kingdom WolfVision UK Ltd. Maidenhead Tel: +44 1628 509067, Fax: +44 1628 509100 E-Mail: wolfvision.uk@wolfvision.com Internet Homepage: www.wolfvision.com E-Mail to technical support: support@wolfvision.com Printed in Austria - August 2014...
Need help?
Do you have a question about the EYE-14 and is the answer not in the manual?
Questions and answers