Advertisement
Available languages
Available languages
Quick Links
Advertisement

Related Manuals for PARKZONE P-47 THUNDERBOLT


Summary of Contents for PARKZONE P-47 THUNDERBOLT
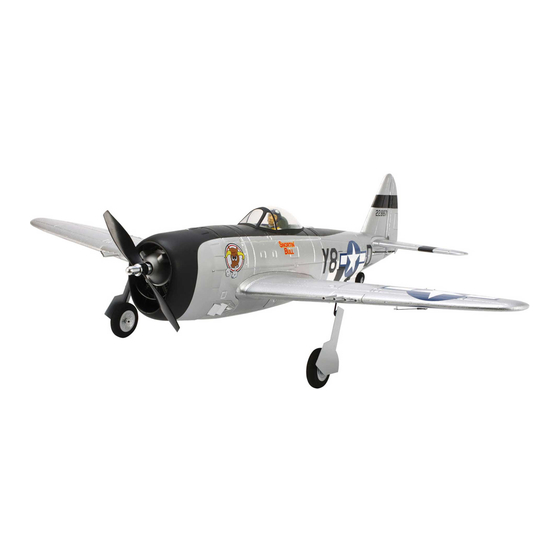
- Page 1 P-47 THUNDERBOLT...
- Page 2 NOTICE All instructions, warranties and other collateral documents are subject to change at the sole discretion of Horizon Hobby, Inc. For up-to-date product literature, The following terms are used throughout the product literature to indicate various levels of potential harm when operating this product: NOTICE: Procedures, which if not properly followed, create a possibility of physical property damage AND a little or no possibility of injury.
- Page 3 Warranty and Repair Policy ................13 First Flight Preparation ..................7 Contact Information ..................14 Maintenance After Flying ................. 7 Compliance Information for the European Union ..........14 1200 g) with retracts and flap servos To register your product online, visit www.parkzone.com...
- Page 4 ® during the charge process. Failure to follow the instructions properly could result Charge the flight battery while assembling the aircraft. Install the fully charged battery to perform control tests and binding. Li-Po balancing charger. punctured. LED will flash. The green and red LEDs may flash during the charging process, when the charger is balancing cells. Balancing prolongs the life of the battery. Always unplug the battery from the charger immediately upon completion of charging.
- Page 5 ® ® : Any JR ceiver. Please visit www.bindnfly.com for a complete list of compatible transmitters. ¸ Install a bind plug in the receiver bind port. instructions. Remove the bind plug from the receiver in the battery compartment. If you encounter problems, obey binding instructions and refer to transmitter troubleshooting guide for other instructions. If needed, contact the ap- Remove battery hatch Install flight battery in battery cavity.
- Page 6 M3 X 25 Not to scale. Not all wiring is shown. Tape is not shown. 6. Turn assembled fuselage and wing so the bottom of the wing is down. 2. Turn aircraft over so bottom of fuselage faces up. or Y-harnesses. There is no difference between 2 connections on a Y-harness.
- Page 7 control horn. Tail Aileron Flap Elevator Rudder Wheel Arms Horns Not to scale loop strap. Turn the model until landing gear faces up to find balance most easily. planning for future flights...
-
Page 8: Installation
fuselage using double-sided tape. without landing gear. installed in the two rear holes when M3 X 20 holes if using optional retractable landing gear. M2.5 X 10 M3 X 15 Not to scale. Wiring is not shown. Tape is not shown. Installation 1. - Page 9 M3 X 15 optional landing gear. M3 X 20 the two front holes. 130mm Not to scale. Y-harness is not shown. M1.5 X 15 Not to scale. Wiring is not shown. Tape is not shown. 1. Remove wing from fuselage. 11.
- Page 10 Elevator up Elevator down Aileron left Aileron right Rudder left Rudder right High Rate Low Rate Aileron Flap switch Elevator Rudder 1/2 or Takeoff Flap Full Flap Flap down 15mm down 25mm M1.5 X 6 M2 X 10 M3 X 10 CAUTION 1.
- Page 11 to your specific transmitter instruction manual for range test information. During landing, the flaps allow a landing approach to be steeper with the ability to use more throttle. The flaps Always is ideal for you to fly at a sanctioned flying field. If you are not flying at an decrease throttle at approved site, always avoid flying near houses, trees, wires and buildings.
- Page 12 Horizon’s Consumer Sales Division: (800) 338-4639 : P-47 Thunderbolt EFLC505 1- To 5-cell Li-Po battery charger with balancer Top Hatch with Canopy and Pilot: P-47 Thunderbolt Pilot: P-47 Thunderbolt Flap pushrod set: P-47 Thunderbolt Pushrods with Clevis: P-47 Thunderbolt...
- Page 13 If this Product needs to be inspected or repaired, please use the Horizon Online Repair Request submission process found on our website or call Horizon to ship at the date of purchase by the Purchaser. Horizon reserves the right to change or modify this warranty without notice included, but are not designed to withstand the rigors of shipping without ad- and disclaims all other warranties, express or implied.
- Page 14 Country of Purchase Horizon Hobby Address 4105 Fieldstone Rd Champaign, Illinois Online Repair Request: America 4105 Fieldstone Rd Champaign, Illinois productsupport@horizonhobby.com Horizon Hobby Limited +49 4121 46199 66 service@horizonhobby.de France infofrance@horizonhobby.com This product must not be disposed of with other waste. waste equipment by handing it over to a designated collections point for the recycling of waste electrical and Equipment class:...
- Page 16 ACHTUNG: WARNUNG: WARNUNG: WARNUNG WARNUNG WARNUNG WARNUNG WARNUNG WARNUNG Lagern Lassen Sie Laden Sie Akkus niemals Laden Sie Akkus Laden Sie Akkus Laden Sie niemals Akkus beim Aufladen niemals außerhalb der außerhalb des sicheren Sie Akkus niemalsin der Nähe von beschädigte Akkus auf.
- Page 17 Werkeinstellungen ................21 Ersatzteile ..................26 Anpassen des Schwerpunkts .............. 21 Optionale Bauteile ................26 Vorbereitung des ersten Fluges ............21 Rechtliche Informationen für die Europäische Union ......28 1200 g mit einziehbarem Fahrwerk und Klappenservos Produktregistrierung online unter www.parkzone.com...
- Page 18 ® ® z. B. angeschwollen, verbogen, aufgebrochen oder durchstochen. ACHTUNG WARNUNG walten. 500-1000 mAh 500 mA WARNUNG 1000-1500 mAh besteht Brandgefahr. 1500-2000 mAh 1,5 A 2000 mAh + 2,0 A...
- Page 19 ® ® : Jeder beliebige JR ¸ Stellen Sie den Gasstick auf Nehmen Sie die obere Setzen Sie den Flugakku in den Kontinuierliche LED die niedrigste Postion Akkuschacht ein und sichern ihn mit der Abdeckung ab. (Leerlauf / Motor aus) Klettschlaufe Signaltöne Akku am...
- Page 20 M3X25 Nicht maßstabsgetreu. Verkabelung nicht vollständig abgebildet. Klebeband nicht abgebildet. ACHTUNG: unten auf das Ruder. Flosse.
- Page 21 bevor diese Anpassung vorgenommen wird. um ihn darauf festzuhalten. Querruder Klappe Höhenruder Seitenruder Heckrad Arme Hörner Flugzeug umgedreht wird. Flugzeug ein.
- Page 22 Der Bauchschlitten wird beim M3 X 20 M2,5 X 10 M3 X 15 Nicht maßstabsgetreu. Verkabelung nicht abgebildet. Klebeband nicht abgebildet. bitte den entsprechenden Anweisungen.
- Page 23 Befestigung des optionalen einziehbaren M3X15 M3X20 Nicht maßstabsgetreu. 130 mm Y-Kabelbaum nicht abgebildet. M1,5 X 15 Nicht maßstabsgetreu. Verkabelung nicht abgebildet. Klebeband nicht abgebildet. ACHTUNG:...
- Page 24 Hohe Rate Niedrige Rate 1/2 oder Startklappe Volle Klappe 15 mm nach unten 25 mm M1,5 X 6 M2 X 10 M3 X 10 ACHTUNG sich sonst verletzen.
- Page 25 WARNUNG Bei Propelleraufprall stets Gas wegnehmen. leichter anstellen und weich aufsetzen. In diesem Bereich fliegen Hier stehen...
- Page 26 Leistung nicht mehr ausreicht Wenn Sie Ersatzteile direkt bei Horizon Hobby beziehen möchten, besuchen Sie bitte www.horizonhobby.com, oder wenden Sie sich telefonisch an Horizons Consumer Sales Division: +49 4121 46199 60 : P-47 Thunderbolt EFLC505 : P-47 Thunderbolt...
- Page 27 eine Email Adresse. ersetzt. Diese Entscheidung obliegt einzig Horizon Hobby. wird. irgendwelcher Art aus. und Fahrzeugen. Es ist unabdingbar, diese Hinweise vor der ersten Inbetriebnahme zu lesen und zu...
- Page 28 Horizon Hobby Adresse +49 4121 46199 66 Deutschland service@horizonhobby.de...
- Page 29 REMARQUE REMARQUE : ATTENTION : AVERTISSEMENT AVERTISSEMENT AVERTISSEMENT AVERTISSEMENT AVERTISSEMENT AVERTISSEMENT Ne chargez jamais les Chargez toujours les Ne laissez jamais sans Stockez les Ne chargez jamais les Ne chargez jamais des batteries en dehors de la batteries à distance de batteries de surveillance des batteries batteries sans respecter...
- Page 30 Coordonnées ..................41 Préparation au premier vol ..............34 Informations de conformité pour l'Union européenne ......41 Maintenance après un vol ..............34 1 200 g avec trains rétractables et servos de volets Pour enregistrer votre produit en ligne, rendez-vous sur le site www.parkzone.com.
- Page 31 ® laissez jamais la batterie et le chargeur sans surveillance pendant le processus du processus de charge, assurez-vous que la batterie repose sur une surface ® ATTENTION : une surcharge de la batterie peut provoquer un incendie. lorsque vous chargez des batteries Li-Po. 500-1 000 mAh 500 mA 1 000-1 500 mAh...
- Page 32 ® ® ¸ Abaissez la manette et le trim Retirez le capot de la batterie Installez la batterie de vol dans le logement DEL continue des gaz jusqu’à leurs réglages du nez de l’avion. prévu à cet effet.Fixez la batterie de vol les plus bas.
- Page 33 M3 X 25 ce schéma n’est pas à l’échelle. Tous les câblages ne sont pas représentés. L’adhésif n’est pas représenté. sur le fuselage. ATTENTION : 1. Installez le tube dans le trou du fuselage. utilisant le connecteur permettant la liaison avec le panneau gauche.
- Page 34 du guignol de commande. commande. Gouverne de Gouverne de Roulette de Aileron Volet profondeur direction queue Bras Guignols de la batterie. planification de vos prochaines sorties.
- Page 35 M3 X 20 M2,5 X 10 M3 X 15 ce schéma n’est pas à l’échelle. Les câblages ne sont pas représentés. L’adhésif n’est pas représenté. Installation Désinstallation 2. Retirez le collier et la roue de la jambe. 4. Enlevez la jambe de la plaque. 4.
- Page 36 M3 X 15 M3 X 20 ce schéma n’est pas à l’échelle. Le câble en Y n’est pas 130 mm représenté. M1,5 X 15 ce schéma n’est pas à l’échelle. Les câblages ne sont pas représentés. L’adhésif n’est pas représenté. ces instructions.
- Page 37 Débattement fort Débattement faible Aileron Commutateur des volets 1/2 ou volet de décollage Volet complet 15 mm bas 25 mm M1,5 X 6 M2 X 10 M3 X 10 ATTENTION et les 4 vis. 2. Retirez les 4 vis du capot moteur. 4.
- Page 38 avec le train principal, puis avec la roulette de queue. Le P-47 peut effectuer bon arrondi. AVERTISSEMENT queue monte plus rapidement pour un meilleur contrôle de la direction au cours du roulage. Baissez toujours les gaz en cas de choc sur l’hélice. un atterrissage en douceur.
- Page 39 Ensemble roulette de queue : P-47 Thunderbolt : P-47 Thunderbolt EFLC505 Pilote : P-47 Thunderbolt : P-47 Thunderbolt Jeu de tiges pour volet : P-47 Thunderbolt Empennage horizontal peint : P-47 Thunderbolt Capot peint : P-47 Thunderbolt Cloison pare-feu : P-47 Thunderbolt : P-47 Thunderbolt...
- Page 40 ainsi que des indications concernant la maintenance et le fonctionnement du produit. Il est absolument indispensable de lire et de comprendre ces bien, dans un tel cas, contacter le revendeur qui conviendra avec Horizon de messagerie proposant une fonction de suivi et une assurance, puisque majeure, une manipulation incorrecte du produit, une utilisation incorrecte ou commerciale de ce dernier ou encore des modifications de quelque nature de Horizon Hobby.
- Page 41 Horizon Hobby Adresse Adresse de messagerie France infofrance@horizonhobby.com en vue du recyclage, veuillez contacter votre mairie, votre service de Horizon Hobby, Inc. Horizon Hobby, Inc.
- Page 43 NOTA Tutte le istruzioni, le garanzie e gli altri documenti pertinenti sono soggetti a cambiamenti a totale discrezione di Horizon Hobby, Inc. Per una documentazione NOTA: indica procedure che, se non debitamente seguite, possono determinare il rischio di danni alle cose E il rischio minimo o nullo di lesioni alle persone. ATTENZIONE: indica procedure che, se non debitamente seguite, determinano il rischio di danni alle cose E di gravi lesioni alle persone.
- Page 44 Preparazione al primo volo ..............48 Informazioni per i contatti ..............55 Manutenzione dopo il volo ..............48 Informazioni sulla conformità per l'Unione Europea ......55 1.200 g con elementi retrattili e servo dei flap Per registrare il modello online, visitare il sito www.parkzone.com...
- Page 45 ® Thunderbolt viene fornito insieme a un caricabatteria con bilanciatore CC la carica. La mancata osservanza delle istruzioni può determinare il rischio di incendio. Durante la carica, accertarsi che la batteria si trovi su una superficie di controllo e il binding. ®...
- Page 46 ® ricevente. Nota ® www.bindnfly.com. Nota ¸ Accertarsi che la trasmittente sia spenta. Inserire lo spinotto per il binding nel connettore Bind della ricevente. 10. La ricevente deve mantenere il binding con la trasmittente fino a quando non viene eseguito un altro binding. In caso di problemi, seguire le istruzioni per il binding e fare riferimento alla guida per la risoluzione dei problemi della trasmittente contenente Rimuovere il coperchio Installare la batteria di volo nell'apposito...
- Page 47 M3X25 Nota: non in scala. Non tutti i cablaggi sono illustrati. Il nastro adesivo non è illustrato. rivolta verso il basso. alla ricevente o al cablaggio a Y. Nota: fori sulla fusoliera. a Y. I connettori del servo di sinistra e di destra non devono essere Nota: collegati a un lato specifico del cablaggio a Y.
- Page 48 connettore. Assicurarsi che i trim della trasmittente siano centrati prima di effettuare questa regolazione. di controllo. Ruotino Alettone Flap Elevatore Timone di coda Bracci Antenne Nota: non in scala utilizzando il gancio e la bandella. È preferibile bilanciare il P-47 con il livello di carica della batteria i voli futuri...
- Page 49 Pattino Fissare il pattino in plastica trasparente alla parte inferiore della fusoliera utilizzando nastro biadesivo. Nota: carrello di atterraggio. Nota: se si utilizza il carrello fisso, M3 X 20 nei due fori posteriori, mentre se si utilizza il carrello di atterraggio retrattile opzionale esse sono installate nei due fori anteriori.
- Page 50 Rimuovere il supporto del carrello di atterraggio M3 X 15 di installazione in dotazione al carrello di M3 X 20 atterraggio opzionale. Nota: due fori anteriori. Nota: non in scala. Il cablaggio a Y non è illustrato. 130 mm M1.5 X 15 Nota: non in scala.
- Page 51 Elevatore alzato Elevatore abbassato Alettone a sinistra Alettone a destra Timone a sinistra Timone a destra Alto Basso Alettone Elevatore Interruttore flap Timone 1/2 o flap decollo Flap intero 25 mm M1.5 X 6 M2 X 10 M3 X 10 ATTENZIONE lesioni personali.
- Page 52 suolo prima con il carrello di atterraggio principale con il ruotino di coda sollevato. Il P-47 può atterrare su tre punti, ossia quando tutte e tre le ruote Dopo avere completato il montaggio, verificare il raggio di azione del sistema radio di Thunderbolt.
- Page 53 Per acquistare direttamente da Horizon Hobby, visitare il sito www.horizonhobby.com o chiamare il reparto vendite clienti Horizon: (800) 338-4639 Dado per ogiva e bussola di chiusura: P-47 Thunderbolt Ruote del carrello di atterraggio principale: P-47 Thunderbolt Porte carrello di atterraggio principale: P-47 Thunderbolt...
- Page 54 deve essere manipolato con cautela, con giudizio e richiede delle conoscenze ammonta a 6 mesi e si estende ad altri 18 mesi dopo tale termine. diretta supervisione di un adulto. Il manuale del prodotto contiene le istruzioni di sicurezza, di funzionamento e di manutenzione del prodotto stesso. È fondamentale leggere e seguire tutte le istruzioni e le avvertenze nel manuale il periodo di questa garanzia.
- Page 55 Horizon Hobby Indirizzo +49 4121 46199 66 service@horizonhobby.de smaltimento di tali rifiuti che devono essere portati in un centro di raccolta designato per il riciclaggio di rifiuti Classe dei dispositivi: elettrici e apparecchiature elettroniche. La raccolta differenziata e il riciclaggio di tali rifiuti provenienti da apparecchiature nel momento dello smaltimento aiuteranno a preservare le risorse naturali e garantiranno un delle specifi...
- Page 56 © 2010 Horizon Hobby, Inc.
Need help?
Do you have a question about the P-47 THUNDERBOLT and is the answer not in the manual?
Questions and answers