Olympus Camedia C-720 Ultra Zoom Basic Manual
Hide thumbs
Also See for Camedia C-720 Ultra Zoom:
- Reference manual (180 pages) ,
- Quick start manual (2 pages) ,
- Basic manual (172 pages)
Table of Contents
Advertisement
Quick Links
Download this manual
See also:
Reference Manual
C-720 Ultra Zoom
BASIC MANUAL/MANUEL DE BASE
EINFACHE ANLEITUNG/MANUAL BÁSICO
Before using your camera, read this manual carefully to ensure correct use.
We recommend that you take test shots to get accustomed to your camera before taking important
photographs.
These instructions are only for quick reference. For more details on the camera functions described
in this manual, refer to the camera Reference Manual on the CD-ROM enclosed in the camera
package.
For more details on connecting the camera to a PC and installing the provided software, refer to
the "Software Installation Guide" (included in the CD-ROM package).
Avant d'utiliser votre appareil photo, veuillez lire attentivement ce mode d'emploi, de manière à
obtenir les meilleurs résultats possibles.
Avant d'effectuer des prises de vues importantes, nous vous conseillons par ailleurs de faire
quelques essais afin de vous familiariser avec le maniement de l'appareil photo.
Ces instructions ne sont que pour une référence rapide. Pour plus de détails sur les fonctions de
l'appareil décrites dans ce manuel, se référer au manuel de référence de l'appareil sur le CD-ROM
inclus dans l'emballage de l'appareil.
Pour plus de détails sur le raccordement de l'appareil photo à un ordinateur personnel et sur
l'installation du logiciel fourni, se référer au "Guide d'installation de logiciel" (inclus dans
l'emballage du CD-ROM).
Bitte lesen Sie vor Gebrauch dieser Kamera sorgfältig diese Bedienungsanleitung, um optimale
Ergebnisse beim Fotografieren zu erzielen.
Wir empfehlen, vor wichtigen Aufnahmen Probeaufnahmen durchzuführen, um sich mit der
Bedienung und den Funktionen der Kamera vertraut zu machen.
Diese Kurzanleitung dient dem ersten Kennenlernen Ihrer Kamera. Weitere und ausführliche Angaben
zur Funktionsweise dieser Kamera finden Sie im Referenzhandbuch auf der CD-ROM, die zum
Lieferumfang der Kamera gehört.
Weitere Angaben zum Anschluss der Kamera an einen Personal Computer und zum Installieren
der mitgelieferten Software siehe die „Software-Installationsanleitung" (in der CD-ROM-Packung
enthalten).
Antes de usar su cámara lea este manual detalladamente para asegurar el uso correcto.
Nosotros le recomendamos que tome fotografías de prueba para familiarizarse con su cámara
antes de tomar fotografías importantes.
Estas instrucciones son sólo de referencia rápida. Para más detalles de las funciones de la cámara
descritas en este manual, refiérase al manual de consulta del CD-ROM adjunto en el paquete de la
cámara.
Para más detalles sobre la conexión de la cámara a un PC e instalación del software suministrado,
refiérase a la "Guía de instalación del software" (adjunto en el paquete del CD-ROM).
DIGITAL CAMERA
APPAREIL PHOTO NUMÉRIQUE
DIGITALKAMERA
CÁMARA DIGITAL
ENGLISH
FRANÇAIS
DEUTSCH
ESPAÑOL
Advertisement
Table of Contents

Related Manuals for Olympus Camedia C-720 Ultra Zoom


Summary of Contents for Olympus Camedia C-720 Ultra Zoom
- Page 1 ENGLISH DIGITAL CAMERA APPAREIL PHOTO NUMÉRIQUE FRANÇAIS DIGITALKAMERA CÁMARA DIGITAL DEUTSCH C-720 Ultra Zoom ESPAÑOL BASIC MANUAL/MANUEL DE BASE EINFACHE ANLEITUNG/MANUAL BÁSICO Before using your camera, read this manual carefully to ensure correct use. We recommend that you take test shots to get accustomed to your camera before taking important photographs.
- Page 2 Thank you for purchasing an Olympus digital camera. Before you start to use your new camera, please read these instructions carefully to enjoy optimum performance and a longer service life. Keep this manual in a safe place for future reference.
- Page 3 Declaration of Conformity Model Number : C-720 Ultra Zoom Trade Name : OLYMPUS Responsible Party : Olympus America Inc. Address : 2 Corporate Center Drive, Melville, New York 11747-3157 U.S.A. Telephone Number : 1-631-844-5000 Tested To Comply With FCC Standards FOR HOME OR OFFICE USE This device complies with Part 15 of the FCC rules.
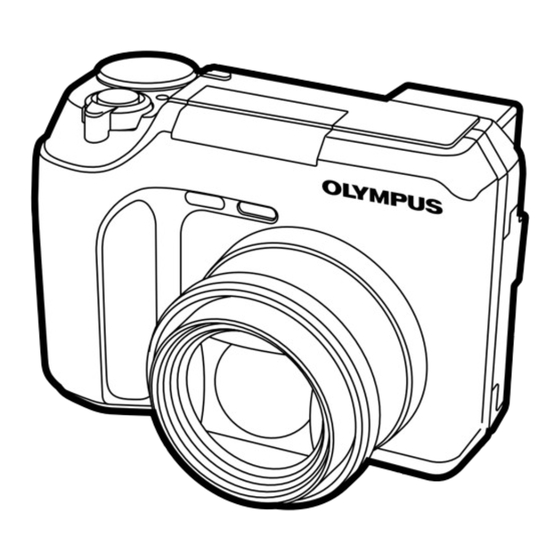
- Page 4 NAMES OF PARTS Camera Zoom lever (W/T) Index display/Close-up playback lever ( Shutter button Flash switch ( Mode dial ( , P/A/S/M, Macro/Spot button ( Print button ( DRIVE button Flash mode button ( Erase button ( Protect button ( Diopter adjustment dial Viewfinder Card access lamp...
- Page 5 Flash Self-timer lamp Lens Card cover DC-IN jack USB connector VIDEO OUT jack Strap eyelet Connector cover Battery compartment lock Tripod socket Battery compartment cover...
- Page 6 NAMES OF PARTS Viewfinder/Monitor indications — Shooting information The INFO setting on the menu allows you to select how much information to display. The indications vary depending on the shooting mode.* When INFO is set to OFF: The When INFO is set to ON: The information below is displayed information below is displayed constantly in the shooting mode.
- Page 7 & ISO 100 Items Indications Record mode TIFF/SHQ/HQ/SQ1/SQ2 Memory gauge Battery check AE lock Drive mode , BKT White balance ISO100, ISO200, ISO400 Green lamp Flash stand-by Lights. Camera movement Blinks. warning Flash charge Blinks. Flash mode & Spot metering/ Macro mode...
- Page 8 NAMES OF PARTS Viewfinder/Monitor indications — Playback information INFO setting on the menu allows you to select how much information to display. Still picture playback information SIZE: 1984x1488 F2.8 1/800 +2.0 ISO100 ’02.09.12 12:30 ’02.09.12 12:30 FILE: 100–0020 When INFO is set to ON When INFO is set to OFF Items Indications...
- Page 9 Movie playback information SIZE: 320x240 ’02.09.12 12:30 FILE: 100–0020 When INFO is set to ON When INFO is set to OFF Items Indications Battery check Movie mark Protect Frame number Record mode HQ, SQ Number of pixels 320x240, 160x120 White balance Date ’02.
- Page 10 NAMES OF PARTS Viewfinder/Monitor indications — Memory gauge & battery check Memory gauge The memory gauge lights when you take a picture. When the gauge is lit, the camera is storing a picture on the SmartMedia card. The memory gauge indication changes as shown below depending on the shooting status.
- Page 11 HOW TO USE THIS MANUAL The instructions in this manual use a series of numbers for each operating procedure and button/dial illustration. Follow these numbers in order when operating the camera. Before using the following function, set the mode dial to any of the positions shown.
- Page 12 ● Attach the strap correctly as shown so that the camera does not fall off. If the strap is attached incorrectly and the camera falls off the strap, Olympus is not responsible for any damages.
- Page 13 Using an AC power adapter When using CR-V3 lithium (optional) battery packs Use an AC adapter designed for the area where the camera is used. Consult your nearest Olympus dealer or Service center for details.
- Page 14 “card” when referring to SmartMedia. Be sure to use a 3 V (3.3 V) card. Non-Olympus 3 V (3.3 V) cards must be formatted with the camera. Do not use a 5 V card or a 2 MB card.
- Page 15 Power on/off Before turning the camera on, press the tabs on the lens cap to remove it. Press the power switch to turn the camera on. ● The lens moves out when the mode dial is not set to ● The viewfinder turns on. ●...
-
Page 16: Contents
GETTING STARTED (Cont.) Note ● The current settings stay the same even when the power is turned off, unless they are readjusted. ● The date setting will be canceled if the camera is left with no batteries for approximately 1 hour. If this happens, you will need to set the date again. ●... - Page 17 For more details on the camera functions described in this manual, refer to the camera Reference Manual on the CD-ROM enclosed in the camera package. Some function settings may not be available depending on the mode. Factory default settings of some functions vary depending on the mode.
- Page 18 3x digital zoom, making possible up to approx. 24x zoom. PANORAMA Allows panorama pictures to be taken with – Olympus CAMEDIA-brand card. 2 in 1 Combines two pictures taken in succession – and stores them as a single picture.
- Page 19 CARD tab Display Function Setting CARD SETUP Formats cards. – SETUP tab Display Function Setting ALL RESET Selects whether to keep the current camera OFF, ON settings when you turn off the power. INFO Changes the amount of shooting information OFF, ON displayed on the viewfinder/monitor.
- Page 20 USING THE MENU (Cont.) Tabs & MODE MENU functions (Playback) When a still picture is played back, the MODE MENU has 3 tabs. When a Ññ movie is played back, the MODE MENU has 2 tabs. Press to select a tab and display the associated menu items.
- Page 21 SHOOTING BASICS Shooting mode setting — Mode dial Full-auto shooting Allows you to take still pictures using NO special functions or manual adjustments. The camera sets optimal focusing and exposure. Suitable for simple shooting. Sports shooting Suitable for capturing fast-moving action (such as a sports scene or moving vehicles) without blurring.
- Page 22 SHOOTING BASICS (Cont.) My Mode Your favorite settings can be saved in MY MODE SETUP (in the menu’s SETUP). Customized settings are activated when the power is turned on in mode. Settings such as aperture value, zoom position, etc. can be customized.
- Page 23 Shutter speed setting — Shutter priority shooting Mode dial setting In the top menu, select MODE MENU T CAMERA T P/A/S/M T S. Press . Press again to cancel the menu. To set a faster shutter Ñ speed, press To set a slower shutter ñ...
- Page 24 SHOOTING BASICS (Cont.) Mode dial Taking still pictures setting Remove the lens cap. Set the mode dial to any of the following positions and press the POWER switch. Shooting mode: , P/A/S/M, Point the camera towards a subject while viewing through the viewfinder. Flash switch Power switch Card access lamp...
- Page 25 Mode dial Recording movies setting Remove the lens cap. Set the mode dial to and press the POWER switch. Point the camera towards a subject while viewing through the viewfinder. Power switch Card access lamp Press the shutter button halfway. AF target mark ●...
- Page 26 SHOOTING BASICS (Cont.) Zoom Zoom lever T To zoom in on a subject, press the zoom lever towards T. To shoot a wider-angle picture, press the zoom lever towards W. TTelephoto/Wide-angle shooting is possible at up to 8x magnification (optical zoom limit, equivalent to 40 mm-320 mm on a 35 mm camera).
- Page 27 Mode dial Using the flash setting Auto-flash (No indication, factory default setting) : Automatically fires in low-light and backlight conditions. Red-eye reduction flash Significantly reduces the phenomenon of “red-eye” (subject’s eyes appearing red). Fill-in flash Always fires regardless of the lighting conditions. Flash off For situations where flash is prohibited, or when not using the flash.
-
Page 28: Advanced Shooting
ADVANCED SHOOTING Mode dial Drive mode setting Single-frame shooting : Shoots 1 frame at a time when the shutter button is pressed all the way. (normal shooting) Sequential shooting : Shoots pictures sequentially. Focus, exposure and white balance are locked at the first frame. AF Sequential shooting : Shoots pictures sequentially. - Page 29 Mode dial Macro mode shooting setting Focusing is usually slow when you get close to a subject (0.1 m-0.6 m (0.3 ft- 1.9 ft) in the max. W position or 1.0 m-2.0 m (3.2 ft-6.5 ft) in the max. T position).
- Page 30 PLAYBACK Viewing still pictures Set the mode dial to (playback mode) and press the POWER switch. Display the desired pictures using the arrow pad. ● Pictures indicated by movie frames. Jumps to the picture 10 frames behind. Displays the next picture. Jumps to the picture 10 frames ahead.
- Page 31 Playing back movies Display the movie frame (picture with ) you want to play back. Steps 1 and 2 in “Viewing still pictures”. Ñ Press on the arrow pad to Press ● The top menu appears. select MOVIE PLAY. MOVIE PLAY INFO MODE MENU Ññ...
- Page 32 PLAYBACK (Cont.) Mode dial Picture Rotation setting There may be times when you want to rotate a picture. With picture rotation, you can turn them horizontally, 90 degrees clockwise, or counter-clockwise. Display a vertically oriented picture in the single-frame playback mode.
- Page 33 This function lets you format a card. Formatting prepares cards to receive data. Olympus CAMEDIA-brand cards are highly recommended for use with this camera. If you are going to use non-OLYMPUS cards or cards formatted by other devices such as a computer, you must format them with the camera before use.
- Page 34 PLAYBACK (Cont.) Press to start formatting. ● A bar is displayed to show the progress of formatting. ● To cancel formatting, select NO in step 3 and press Note ● All existing data stored on the card is erased when the card is formatted. Make sure that you save or transfer important data to a PC before formatting a used card.
-
Page 35: Print Settings
PRINT SETTINGS Mode dial setting By specifying the desired number of prints of each picture on the card and whether or not the date and time are to be printed, you can print out the desired pictures according to the print reservation data with a DPOF- compatible printer or at a DPOF photo lab. -
Page 36: Transferring Pictures To A Computer
TRANSFERRING PICTURES TO A COMPUTER By connecting the camera to a computer with the provided USB cable, images on a card can be transferred to the computer. Some OS's (operating systems) may need a special setup when connecting to the camera for the first time. - Page 37 Note ● You can view images using: graphics applications that support the JPEG file format (Paint Shop Pro, Photoshop, etc.); Internet browsers (Netscape Communicator, Microsoft Internet Explorer, etc.); CAMEDIA Master software; or other software. For details on using commercial graphics applications, refer to their instruction manuals.
- Page 38 • Windows 98 * Certain card readers may not be å • Windows 2000 compatible with Mac OS X. • Windows Me Check the Olympus website for the • Windows XP most up-to-date compatibility • Mac OS 9/X ¥ information.
-
Page 39: Optional Accessories
P-400 and P-200 photo printers for Olympus digital cameras AC adapter Standard SmartMedia card (8/16/32/64/128MB) Floppy disk adapter PC card adapter Olympus-brand removable media reader/writer NiMH batteries NiMH battery chargers Visit the Olympus home page for the latest information on optional items. http://www.olympus.com/... - Page 40 ERROR CODES If there is a problem with your camera, one of the error codes below will appear. Possible Corrective Indications causes action The card is not Insert a card correctly or inserted, or it cannot insert a different card. be recognized.
- Page 41 The battery is dead. Install either new or freshly The camera stops charged batteries. working. The card access lamp and self-timer lamp blink at the same time. Consult your nearest Olympus dealer or customer Other indications support department (see back cover).
- Page 42 1024 x 768 pixels (SQ2) 640 x 480 pixels (SQ2) Lens Olympus lens 6.4 mm to 51.2 mm, f2.8 to f3.4, 10 elements in 7 groups (equivalent to 40 mm to 320 mm lens on 35 mm camera) Photometric system...
- Page 43 Battery charging time Approx. 7 sec. (at normal temperature with new for flash batteries) Autofocus TTL system autofocus, Contrast detection system, Focusing range: W: 0.1 m to ∞ (0.3 ft to ∞) T: 1.0 m to ∞ (3.2 ft to ∞) Outer connector DC-IN jack, USB connector (mini-B), VIDEO OUT jack...
- Page 44 Our phone customer support is available from 8 am to 10 pm (Monday to Friday) ET E-Mail: distec@olympus.com Olympus software updates can be obtained at: http://olympus.com/digital Adobe [Photoshop] Support Adobe software updates and technical information can be obtained at: http://www.adobe.com/support/ OLYMPUS OPTICAL CO.
-
Page 45: Digital Camera
DIGITAL CAMERA C-720 Ultra Zoom REFERENCE MANUAL < Click Here > CAMERA OPERATION MANUAL Explanation of digital camera functions and operating instructions. DIGITAL CAMERA - PC CONNECTION OPERATION MANUAL Explanation of how to download images between your digital camera and PC. - Page 46 C-720 Ultra Zoom REFERENCE MANUAL Thank you for purchasing an Olympus digital camera. Before you start to use your new camera, please read these instructions carefully to enjoy optimum performance and a longer service life. Keep this manual in a safe place for future reference.
- Page 47 Declaration of Conformity Model Number : C-720 Ultra Zoom Trade Name : OLYMPUS Responsible Party : Olympus America Inc. Address : 2 Corporate Center Drive, Melville, New York 11747-3157 U.S.A. Telephone Number : 1-631-844-5000 Tested To Comply With FCC Standards FOR HOME OR OFFICE USE This device complies with Part 15 of the FCC rules.
- Page 48 Contents ................P. 4 Chapter 1 Getting started P. 19 Chapter 2 Quick-start guide P. 32 Chapter 3 Using the menus P. 37 Chapter 4 Shooting basics P. 44 Chapter 5 Advanced shooting P. 65 Chapter 6 Adjusting image quality and exposure P.
-
Page 49: Table Of Contents
C o n t e n t s Names of parts ................10 Camera 10 Viewfinder/Monitor indications — Shooting information 12 Viewfinder/Monitor indications — Playback information 14 Still picture playback information 14 Movie playback information 15 Viewfinder/Monitor indications — Memory gauge & battery check 16 Memory gauge 16 Battery check 16 How to use this manual ..............17... - Page 50 C o n t e n t s Using the menus What are the menus? ............37 How to use the menu ............38 Modes & short cut menus ............40 Tabs & MODE MENU functions (shooting) ......41 Tabs & MODE MENU functions (playback) ......43 Shooting basics Shooting mode setting —...
- Page 51 C o n t e n t s Flash shooting ..............60 Auto-flash 60 Red-eye reduction flash Fill-in flash Flash off Night scene flash & Night scene with red-eye reduction flash Using the flash 62 Flash intensity control 64 Advanced shooting Spot metering —...
- Page 52 C o n t e n t s Adjusting image quality and exposure Record mode ................78 Selecting record modes 78 ISO sensitivity ................82 Exposure compensation ............84 White balance ..............85 Sharpness................86 Contrast ................86 Playback Playing back still pictures ............87 Single-frame playback 87 Quick View 87 Slide-show ................88 Playing back movies —...
- Page 53 C o n t e n t s Useful functions All reset — Saving the camera’s settings ......104 Custom button..............105 Setting the custom button 105 Using the custom button 106 Shortcut ................107 Setting the shortcut menu 108 Using the shortcut menu 109 MY MODE SETUP ..............110 Information display ............113 Monitor brightness adjustment ..........114...
- Page 54 C o n t e n t s Miscellaneous Troubleshooting..............124 User maintenance ..............131 After use 131 Cleaning the camera 131 Error codes................132 Menu maps ................134 Menu functions & factory default settings ......137 Modes & Shooting functions..........138 Specifications ..............140 Glossary of terms ..............142 Index ..................145...
-
Page 55: Names Of Parts
Camera Zoom lever (W/T) (P. 58) Index display/Close-up playback lever ( ) (P. 93, 95) Shutter button (P. 50) Flash switch ( (P. 62) Mode dial ( , P/A/S/M, ) (P. 44–46) Macro/Spot button ( ) (P. 65, 68) Print button ( ) (P. - Page 56 Camera (Cont.) Flash (P. 62) Self-timer lamp (P. 70) Card cover Lens (P. 26) DC-IN jack (P. 23) USB connector VIDEO OUT jack (P. 103) Strap eyelet (P. 19) Connector cover (P. 103) Battery compartment lock (P. 21) Tripod socket Battery compartment cover (P.
-
Page 57: Viewfinder/Monitor Indications - Shooting Information
Viewfinder/Monitor indications — Shooting information The INFO setting on the menu allows you to select how much information to display. Information display (P. 113) The indications vary depending on the shooting mode.* When INFO is set to OFF: The When INFO is set to ON: The information below is displayed information below is displayed constantly in the shooting mode. - Page 58 Viewfinder/Monitor indications — Shooting information (Cont.) & ISO 100 Items Indications Ref. page Record mode TIFF/SHQ/HQ/SQ1/SQ2 P. 78 Memory gauge P. 16 Battery check P. 16 AE lock P. 66 Drive mode , BKT P. 71 White balance P. 85 ISO100, ISO200, ISO400 P.
-
Page 59: Viewfinder/Monitor Indications - Playback Information
Viewfinder/Monitor indications — Playback information INFO setting on the menu allows you to select how much information to display. Information display (P. 113) Still picture playback information SIZE: 1984x1488 F2.8 1/800 +2.0 ISO100 ’02.09.12 12:30 ’02.09.12 12:30 FILE: 100–0020 When INFO is set to ON When INFO is set to OFF Items Indications... -
Page 60: Movie Playback Information
Viewfinder/Monitor indications — Playback information (Cont.) Movie playback information SIZE: 320x240 ’02.09.12 12:30 FILE: 100–0020 When INFO is set to ON When INFO is set to OFF Items Indications Ref. page Battery check P. 16 Movie mark P. 35 Protect P. -
Page 61: Viewfinder/Monitor Indications - Memory Gauge & Battery Check
Viewfinder/Monitor indications — Memory gauge & battery check Memory gauge The memory gauge lights when you take a picture. When the gauge is lit, the camera is storing a picture on the SmartMedia card. The memory gauge indication changes as shown below depending on the shooting status. When the memory gauge is full, wait until the light goes out before you take any more shots. -
Page 62: How To Use This Manual
How to use this manual The instructions in this manual use a series of numbers for each operating procedure and button/dial illustration. Follow these numbers in order when operating the camera. Example 1 If a button is shown in black, press it as part of the step. Shooting mode setting —... -
Page 63: Using The Menu
How to use this manual (Cont.) Example 2 Shows the modes that the function can be used with. You can set the mode dial to any of the positions shown. Information display Lets you select the amount of shooting information displayed in the shooting or playback mode. -
Page 64: Getting Started
Attaching the strap Attach the string to the lens cap; Pull the string loop through the hole in the lens cap. Put the other end of the string through the string loop. Thread the strap through the camera’s Monitor strap eyelet. It can only enter from the monitor side. - Page 65 ● Attach the strap correctly as shown so that the camera does not fall off. If the strap is attached incorrectly and the camera falls off the strap, Olympus is not responsible for any damages.
-
Page 66: Loading The Batteries
Loading the batteries This camera uses 2 CR-V3 lithium battery packs or 4 AA (R6) NiMH batteries, NiCd batteries, alkaline batteries or lithium batteries. Important: ● CR-V3 lithium battery packs cannot be re-charged. ● Do not peel the label on a CR-V3 lithium battery pack. Make sure the camera is turned off;... -
Page 67: Selecting Optional Batteries Or Ac Adapter
Since the CR-V3 lithium battery pack has an exceptionally long service life, it is convenient when traveling. The CR-V3 lithium battery pack cannot be charged. Rechargeable batteries Olympus NiMH batteries are rechargeable and economical. In addition, the low-temperature resistance makes them a good choice for cold areas. - Page 68 AC adapter An optional Olympus CAMEDIA-brand AC adapter allows you to power your digital camera from a common AC wall outlet. Be sure to use the specified AC adapter. An AC adapter is useful for time-consuming tasks such as image downloads.
- Page 69 Loading the batteries (Cont.) Note ● Manganese (zinc-carbon) batteries cannot be used. ● The lives of battery packs may vary according to the type of battery, manufacturer, camera shooting conditions, etc. ● If the battery power runs out while the camera is connected to a PC, image data will be corrupted.
-
Page 70: Card Basics
● 2 MB cards cannot be used. ● Commercially-available 5 V cards cannot be used. ● This camera may not recognize a non-Olympus card (such as 3 V (3.3 V)) or a card that was formatted on another device (such as PC, etc.). Before use, be sure to format the card on this camera (P. -
Page 71: Inserting/Removing The Card
Card basics (Cont.) Inserting/Removing the card Make sure the camera is turned off; ● The monitor is off. ● The viewfinder is off. ● The lens is not extended. Open the card cover. Inserting the card Insert the card as far as it will go in the direction shown in the illustration. -
Page 72: Power On/Off
Power on/off Before turning the camera on, press the tabs on the lens cap to remove it. Press the power switch to turn on the camera. ● The lens moves out when the mode dial is not set to ● The viewfinder turns on. Lens cap ●... -
Page 73: Card Check
Power on/off (Cont.) Card check When the power is turned on, the camera checks the card automatically. Indications TIPS There is no card in the camera or the card is not locked into place. T Insert a card. If a card is already inserted, remove it and insert it again. -
Page 74: Date/Time Setting
Date/time setting It is possible to set the date/time of the camera’s built-in clock. Since the date and time is saved with recorded pictures, be sure to set it correctly. POWER switch Set the mode dial to , then press Mode dial the POWER switch to turn on the camera. - Page 75 Date/time setting (Cont.) í Press to move to the year (Y) setting. Ññ í Press to set the year. When the year is set, press to move to the month (M) setting. ● Repeat this procedure until the date and time are completely set. É...
-
Page 76: Adjusting The Diopter
Adjusting the diopter Set the mode dial to , then press the POWER switch to turn on the camera. Turn the diopter adjustment dial to see the AF target mark clearly. Viewfinder Diopter adjustment dial AF target mark Holding the camera Hold the camera firmly with both hands while keeping your elbows at your sides to prevent the camera from moving. -
Page 77: Quick-Start Guide
Taking still pictures Remove the lens cap. Set the mode dial to press the POWER switch. Point the camera towards a subject while viewing through the viewfinder. Flash switch Power switch Card access lamp To focus on the subject, press the shutter button halfway, slowly and gently. -
Page 78: Recording Movies
Recording movies Remove the lens cap. Set the mode dial to and press the POWER switch. Point the camera towards a subject while viewing through the viewfinder. Power switch Card access lamp Press the shutter button halfway. AF target mark ●... -
Page 79: Viewing Still Pictures
Viewing still pictures Display the desired pictures Set the mode dial to using the arrow pad. (playback mode) and ● Pictures indicated by press the POWER switch. movie frames. “Playing back movies” on page 35. Jumps to the picture 10 frames behind. Displays the next picture. -
Page 80: Playing Back Movies
Playing back movies Display the movie frame (picture with ) you want to play back. See steps 1 and 2 on page 34. Ñ Press on the arrow pad to Press ● The top menu appears. select MOVIE PLAY. MOVIE PLAY INFO MODE MENU Ññ... -
Page 81: Erasing Pictures
Erasing pictures Display the picture you want to erase. See steps 1 and 2 on page 34. Press the (erase) button. ERASE SELECT When the ERASE screen Ñ appears, press to select YES. ● To cancel erasure, press ñ on the arrow pad to select NO, and press or the... -
Page 82: Using The Menus What Are The Menus
What Are the Menus? When you turn on the camera and press the (OK/Menu) button, the menu that appears on the monitor is generally called “the top menu”. Many functions of this camera are accessed using the menus. Below, we’ll explain how the camera’s menus work, using examples of menus displayed in the P/A/S/M mode. -
Page 83: How To Use The Menu
How to use the menu Ññ Press to display the top Press to select a tab and í í menu. Press press P/A/S/M top menu CAMERA tab AUTO P/A/S/M MODE MENU 1.0 x3 DIGIT DIGITAL ZOOM AL ZOOM ˙ É Pressing returns to the tab selection. - Page 84 How to use the menu (Cont.) Ññ Ññ Press to select an item Press to select the setting. í and press Press to save the setting. ● To go back to shooting, press ALL RESET INFO INFO REC VIEW MY MODE SETUP MY MODE SETUP ˙...
-
Page 85: Modes & Shortcut Menus
Modes & Shortcut Menus P/A/S/M top menu top menu (same as in (same as in top menu DIGITAL ZOOM MODE MENU CARD SETUP MODE MENU top menu top menu (movie) top menu (for still pictures) (for movies) DIGITAL ZOOM MOVIE PLAY INFO MODE MENU MODE MENU... -
Page 86: Tabs & Mode Menu Functions (Shooting)
3x digital zoom, making possible up to approx. 24x zoom. PANORAMA Allows panorama pictures to be taken with P. 75 Olympus CAMEDIA-brand card. 2 in 1 Combines two pictures taken in succession P. 77 and stores them as a single picture. - Page 87 Tabs & MODE MENU functions (shooting) (Cont.) CARD tab CARD SETUP Formats cards. P. 102 SETUP tab ALL RESET Selects whether to keep the current camera P. 104 settings when you turn off the power. INFO Changes the amount of shooting information P.
-
Page 88: Tabs & Mode Menu Functions (Playback)
Tabs & MODE MENU functions (playback) When a still picture is played back, the MODE MENU has 3 tabs. When a Ññ movie is played back, the MODE MENU has 2 tabs. Press to select a tab and display the associated menu items. The EDIT tab is not available during movie playback. -
Page 89: Shooting Basics
Shooting mode setting — Mode dial Set the mode dial to any of the following positions and press the POWER switch. Mode dial Shooting mode: , P/A/S/M, ● The camera turns on and the lens automatically extends. ● P/A/S/M mode setting: In the top menu, select MODE MENU T CAMERA T P/A/S/M T P, A, S or M. - Page 90 Shooting mode setting — Mode dial (Cont.) ●P ( Program shooting) Allows you to take still pictures. The camera sets aperture and shutter speed. Other functions, such as flash modes and drive modes, can be adjusted manually. ●A (Aperture priority shooting) Allows you to set the aperture manually.
- Page 91 Shooting mode setting — Mode dial (Cont.) ●M (Manual shooting) Allows you to set the aperture and shutter speed manually. To check the exposure, refer to the exposure differential. This mode gives you more creative control, allowing you to make the settings you need to get the type of picture you want, regardless of optimum exposure.
-
Page 92: Aperture Setting - Aperture Priority Shooting
Shooting mode setting — Mode dial (Cont.) Aperture setting — Aperture priority shooting Mode dial setting In the top menu, select MODE MENU T CAMERA T P/A/S/M T A. Press . Press again to cancel the menu. “How to use the menu”... -
Page 93: Shutter Speed Setting - Shutter Priority Shooting
Shooting mode setting — Mode dial (Cont.) Shutter speed setting — Shutter priority shooting Mode dial setting In the top menu, select MODE MENU T CAMERA T P/A/S/M T S. Press . Press again to cancel the menu. “How to use the menu”... -
Page 94: Aperture & Shutter Speed Setting - Manual Shooting
Shooting mode setting — Mode dial (Cont.) Aperture & Shutter speed setting — Manual shooting Mode dial setting In the top menu, select MODE MENU T CAMERA T P/A/S/M T M. Press . Press again to cancel the menu. “How to use the menu”... -
Page 95: Using My Mode
Shooting mode setting — Mode dial (Cont.) Using My Mode When using My Mode, the shooting mode you selected with the menus in the mode is activated. You can also save the shooting mode or function settings you are currently using in the mode. -
Page 96: Focusing
How to use the shutter button (Cont.) Press the shutter button all the way. ● , P/A/S/M, or mode: The camera starts storing your pictures on the card. While pictures are being stored, the card access lamp blinks. ● mode: The camera starts recording a movie. -
Page 97: When Auto Focus Does Not Work - Subjects That Are Difficult To Focus On
Focusing (Cont.) When Auto focus does not work — Subjects that are difficult to focus on Under certain types of conditions auto focus may not work properly. If you run into problems, try the procedure below. Conditions Auto focus may not work properly. The green lamp may blink. Conditions Auto focus may not work properly even when the green lamp lights when you press the shutter button down halfway. -
Page 98: Focus Lock - Focusing On Subjects That Are Not In The Center Of The Frame
Focusing (Cont.) Focus lock — Focusing on subjects that are not in the center of the frame If the subject of your composition is not within the AF target mark and focusing is not possible (as illustrated to the right), try the following: AF target mark Mode dial... -
Page 99: Taking Still Pictures
Taking still pictures Mode dial setting Point the camera towards a subject, and place the subject on the AF target mark. Press the shutter button halfway. ● When the focus and brightness (exposure) are locked, the green lamp lights. ● To warn you of camera shake, will blink. - Page 100 Taking still pictures (Cont.) TIPS ● How to use the monitor T Press the (monitor) button. The monitor turns on automatically. ● The green lamp blinks. T If you want to get as close as approximately 0.1 m (0.3 ft) in the maximum W position or 1 m (3.2 ft) in the maximum T position to your subject, put the camera into the macro mode (P.
-
Page 101: Recording Movies
Recording movies Mode dial setting Point the camera towards a subject, and place the subject on the AF target. ● When the mode dial is set to , the total recording time is shown. Total recording time depends on the memory capacity of the card. - Page 102 Recording movies (Cont.) Press the shutter button all the way to stop recording. ● The card access lamp blinks and the camera begins storing the movie on the card. You cannot record another movie as long as the card access lamp is blinking. ●...
-
Page 103: Zoom - Telephoto/Wide-Angle Shooting
Zoom — Telephoto/Wide-angle shooting Telephoto/Wide-angle shooting is possible at up to 8x magnification (optical zoom limit, equivalent to 40 mm-320 mm on a 35 mm camera). By combining the digital zoom with the 8x optical zoom, zoom magnification up to approx. 24x is possible. -
Page 104: Digital Zoom
Zoom — Telephoto/Wide-angle shooting (Cont.) Digital zoom Mode dial setting : In the top menu, select DIGITAL ZOOM T ON. Press . Press again to cancel the menu. : In the top menu, select MODE MENU T CAMERA P/A/S/M T DIGITAL ZOOM T ON. Press . -
Page 105: Flash Shooting
Flash shooting You can select a flash mode appropriate to the lighting conditions and the effect you want to achieve. You can also adjust the amount of light emitted using the flash intensity control (P. 64). The flash modes are as follows: Auto-flash Automatically fires in low-light and backlight conditions. -
Page 106: Flash Off
Flash shooting (Cont.) Flash off When the flash is pushed back in the camera, the flash is in the Off mode. The flash does not fire even in low-light conditions. Use this mode in situations where flash photography is not desired or is prohibited, or when you want to shoot a natural-looking twilight or night scene. -
Page 107: Using The Flash
Flash shooting (Cont.) Using the flash Mode dial setting Press the (flash) switch. Flash switch ● The flash pops up. Press the (flash mode) button repeatedly until the desired flash mode indication appears. ● The flash mode changes as follows (if all modes are available): Flash mode button When selecting/When shooting... - Page 108 Flash shooting (Cont.) Mode P/A/S/M Flash mode Auto-flash – – – – – – – – – – – – – – – – – – – : Available, – : Not available : Factory default setting * The factory default setting and the available settings differ depending on which shooting mode is selected.
-
Page 109: Flash Intensity Control
Flash shooting (Cont.) Flash intensity control You can adjust the amount of light emitted by the flash. In some situations, you may get better results by adjusting light emission. Examples include small subjects, distant backgrounds, or situations when increased contrast is desired. Mode dial setting In the top menu, select MODE MENU T CAMERA T... -
Page 110: Spot Metering — Selecting The Metering Area
Spot metering — Selecting the metering area There are 2 metering methods: Digital ESP metering and spot metering. Digital ESP metering: Meters the center of the subject and the area around it. Spot metering: Exposure is determined by metering within the AF target mark. -
Page 111: Ae Lock — Locking The Exposure
AE lock — Locking the exposure Suitable for situations when optimal exposure is difficult to achieve (such as excessive contrast between the subject and the surroundings). For example, if the sun is in the frame and shooting with automatic exposure results in a dark subject, re-compose your shot so that the sun is not in the frame. - Page 112 AE lock — Locking the exposure (Cont.) Place the subject you want to focus on within the AF target mark, then press the shutter button halfway. ● The green lamp lights. Green lamp During AE lock, AEL is displayed. Press the Shutter button all the way. ●...
- Page 113 Macro mode shooting — Taking close-up pictures Focusing is usually slow when you get close to a subject (0.1 m-0.6 m (0.3 ft- 1.9 ft) in the max. W position or 1.0 m-2.0 m (3.2 ft-6.5 ft) in the max. T position).
- Page 114 Macro mode shooting — Taking close-up pictures (Cont.) Supported working range ∞ ∞ Normal (except macro) : W : 0.1 m to (0.3 ft to ∞ ∞ T : 1.0 m to (3.2 ft to Macro : W : 0.1 m to 0.6 m (0.3 ft to 1.9 ft) T : 1.0 m to 2.0 m (3.2 ft to 6.5 ft) Factory default setting: Digital ESP Note...
-
Page 115: Self-Timer Shooting
Self-Timer Shooting This function is useful for taking pictures where you want to be included in the photograph. Mode dial setting Use a tripod to stabilize the camera. Press the DRIVE button repeatedly until appears. ● If DRIVE is not pressed within 2 seconds after the selection screen is displayed, the selection screen disappears. -
Page 116: Sequential Shooting
Sequential shooting There are 3 Sequential shooting modes: Sequential shooting , AF Sequential shooting and Auto bracketing BKT. You can select sequential shooting modes by pressing the DRIVE button. The drive mode changes as follows (if all modes are available): When selecting/When shooting Single-frame : Shoots 1 frame at a time when the... -
Page 117: Auto Bracketing — Shooting Pictures Sequentially With A Different Exposure For Each Frame
Sequential shooting (Cont.) Take pictures. ● Press the shutter button all the way and keep it pressed. The camera will take pictures in sequence until you release the button. ● Sequential shooting speed (HQ mode): approximately 1.2 frames/sec., number of pictures: 5 max. Note ●... - Page 118 Sequential shooting (Cont.) Ññ Press to select the number of frames to shoot (x3, x5), then press ● In some combinations of picture size and record mode, only x3 is available. SELECT Press the DRIVE button repeatedly until BKT appears. ●...
- Page 119 Sequential shooting (Cont.) Note ● Sequential shooting ( , BKT) is not possible when the record mode is set to TIFF (P. 78). ● The flash will not fire during auto bracketing. ● Red-eye reduction and Night scene with red-eye reduction are not available in sequential shooting or AF sequential shooting.
-
Page 120: Panorama Shooting
Panorama shooting You can take advantage of panorama shooting with both Olympus CAMEDIA- brand cards and CAMEDIA Master software. (Non-Olympus cards do not support this feature.) Panorama shooting lets you connect images with overlapping edges into a single panoramic image, using the provided CAMEDIA Master software. - Page 121 If you take 10 pictures, a warning screen appears and no more pictures can be taken. ● The Panorama mode is only available with the OLYMPUS CAMEDIA-brand SmartMedia cards. ● The camera itself cannot connect panorama pictures. To connect each picture, the CAMEDIA Master software is necessary.
-
Page 122: Taking Two-In-One Pictures
Taking two-in-one pictures Allows you to combine two pictures taken in succession and store them as a single picture. Mode dial setting In the top menu, select MODE MENU T CAMERA T 2 IN 1. “How to use the menu” (P. 38) í... -
Page 123: Record Mode
Record Mode Selecting Record Modes Choose the best record mode for your purposes (printing, editing on a computer, web-site editing, etc.). To see how large SmartMedia memory capacity is under various conditions (such as different resolutions, compressions, or file formats), refer to the table on page 79. The numbers in the table are approximate. - Page 124 Record Mode (Cont.) Still Picture Record Modes The memory capacity listed here is approximate. Memory capacity in # of shots File Record Resolution Compression format mode 32MB 16MB TIFF 1984x1488 Uncompressed TIFF 1984x1488 Low compression 1984x1488 1600x1200 JPEG 1280x960 Normal 1024x768 640x480 Movie Record Modes...
- Page 125 Record Mode (Cont.) Mode dial setting T SHQ, HQ, SQ1 or : In the top menu, select SQ2. ● In these shooting modes, resolution cannot be selected. SQ2: 640 x 480 T HQ or SQ. : In the top menu, select “How to use the menu”...
- Page 126 Record Mode (Cont.) TIPS ● Resolution: The number of pixels (vertical x horizontal) used when saving an image. If the image will be printed, higher resolutions (larger numbers) are recommended so that the image will be clearer. However, higher resolutions make the file size (amount of data) larger, so less pictures can be saved to a card.
-
Page 127: Iso Sensitivity
ISO Sensitivity The higher the ISO value, the greater the camera’s light sensitivity and the better its ability to shoot in low-light conditions. However, higher values also introduce electrical noise into the resulting image, which may make give them a grainy appearance. Mode dial setting : In the top menu, select MODE MENU T CAMERA T ISO. - Page 128 ISO Sensitivity (Cont.) Modes & ISO Sensitivity Mode P/A/S/M AUTO – : Available, – : Not available : Factory default setting * The factory default setting and the available settings differ depending on which shooting mode is selected. See the P/A/S/M column. Note ●...
-
Page 129: Exposure Compensation
Exposure Compensation This function allows you to make fine changes to the present exposure setting. In some situations, you may get better results when the exposure that the camera sets is compensated (adjusted) manually. You can adjust between +/–2.0 in 1/3 steps. When the setting is changed, you can check the result on the monitor. -
Page 130: White Balance
White Balance Color reproduction differs depending on the lighting conditions. For instance, when daylight, the setting sun, or indoor lighting are reflected on white paper, the shade of white produced will be slightly different for each. By setting the WB (white balance), you can achieve more natural-looking color. You can also preview different color tones by trying the different settings under the actual light source, and checking the result on the viewfinder/monitor. -
Page 131: Sharpness
Sharpness This function adjusts the sharpness of images. You can select one of the following three options: NORMAL : Image outlines are sharp. This makes it ideal for printing. SOFT : Image outlines are softer. This makes it ideal for editing images on a computer. -
Page 132: Playback
Playing Back Still Pictures Single-Frame Playback Plays back one picture. Mode dial setting Set the mode dial to (playback mode) and press the POWER switch. ● The monitor turns on and displays the last picture taken. Use the arrow pad to play back other pictures. ●... -
Page 133: Slide-Show
Slide-Show This function displays pictures from the card one after another, as if you are watching a slide-show. Movies are played back like still pictures, starting from the first frame. Mode dial setting Playback top menu (still pictures) Display a still picture. Then, press to display the top menu. -
Page 134: Playing Back Movies - Movie Play
Playing Back Movies — MOVIE PLAY This function lets you play back or edit movies. Mode dial setting Use the arrow pad to select a picture with Playback top menu (movies) Press to display the top menu. MOVIE PLAY INFO MODE MENU Ñ... -
Page 135: Movie Playback
Playing Back Movies — MOVIE PLAY (Cont.) MOVIE PLAYBACK Plays back movies. Mode dial setting Follow steps 1-3 on page 89. Ññ Press to select MOVIE PLAYBACK on the MOVIE PLAY screen. Press to start playback. ● When movie playback ends, the display automatically returns to the beginning of the movie. -
Page 136: Index
Playing Back Movies — MOVIE PLAY (Cont.) INDEX Movies can be displayed as indexes of still frames. Indexes can be saved on the card as still pictures. Indexes are not stored in the same record mode as movies (see below). Record mode when Record mode when stored as an index the movie is shot... - Page 137 Playing Back Movies — MOVIE PLAY (Cont.) Press to run the selected movie. ● When OK is selected, the MOVIE PLAY screen appears. To exit, press É Note ● The interval between automatically selected frames varies depending on the recording time of the movie. ●...
-
Page 138: Close-Up Playback
Close-up Playback Pictures displayed on the monitor can be enlarged. Each time you turn the zoom lever towards T, pictures are enlarged by 1.5, 2, 2.5 or 3 times. Mode dial setting With the arrow pad, select the picture you want to enlarge. ●... -
Page 139: Picture Rotation
Picture Rotation There may be times when you want to rotate a picture. For example, pictures taken with the camera held vertically are also oriented vertically (i.e. longer vertically than horizontally). With picture rotation, you can turn them horizontally, 90 degrees clockwise, or counter-clockwise. Mode dial setting Display a vertically... -
Page 140: Index Display
Index Display This function lets you show many pictures at the same time on the monitor. It is useful for comparing your pictures and choosing the best ones. The number of pictures shown can be 4, 9, or 16 (see the next page). Index display (9-frame) In the single-frame playback mode (P. -
Page 141: Selecting The Number Of Pictures
Index Display (Cont.) TIPS ● How to view a full-size picture from the index T Select the picture with the arrow pad, then press the zoom lever toward T. Selecting the Number of Pictures This function lets you change the number of pictures in an index display. Mode dial setting In the top menu, select MODE MENU T SETUP T... -
Page 142: Editing Still Pictures
Editing still pictures Allows you to edit still pictures and save them as new ones. BLACK&WHITE : Creates black and white pictures. SEPIA : Creates sepia-toned pictures. : Changes picture dimensions to 640 x 480 or 320 x 240 and saves the picture as a new file. Use this function to make the image file size smaller needed for instances such as attaching the picture to e-mail. -
Page 143: Resizing Pictures
Editing still pictures (Cont.) Note ● BLACK & WHITE/SEPIA is not available in the following situations. – Movie – When the card is protected or when “ CARD FULL” (P. 132) appears (indicating there is no memory left) to save the resulting image. –... -
Page 144: Protect
Protect It is highly recommended that you protect important pictures to avoid accidentally erasing them. Protected pictures cannot be erased by the single- frame/all-frame erase function. Mode dial setting Display the picture you want to protect by using the arrow pad. Press . -
Page 145: Erasing Pictures
Erasing Pictures Recorded pictures can also be erased. This can be done either one frame at a time or to all the pictures in the card. Note ● It is not possible to erase protected pictures or pictures stored on a card that has a write-protect seal. -
Page 146: All-Frame Erase
Erasing Pictures (Cont.) All-Frame Erase This function erases all still pictures and movies on the card, except protected ones (P. 99). Mode dial setting In the top menu, select MODE MENU T CARD T CARD SETUP T ALL ERASE. “How to use the menu” (P. 38) Press ●... -
Page 147: Formatting Cards
This function lets you format a card. Formatting prepares cards to receive data. Olympus CAMEDIA-brand cards are highly recommended for use with this camera. If you are going to use non-OLYMPUS cards or cards formatted by other devices such as a computer, you must format them with the camera before use. -
Page 148: Playback On A Tv
Playback on a TV Use the provided video cable to play back recorded images on your TV. Mode dial setting Make sure that the TV and camera power are off . Connect the camera to the TV using the video cable. Connect to the TV's video input (yellow) terminal Video cable... -
Page 149: Useful Functions
All reset — Saving the camera’s settings This function lets you choose whether or not the camera saves its current settings. OFF: The settings made just before the power is turned off are saved. ON : All settings are returned to the factory default settings. The settings affected by All Reset are listed below. -
Page 150: Custom Button
Custom Button Menu items listed in the table below can be set to the custom button on the camera. This makes it easy to jump to frequently-used functions by pressing only one button. The factory default setting is “AE LOCK”. Custom button Available Items Settings... -
Page 151: Using The Custom Button
Custom Button (Cont.) Using the Custom Button Mode dial setting Press the (custom) button. ● The function currently set to the custom button appears. Set following the below: Ex: When INFO is set to the custom button. INFO ON INFO OFF Press this button. -
Page 152: Shortcut
Shortcut Functions on the top menu other than MODE MENU can be replaced with those listed in the table below. This is useful when you want to quickly go to MODE MENU frequently-used functions. Shortcut menu Available Menu Items Settings ISO (P. -
Page 153: Setting The Shortcut Menu
Shortcut (Cont.) Setting the Shortcut Menu Assign settings to the A, B and C positions on the top menu. MODE MENU Mode dial setting SHORT CUT screen In the top menu, select MODE MENU í T SETUP T SHORT CUT. Press SHOR SHORT CUT T CUT... -
Page 154: Using The Shortcut Menu
Shortcut (Cont.) Using the Shortcut Menu Mode dial setting Press to display the top menu. ● The shortcut menu you set before is shown on the top menu. Press the arrow pad according to the arrow (˙ߥ) shown next to each item. -
Page 155: My Mode Setup
MY MODE SETUP Your favorite settings can be saved in MY MODE SETUP. When the mode dial is set to , your customized settings are activated. When the camera is in the P/A/S/M mode, you can also save some of the settings you are using in MY MODE SETUP. - Page 156 MY MODE SETUP (Cont.) Ññ Set CUSTOM on the CUSTOM screen. Press to select the í functions you want, then press Ññ Select the setting within the function by using , then press ● Repeat Steps 4 and 5 to change other functions. Ex: When setting the aperture on the CUSTOM screen.
- Page 157 MY MODE SETUP (Cont.) Available Items and Factory Default Settings Factory default Factory default Setting Setting setting setting P/A/S/M (P. 44 – 46) (P. 64) ±0 FNo (P. 47, 49) F2.8 DIGITAL ZOOM (P. 59) SHUTTER (P. 48) 1/500 (for still pictures) (P.
-
Page 158: Information Display
Information display Lets you select the amount of shooting information displayed in the shooting or playback mode. When it is set to OFF, only a small amount of information is displayed. For details on each piece of information displayed, see pages 12 to 15. -
Page 159: Monitor Brightness Adjustment
Monitor brightness adjustment Adjusts the brightness of the monitor/viewfinder. When the monitor is OFF: Adjusts only the viewfinder's brightness. When the monitor is ON: Adjusts the monitor's brightness, causing identical changes in the viewfinder at the same time. (When the monitor is turned off, the viewfinder's brightness returns to its original setting.) Mode dial setting... -
Page 160: Rec View
Rec View You can choose if the image being recorded is displayed on the viewfinder/ monitor during shooting. The image being recorded onto the card is displayed. This is useful for a brief check of images you have just taken. Pressing the shutter button halfway at any time displays the image the camera is currently aimed at. -
Page 161: Sleep Timer
Sleep timer The camera automatically enters the sleep mode if the time you have set has passed with no operations being performed. To leave the sleep mode, operate any button (press the shutter button or arrow pad, etc.). Mode dial setting In the top menu, select MODE MENU T SETUP T SLEEP, then select a setting from the following: 30sec, 1min, 3min, 5min or 10min. -
Page 162: File Name
File name The camera automatically creates file names and folder names for images to be stored in. Files can be numbered from 0001 to 9999 and folders can be numbered from 100 to 999. Examples are shown below. ● Month: Jan. - Sep. = 1 - 9, Oct. = A, Nov. = B, Dec. = C There are two choices here: RESET or AUTO. - Page 163 File name (Cont.) Mode dial setting In the top menu, select MODE MENU T SETUP T FILE NAME. SLEEP SLEEP “How to use the menu” (P. 38) RESET FILE NAME AUTO PIXEL MAPPING PIXEL MAPPING Select RESET or AUTO, then press Factory default setting: RESET TIPS ●...
-
Page 164: Pixel Mapping
Pixel Mapping The Pixel Mapping feature allows the camera to check and adjust the CCD and image processing circuit automatically. It is not necessary to operate this function frequently. Approximately once a year is recommended. Wait a few minutes after the monitor is used or continuous shots are taken to allow for proper performance of the Pixel Mapping function. -
Page 165: Print Setting
DPOF- compatible printing service labs or a personal DPOF-compatible printer. Printing on an Olympus CAMEDIA P-400, P-330N(E) or P-200 digital printer: If you insert a card with Print Reserve data into the printer, printing is possible without using a computer. - Page 166 (index-display mode), it is possible to confirm the print reserve status. ● This camera cannot be directly connected to printers such as the Olympus P-300 digital printer. ● Not all functions may be available on all printers or at all photo labs.
-
Page 167: Applying Print Reserve To A Card
Applying print reserve to a card Mode dial setting Use the arrow pad to play back a still picture. ● You cannot use Print reserve on pictures with Press ● The PRINT ORDER screen appears. PRINT ORDER SETTING PRINT ORDER PRINT ORDERED RESET KEEP... - Page 168 Applying print reserve to a card (Cont.) Ññ Press to set x (number of prints). ● Up to 10 can be set. 0 cancels Print reserve. Increases the number. ’02.12.23 21:56 SELECT Decreases the number. To apply Print reserve for Éí...
-
Page 169: Miscellaneous
Troubleshooting POSSIBLE CAUSES CORRECTIVE ACTION REF. PAGE The camera does not turn on or function buttons do not respond. P. 21 1 The batteries are 1 Replace the batteries with exhausted. new ones. 2 The power is off. 2 Press the POWER switch to P. - Page 170 Troubleshooting (Cont.) POSSIBLE CAUSES CORRECTIVE ACTION REF. PAGE No picture is taken when the shutter button is pressed. 1 Set the mode dial to any P. 44 1 The mode dial is set to position except 2 Wait until there is room in P.
- Page 171 Troubleshooting (Cont.) POSSIBLE CAUSES CORRECTIVE ACTION REF. PAGE The date recorded with the image data is wrong. P. 29 1 The date is not set. 1 Set the date. The clock adjustment is not factory- preset. P. 29 2 The camera has been 2 Set the date again.
- Page 172 Troubleshooting (Cont.) POSSIBLE CAUSES CORRECTIVE ACTION REF. PAGE Pictures you have already taken do not appear on the monitor. 1 Set the mode dial to P. 34, 35 1 The camera is in the shooting mode. 2 NO PICTURE appears on the P.
- Page 173 Troubleshooting (Cont.) POSSIBLE CAUSES CORRECTIVE ACTION REF. PAGE The subject’s eyes appear red in pictures recorded with the flash. P. 60 1 The flash is in the auto- 1 This “red-eye phenomenon” flash mode. occurs with all cameras when a flash is used.
- Page 174 Troubleshooting (Cont.) POSSIBLE CAUSES CORRECTIVE ACTION REF. PAGE The picture is too bright. P. 62 1 The flash mode was 1 Select a flash mode other set to the Fill-in flash than the Fill-in flash mode. mode. P. 84 2 The subject was 2 Adjust the exposure excessively illuminated.
- Page 175 Troubleshooting (Cont.) POSSIBLE CAUSES CORRECTIVE ACTION REF. PAGE The picture has obscured edge(s). 1 Hold the camera correctly, P. 31 1 The lens was partly blocked by a finger or keeping your fingers and the the strap. strap away from the lens. Halation produces unnatural colors in a picture.
-
Page 176: User Maintenance
User maintenance After use Turn off the power and attach the lens cap to the lens. Cleaning the camera Turn off the camera. (P. 27) Remove the batteries (P. 21). When using an AC adapter, unplug the AC adapter from the camera and the AC outlet. Exterior: Wipe gently with a soft cloth. -
Page 177: Error Codes
Error codes If there is a problem with your camera, one of the error codes below will appear. Possible Corrective Indications causes action The card is not Insert a card correctly or inserted, or it cannot insert a different card. be recognized. - Page 178 The battery is dead. Install either new or freshly The camera stops charged batteries. working. The card access lamp and self-timer lamp blink at the same time. Consult your nearest Olympus dealer or Other indications customer support department (see back cover).
-
Page 179: Menu Maps
Menu maps P/A/S/M and modes Top menu Function Setting MODE MENU CAMERA ISO (P. 82) AUTO, 100, 200, 400 P/A/S/M (P. 44) P, A, S, M (P. 64) –2.0 to +2.0 BKT (P. 72) 0.3/ 0.7/ 1.0, x3/x5 DIGITAL ZOOM (P. 59) OFF, ON PANORAMA (P. - Page 180 Menu maps (Cont.) mode Top menu Function Setting CARD SETUP FORMAT, CANCEL (P. 102) (P. 29) (P. 78) SHQ 1984 x 1488, HQ 1600 x 1200, SQ1 1280 x 960, SQ2 640 x 480 , and modes Top menu Function Setting MODE MENU CAMERA...
- Page 181 Menu maps (Cont.) mode Top menu Function Setting MODE MENU BLACK & WHITE (P. 97) BLACK & WHITE, CANCEL EDIT SEPIA (P. 97) SEPIA, CANCEL (P. 98) 640 x 480, 320 x 240, CANCEL CARD SETUP (P. 102) ALL ERASE, FORMAT CARD ALL RESET (P.
-
Page 182: Menu Functions & Factory Default Settings
Menu functions & factory default settings Mode P/A/S/M Function : AUTO – AUTO – A/S/M: 100 – – P/A/S/M – – – 1.0/x3 – – – DIGITAL ZOOM HQ, 1984 x 1488 (when SQ2 is selected, 640 x – (320x240) 480 is factory default setting.) –... -
Page 183: Modes & Shooting Functions
Modes & Shooting functions Mode P/A/S/M* Function Taking still pictures – Recording movies – – – – – – P/A/S/M mode – – – – – setting Aperture value – – – – – setting Aperture priority – – – –... - Page 184 Modes & Shooting functions (Cont.) Mode P/A/S/M* Function Sequential shooting – – AF sequential – – – – – shooting Auto-bracketing – – – – – Panorama – – shooting 2 in 1 shooting – – Record mode setting ISO setting –...
-
Page 185: Specifications
1024 x 768 pixels (SQ2) 640 x 480 pixels (SQ2) Lens Olympus lens 6.4 mm to 51.2 mm, f2.8 to f3.4, 10 elements in 7 groups (equivalent to 40 mm to 320 mm lens on 35 mm camera) Photometric system... - Page 186 Specifications (Cont.) Battery charging time Approx. 7 sec. (at normal temperature with new for flash batteries) Autofocus TTL system autofocus, Contrast detection system, ∞ ∞ Focusing range: W : 0.1 m to (0.3 ft to ∞ ∞ T : 1.0 m to (3.2 ft to Outer connector DC-IN jack, USB connector (mini-B),...
-
Page 187: Glossary Of Terms
Glossary of terms A (Aperture Priority) Mode Backlight You set the aperture yourself and A light source to illuminate the the camera automatically varies monitor from behind the screen. the shutter speed so that the CCD (Charge-coupled Device) picture is taken with the best This converts light passing through exposure. - Page 188 Glossary of terms (Cont.) DPOF (Digital Print Order EV (Exposure Value) Format) A system for measuring exposure. This is for saving desired print EV0 is when the aperture is at F1 settings on digital cameras. By and the shutter speed is 1 second. entering which images to print and The EV then increases by 1 each the number of copies of each, the...
- Page 189 Glossary of terms (Cont.) JPEG (Joint Photographic S (Shutter Priority) Mode Experts Group) Also called Shutter Priority AE A compression format for color still mode. The user selects the shutter images. Photographs (images) speed camera shot using this camera are automatically varies the aperture recorded onto the SmartMedia so that the picture is taken with the...
-
Page 190: Index
Index AC adapter ........23 Index display ........95 AE lock button ( )....10 ISO ..........82 All-frame erase......101 All reset ........104 Aperture ........47 JPEG (compressed)......78 Arrow pad (ÑñÉí)....34, 38 Auto focus ........51 Macro shooting......68 Macro/Spot button ( ) ..10 Battery ..........21 Menu ..........38 Beep ..........114 Mode dial ( , P/A/S/M,... - Page 191 Index (Cont.) Quick view ........87 Record mode ........78 Resizing pictures ......98 Rotation button ( ) ....10 Self-timer shooting ......70 Sepia ..........97 Sequential shooting ......71 Shooting modes ......44 Shutter button........50 Shutter speed........48 Single-frame erase......100 Sleep mode ........27 Slide-show ........88 SmartMedia ........25 Spot metering........65 TIFF (non-compressed) ....78 Two-in-one picture ......77...
- Page 192 Our phone customer support is available from 8 am to 10 pm (Monday to Friday) ET E-Mail: distec@olympus.com Olympus software updates can be obtained at: http://olympus.com/digital/ Adobe [Photoshop] Support Adobe software updates and technical information can be obtained at: http://www.adobe.com/support/ OLYMPUS OPTICAL CO.
- Page 193 How to use your PC to get the most from images taken with your digital camera. Thank you for purchasing an Olympus digital camera. This manual provides instructions on how to install the USB driver. To ensure correct installation, refer only to these...
- Page 194 Introduction This manual explains in detail how to connect your Olympus digital camera to a computer. Read it carefully and keep it in a safe place for future reference. About this manual The information contained in this manual may be subject to change without notice.
- Page 195 INDEX Flowchart ......4 Identifying the OS ....6 Windows (98/Me/2000/XP) .
- Page 196 Flowchart By connecting the camera to a computer with the provided USB cable, images on a card can be transferred to the computer. Some OS’s (operating systems) may need a special setup before connecting to the camera for the first time. Follow the chart below. Identifying the OS (p.6) Windows 98/ MacOS 9.0 - 9.1/OS X (10.0)
- Page 197 Flowchart • When connecting the camera to the computer, make sure that there is sufficient remaining battery power. When connected (transmitting) to the computer, the camera does not enter the sleep mode nor will the camera’s power turn off automatically. Depending on the camera model, when the battery power runs out or the internal temperature rises, the camera may stop operating automatically.
- Page 198 Identifying the OS Identify the OS on your computer before connecting the camera. How to identify the OS depends on the computer. Windows Double-click the “My Computer” icon on your desktop. When the “My computer” icon is not on your desktop, click “Control Panel” from the “Start”...
- Page 199 Identifying the OS A System Properties window will appear. Note and record the “System:” information. Confirm that your system is Windows 98, 98 SE, Me, 2000 Professional or Windows XP, then press “OK” to close the window. If your OS is Windows 98/98 SE, proceed to “Installing the USB driver for Windows 98”...
- Page 200 Windows Windows Windows Windows Using Windows 98/Me/2000/XP Using Windows 98/Me/2000/XP Using Windows 98/Me/2000/XP Using Windows 98/Me/2000/XP Make sure that: Your computer is turned on and Windows is running. If you are running any applications, quit them all. You are recommended to power the camera using the optional AC adapter. If the battery power runs out while the computer is accessing the card in the camera, the camera will turn off in the middle of the operation and this could destroy image files (data).
-
Page 201: Installing The Usb Driver For Windows 98 (When Using Windows 98/98 Se)
( p.11). Insert the provided software CD into your CD-ROM drive. The Olympus Windows Installer should automatically launch. Click “USB driver for Windows 98”. If the installer is not automatically launched, select “Run..” on the “Start” menu and then execute “(drive letter):/ Information.exe”. - Page 202 USB driver will start. Click “OK” to restart your computer and the installation is complete. When the computer has restarted, installation is complete. If the Olympus Windows Installer screen appears, click “Close” and remove the CD-ROM from the CD-ROM drive.
-
Page 203: Connecting The Camera To The Computer
Connecting the camera to the computer Users running Windows 98/98SE need to install the USB drive before connecting the camera to your computer for the first time. ( p.9) Insert the marked end of the provided USB cable into the USB port on your computer as shown below. - Page 204 Connecting the camera to the computer Turn the camera on. Camera with a lens barrier The power turns on automatically, Lamp with the exception of some models which require you to press the Lens barrier (monitor) button. When the camera is turned on, the lamp on the right of the viewfinder lights up.
- Page 205 You may also select “take no action” to bypass the Microsoft Scanner and Camera Wizard. You may then use a more advanced image viewing/editing program such as Olympus CAMEDIA Master software. For detailed instructions on downloading, refer to the CAMEDIA Master software user’s guide.
-
Page 206: Confirming The Computer Recognizes The Camera
Confirming the computer recognizes the camera Double-click the “My Computer” icon on the desktop. For users running Windows XP, click “My Computer” from the “Start” menu. Make sure the “Removable Disk” icon appears in the window. There may already be other “Removable Disk”... -
Page 207: Confirming The Usb Driver Is Installed
Confirming the USB driver is installed If the computer does not recognize the camera as a Removable Disk, follow the procedure below to check whether the USB driver has been fully installed. Open “My Computer” and double-click the “Control Panel” icon. For users running Windows XP, open “Control Panel”... - Page 208 If the USB driver was successfully installed, you can find the following in the “Device Manager”. – the name of the camera you have connected listed under “Disk drives” – “OLYMPUS Digital Camera” listed as one of the items in the “Universal Serial Bus Controller” category...
-
Page 209: Downloading Images To Your Computer
Downloading images to your computer Double-click the “My Computer” icon on the desktop. For users running Windows XP, click “Control Panel” from the “Start” menu. Double-click the “Removable Disk” icon. A new “Removable Disk” icon appears when the camera is connected to the computer, as the digital camera is recognized as a “Removable Disk”. - Page 210 Downloading images to your computer Double-click the “100olymp” folder. Image files (JPEG files) with files names such as “P1010001.jpg” are displayed. • The camera automatically assigns folder names and file names according to the following rules. File name Folder name (Example) (Example) Serial number...
- Page 211 Downloading images to your computer The “My Documents” window is displayed. Drag & drop the image you want to save in the computer (in this case, P1010012.jpg) to the “My Documents” window. The image is saved in the computer (in My Documents folder).
-
Page 212: Disconnecting The Camera From Your Computer
Disconnecting the camera from your computer If your OS is Windows Me/2000, proceed to “Windows Me/2000/XP” ( p.21). Windows 98 Make sure that the lamp on the right Lamp of the viewfinder or the card access lamp is not blinking. Some camera models have either a lamp on the right of the viewfinder or a card access lamp, and the location... - Page 213 Disconnecting the camera from your computer Make sure that the lamp on the right Lamp of the viewfinder or the card access lamp is not blinking. Remove the USB cable from the camera. Remove the USB cable from your computer. Windows Me/2000/XP Make sure that the lamp on the right Lamp...
- Page 214 Disconnecting the camera from your computer Click the “Unplug or Eject Hardware” icon on the task bar. The message saying that the drive has been stopped appears. Click on the message. The “Unplug or Eject Hardware” window appears. When a message appears, click “OK”.
- Page 215 The image file properties are not displayed correctly. Images in the camera cannot be opened without first downloading them. etc. For more details, visit the Olympus web site. Connecting the camera to the computer ......... 24 Downloading images to your computer........26...
- Page 216 Connecting the camera to the computer Insert the marked end of the USB cable into the USB port on your computer as shown below. Look for this mark. Terminal USB port The location of the USB port varies depending on the computer. For details, refer to your computer's manual.
- Page 217 Connecting the camera to the computer Turn the camera on. Camera with a lens barrier The power turns on automatically, Lamp with the exception of some models which require you to press the Lens barrier (monitor) button. When the camera is turned on, the green lamp on the right of the viewfinder lights up.
- Page 218 Downloading images to your computer Mac OS 9 You can download images from the camera and save them in your computer (in this case, in the Hard Disk). Double-click the “Untitled” icon displayed on the desktop when the camera is connected to the computer.
- Page 219 Downloading images to your computer Image files (JPEG files) with files names such as “P1010001.JPG” are displayed. • The camera automatically assigns folder names and file names according to the following rules. Folder name File name (Example) (Example) Serial number Month / Day / Serial number •...
- Page 220 Downloading images to your computer The “Hard Disk” window is displayed. Drag & drop the image you want to save in the computer (in this case, P1010012.JPG) to the “Hard Disk” window. The image is saved in the computer (in the Hard disk).
- Page 221 Downloading images to your computer Mac OS X Malfunctions such as the following may occur due to the OS. • If the camera is not connected correctly, a malfunction occurs in the computer. • Date and time information of image files is not accurately displayed. •...
- Page 222 Disconnecting the camera from your computer Make sure that the lamp on the right Lamp of the viewfinder or the card access lamp is not blinking. Drag the “untitled” icon on the desktop to “Trash”. Make sure that the lamp on the right Lamp of the viewfinder or the card access lamp is not blinking.
- Page 223 • Windows XP *Certain card readers may not be compatible with Mac OS X. • Mac OS 9/X Check the Olympus website for the most up-to-date compatibility information. Does your computer have a built-in PC card slot? Use the optional PC card adapter.
- Page 224 Our phone customer support is available from 8 am to 10 pm (Monday to Friday) ET E-Mail: distec@olympus.com Olympus software updates can be obtained at: http://olympus.com/digital/ Adobe [Photoshop] Support Adobe software updates and technical information can be obtained at: http://www.adobe.com/support/ OLYMPUS OPTICAL CO.
-
Page 242: Chapter 2 Quick-Start Guide
Press the shutter button all the way again to stop recording. OLYMPUS OPTICAL CO. (EUROPA) GMBH. images. ● The card access lamp blinks and the camera starts writing the movie to the card. Premises/Goods delivery: Wendenstrasse 14-18, 20097 Hamburg, Germany To cancel protection, ●... -
Page 243: Chapter 7 Playback
Buttons and Dial Menu functions Moving around the Menu screen Zoom lever Shooting W/T : Zooms in/out. If you select MODE MENU in step 2 Top menu (Mode dial: “P”) Playback : Displays multiple pictures at the same time (Index-display), or enlarges pictures (close-up playback). - Page 250 1. Click Acrobat Reader on the Olympus Software Setup Menu. 2. Insert the CAMEDIA Master software CD into your CD-ROM drive. An Olympus Software Setup 5. The QuickTime files will now be copied to the appropriate folders. When the QuickTime Settings Menu should automatically launch.
- Page 251 Master 4.0 is upgraded to CAMEDIA Master Pro automatically. a. If you want to create a new folder, click the * CAMEDIA Master Pro 4.0 CD Package will also be available online at the Olympus Emporium location of where to create the new folder (http://www.emporium.olympus.com), or at Olympus Authorized retail stores.
Need help?
Do you have a question about the Camedia C-720 Ultra Zoom and is the answer not in the manual?
Questions and answers