Table of Contents
Advertisement
Advertisement
Table of Contents

Related Manuals for GE Security FireShield FS302


Summary of Contents for GE Security FireShield FS302
- Page 1 FireShield Technical Reference Manual P/N 3100353 • Rev 3.0 • 12MAY03...
-
Page 2: Table Of Contents
DEVELOPED BY Content Phone: (941) 739-4200 Chapter 1 System overview and operation • 1.1 –2003 Copyright © 2002 System overview • 1.1 Operations overview • 1.1 IMPORTANT INFORMATION Controls and indicators • 1.1 Limitation of liability Component descriptions • 1.3 This product has been designed to meet the requirements of Operating the panel •... -
Page 3: System Overview And Operation
If the optional FSDACT is installed, the panel: Chapter 1 • Sends a record of the event to the FSDACT LCD and to System overview and operation the history log • Uses the FSDACT to transmit event messages to a monitoring station as programmed System overview Controls and indicators... - Page 4 System overview and operation (4) Notification Appliance Circuits (NACs) LEDs and Operating mode: Initiates a panel reset. controls RESET Programming mode: Selects the next LED/button Description setting for the current option. Trouble LED On steady when there's a wiring fault on Alarm mode: Silences active notification SIGNAL circuit.
-
Page 5: Component Descriptions
System overview and operation Component descriptions Provides Houses the panel electronics and (1) Main AC wiring block and fuse holder: (8) Cabinet enclosure: connections for 120 or 230 volt AC (primary power) from standby batteries. In some cases the batteries may be housed in dedicated service. -
Page 6: Operating The Panel
System overview and operation To silence an FSRSI buzzer: Operating the panel 1. Press the Silence button on the FSRSI. 2. Determine the type of condition that caused the buzzer to Resetting the panel sound: alarm, trouble, supervisory, or monitor. Pressing Reset places the panel in the reset state. - Page 7 System overview and operation Disabling an IDC To re-enable an IDC or NAC: Pressing an IDC Disable button prevents the panel from 1. Press the Disable button for the IDC or NAC you want to responding to any status change from that IDC. When you re-enable.
- Page 8 System overview and operation The IDC you are testing behaves as follows: Conducting lamp tests • For alarm events, the appropriate panel, FSRSI, and Panel lamp test FSRZI-A LEDs and buzzers are turned on A panel lamp test lights all the LEDs on the panel, FSRSIs, •...
-
Page 9: Fsdact Lcd Messages
System overview and operation FSDACT LCD messages Message Description Peripheral trouble The panel lost communications with the peripherals Battery Bad The battery is bad and needs to be replaced Battery Missing The battery is no longer connected AC Failure The panel lost AC power Charger Trouble The panel detected a battery charger trouble condition. - Page 10 System overview and operation FireShield Technical Reference Manual...
-
Page 11: Installation
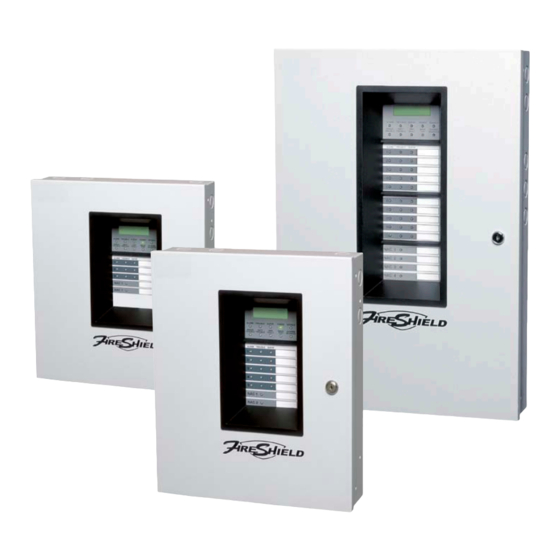
Panel dimensions Chapter 2 Model D1 [1] D5 [1] Installation Three- 16.5 in 3.75 in 9.13 in 10.5 in 14.23 in and five- (41.9 (9.5 cm) (23.2 (26.67 (36.14 zone Installation checklist Ten- 23.65 in 3.75 in 7.75 in 21.27 in 16.25 in zone (60 cm) -
Page 12: Installing The Remote System Indicator
Installation State Description Installing the Remote System Indicator Supervisory Active supervisory device (yellow) The Remote System Indicator (FSRSI) is a supervised remote annunciator that provides remote LED indication of power, Trouble (yellow) On System trouble alarm, supervisory, trouble, and ground fault conditions. A Ground fault System ground fault sounder gives audible indication during a trouble, alarm, or... -
Page 13: Installing The Remote Zone Indicator
Installation Installing the Remote Zone Indicator Compatible electrical box The Remote Zone Indicator (FSRZI-A) is a supervised remote annunciator that provides remote LED indication of IDCs in alarm state. The FSRZI-A indicates conditions for five IDCs. The IDC groups are set by jumpers to indicate zones 1–5 or zones 6–10. - Page 14 Installation Jumper setup Jumper Name Description Compatible electrical box Reserved for future Zone 6 - Sets the five LEDs to report alarms in zones 6 - 10. [1] jumper Zone 1- 5 Sets the five LEDs to report alarms jumper in zones 1 - 5.
-
Page 15: Installing The Remote Relay Module
Installation Common operation current requirements Installing the Remote Relay Module Standby: 30 mA Alarm: 41 mA The Remote Relay Module (FSRRM) provides five dry Max. circuit capacitance: 0.03 µF contact relay outputs. The outputs can be wired as both Max. circuit resistance: 13 ohms normally open and normally closed. - Page 16 Installation Installation instructions 5. Verify that all wiring is free of opens, shorts, and ground faults. The FSRRM snaps into a snap track (shipped with the 6. Connect the FSRRM to the panel or other peripheral FSRRM), which mounts inside a listed fire alarm enclosure. devices.
-
Page 17: Installing The Power Expander Transformer
Installation 3. Connect the cable harness to J4 on the circuit board. Push Installing the Power Expander the cable harness until the connector clicks into place. Transformer 4. Connect the incoming power wires to the dual transformer AC wiring block above the existing transformer. The Power Expander Transformer (XTR3A120, XTR3A230) provides additional primary AC power to increase the NAC 5. -
Page 18: Installing The Fsdact
Installation changes shall be 100 percent tested. In addition, 10 percent of Installing the FSDACT initiating devices that are not directly affected by the change, up to a maximum of 50 devices, also shall be tested, and The FSDACT is a digital alarm communicator transmitter correct system operation shall be verified. - Page 19 Installation 3. Use JP1 to configure the FSDACT for attended or FCC Information unattended downloading: The dialer complies with Part 68 of the FCC rules. The dialer’s FCC certification number and Ringer Equivalence Number (REN) is • Attended: leave the JP1 wire intact displayed on the panel’s programming label and in this manual.
-
Page 20: Connecting An Rpm Module
Installation Alarm and trouble transmitted on a single circuit Connecting an RPM module JP1 on the RPM must be OUT. Note: The Reverse Polarity Module (RPM) is an interface between FireShield and a reverse polarity receiver. It provides off- FireShield premises signal transmission for systems that must comply with NFPA requirements. -
Page 21: Connecting A Ctm Module
Installation Panel in alarm condition Connecting a CTM module Alarm condition The CTM4.7 City Tie Module is an interface between the control panel notification appliance circuit and a master box. It Master box provides off-premises signal transmission for systems that CTM4.7 must comply with NFPA requirements for Auxiliary [1] [2]... -
Page 22: Connecting An Auxiliary Power Supply
Installation Connecting an auxiliary power supply Installing the terminal shield Aux power supplied by the panel cannot exceed 0.5 A. If more The terminal shields for the three, five, and ten zone panels than 0.5 A is required, you must use a compatible UL/ULC (model numbers ending in GC or GF) required for Canadian listed fire alarm power supply. -
Page 23: Programming
ANNUN BATT WALK SIGNAL Chapter 3 TROUBLE TROUBLE FAULT TEST SILENCED Programming Binary numbers Bottom row of LEDs Overview FSDACT display Program options and settings If you are using the optional FSDACT to program the panel, The features and functions of FireShield can be customized each option and setting is displayed on the LCD display. -
Page 24: Using The Factory Default Settings
Programming 2. Press Remote Disconnect to select the Load Defaults Using the factory default settings program option. 3. Press Reset to select Yes, the setting to reload the factory The panel comes from the factory programmed with a pre- default settings. defined set of defaults. -
Page 25: Getting Started
Programming Getting started next option or Walk Test to return to the previous option. To save your changes, you must press Panel Silence before You should complete the programming templates found in advancing to the next option. Appendix B before you program the panel. NFPA 72 requires that you keep a copy of these sheets on file. - Page 26 Programming To program the signal silence/reset inhibit timer: Program option Setting Description Top LEDs/LCD Bottom LEDs/LCD 1. Press Remote Disconnect to select the program option. NACs stay on until Signal 2. Press Reset to select your setting. Silence is pressed Auto Sig Sil None 3.
- Page 27 Programming To program IDC zone types: Waterflow (no retard): For connection of both Waterflow 1. Press Remote Disconnect to select the program option. vane type and pressure flow switches. Activations For new panels, the Trouble LED of IDC 1 lights. are immediately Otherwise, the Trouble LED of the last IDC programmed considered as alarms.
- Page 28 Programming To program IDC classes: Program option Setting Description Top LEDs/LCD Bottom LEDs/LCD 1. Press Remote Disconnect to select the program option. NAC outputs The last programmed IDC Trouble LED stays lit. continuous signal: For NAC Output Continuous strobes and notification 2.
- Page 29 Programming If you selected Yes, the panel automatically switches to Program option Setting Description FSDACT programming mode and “DACT Programming” Top LEDs/LCD Bottom LEDs/LCD is displayed on the LCD. Refer the next topic “FSDACT NAC does not turn off programming” for complete programming instructions. when Signal Silence is NAC Silenceable pressed...
-
Page 30: Fsdact Programming
Programming FSDACT programming Digit Telephone number 4.2 event codes Hexadecimal D (13) Programming the FSDACT sets up the dialer for Hexadecimal E (14) communication with the central monitoring station. It also sets a number of other options such as date, time, phone numbers, Terminator (indicates Hexadecimal F (15) etc. - Page 31 Programming Programming the FSDACT 3. Press Reset (or Signal Silence & Drill) until the next digit of your passcode is displayed. When you program the FSDACT, you’ll follow these general 4. Press Panel Silence to save and advance to the next digit. steps: 5.
- Page 32 Programming Don’t forget that you can press Reset or Signal Silence & The trouble buzzer sounds a long beep as confirmation. Tip: Drill to scroll through the list of settings. It may be faster to If Single Line DACT is selected, dual line programming Note: press Signal Silence &...
- Page 33 Programming 9. Enter the (DACR1) account code 12. Enter retry count one Description: Sets the account code for DACR1. This is the Description: Sets the maximum number of failed attempts to code that is used by the monitoring facilities receiver to deliver an alarm to a DACR.
- Page 34 Programming 6. When you press Reset at the last digit (20th digit), the Settings: Send restores system automatically advances you to the next program No restores option. Default: Send restores 15. Enter the (DACR2) secondary phone number To select the restore option: Description: Specifies the secondary phone number that is 1.
- Page 35 Programming 3. Press Reset to select tone or pulse dialing for line 2. 2. Press Panel Silence to save and advance to the next step. 4. Press Panel Silence to save and advance to the next The trouble buzzer sounds a long beep as confirmation. program option.
- Page 36 Programming 28. Enter the call back phone number Low Batt Rcvr Mis Batt Rcvr Description: Specifies the phone number that is used for call Int Comm Tr Rcvr back. AC Fail Rcvr Format: Up to 20 digits Charger Tr Rcvr Xfrmr 2 Tr Rcvr Default: Blank Aux Pwr Tr Rcvr...
- Page 37 Programming Circuit programming To select the receiver for each IDC event: Circuit programming defines the routes and codes used to 1. Select an IDC for programming by pressing the Disable report IDC and NAC events. Unless the options described button for that IDC. below are changed, the factory default event codes are sent to 2.
- Page 38 Programming Format: 2 digits (0 – 9 and A – F) To change the IDC zone restoration code: Default: See Appendix E “Default event codes.” These can be 1. Press Reset to change the IDC zone restoration code. changed if needed. 2.
- Page 39 Programming The system takes you back to the beginning of FSDACT programming (Program DACT). 2. Remove the program jumper PRG. You can store the jumper on one pin of the jumper. Editing previously programmed information You may find it necessary to change information that you previously programmed (e.g.
- Page 40 Programming 3.18 FireShield Technical Reference Manual...
-
Page 41: Maintenance
Canadian tests for grounds, opens, and shorts Chapter 4 ULC requires that you test ground fault, open circuit, and Maintenance short circuit indications. For ground fault tests, directly short one leg of the circuit to chassis ground. The Ground Fault and Trouble LEDs must light. - Page 42 Maintenance FireShield Technical Reference Manual...
-
Page 43: Calculations
Standby current: three-zone - 110 mA, five-zone - 120 Appendix A mA, ten-zone - 145 mA Calculations Alarm current: three-zone - 145 mA, five-zone - 170 mA, ten-zone - 250 mA) [2] The maximum battery size the panel can charge is 18 Ah (Power-Sonic P/N PS-12180-NB or equivalent). - Page 44 Calculations Form A Qty × Standby Qty × Alarm Standby Alarm current current Module Quantity current (mA) current (mA) (mA) (mA) FSRSI [1] FSRZI-A [1] FSRRM common [1] FSRRM zone [1] Other AUX Total AUX [5] [6] Form B (Note: Calculate IDC detector load or use maximum load.) Quantity of Detector current Total standby current [4]...
-
Page 45: Notification Appliance Voltage Drop Calculation
Calculations Notification appliance voltage drop calculation NAC 1 voltage drop calculations Circuit length Total circuit Wire resistance Voltage current [2] per 1000 ft [1] drop Ω ÷ 1000 = feet amps Panel Voltage End of line Voltage Panel Voltage voltage drop voltage [3] drop... -
Page 46: Notification Appliance Circuit Maximum Wire Length Calculation
Calculations Maximum wire length Notification appliance circuit maximum wire length calculation Current 18 AWG 16 AWG 14 AWG 12 AWG required Use this worksheet to determine the maximum wire length of 0.25 1460 2170 a notification appliance circuit. Fill in one worksheet for each 0.50 1084 NAC connected to the panel. -
Page 47: Programming Templates
Appendix B Programming templates Panel programming worksheet Project name _____________________________ Project address ___________________________________________________________ Programmed by __________________________ Date ____________ Tested by ____________________________ Date ____________ Panel LEDs and binary number values [1] Load defaults No (1) Yes (2) ALARM TROUBLE POWER DISABLE [2] Find annunciators Peripherals installed Peripherals found... -
Page 48: Fsdact Programming Worksheet
Programming templates FSDACT programming worksheet DACT setup Access passcode (0 – 9, A – F) 1111111 Load defaults Edit passcode (0 – 9, A – F) Date (MMDDYYYY) 01012002 Time (HHMM) 0000 DACT mode Single line DACT Dual line DACT Modem/LCD LCD only Receiver 1 (DACR1) Setup... - Page 49 Programming templates System event reporting setup Event Where to report the event 4/2 event code Panel test None CS 1 CS 2 CS 1 & 2 Panel abnormal test None CS 1 CS 2 CS 1 & 2 Walk test None CS 1 CS 2...
- Page 50 Programming templates Zone settings - IDC 4 Event Where to report the event 4/2 event code Alarm activation None CS 1 CS 2 CS 1 & 2 Waterflow activation None CS 1 CS 2 CS 1 & 2 Trouble activation None CS 1 CS 2...
- Page 51 Programming templates Zone settings - IDC 10 Event Where to report the event 4/2 event code Alarm activation None CS 1 CS 2 CS 1 & 2 Waterflow activation None CS 1 CS 2 CS 1 & 2 Trouble activation None CS 1 CS 2...
- Page 52 Programming templates Contact ID codes Code Description Code Description FireShield Technical Reference Manual...
-
Page 53: Jumper Settings And Wiring Diagrams
Appendix C Jumper settings and wiring diagrams Three-zone panel FireShield Technical Reference Manual... - Page 54 Jumper settings and wiring diagrams REMOTE MODULE AND REMOTE RELAY WIRING [6] C– POWER REMOTE ALARM RELAY MODULE 24VDC+ (RRM) 24VDC– GND FLT SILENCE LMPTST TYPICAL FOUR-WIRE SMOKE DETECTOR CIRCUIT [2] [3] [7] Keep power-limited wiring in the shaded area and nonpower-limited wiring in the IDC1+ unshaded area at all times.
- Page 55 Jumper settings and wiring diagrams Five-zone panel FireShield Technical Reference Manual...
- Page 56 Jumper settings and wiring diagrams REMOTE MODULE AND REMOTE RELAY WIRING [6] C– POWER REMOTE ALARM RELAY MODULE 24VDC+ (RRM) 24VDC– GND FLT SILENCE LMPTST TYPICAL FOUR-WIRE SMOKE DETECTOR CIRCUIT [2] [3] [7] Keep power-limited wiring in the shaded area and nonpower-limited wiring in the IDC1+ unshaded area at all times.
- Page 57 Jumper settings and wiring diagrams Ten-zone panel FireShield Technical Reference Manual...
- Page 58 Jumper settings and wiring diagrams REMOTE MODULE AND REMOTE RELAY WIRING [6] C– POWER REMOTE ALARM RELAY MODULE 24VDC+ (RRM) GND FLT 24VDC– SILENCE LMPTST TYPICAL FOUR-WIRE SMOKE DETECTOR CIRCUIT [2] [3] [7] UL/ULC LISTED IDC1+ EOL RELAY 24VDC+ (shown energized) 24VDC–...
-
Page 59: Panel Specifications
Appendix D Panel specifications FS302 three-zone FS502 five-zone panel FS1004 ten-zone panel panel Initiating device Class B circuits (IDCs) Class A Notification appliance Class B circuits (NACs) Class A Power supply 2.0 amps total 3.0 amps total 3.0 amps (expandable to 5.5 amps) NAC voltage rating 24 Vfwr Maximum NAC current... - Page 60 Panel specifications FireShield Technical Reference Manual...
-
Page 61: Default Event Codes
Trouble – zone Appendix E 37300001 Fire trouble (380 Sensor trouble) IDC 1 Default event codes 37300002 Fire trouble (380 Sensor trouble) IDC 2 37300003 Fire trouble (380 Sensor trouble) IDC 3 37300004 Fire trouble (380 Sensor trouble) IDC 4 37300005 Fire trouble (380 Sensor trouble) IDC 5 37300006... -
Page 62: Default (4/2) Event Codes
Default event codes Code Description Default (4/2) event codes E<N> Supervisory restoration E<N> Monitor restoration F<N> IDC trouble restoration Code Description Note: N is the circuit number. 1<N> Fire alarm activation events 2<N> Waterflow alarm activation events 3<N> Supervisory signal activation events Not used 5<N>... -
Page 63: Index
Index 4/2 event codes • E.2 default event codes FSDACT • E.1 defaults factory defaults • 3.2 reloading the factory defaults • 3.2 alarm disable IDC zone type • 3.4 IDC • 1.2, 1.5 LED • 1.2 LED • 1.2 resounding an alarm condition •... - Page 64 Index LEDs • 2.2 specifications • 2.2 maintenance • 4.1 wiring • 2.3 metal dead front FSRZI-A installing • 2.12 description • 2.3 MFC-A installation instructions • 2.4 FSRRM • 2.6 jumper setup • 2.4 monitor lamp test • 1.6 IDC zone type •...
- Page 65 Index NAC output • 3.6 LED • 1.2 NAC silence inhibit timer • 3.4 surface mount NAC silenceable • 3.6 cabinet • 2.1 options • 3.2 overview • 3.1 templates • B.1 programming methods • 3.1 tie wrap mounts • 1.3 trouble LED •...
- Page 66 Index FireShield Technical Reference Manual...
-
Page 67: Fireshield Fire Alarm Control Panel Operating Instructions
Frame these instructions and mount on the wall next to the control panel. FireShield Fire Alarm Control Panel Operating Instructions For additional information, refer to the FireShield TO SILENCE THE PANEL BUZZER Technical Reference Manual P/N 3100353. Press Panel Silence. RESPONDING TO ALARM SIGNALS The buzzer turns off.
Need help?
Do you have a question about the FireShield FS302 and is the answer not in the manual?
Questions and answers