Panasonic S-12MT2U6 Installation Instructions Manual
Hide thumbs
Also See for S-12MT2U6:
- Operating instructions manual (12 pages) ,
- Installation instructions manual (64 pages) ,
- Installation instructions manual (60 pages)
Table of Contents
Advertisement
Quick Links
INSTALLATION INSTRUCTIONS
Air Conditioner
This air conditioner uses the refrigerant R410A.
Model No.
Indoor Units
Nominal Capacity
Type
Indoor Unit Type
12
18
24
T2
Ceiling
S-12MT2U6
S-18MT2U6
S-24MT2U6
Read through the Installation Instructions before you proceed with the installation.
In particular, you will need to read under the "IMPORTANT!" section at the top of the page.
F616839
Advertisement
Table of Contents

Subscribe to Our Youtube Channel
Related Manuals for Panasonic S-12MT2U6


Summary of Contents for Panasonic S-12MT2U6
-
Page 1: Installation Instructions
INSTALLATION INSTRUCTIONS Air Conditioner This air conditioner uses the refrigerant R410A. Model No. Indoor Units Nominal Capacity Type Indoor Unit Type Ceiling S-12MT2U6 S-18MT2U6 S-24MT2U6 Read through the Installation Instructions before you proceed with the installation. In particular, you will need to read under the “IMPORTANT!” section at the top of the page. F616839... -
Page 2: Important
IMPORTANT! When Transporting Please Read Before Starting Be careful when picking up and moving the indoor and outdoor units. Get a partner to help, and bend your knees This air conditioning system meets strict safety and when lifting to reduce strain on your back. Sharp edges or operating standards. As the installer or service person, it is thin aluminum fins on the air conditioner can cut your an important part of your job to install or service the fingers. system so it operates safely and efficiently. When Installing… For safe installation and trouble-free operation, you Select an installation location which is rigid and strong must: enough to support or hold the unit, and select a location for ● Carefully read this instruction booklet before beginning. easy maintenance. ● Follow each installation or repair step exactly as shown. …In a Room ● This air conditioner shall be installed in accordance with Properly insulate any tubing run inside a room to prevent National Wiring Regulations. “sweating” that can cause dripping and water damage to ● Pay close attention to all warning and caution notices walls and floors. given in this manual. -
Page 3: Check Of Density Limit
• Do not leak refrigerant while piping work for an installation or re-installation, and while repairing CAUTION refrigeration parts. Handle liquid refrigerant carefully as it may cause • Do not touch the air inlet or the sharp frostbite. aluminum fins of the outdoor unit. You When Servicing may get injured. • Ventilate any enclosed areas when installing or • Turn the power OFF at the main power box (mains) testing the refrigeration system. Leaked before opening the unit to check or repair electrical refrigerant gas, on contact with fire or heat, can parts and wiring. produce dangerously toxic gas. • Keep your fingers and clothing away from any moving • Confirm after installation that no refrigerant gas parts. is leaking. If the gas comes in contact with a • Clean up the site after you finish, remembering to burning stove, gas water heater, electric room check that no metal scraps or bits of wiring have been heater or other heat source, it can cause the left inside the unit. generation of toxic gas. Others WARNING • This product must not be modified or CAUTION disassembled under any circumstances. -
Page 4: Table Of Contents
CONTENTS Page Page IMPORTANT ........2 8. -
Page 5: General
1. GENERAL Part Name Figure Q’ty Remarks This booklet briefly outlines where and how to install the Full-scale air conditioning system. Please read over the entire set of For positioning installation installation instructions for the indoor and outdoor units and make sure all diagram accessory parts listed are with the system before beginning. Wire cover For control box 1-1. Tools Required for Installation (not supplied) 1. Flathead screwdriver Screw For wire cover 2. Phillips head screwdriver 3. Knife or wire stripper Part Name Figure Q’ty Remarks 4. Tape measure Operating 5. Carpenter’s level Instructions... -
Page 6: Selecting The Installation Site
2. SELECTING THE INSTALLATION SITE Ceiling Ceiling 2-1. Indoor Unit AVOID: ● areas where leakage of flammable gas may be expected. ● places where large amounts of oil mist exist. Wall ● direct sunlight. min. 0.83ft. (250mm) min. 0.83ft. (250mm) ● locations near heat sources which may affect the Front view performance of the unit. ● locations where external air may enter the room directly. This may cause “condensation” on the air discharge ports, N OT E causing them to spray or drip water. ● locations where the remote controller will be splashed with The rear of the indoor unit can be installed flush against water or affected by dampness or humidity. the wall. ● installing the remote controller behind curtains or furniture. ● locations where high-frequency emissions are generated. discharge ● select an appropriate position from which every corner of the room can be uniformly cooled. -
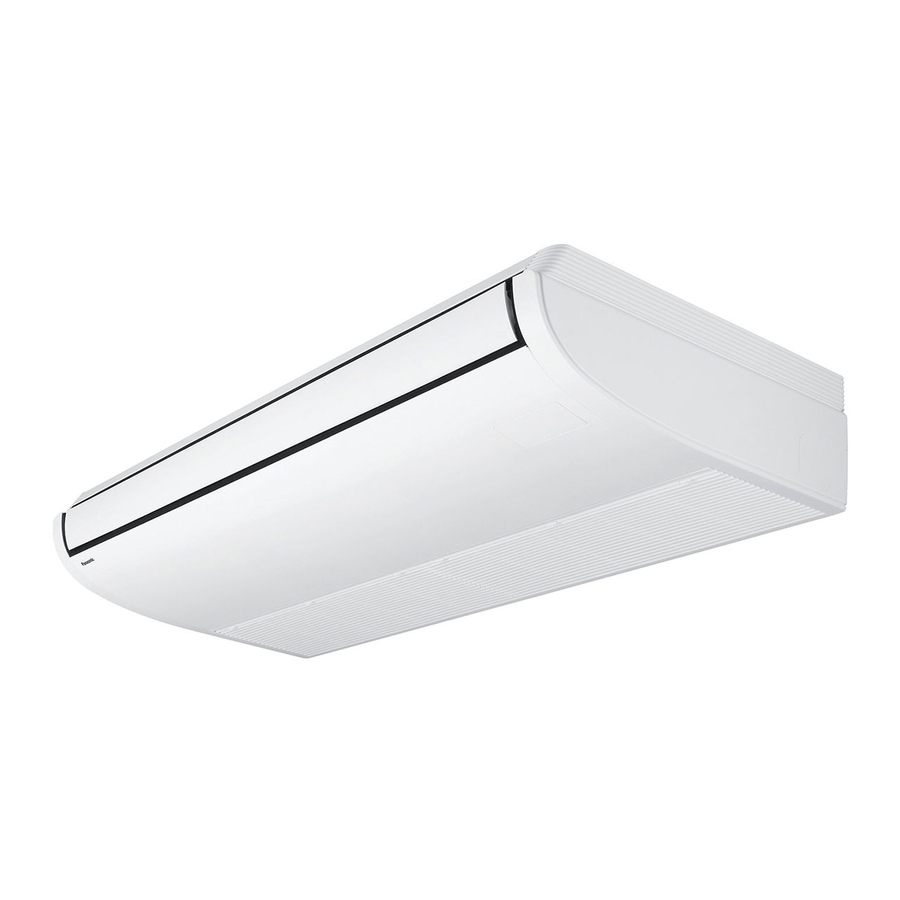
Page 7: How To Install The Indoor Unit
3. HOW TO INSTALL THE INDOOR UNIT Unit: inch (mm) ■ Ceiling Type (Type T2) 3-1. Required Minimum Space for Installation and Service Air intake (1) Dimensions of suspension bolt pitch and unit Length Type inch 35-55/64 37-51/64 9-1/4 12, 18 inch 48-17/64 50-13/64 9-1/4 31/32... -
Page 8: Preparation Before Installation
3-2. Preparation Before Installation (4) Remove the center bracket. When wiring, remove the center bracket if necessary. When (1) Remove the bracket (for suspending the indoor unit). wiring is completed, reinstall the center bracket in its original L oose the M8 or 5/16” suspension bolts. position. Then remove the bracket. (Fig. 3-4) Center bracket NOT E Loosen the M8 or 5/16” suspension bolts and expose the axis of bolts less than 5/16” (8 mm). Less than 5/16” (8 mm) Fig. 3-8 3-3. Suspending the Indoor Unit N OTE Since the diagram is made of paper, it may shrink or stretch M8 or 5/16” suspension bolts M4 or 5/32” screw for slightly because of high temperature or humidity. for suspending the indoor unit preventing bracket from For this reason, before drilling the holes maintain the correct Bracket taking off dimensions between the markings. Fig. 3-4 (1) If the full-scale installation diagram is placed on the ceiling, the (2) Remove the air-intake grille before suspending the indoor unit. First, locations of each suspension bolt can be chosen. -
Page 9: Duct For Fresh Air
b) Suspend the indoor unit to the bracket. WARNING Tighten the M8 or 5/16” suspension bolts and fix the indoor unit in place. (Fig. 3-17) It is important that you use extreme care in supporting the indoor unit from the ceiling. Ensure that the ceiling is strong enough to support the weight of the unit. Before hanging the M8 or 5/16” suspension bolt ceiling unit, test the strength of each attached suspension bolt. - Page 10 * If the drain hose is routed through the left side, refer to Fig. 3-18, NOT E and follow the procedure above to install the hose. The hole should be made at a slight downward slant to the Reattach the rubber stopper removed earlier onto the right side. outside. The rubber stopper can be inserted easily by using a screwdriver Indoor Outdoor or similar tool to press the side side Drain port stopper into the drain port on Screwdriver the main unit. Press the stopper into the main unit drain port as far as it will Rubber stopper Fig. 3-20 Unit drain port Hose band (supplied) Hard PVC pipe PVC pipe (not supplied) (VP20 not supplied) INSIDE OUTSIDE Wall PVC pipe Slight Drain hose (supplied) Adhere with PVC adhesive. angle Do not use adhesive. Drain insulator (supplied) Unit: inch (mm) Cut at slight angle Fig.
-
Page 11: Electrical Wiring
4. ELECTRICAL WIRING 4-1. General Precautions on Wiring (1) Before wiring, confirm the rated voltage of the unit as shown on its nameplate, then carry out the wiring closely following the wiring diagram. WARNING (2) This equipment is strongly recommended to be installed with Earth Leakage Circuit Breaker (ELCB) or Residual Current Device (RCD). Otherwise, it may cause electrical shock and fire in case of equipment breakdown or insulation breakdown. Earth Leakage Circuit Breaker (ELCB) must be incorporated in the fixed wiring in accordance with the wiring regulations. The Earth Leakage Circuit Breaker (ELCB) must be an approved 15 A, having a contact separation in all poles. (3) To prevent possible hazards from insulation failure, the unit must be grounded. (4) Each wiring connection must be done in accordance with the wiring system diagram. Wrong wiring may cause the unit to misoperate or become damaged. (5) Do not allow wiring to touch the refrigerant tubing, compressor, or any moving parts of the fan. (6) Unauthorized changes in the internal wiring can be very dangerous. The manufacturer will accept no responsibility for any damage or misoperation that occurs as a result of such unauthorized changes. (7) Regulations on wire diameters differ from locality to locality. For field wiring rules, please refer to your LOCAL ELECTRICAL CODES before beginning. You must ensure that installation complies with all relevant rules and regulations. (8) To prevent malfunction of the air conditioner caused by electrical noise, care must be taken when wiring as follows: ● The remote control wiring and the inter-unit control wiring should be wired apart from the inter-unit power wiring. ● Use shielded wires for inter-unit control wiring between units and ground the shield on single side. (9) If the power supply cord of this appliance is damaged, it must be replaced by a repair shop designated by the manufacturer, because special- purpose tools are required. 4-2. -
Page 12: Wiring System Diagrams
4-3. Wiring System Diagrams Indoor unit (No. 1) Outdoor unit INV unit Power supply Ground 208 / 230V, 60Hz, 1PH Power supply Ground 208 / 230 V, 60Hz, 3PH Ground Remote Controller Ground Ground Indoor Inter-outdoor unit control wiring unit (No. 2) Power supply Ground Outdoor unit 208 / 230V, 60Hz, 1PH INV unit Ground Power supply Ground Remote 208 / 230 V, 60Hz, 3PH Controller Ground Ground Group control: Indoor unit (No. 3) * Disconnect switch Power supply Ground (Field Supply) 208 / 230V, 60Hz, 1PH... - Page 13 CAUTION (1) When linking outdoor units in a network, disconnect the terminal extended from the short plug (on the outdoor main control PCB) from all outdoor units except any one of the outdoor units. (When shipping: In shorted condition.) For a system without link (no connection wiring between outdoor units), do not remove the short plug. (2) Do not install the inter-unit control wiring in a way that forms a loop.
- Page 14 Loose wiring may cause the terminal to overheat or result in unit malfunction. A fire hazard may also occur. CAUTION Therefore, ensure that all wiring is tightly connected. When connecting each power wire to the terminal, follow the instructions on “How to connect wiring to the terminal” and fasten the wire securely with the fixing screw of the terminal board. How to connect wiring to the terminal Stranded wire ■ For stranded wiring Ring (1) Cut the wire end with cutting pliers, then strip the insulation pressure...
- Page 15 Wire cover * T ake care not to pinch the wires when covering by the wire cover. Ground wiring Power supply wiring Fig. 4-9 How to install the remote control wiring and inter-unit control wiring 1. Connect the remote control wiring and inter-unit control wiring to the terminal board as shown in the figure. 2. Fasten the remote control wiring and inter-unit control wiring using the supplied band through the clamper aside the terminals. Band Band (Supplied) Clamper Wire cover Fig. 4-10 How to install the Optional subpart Solenoid Valve Relay Kit (part of Solenoid Valve Kit) 1. Punch the hole corresponding to a cutter part with a hole punching tool.
-
Page 16: How To Process Tubing
5. HOW TO PROCESS TUBING Deburring The liquid tubing side is connected by a flare nut, and the Before After gas tubing side is connected by brazing. 5-1. Connecting the Refrigerant Tubing Use of the Flaring Method Many of conventional split system air conditioners employ the flaring method to connect refrigerant tubes which run between indoor and outdoor units. In this method, the copper tubes are flared at each end and connected with flare nuts. Fig. 5-1 Flaring Procedure with a Flare Tool (1) Cut the copper tube to the required length with a tube cutter. It is recommended to cut approx. 1 – 2 ft. (30 - 50 cm) longer than the tubing length you estimate. Copper (2) Remove burrs at the end of the copper tube with a tube tubing reamer or a similar tool. This process is important and should be done carefully to make a good flare. (Fig. 5-1) -
Page 17: Connecting Tubing Between Indoor And Outdoor Units
Cautions During Brazing ● Replace air inside the tube with nitrogen gas to prevent copper oxide film from forming during the brazing process. (Oxygen, carbon dioxide and Freon are not acceptable.) ● Do not allow the tubing to get too hot during brazing. The nitrogen gas inside the tubing may overheat, causing refrigerant system valves to become damaged. -
Page 18: Insulating The Refrigerant Tubing
5-3. Insulating the Refrigerant Tubing Flare insulator (for gas tube) Tubing Insulation Facing upward Flare insulator (for liquid tube) ● Thermal insulation must be applied to all units tubing, Tube cradle including distribution joint (field supply). * For gas tubing, the insulation material must be heat resistant to 248°F (120°C) or above. For other tubing, it Liquid tubing must be heat resistant to 176°F (80°C) or above. Gas tubing Insulation material thickness must be 13/32” (10 mm) or greater. Without any space If the conditions inside the ceiling exceed DB 86°F (30°C) Insulator (not supplied) and RH 70%, increase the thickness of the gas tubing Flare nut Clamper Clamper Tube cradle insulation material with one grade higher. (supplied) Outdoor unit Insulation of the flare nuts Indoor unit side side About About... -
Page 19: Finishing The Installation
5-5. Finishing the Installation ● Attach the air-intake grille. When attaching the air-intake grille, perform the reverse After finishing insulating and taping over the tubing, use sealing procedure to removing the grille. putty to seal off the hole in the wall to prevent rain and draft Refer to the section “3-2. Preparation Before Installation”. from entering. (Fig. 5-10) Be sure to attach the safety string. Close the air-intake grille and fix the claws of the latches with the screws. Apply putty here Safety string Tubing Fig. 5-10 Confirm the “Checkpoint” under the section “8. PRECAUTIONS ON TEST RUN” after installation of indoor and outdoor units, panels and electrical wiring. 6. FINAL PROCEDURE Fig. 6-2 Reinstall the removed part to be placed in its original position. (See the section “3-2. Preparation Before Installation”.) 7. HOW TO INSTALL TIMER REMOTE Then install the accessory supplied side covers (L/R) on both CONTROLLER OR HIGH-SPEC WIRED sides of the indoor unit. -
Page 20: Precautions On Test Run
8. PRECAUTIONS ON TEST RUN ● Request that the customer be present at the time the test run is performed. Explain the Operating Instructions to the customer and then have the customer actually operate the system. ● Be sure to pass the manual and warranty certificate to the customer. ● Verify that the AC 208 / 230 V wiring is not connected to the terminal plate which is used to connect the inter-unit control wiring. * If AC 208 / 230 V is accidentally applied to this terminal plate, the fuse (0.4A for both indoor and outdoor units) on the inter-unit control PCB will be tripped in order to protect the PCB. Correct the wiring connections, then disconnect the 2P connectors (blue, OC, CN040) which are connected to the PCB and connect the other 2P connectors (brown, EMG, CN044). (See the figure below.) If operation is still not possible with the brown connectors connected, cut the JP040. (Be sure to turn OFF the power before performing this work.) JP040 CN044 CN040 ■ Checkpoint Checkpoint Symptom Check Remark Make sure whether indoor and outdoor units are Fall, vibration, noise correctly installed. Make sure whether gas leakage is tested. No cooling, no heating Make sure whether insulation is completed. Water leakage (Refrigerant piping and drain piping) Make sure whether drain water is running Water leakage smoothly. Make sure whether the power voltage matches Inoperative, burnout the nameplate. -
Page 21: How To Install Wireless Remote Controller Receiver
9. HOW TO INSTALL WIRELESS REMOTE <How to clean the filter> 1. Remove the air filter from the air-intake grille. CONTROLLER RECEIVER 2. Use a vacuum cleaner to remove light dust. If there is sticky dust on the filter, wash the filter in lukewarm, soapy water, NOT E rinse it in clean water, and dry it. <How to remove the filter> Refer to the Operating Instructions attached to the optional Ceiling Type (T2) Wireless Remote Controller Receiver. 1. Remove 2 attachment screws fixed with the latches. Take hold of the finger-hold on the air-intake grille and press 10. APPENDIX it to the rear, and the grille will open downward. 2. Take hold of the finger-hold on the air filter, pull it toward ■ Care and Cleaning you. -
Page 22: Troubleshooting
■ Troubleshooting If your air conditioner does not work properly, first check the following points before requesting service. If it still does not work properly, contact your dealer or a service center. ● Indoor unit Symptom Cause Noise Sound like streaming water during Sound of refrigerant liquid flowing inside unit ● operation or after operation. Sound of drainage water through drain pipe ● Cracking noise during operation or Cracking sound due to temperature changes of parts when operation stops. Odor Discharged air is smelled during Indoor odor components, cigarette odor and cosmetic odor accumurated in operation. the air conditioner and its air is discharged. Unit inside is dusty. Consult your dealer. Dewdrop Dewdrop gets accumurated near air Indoor moisture is cooled by cool wind and accumulated by dewdrop. discharge during operation. Fog occurs during operation in Cleaning is necessary because unit inside (heat exchanger) is dirty. ● cooling mode. Consult your dealer as technical engineering is required. (Places where large amounts of oil During defrost operation ● mist exist at restaurants.) Fan is rotating for a while even though operation Fan rotating makes operation smoothly. ●... -
Page 23: Check Before Requiring Services
● Check Before Requiring Services Symptom Cause Remedy Air conditioner does not run Power failure or after power failure Press ON/OFF operation button on remote at all although power is turned controller again. Operation button is turned off. Switch on power if breaker is turned off. ● If breaker has been tripped, consult your dealer ● without turning it on. Fuse blow out. If blown out, consult your dealer. Poor cooling or heating Air intake or air discharge port of indoor Remove dust or obstruction. performance. and outdoor units is clogged with dust or obstacles. Wind speed switch is set to “Low”. Change to “High” or “Strong”. Improper temperature settings Refer to “ ■ Tips for Energy Saving”. Room is exposed to direct sunlight in cooling mode. Doors and /or windows are open. Air filter is clogged. Refer to “ ■ Care and Cleaning”. Too much heat sources in room in cooling Use minimum heat sources and in a short time. mode Too many people in room in cooling mode Reduce temperature settings or change to “High” or “Strong”. - Page 24 F616839 DC0515-10615 Printed in China...
Need help?
Do you have a question about the S-12MT2U6 and is the answer not in the manual?
Questions and answers