Advertisement
Quick Links
INSTALLATION INSTRUCTIONS
Air Conditioner
This air conditioner uses the refrigerant R410A.
External diameter of service port R410A: 5/16" (7.94mm)
NOTE
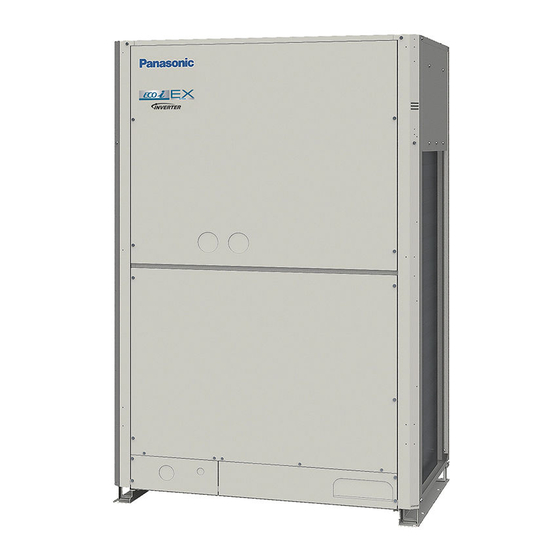
Model No.
Outdoor Units
Type Outdoor Unit Type
MF2
3WAY VRF System
• To be connecting Indoor Unit
Indoor Units
Type Indoor Unit Type
4-Way Cassette
U2
36" × 36"
4-Way Cassette
Y2
24" × 24"
D1
1-Way Cassette
Concealed Duct
F2
- Medium Static
Concealed Duct
M2
- Low Static
Concealed Duct
E1
- High Static
T2
Ceiling
K2
Wall Mounted
P1
Floor Standing
Concealed Floor
R1
Standing
Read through the Installation Instructions before you proceed with the installation.
In particular, you will need to read under the "IMPORTANT!" section at the top of the page.
CV6233323510
85464369843023
01_302412_Eng.indd 1
Nominal Capacity
72
96
U-72MF2U9
U-96MF2U9
U-72MF2U94
U-96MF2U94
7
9
12
S-07MU2U6 S-09MU2U6 S-12MU2U6
S-07MY2U6 S-09MY2U6 S-12MY2U6
S-07MD1U6 S-09MD1U6 S-12MD1U6
S-07MF2U6 S-09MF2U6 S-12MF2U6 S-15MF2U6 S-18MF2U6 S-24MF2U6 S-36MF2U6 S-48MF2U6 S-54MF2U6
S-07MM2U6 S-09MM2U6 S-12MM2U6 S-15MM2U6 S-18MM2U6
S-12MT2U6
S-07MK2U6 S-09MK2U6 S-12MK2U6
S-07MP1U6 S-09MP1U6 S-12MP1U6 S-15MP1U6 S-18MP1U6 S-24MP1U6
S-07MR1U6 S-09MR1U6 S-12MR1U6 S-15MR1U6 S-18MR1U6 S-24MR1U6
120
144
U-120MF2U9
U-144MF2U9
U-120MF2U94
U-144MF2U94
Nominal Capacity
15
18
24
S-24MU2U6 S-36MU2U6
S-18MY2U6
S-36ME1U6 S-48ME1U6
S-18MT2U6 S-24MT2U6
S-18MK2U6 S-24MK2U6
36
48
54
ACXF60-18571
2018/7/4 13:30:24
Advertisement

Related Manuals for Panasonic U-72MF2U94


Summary of Contents for Panasonic U-72MF2U94
- Page 1 Model No. Outdoor Units Type Outdoor Unit Type Nominal Capacity 3WAY VRF System U-72MF2U9 U-96MF2U9 U-120MF2U9 U-144MF2U9 U-72MF2U94 U-96MF2U94 U-120MF2U94 U-144MF2U94 • To be connecting Indoor Unit Indoor Units Nominal Capacity Type Indoor Unit Type 4-Way Cassette S-07MU2U6 S-09MU2U6 S-12MU2U6 S-24MU2U6 S-36MU2U6 36"...
- Page 2 IMPORTANT! When Transporting Please Read Before Starting Be careful when picking up and moving the indoor and outdoor units. Get a partner to help, and bend your knees This air conditioning system meets strict safety and when lifting to reduce strain on your back. Sharp edges or operating standards.
- Page 3 • Do not leak refrigerant while piping work for an CAUTION WARNING installation or re-installation, and while repairing refrigeration parts. • Do not touch the air inlet or the sharp Handle liquid refrigerant carefully as it may cause aluminum fins of the outdoor unit. You frostbite.
- Page 4 Precautions for Installation Using New Refrigerant 1. Care regarding tubing 1-1. Process tubing Material: Use seamless phosphorous deoxidized copper tube for refrigeration. Wall thickness shall comply with the ● applicable legislation. The minimal wall thickness must be in accordance with the table below. Tubing size: Be sure to use the sizes indicated in the table below.
- Page 5 3-2. Use R410A exclusive cylinder only. Valve Single-outlet valve (with siphon tube) Liquid refrigerant should be recharged with the cylinder standing on end as shown. Liquid New refrigerant R410A cannot be used for earlier models 1. Compressor specifications are different. If recharging a R22 or R407C compressor with R410A, durability will significantly decrease since some of the materials used for compressor parts are...
- Page 6 CONTENTS Page Page IMPORTANT! ......2 4. ELECTRICAL WIRING ....29 Please Read Before Starting 4-1.
- Page 7 4. Refrigeration tubing lubricant 5. Clamps or saddles to secure refrigerant tubing 6. Scale for weighing Table 1 Outdoor Unit Q’ty U-72MF2U9 U-96MF2U9 U-120MF2U9 U-144MF2U9 Part name Figure U-72MF2U94 U-96MF2U94 U-120MF2U94 U-144MF2U94 (6 ton) (8 ton) (10 ton) (12 ton) Outer Inner diameter diameter ø...
- Page 8 1-5. Tubing Length Select the installation location so that the length and size of refrigerant tubing are within the allowable range shown in the figure below. Main tubing length (maximum tubing size) LM = LA + LB … Main distribution tubes LC – LH are selected according to the capacity after the distribution joint. 3.
- Page 9 *6: If any of the tubing length exceeds 98ft. (30m), increase the size of the tubes (liquid tube, suction tube and discharge tube) between the distribution tube and solenoid valve kit by 1 rank and also increase the size of the tubes (liquid tube and gas tube) between the solenoid valve kit and indoor unit by 1 rank.
- Page 10 Table 6 Refrigerant Charge Amount at Shipment (for outdoor unit) BTU/h (kW) 72,000 (21.1) 96,000 (28.1) 120,000 (35.2) 144,000 (42.2) Initial amount oz (g) 293 (8,300) 293 (8,300) 353 (10,000) 416 (11,800) Table 7 Indoor Unit Tubing Connection Size ( 1 – 52) Unit: in.
- Page 11 Table 11 Necessary Amount of Additional Refrigerant Charge Per Outdoor Unit Further charge a certain amount listed below in addition to the amount of refrigerant charge. Combination number of outdoor unit Additional amount oz (g) 70.5 (2,000) 141.0 (4,000) 212 (6,000) Necessary Amount of Additional Refrigerant Charge for All Indoor Unit Cooling Capacity Charge a refrigerant amount calculated in the following formula according to the total amount of indoor unit cooling capacity.
- Page 12 1-10. Installation Standards Relationship between A/C units and refrigerant tubing 4-tube layout 3-tube layout 2-tube layout Solenoid Outdoor unit Outdoor unit Indoor unit valve kit Suction tube Suction tube Gas tube Discharge tube Discharge tube Liquid tube Liquid tube Liquid tube Balance tube ●...
- Page 13 1-12. Installing Distribution Joint Pay special attention to any location, such as a basement, etc., where leaking refrigerant can CAUTION CAUTION accumulate, since refrigerant gas is heavier than air. (1) Refer to “HOW TO ATTACH DISTRIBUTION JOINT” enclosed with the optional distribution joint kit (CZ-P900PH1U, CZ-P224BH1U, CZ-P680BH1U, CZ-P1350BH1U).
- Page 14 1-13. Optional Distribution Joint Kits Refer to the installation instructions packaged with the distribution joint kit for the installation procedure. Table 15 Model name Cooling capacity after distribution Remarks 1. CZ-P900PH1U — For outdoor unit * In case the total capacity of indoor units 2.
- Page 15 Table 17 Dimensions for connections of each part Unit: in. (mm) Position ø1-1/2" ø1-1/4" ø1-1/8" ø1" ø7/8" ø3/4" ø5/8" ø1/2" ø3/8" – Dimension (ø38.1) (ø31.75) (ø28.58) (ø25.4) (ø22.22) (ø19.05) (ø15.88) (ø12.7) (ø9.52) – . CZ-P224BH1U Use: For indoor unit (Capacity after distribution joint is 76,400 BTU/h (22.4kW) or less.)* Example: (F below indicates inner diameter.
- Page 16 1-15. Example of Tubing Size Selection and Refrigerant Charge Amount Additional refrigerant charging Based on the values in Tables 3, 4, 5, 7, 10 and 11, use the liquid tubing size and length, and calculate the amount of additional refrigerant charge using the formula below. Unit of account (oz) Necessary Amount of Additional Refrigerant Charge Per Outdoor Unit Required additional...
- Page 17 Example: ● Example of each tubing length Main tubing Distribution joint tubing Outdoor unit LA = 131 ft. (40m) Outdoor side Indoor side LB = 16 ft. (4.9m) A = 7 ft. (2.1m) 1 = 98 ft. (30m) 1-1 = 82 ft. (25m) Type 96 Type 72 LC = 16 ft.
- Page 18 2. SELECTING THE INSTALLATION SITE ● Leave space open above the CAUTION CAUTION unit. 2-1. Outdoor Unit ● Construct louvers or other openings in the wall, if AVOID: necessary, to ensure adequate ● heat sources, exhaust fans, etc. ventilation. ● damp, humid or uneven locations NOTE ●...
- Page 19 2-2. Shield for Horizontal Exhaust Discharge 2-3. Installing the Outdoor Unit in Heavy Snow Areas It is necessary to install an air-discharge chamber (field supply) to direct exhaust from the fan horizontally if it is difficult In locations where wind-blown snow can be a problem, to provide a minimum space of 7 ft.
- Page 20 2-5. Dimensions of Wind Ducting Reference diagram for air-discharge chamber (field supply) Note: Can be installed so that the air direction is to the front or rear direction. unit: in. (mm) Air direction: Front direction Top view 46-11/16 (1186) 45-19/32 39-31/64 (1158) (1003)
- Page 21 Reference diagram for air-discharge chamber (field supply) (continued) Combination of units For various types of combination, refer to Technical Data. unit: in. (mm) Top view (Before installing air-discharge chamber) Top view 39-31/64 (1003) 3/64 (1) 5/64 (2) Front view Right side view According to the installation site, you may choose the setting position in the depth direction of the anchor bolt from “A”, “B”...
- Page 22 2-6. Dimensions of Snow Ducting Reference diagram for snow-proof ducting (field supply) Note: Can be installed so that the air direction is to the front or rear direction. unit: in. (mm) Air direction: Front direction 42-1/4 (1073) Top view 46-11/16 (1186) 45-19/32 39-31/64...
- Page 23 Reference diagram for snow-proof ducting (field supply) (continued) Combination of units For various types of combination, refer to Technical Data. unit: in. (mm) 8-17/64 (210) 8-17/64 (210) 7-3/32 (180) 7-3/32 (180) Top view (Before installing snow-proof ducting) Top view 39-31/64 (1003) 3/64 (1) 5/64 (2)
- Page 24 3. HOW TO INSTALL THE OUTDOOR UNIT 3-1. Transporting When transporting the unit, have it delivered as close to the installation site as possible without unpacking. Use a hook for suspending the unit. CAUTION CAUTION ● When hoisting the outdoor unit, pass ropes or straps under the bottom plate as shown in the figure at right.
- Page 25 Unit: in. (mm) Air intake 19/32 (15) 45-9/32 (1150) (Installation hole pitch) 46-29/64 (1180) A : 37-61/64 (964) [Installation hole pitch] * The tubing is routed out from the front. B : 28-47/64 (730) [Installation hole pitch] * The tubing is routed out from the bottom. C : 28-47/64 (730) [Installation hole pitch] 3-3.
- Page 26 3-4. Prepare the Tubing ● Material: Use C1220 phosphorous deoxidized copper as described in JIS H3300, “Copper and copper alloy seamless pipes and tubes”. ● Tubing size: Use the tubing size indicated in the table below. ● When cutting the tubing, use a tube cutter, and be sure to remove any burrs. (The same applies to distribution tubing (optional).) ●...
- Page 27 Tubing cover Refrigerant tube port ● Use caulking, putty, or a similar material to fill any gaps at the refrigerant tube port ) in order to prevent rainwater, dust or foreign substances from entering the unit. * Perform this work even if the tubing is routed out in a downward direction. ●...
- Page 28 ● Precautions for brazing Be sure to replace the air inside the tube with nitrogen to prevent oxide film from forming during the brazing process. Be sure to use a damp cloth or other means to cool the valve unit during brazing. Work method Pressure-reducing valve (regulator)
- Page 29 U-96MF2U9 60 A D1, U2, Y2, F2, M2, T2, P1, R1 15 A U-120MF2U9 60 A 15 A U-144MF2U9 70 A U-72MF2U94 20 A U-96MF2U94 30 A U-120MF2U94 30 A U-144MF2U94 35 A Control wiring (A) Inter-unit (between outdoor and...
- Page 30 INV unit Power supply Ground 208 / 230V, 60Hz, 3-PH Remote Controller Ground Group control: U-72MF2U94 / U-96MF2U94 / U-120MF2U94 / U-144MF2U94 Indoor unit (No. 3) Outdoor unit INV unit Power supply 208 / 230V, 60Hz, 1-PH Power supply 460V, 60Hz, 3-PH...
- Page 31 CAUTION CAUTION (1) When linking outdoor units in a network, see the section “ATTENTION!”. (2) Do not install the inter-unit control wiring in a way that forms a loop. Outdoor unit Outdoor unit Outdoor unit Prohibited Prohibited Indoor unit Indoor unit Indoor unit Indoor unit Indoor unit...
- Page 32 Loose wiring may cause the terminal to overheat or result in unit malfunction. CAUTION WARNING A fire hazard may also exist. Therefore, ensure that all wiring is tightly connected. When connecting each power wire to the terminal, follow the instructions on “How to connect wiring to the terminal” and fasten the wire securely with the fixing screw of the terminal board.
- Page 33 U-72MF2U94 / U-96MF2U94 / U-120MF2U94 / U-144MF2U94 In this case, replace the pins 1 and 2 of the 2P connector (CR-72MF2U94/ACXA73-02070) (BRN, EMG, CN69) with the pins 2 and 3. Cut out the jumper (JP11). Jumper JP11 EMG, CN69 2P connector,...
- Page 34 U-72MF2U94 / U-96MF2U94 / U-120MF2U94 / U-144MF2U94 Electronic component box Inter-unit control wiring (U1, U2) P.C. board 4P terminal board * Inter-outdoor unit control wiring (1, 2) 4P terminal board * Terminal board for power supply 3P terminal board *...
- Page 35 5. HOW TO PROCESS TUBING (3) Remove the flare nut from the unit and be sure to mount it on the copper tube. The liquid tubing side is connected by a flare nut, and the gas (4) Make a flare at the end of copper tube with a flare tool. tubing side is connected by brazing.
- Page 36 Caution Before Connecting Tubes Tightly (1) Apply a sealing cap or water-proof tape to prevent dust or water from entering the tubes before they are used. (2) Be sure to apply refrigerant lubricant to the matching surfaces of the flare and union before connecting them together.
- Page 37 5-3. Insulating the Refrigerant Tubing 5-4. Taping the Tubes (1) At this time, the refrigerant tubes (and electrical wiring Tubing Insulation if local codes permit) should be taped together with armoring tape in 1 bundle. ● Thermal insulation must be applied to all unit tubing, including To prevent the condensation from overflowing the drain the distribution joint (purchased separately).
- Page 38 6. AIR PURGING Vacuum pump Manifold gauge Air and moisture in the refrigerant system may have Outlet undesirable effects as indicated below. Inlet pressure in the system rises ● operating current rises ● cooling (or heating) efficiency drops ● moisture in the refrigerant circuit may freeze and ●...
- Page 39 (3) Do a leak test of all joints of the tubing (both indoor and outdoor) and all service valves. Bubbles indicate Manifold valve a leak. Wipe off the soap with a clean cloth after a leak test. Vacuum (4) After the system is found to be free of leaks, relieve gauge the nitrogen pressure by loosening the charge hose connector at the nitrogen cylinder.
- Page 40 Charging additional refrigerant Manifold valve Use a cylinder designed for CAUTION CAUTION use with R410A. Pressure gauge Charging additional refrigerant (calculated from ● Valve the liquid tube length as shown in the section “1-8. Additional Refrigerant Charge”) using the liquid tube service valve.
- Page 41 7. TEST RUN (4) If only 1 outdoor unit is installed, close the service valve on the balance tubes, and open the service 7-1. Preparing for Test Run valve on the other 3 tubes (suction, discharge, and liquid tubes). Before attempting to start the air conditioner, ●...
- Page 42 7-2. Test Run Procedure Notes: Recheck before the test run. 1. Use caution when making the settings. If there are duplicated system addresses, or if the settings for the number of indoor units are not Have outdoor sub units been connected? consistent, an alarm will occur and the system will not start.
- Page 43 7-3. Main Outdoor Unit PCB Setting U-72MF2U9 / U-96MF2U9 CN23 CN34 CN33 Terminating resistance pin CN73 CN24 CN27 CN28 CN30 CN40 COOL HEAT MODE NO. OF I / U R. C. ADD O/U. ADD NO. OF O/U SHORT OPEN CN67 U-120MF2U9 / U-144MF2U9 CN28 CN24...
- Page 44 U-72MF2U94 / U-96MF2U94 / U-120MF2U94 / U-144MF2U94 Terminating resistance pin CN73 CN34 CN33 CN24 CN23 CN40 CN30 CN28 CN27 01_302412_Eng.indd 44 2018/7/4 13:30:58...
- Page 45 ● <Sample> Outdoor unit number setting (SW5) Unit number setting (SW5) Unit number setting Notes: (3P Dip switch, Black) (1) Unit 1 (outdoor main unit) needs to prepare the settings Unit 1 (at shipment) 1: ON of “number of outdoor units”, “number of indoor units” and “system address”.
- Page 46 7-4. Function Switches on P.C. Board Function Switch Remarks Changes to cooling/heating mode. (outdoor main unit is only usable.) When in normal operation: When short circuited the COOL side, indoor unit operation in the same MODE pin (3P, BLK) refrigerant system changes to all cooling mode. (CN40) When short circuited the HEAT side, indoor unit operation in the same refrigerant system changes to all heating mode.
- Page 47 7-5. Auto Address Setting Example: Basic Wiring Diagram (1) • Case of no link wiring 3P terminating (Inter-unit control wiring is not connected to a multiple system.) resistance pin Indoor unit address setting is possible without starting the compressor. (SHORT side) Unit 1 setting (outdoor main unit) * It is not necessary to control the terminating No.
- Page 48 Example: Basic Wiring Diagram (2) Setting of terminal pin (CN67) Refrigerant circuit No. 1 • Case of link wiring Unit No. 1 (Main) : short-circuit (at shipment) * See the section “ATTENTION!”. Unit No. 2 (Sub) : short-circuit (at shipment) No.
- Page 49 Between conductors ● F inal check before operation Wire Final check must be done under the conditions of inter-outdoor unit control wiring connected to the centralized control system and the resistor between conductors must be measured by a Megger. Check if it is showing between 30Ω and 120Ω. Wire If the resistance value is out of range, check adjustment of the termination resistor again.
- Page 50 Case 3.a Auto Address Setting in Heating Mode ● In case of impossibility of turning ON power to indoor/outdoor units in each refrigerant system: Indoor unit auto address setting cannot be made unless the compressor is started. How to Control Auto Address from Outdoor Unit 1.
- Page 51 Case 3.b Auto Address Setting in Cooling Mode ● In case of impossibility of turning ON power to indoor/outdoor units in each refrigerant system: The indoor unit auto address setting cannot be made unless the compressor is started. How to Control Auto Address from Outdoor Unit 1.
- Page 52 Auto Address Setting from the High-spec Wired Remote Controller (CZ-RTC5A) 1 Keep pressing the buttons simultaneously for 4 or more seconds. The “Maintenance func” screen appears on the LCD display. 20:30 (THU) 2 Press the button to see each menu. If you wish to see the next screen instantly, press the button.
- Page 53 Display During Auto Address Setting ● On the surface of outdoor unit control P.C. board * Do not short circuit the A.ADD pin (CN30) again during auto address setting. LEDs 1 and 2 go out and address setting is interrupted. * When auto address setting is normally completed, both LEDs 1 and 2 go out.
- Page 54 Checking the indoor unit addresses Use the remote controller to check the indoor unit address. CZ-RTC5A (High-spec wired remote controller) 3 The “Simple settings” screen appears on the LCD 1 Keep pressing the buttons display. simultaneously for 4 or more seconds. The “Maintenance func”...
- Page 55 7-6. Setting Test Run Remote Controller CZ-RTC5A (High-spec wired remote controller) 20:30 (THU) 1 Keep pressing the buttons simultaneously for 4 or more seconds. The “Maintenance func” screen appears on the LCD display. START Maintenance func 20:30 (THU) 1. Outdoor unit error data 2.
- Page 56 7-7. Caution for Pump Down Pump down means refrigerant gas in the system is returned to the outdoor unit. Pump down is used when the unit is to be moved, or before servicing the refrigerant circuit. Refer to Service Manual. ●...
- Page 57 • If the alarm display “E15”, “E16” and “E20” appear after auto address setting began, check the following items. Alarm display Alarm contents Recognized number of indoor units at the time of auto address setting are fewer than that of indoor units set by SW3 and SW4 on outdoor main unit P.C.
- Page 58 Remote control display Alarm contents Two or more remote controllers are set as main on R1-R2 link. Auto Address failed to start. Two or more indoor units are set as main, in the group controlled indoor units. Fewer indoor units are found in Auto Addressing than the setting on outdoor PCB. More indoor units are found in Auto Addressing than the setting on outdoor PCB.
- Page 59 Remote control display Alarm contents Protection device activated. High pressure switch (63PH, 63PH1 or 63PH2) or compressor thermal protector (49C1 / 49C2). Missing phase in power input is detected at HIC for 1st compressor. Connection to the panel of indoor unit is not good. Float switch of drain pan safety is activated.
- Page 60 Wired remote Detected contents control display Indoor thermistor is either open or damaged. <<F01>> E1 thermistor on liquid side of indoor heat exchanger has failure. (E1) <<F02>> Indoor unit set as single split. (E2) E3 thermistor on gas side of indoor heat exchanger has failure. (E3) <<F03>>...
- Page 61 Wired remote Detected contents control display Abnormal device function HIC for 2nd compressor has failure. Overcurrent or overheat of HIC. HIC for 1st compressor has failure. Overcurrent or overheat of HIC. • The parentheses of << >> used in the table of alarm display does not affect anything the operation of other indoor units. •...
- Page 62 – NOTE – 01_302412_Eng.indd 62 2018/7/4 13:31:05...
- Page 63 – NOTE – 01_302412_Eng.indd 63 2018/7/4 13:31:05...
- Page 64 ACXF60-18571 Printed in China 85464369843023 DC0915-40718 01_302412_Eng.indd 64 2018/7/4 13:31:05...
Need help?
Do you have a question about the U-72MF2U94 and is the answer not in the manual?
Questions and answers