ATEN Master View CS-9134 User Manual
Master view kvm switch
Hide thumbs
Also See for Master View CS-9134:
- User manual (47 pages) ,
- User manual (31 pages) ,
- User manual (31 pages)
Table of Contents
Advertisement
Quick Links
Download this manual
See also:
User Manual
Advertisement
Table of Contents

Related Manuals for ATEN Master View CS-9134


Summary of Contents for ATEN Master View CS-9134
- Page 1 User Manual CS-9134 CS-9138 2005-12-21...
- Page 2 This equipment has been tested and found to comply with the limits for a Class A digital device, pursuant to Part 15 of the FCC Rules. These limits are designed to provide reasonable protection against harmful interference when the equipment is operated in a commercial environment.
-
Page 3: Packing List
Packing List The complete Master View CS-9134 / CS-9138 package consists of: 1 CS-9134 or CS-9138 KVM Switch 1 Power Adapter 1 Rack Mounting Kit 1 User Manual 1 Quick Start Guide Check to make sure that the unit was not damaged in shipping. If you encounter a problem, contact your dealer. -
Page 4: Table Of Contents
Introduction ....... . . 4 CS-9134 Front View ......4 CS-9138 Front View . -
Page 5: Overview
A single Master View CS-9134 or CS-9138 can control up to 4 or 8 computers, respectively. Since the switches can be cascaded to three levels, in a full three stage installation up to 21 CS-9134 Master Views can control up to 64 computers and 73 CS-9138 Master Views can control up to 512 computers - all from a single console. -
Page 6: Features
Features Cascadable To Three Levels - Control Up to 64 (CS-9134) or 512 (CS-9138) Computers From a Single Console No Software Required - Computer Selection via Front Panel Switches, Hot Keys, or OSD (On Screen Display) Quick View Scan Feature for Monitoring Selected Computers PS/2 and Serial Mouse Emulation For System Bootup Console’s PS/2 Mouse Controls All Connected Computers - Even Those... -
Page 7: Hardware Requirements
3. Because of the wiring and pin assignments, you cannot use a Serial-to-PS/2 adapter at the end that plugs into the switch. Attempting to use a standard serial extender cable with adapters at both ends will fail. CS-9134 / CS-9138 User Manual 2005-12-21 CS Cable Part Number 2L-1001P/C (1.8m) or... -
Page 8: Introduction
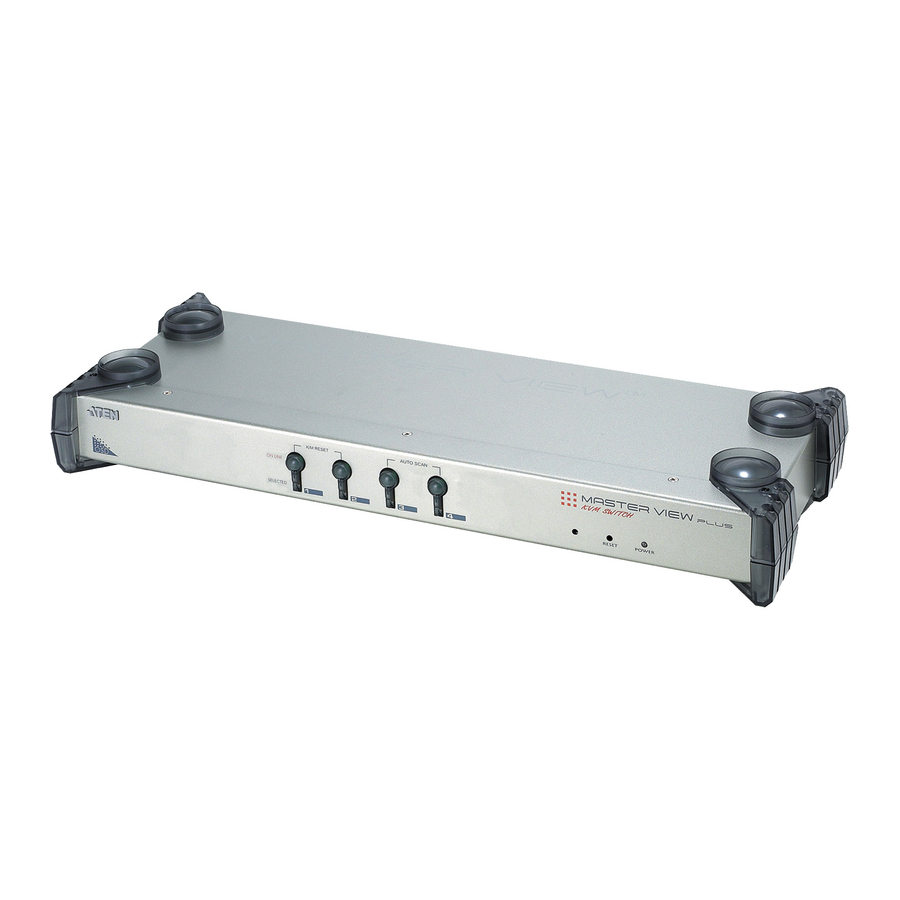
If the switch is kept in for longer than three seconds, a cold reset takes place. 5. Power LED Lights to indicate that the unit is receiving power. AUTO SCAN CS-9134 / CS-9138 User Manual 2005-12-21... -
Page 9: Cs-9138 Front View
If the switch is kept in for longer than three seconds, a cold reset takes place. 5. Power LED Lights to indicate that the unit is receiving power. CS-9134 / CS-9138 User Manual 2005-12-21 AUTO SCAN... -
Page 10: Rear View
If this is a daisy chained unit, the cables that link back to a port on a higher Master View unit plug in here. 3. CPU Port Section The cables that link to the computers plug in here. CS-9134 / CS-9138 User Manual 2005-12-21... -
Page 11: Installation
4. Turn on the power to the computers. Note: If you choose to use external power, the Master View unit must be plugged in and receiving power prior to turning on the power to the computers. CS-9134 / CS-9138 User Manual 2005-12-21... -
Page 12: Two Stage Installation
Stage unit. The cascaded Master Views that connect back to the First Stage unit are considered Second Stage units. As many as 16 (CS-9134) or 64 (CS-9138) computers can be controlled in a complete two stage installation. Tables showing the relation between the number of computers and the number of Master View units needed to control them are provided in the Appendix. -
Page 13: Three Stage Installation
The procedures for setting up a three stage installation are essentially the same as for a two stage installation. With a three stage setup, as many as 64 (CS-9134) or 512 (CS-9138) computers can be controlled in a complete installation. - Page 14 After all the Second Stage units are on, the First Stage unit must be powered on. Only after all the Master Views have been powered on in this sequence, can the computers be powered on. CS-9134 / CS-9138 User Manual 2005-12-21...
-
Page 15: Operation
Operation Hot Plugging The Master View CS-9134 / CS-9138 supports hot plugging. Components can be removed and added back into the installation by unplugging and replugging their cables from their respective ports without the need to shut the switch down. For hot plugging to work properly, the following procedures must be... -
Page 16: Powering Off And Restarting
The buzzer can be toggled on and off with a hotkey combination as follows: 1. Press [Ctrl]+[Shift]+[Alt] to invoke the hotkey function. 2. Press [B], then press [Enter]. Note: You must press [B] and [Enter] withing 1 second. The default is for the buzzer to be On. CS-9134 / CS-9138 User Manual 2005-12-21... -
Page 17: Port Selection
Port Selection The Master View CS-9134 / CS-9138 provides three methods to obtain instant access to any computer in your installation: Manual, Hotkey, and OSD. Manual Simply press the appropriate Port Selection Switch on the Master View’s front panel. After you press the switch, the Selected LED lights to indicate that the port has the KVM focus. -
Page 18: Port Id Numbering
A computer attached to a First Stage unit has a one digit Port ID (from 1 to 4 for the CS-9134; from 1 to 8 for the CS-9138), that corresponds to the CPU Port number that the computer is connected to. -
Page 19: Port Key In Examples
4 of a Second Stage unit, which, in turn, is cascaded down from port 2 of the First Stage unit, key in 2 4 1 for the Port ID, as follows: [Ctrl]+[Shift]+[Alt] 2 4 1 [Enter] CS-9134 / CS-9138 User Manual 2005-12-21... -
Page 20: Osd
OSD always starts in List view, with the highlight bar at the same position it was in the last time it was closed. The next two sections explain how to navigate using the OSD and OSD Hotkey methods. CS-9134 / CS-9138 User Manual 2005-12-21... -
Page 21: Osd Navigation
Number keys must be pressed from the regular keyboard; not from the numeric keypad. If you submit an incorrect Port ID, an error message displays, and you are returned to the OSD Main Menu. CS-9134 / CS-9138 User Manual 2005-12-21... -
Page 22: Osd Main Screen Headings
If the next letter you type is b, the list is narrows down even further to only those ports whose names begin with ab, etc. To return to the OSD Main Menu without making a choice, press [Esc]. Explanation CS-9134 / CS-9138 User Manual 2005-12-21... - Page 23 Duration time is up, the Scan function will move on to the next port. 2. As each system is accessed, an ID display to indicate that it is being accessed under Quick Scan Mode. CS-9134 / CS-9138 User Manual 2005-12-21 appears in front of the Port...
- Page 24 2. If you select a port that does not have a computer attached to it, or if the attached system is powered Off, the OSD will still switch to it, and will not show an error. Meaning CS-9134 / CS-9138 User Manual 2005-12-21...
- Page 25 Case does not matter; the OSD displays the Port Name in all capitals no matter how they were keyed in. 4. When you have finished editing, press [Enter] to have the change take effect. To abort the change, press [Esc]. CS-9134 / CS-9138 User Manual 2005-12-21...
-
Page 26: Scan Duration
[Ctrl] or [Scroll Lock] [Scroll Lock]. The default is the Ctrl key combination, but this may conflict with programs running on the systems, in which case, the Scroll Lock option should be used. (Table continues on next page) CS-9134 / CS-9138 User Manual 2005-12-21... - Page 27 Console. If no password has been set, pressing [Enter] will Lock / Unlock the Console. * If a password has been set, this setting requires you to supply it in order to gain access. See the OSD Security section, below, for details. CS-9134 / CS-9138 User Manual 2005-12-21...
-
Page 28: Osd Factory Default Settings
Note: To modify or delete a previous password, access the Password function as in Steps 1 and 2, then use the backspace or delete key to erase the individual letters or numbers. Default CS-9134 / CS-9138 User Manual 2005-12-21... -
Page 29: Appendix
239 - 246 113 - 120 246 - 253 120 - 127 253 - 260 127 - 134 260 - 267 CS-9134 / CS-9138 User Manual 2005-12-21 Computers Computers 267 - 274 400 - 407 274 - 281 407 - 414... -
Page 30: Troubleshooting
1. Reset the mouse (and keyboard) by simultaneously pressing Buttons 1 and 2 on the First Stage unit for 3 seconds. 2. Unplug the mouse connector from the Console Mouse Port, then plug it back in. CS-9134 / CS-9138 User Manual 2005-12-21... -
Page 31: Stacking And Rack Mounting
Stacking and Rack Mounting Stacking CS-9134 / CS-9138 switches can be stacked one on top of the other using the stacking brackets that come already attached to the unit. Line up the four bottom brackets of the top unit with the four top brackets of the bottom unit;... - Page 32 2. Next screw the mounting brackets into the sides of the unit, as shown in the diagram below: Phillips hex head M3 x 8 3. Slide the unit into the rack and secure it to the rack. CS-9134 / CS-9138 User Manual 2005-12-21...
-
Page 33: Specifications
0 - 80% RH Housing Metal Weight 2.5 Kg Dimensions (L x W x H) 48.3 x 15.0 x 4.45cm (19" 1U) CS-9134 / CS-9138 User Manual 2005-12-21 CS-9138 512 (via Cascade) 8 (Green) 8 (Orange) 8 x 6 pin mini DIN female... - Page 34 The direct vendor also reserves the right to revise or update the device or documentation without obligation to notify any individual or entity of such revisions, or update. For further inquires please contact your direct vendor. CS-9134 / CS-9138 User Manual 2005-12-21...
Need help?
Do you have a question about the Master View CS-9134 and is the answer not in the manual?
Questions and answers