Table of Contents
Advertisement
Quick Links
Download this manual
See also:
User Manual
Advertisement
Table of Contents

Related Manuals for Kyocera VERVE


Summary of Contents for Kyocera VERVE
- Page 1 Available applications and services are subject to change at any time.
-
Page 2: Table Of Contents
Table of Contents Get Started User Guide Notes Your Phone at a Glance Set Up Your Phone Activation and Service Create Your Account and Pick Your Plan Activate Your Phone Manage Your Account Re-Boost Additional Information Set Up Voicemail Phone Basics Your Phone’s Layout Turn Your Phone On and Off Status Bar... - Page 3 Call a Phone Number in a Message Call Emergency Numbers Receive Phone Calls End Phone Calls Missed Call Notification Voicemail Voicemail Setup Voicemail Notification Retrieve Your Voicemail Messages Phone Call Options In-call Options Caller ID Call Waiting 3-Way Calling Call Forwarding Set Up Speed Dialing Call Settings Abbreviated Dialing...
- Page 4 Remove Members from a Group Delete a Group Contact ICE (In Case of Emergency) Contacts ICE Contacts Call the ICE Contact Emergency Message Personal Information Secret Contacts Entries Dial Services Accounts and Messaging Text and Multimedia Messaging Send a Message Access Messages Threaded Messaging Messaging Settings...
- Page 5 Alarm Calendar Add an Event to the Calendar Add a To Do List Item to the Calendar Calendar Event Alerts View Calendar Events Erase Calendar Events Bluetooth Turn Bluetooth On or Off Bluetooth Settings Menu Change the Device Name Pair Bluetooth Devices View the Trusted Devices List Trusted Devices List Menu Send Items via Bluetooth...
- Page 6 Volume Settings Adjust the Phone’s Volume Settings Silence All Ringtone Settings Keyguard Text Entry Phone Information Security Settings Lock Phone Reset Your Phone and Phone Content Delete Phone Content Accessibility Settings Voice Guide Voice Recognition TTY Mode Font Size Vibrate Type Hearing Aid Device Compatibility Screen Contrast Phone Setup Options...
-
Page 7: Get Started
Get Started The following topics give you all the information you need to set up your phone and service the first time. User Guide Notes Instructions to perform tasks in this guide may change depending on the software version on your phone. -
Page 8: Set Up Your Phone
Set Up Your Phone You must first install and charge the battery to begin setting up your phone. 1. Install the battery. Insert your fingernail into the slot at the side of the battery compartment cover and lift the cover off gently. -
Page 9: Activation And Service
Note: When you insert the battery, your phone may power on automatically. 2. Charge your battery. Plug the USB connector into the charger/accessory jack on the lower left side of your phone. Plug the AC adapter into an electrical outlet. Note: Your phone’s battery should have enough charge for the phone to turn on and find a signal, set up voicemail, and make a call. -
Page 10: Activate Your Phone
Your phone’s MEID (serial number) is printed on the sticker located on the back of your phone in the battery compartment. This number can also be found on the bottom panel of the phone’s package. 3. Follow the remaining instructions to choose your plan and select a payment method. 4. -
Page 11: Re-Boost
From Any Other Phone Boost Customer Care: 1-888-BOOST-4U (1-888-266-7848). Re-Boost Boost Mobile makes it easy to add money to your account. You decide exactly how and where you want to pay. Keep your account active by using your phone and adding money to your account. Pay with Cash Find an Authorized Re-Boost Retailer near you. - Page 12 Create your password. Record your name announcement. Record your greeting. Important: Voicemail Password – It is strongly recommended that you create a password when setting up your voicemail to protect against unauthorized access. Without a password, anyone who has access to your phone is able to access your voicemail messages.
-
Page 13: Phone Basics
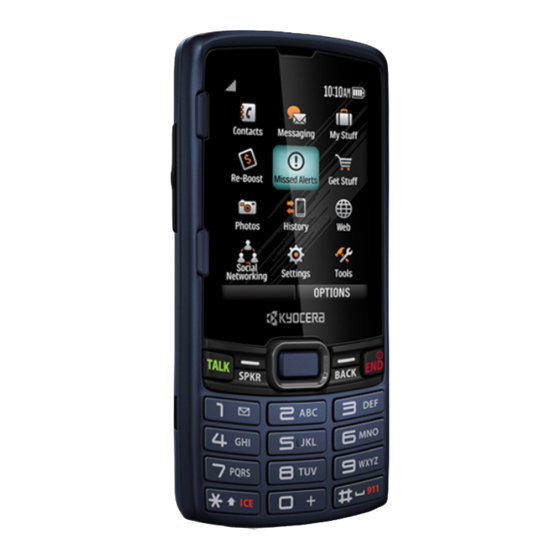
Phone Basics Your phone is packed with features that simplify your life and expand your ability to stay connected to the people and information that are important to you. The following topics will introduce the basic functions and features of your phone. Your Phone’s Layout The illustrations and descriptions below outline your phone’s basic layout. -
Page 14: Key Functions
Key Functions LED Indicator shows your phone's status at a glance. Menu/OK Key ( ) lets you access the phone’s menus and select the highlighted choice when navigating through a menu. Talk Key ( ) allows you to place or receive calls, answer Call Waiting, use 3-Way Calling, or activate Automatic Speech Recognition (ASR). -
Page 15: Turn Your Phone On And Off
Back Key ( ) deletes characters from the display in text input mode. When in a menu, pressing it returns you to the previous menu. This key also allows you to return to the previous screen in a data session. ... -
Page 16: Status Bar
T urn Your Phone Off Press and hold for two seconds until you see the powering-down animation on the screen. Your screen remains blank while your phone is off (unless the battery is charging). Status Bar The status bar at the top of your phone's display screen provides information about your phone's status and options. -
Page 17: Notification Icons
Icon Status 1 beep 1 beep & vibrate Ringtone off Vibrate all Silence all Location on Location off TTY mode Alarm on Hearing aid Multitasking virtual machine Notification Icons Icon Notification Missed call New message New voicemail Urgent messages Multiple alerts Urgent multiple alerts Application alerts Calendar... -
Page 18: Navigate Through The Menus
Camera Icons Icon Camera Beach/snow mode Scenery mode Mirror image mode Night/dark mode Self-timer (5 seconds) Self-timer (10 seconds) Multiple shots Camera resolution (2.0M) Camera resolution (1.3M) Camera resolution (0.3M) Camera resolution (0.1M) Navigate Through the Menus The navigation key on your phone lets you scroll through onscreen items. To navigate through a menu, press the navigation key up or down. -
Page 19: Display Your Phone Number
1. From standby mode, press to access the main menu. 2. Select Settings by highlighting it and pressing 3. Select Phone Info by highlighting it and pressing 4. Select Icon Glossary by highlighting it and pressing For the purposes of this guide, the above steps condense into: ... - Page 20 2. Push the screen panel up with your thumbs to reveal the slide-out keyboard. Note: When the slide-out keyboard is opened, the display stays in landscape mode and you can use the keypad on the front panel for entering numbers. 3.
-
Page 21: Select A Text Input Mode
Press to open the Symbols window. Press the navigation key to scroll to the symbol you want to insert into your text and press to select it. 5. Press these keys to perform other actions: Navigation keys ( ... -
Page 22: Xt9 Smart Input
Text Options to display the text entry options menu (if applicable). See Text Entry Options. XT9 Smart Input XT9 Smart Input is a predictive text input technology which uses the word database to analyze the letters you enter and create a suitable word. Enter T ext in the XT 9 Mode 1. -
Page 23: Abc Mode
Abc Mode Abc mode is a traditional text input mode. Simply type the keys on the QWERTY keyboard as you do on the computer keyboard or multi-tap the keys on the keypad. Use Abc Mode on the Keypad In Abc mode, also known as multi-tap entry, you press keys one, two, three, or four times to enter the letters you see on the keypad. -
Page 24: Copy And Paste Text
Delete All to delete all text (if applicable). Help to view the XT9 instructions. Copy and Paste Text You can copy and paste the text in the text entry field. 1. In the text entry field, move the cursor next to the text you want to copy and press OPTIONS (right softkey) >... -
Page 25: Phone Calls
Phone Calls With mobile service and your phone’s calling features, you can enjoy clear phone calls across the country. Make Phone Calls There are several convenient ways to place calls from your phone. Call Using the Phone Keypad The most “traditional” way to place a call is by using the phone’s keypad. 1. -
Page 26: Call From Contacts
Call from Contacts You can place phone calls directly from entries in your Contacts list. 1. From standby mode, press CONTACTS (right softkey). 2. Highlight the entry you want to call. 3. Press to dial the entry’s default phone number. –... -
Page 27: Call A Phone Number With Pauses
To use speed dial for locations 2-9: From standby mode, press and hold the appropriate key for approximately two seconds. To use speed dial for locations 10-99: From standby mode, enter a two-digit speed dial number, and then press The display confirms that you have dialed the number when it shows “Connecting...”... -
Page 28: Call Emergency Numbers
3. Press For more information on utilizing the information in a message, see Simple Data Exchange. Call Emergency Numbers You can place calls to 9-1-1 even if the phone’s screen is locked or your account is restricted. From standby mode, press and hold >... -
Page 29: Receive Phone Calls
When you place an emergency 9-1-1 call, the GPS feature of your phone seeks information to calculate your approximate location. Depending on several variables, including availability and access to satellite signals, it may take up to 30 seconds or more to determine and report your approximate location. -
Page 30: End Phone Calls
Mute the Ringtone and Stop the Vibration Select Silence on the screen. – or – Press – or – Press the volume button up or down. Reject an Incoming Call Select Send to Voicemail on the screen. – or – Press –... -
Page 31: Missed Call Notification
Missed Call Notification When an incoming call is not answered, your screen displays the Missed Call log. Press to dial the phone number. To display a Missed Alerts entry from standby mode: 1. Press > Missed Alerts. 2. Select the entry you wish to view and press Voicemail The following topics outline your phone’s voicemail service. -
Page 32: Retrieve Your Voicemail Messages
1. From standby mode, press > Settings > Others > Alerts > Repeated Tone > Voicemail. 2. Select Single Tone (once only) or Repeated Tone (once every minute). Note: Your phone accepts messages even when it is turned off. However, your phone notifies you of new messages only when it is turned on and you are in a network service area. -
Page 33: Caller Id
Transfer Audio to switch the call to a Bluetooth device (if applicable). Save to save the current call’s phone number in your Contacts. Contact Details to display information about the caller stored in your Contacts (if applicable). ... -
Page 34: 3-Way Calling
Press . This puts the first caller on hold and answers the second call. To switch back to the first caller: Press again. Note: For those calls where you don’t want to be interrupted, you can temporarily disable Call Waiting by pressing before placing your call. -
Page 35: Set Up Speed Dialing
1. From standby mode, press 2. Enter the area code and phone number to which you want your calls forwarded. 3. Press . You will hear a tone to confirm the activation of Call Forwarding. To deactivate Call Forwarding: 1. From standby mode, press 2. -
Page 36: Call Settings
Call Settings You can configure various call-related settings. Abbreviated Dialing Abbreviated Dialing is similar to speed dialing. You can use either of the following abbreviated dialing features. Contacts Match - Retrieve any number saved in your Contacts by entering four or more digits of any part of the number. -
Page 37: Auto-Answer Mode
1. From standby mode, press > Settings > Others > Call Setup > Call Answer. 2. Select Talk Key, Any Key, or Slide Open. Auto-Answer Mode Set your phone to automatically pick up incoming calls. Remember, your phone will answer calls in auto-answer mode even if you are not present. -
Page 38: Delete History
= Missed Call History List Options To make a call from the history, see Call from History. For additional options: 1. From standby mode, press 2. Select an entry and press OPTIONS (right softkey) to display the options list. Options may vary according to entry: ... -
Page 39: Contacts
Contacts Your phone’s Contacts help you stay in touch with family, friends, and colleagues by keeping track of all their contact information. The following topics explain how to use your phone’s Contacts. Get Started with Contacts Before using Contacts, it’s best to learn a few basics. Access Contacts There are a few ways to display Contacts. -
Page 40: Add A Contact
1. From standby mode, press CONTACTS (right softkey). 2. Highlight a contact and press OPTIONS (right softkey) to display the options list: New Group to create a new group. See Add a Group Contact. Edit Contact to edit the selected contact. See Edit a Contact. -
Page 41: Save A Phone Number
Save a Phone Number You can save a phone number to Contacts directly from the phone keypad. 1. From standby mode, enter a phone number. 2. Press OPTIONS (right softkey) > Save. (If this is the first time you are saving an entry to Contacts, skip to step 4.) 3. -
Page 42: Assign A Ringtone To A Contact
1. From standby mode, press CONTACTS (right softkey). 2. Highlight an entry and press 3. Highlight and press 4. Select Choose Photo. 5. Select a photo category and press 6. Select an image and press to assign it. Assign a Ringtone to a Contact Know who’s calling without looking at your phone by assigning a specific ringtone to a contact. -
Page 43: Delete A Contact
5. Highlight a vibrate type category, such as Default Vibrate Type, Preloaded Vibrate Type, or No Vibration and then press 6. Highlight a vibrate type and press Delete a Contact You can delete existing entries from your Contacts. 1. From standby mode, press CONTACTS (right softkey). 2. -
Page 44: Add Members To A Group
Add Members to a Group You can add group members to existing groups. 1. From standby mode, press CONTACTS (right softkey). 2. Highlight the group you want to add members to and press OPTIONS (right softkey) > Edit Group > Add More. 3. -
Page 45: Ice (In Case Of Emergency) Contacts
ICE (In Case of Emergency) Contacts Registering ICE information might help rescue workers, such as paramedics and police officers, as well as hospital personnel identify your primary contact or special medical needs you might have in case of emergency. ICE Contacts You can register up to five ICE contacts. -
Page 46: Emergency Message
Note: When Location settings is turned off, it will be automatically turned on. Emergency Message Register a message to accompany an ICE call. The GPS information will be attached to the message. To enter or edit the emergency message: 1. From standby mode, press and hold 2. -
Page 47: Dial Services
2. Press OPTIONS (right softkey) > Settings > Hide Secret or Show Secret. 3. Enter the four-digit lock code. Dial Services Your Contacts list is preprogrammed with contact numbers for various services. To dial a service from your Contacts: 1. From standby mode, press CONTACTS (right softkey). 2. -
Page 48: Accounts And Messaging
Accounts and Messaging Send your messages to your family and friends with text messaging (SMS) and multimedia messaging (MMS). You can also share information through social networking accounts. Text and Multimedia Messaging Messaging allows you to stay connected 24 hours a day anywhere on the network. With your phone, you can use two types of messaging, text messaging (SMS) and multimedia messaging (MMS). -
Page 49: Access Messages
7. Review your message and press SEND (left softkey). Access Messages Read and reply to the messages you have received. To read a message: When you receive a message, your phone will display a notification message. Select View or press VIEW (left softkey). -
Page 50: Message Details
Me(Pending) - Message you have not sent yet because your phone has no network connection. The message will be sent automatically when your phone reconnects to the network. Me(Draft) - Message you saved as a draft. Only one draft can be saved in each thread, and that draft appears at the top of the thread. -
Page 51: Messaging Settings
Manage Text Blocking to block text messages from specific phone numbers or email addresses. Settings to display the Messaging Settings menu. Combine to display segmented messages as one message. Uncombine to display a combined message as segmented messages. ... -
Page 52: Preset Messages
Preset Messages Your phone is loaded with 20 preset messages to help make sending messages easier. Customize or delete these messages, such as “Where are you?,” “Don't forget to,” and “Meet me at” to suit your needs, or add your own messages to the list. To edit or delete a preset message: 1. -
Page 53: Simple Data Exchange
Presidential Alerts to receive emergency Presidential alerts. Presidential Alerts is always grayed out (not selectable) and cannot be excluded. Imminent Threat - Extreme to receive emergency alerts of extreme emergency situations (extraordinary threats to life or property). Imminent Threat - Severe to receive emergency alerts of severe emergency situations (significant threats to life or property). -
Page 54: Social Networking Accounts
Contact Details to display the Contacts entry if the email address is already saved in Contacts. Street Address Options Highlight a street address, press , and select an option: Share to select Message. The messaging application will open and the address will appear in the message body. - Page 55 Access a Social Networking Account 1. From standby mode, press > Social Networking. 2. Highlight a social networking application and press 3. Follow the onscreen instructions to sign in to the application. Accounts and Messaging...
-
Page 56: Apps And Entertainment
Apps and Entertainment The features such as downloading games, ringtones and applications are accessible from your phone. Download Games, Ringtones, and More You have access to a dynamic variety of downloadable content, such as games, ringtones, and other applications. (Additional charges may apply.) Follow the basic steps below to access and download these items. - Page 57 Select Assign to assign a ringtone or wallpaper to a phone function. Select Settings to configure downloaded games or applications. Select Shop to browse for other items to download. Press to quit the browser and return to standby mode. Note: Services may be available for an additional subscription fee.
-
Page 58: Web And Data
Web and Data Your phone’s data capabilities let you wirelessly access the Internet. The following topics address your phone’s data connections and the built-in Web browser. Launch a Web Connection Launching a Web connection is as simple as opening the browser on your phone. ... -
Page 59: Data Connection Status And Indicators
Update Your User Name If you choose to change your user name and select a new one online, or make any changes to your services, you must then update the profile on your phone. From standby mode, press > Settings > Others > Data Settings > Update Data Profile. (To cancel, press before completing the update.) Data Connection Status and Indicators... -
Page 60: Browser Menu
Softkeys During a data session, the bottom line of your phone’s display screen contains one or more softkeys. These keys are shortcut controls for navigating around the Web, and they correspond to the softkeys, or QWERTY softkeys when the slide is open, directly below the phone’s display screen. Tip: Depending on which websites you visit, the labels on the softkeys may change to indicate their function. -
Page 61: Open The Browser Menu
Open the Browser Menu The browser menu may be opened anytime you have an active data session, from any page you are viewing. From any open Web page, press Navigation (left softkey). Use the navigation window for the following operations. To open a specific page: ... - Page 62 View browsing history to display a list of the Web pages visited. Send this page to a friend to send a URL of the currently viewed Web page. Overview Mode to display the entire Web page. Browser settings ...
-
Page 63: Camera
Camera You can use the camera to take and share pictures. Your phone comes with a 2.0 megapixel camera. Take Pictures The following topics teach you how to take pictures with your phone’s camera. Take a Picture Taking pictures with your phone’s built-in camera is as simple as choosing a subject, aiming the lens, and pressing a button. -
Page 64: Camera Mode Options
Camera Mode Options Various options are available from camera mode. Press OPTIONS (right softkey) in camera mode to display additional camera options: Picture Mode to select a picture mode from Normal, Beach/Snow, Scenery, Mirror Image, or Night/Dark. Zoom to zoom in on a subject. -
Page 65: Camera Settings
2. Highlight a delay time (5 Seconds or 10 Seconds) and press 3. Press , or START (left softkey) when you are ready to start the timer. (A countdown is displayed in the middle of the screen and your phone will beep during the countdown.) 4. -
Page 66: Assign Pictures
Auto Review to select whether or not the picture is displayed for review after you take a picture. Assign Pictures Assign a picture as a wallpaper or as a picture ID. 1. Take a picture. See steps 1-3 on Take a Picture. -
Page 67: Send Pictures
Special Effects to select from Fun Frames, Color Tone, Fun Stamps, or Rotate. Resize to resize the selected picture. Select 1.3M, 0.3M, or 0.1M. (Some options may not be available depending on the size of picture you have.) ... -
Page 68: Tools And Calendar
Tools and Calendar Learn how to use many of your phone’s productivity-enhancing features. Activate This Device Your phone comes with a built-in servicing application that can assist you with activating a new phone, updating software (over the air), and more. 1. -
Page 69: Calendar
Calendar Use Calendar to create and manage events, meetings, and appointments. Your Calendar helps organize your time and reminds you of important events. Add an Event to the Calendar Your Calendar helps organize your time and reminds you of up to 100 important events. 1. -
Page 70: Add A To Do List Item To The Calendar
Tip: Press OPTIONS (right softkey) > Settings > Holiday/Weekday to enter holidays and weekdays. Add a To Do List Item to the Calendar Your phone can store and manage up to 40 To Do list items. 1. From standby mode, press >... -
Page 71: View Calendar Events
Select Snooze, or press SNOOZE (left softkey) after selecting View to stop the alarm and start snooze mode (if applicable). Press DISMISS (right softkey) to clear the alarm (if applicable). To set reminder settings: On any Calendar view, press OPTIONS (right softkey) > Settings > Alarm and set the items. View Calendar Events Display the scheduled events on your Calendar. -
Page 72: Bluetooth
Select to delete multiple events. All on This List to delete all events on the list. All Completed Events to delete completed To Do List items. 5. Press YES (left softkey). To delete old events or all events: ... -
Page 73: Change The Device Name
My Bluetooth Info to display your phone’s Bluetooth name, address, class, and supported profiles. Change the Device Name The device name identifies your phone to other devices. 1. From standby mode, press > Tools > Bluetooth > My Bluetooth Info. 2. -
Page 74: Send Items Via Bluetooth
Left Softkey Menus 1. From standby mode, press > Tools > Bluetooth > Trusted Devices. 2. Highlight a device and press the available left softkey options: CONNECT... to connect to the selected Bluetooth device, if not connected (for headsets, hands-free and other devices, excluding computers, PDAs, or phones). -
Page 75: Update Phone
Update Phone From time to time, updates may become available for your phone. 1. From standby mode, press > Tools > Update Phone. 2. Select an option: Update Firmware to update your phone’s software. Update PRL to update the preferred roaming list. Your phone automatically downloads and installs any available updates. -
Page 76: Automatic Speech Recognition (Asr)
Automatic Speech Recognition (ASR) You can use your phone’s built-in automatic speech recognition (ASR) software to dial a phone number in your contacts or to launch phone functions. All you have to do is to talk into the phone, and ASR will recognize your voice and complete tasks by itself. -
Page 77: Send A Message Using Asr
Note: If ASR does not recognize the name or number, it will find the most likely matches and display a list of up to three names or numbers. You will hear “Did you say, ‘Call...?’” followed by the name or number. -
Page 78: Asr Settings
Battery My Phone Number 1. From standby mode, press and hold 2. When you hear “Say a command,” say “Check.” 3. When you hear “Which status item?,” say a command. ASR Settings Configure the automatic speech recognition settings. Tip: The ASR settings can also be accessed from the Voice Recognition menu. -
Page 79: Manage Voice Memos
Expert Mode to sound a beep only. Prompt Mode to prompt for required information. Readout Mode to prompt for required information and to read the text displayed on the screen. To change the ASR dialing region: 1. From standby mode, press and hold 2. -
Page 80: Play Voice Memos
3. To stop recording, press or STOP (left softkey). Play Voice Memos To play one or all memos: 1. From standby mode, press > Tools > Voice Services > Voice Memo > List. 2. Highlight the memo you want to play and press or PLAY (left softkey). -
Page 81: Assigned Media
Assigned Media The Assigned Media folder automatically stores copies of pictures assigned as picture IDs or wallpapers on your phone. See Assign Pictures. 1. From standby mode, press > Tools > Assigned Media. 2. Use your navigation key to view and scroll through the pictures. (To switch a picture from thumbnail view to expand view mode, select a picture and press Calculator Your phone’s convenient built-in calculator lets you perform basic mathematical equations. -
Page 82: Stopwatch
Tip: Press ON or OFF (left softkey) to toggle the countdown alarm on and off. Stopwatch You can record split times or lap times with the built-in stopwatch. 1. From standby mode, press > Tools > Stopwatch. 2. Press MODE (left softkey) to select split timing or lap timing. 3. -
Page 83: Settings
Settings The following topics provide an overview of items you can change using your phone’s Settings menus. Display Settings Adjusting your phone’s display settings not only helps you see what you want, they can also help increase battery life. Change the Wallpaper You can set a wallpaper to display while in standby mode. -
Page 84: Change The Backlight Settings
2. Highlight a font size. You can see the current and new font sizes in the display window above the menu. 3. If you are satisfied with the font size, press SAVE (left softkey). – or – From standby mode, press to display the main menu, and then press OPTIONS (right softkey) >... -
Page 85: Select A Picture Id
Select a Picture ID You can select an image as a picture ID. 1. From standby mode, press > Settings > Display > Picture ID. 2. Select Contact, Unsaved Numbers, or Private / Unknown. If you select Contact, select an entry. 3. -
Page 86: Change The Phone's Menu Style
3. Press DONE (left softkey) to save your greeting. Change the Phone’s Menu Style Choose the layout of your phone’s menu. 1. From standby mode, press to display the main menu. 2. Press OPTIONS (right softkey) > Grid View or List View to change the menu style. Volume Settings Adjust your phone’s volume settings to suit your needs and your environment. -
Page 87: Ringtone Settings
Ringtone Settings Ringtones help you identify incoming calls and messages. You can assign ringtones to individual Contacts entries, types of calls, and messages. Select Ringtones for Incoming Calls and Messages 1. From standby mode, press > Settings > Ringtones > Incoming Calls or Messages. 2. -
Page 88: Keyguard
Listen to listen to the ringtone. Assign to assign the ringtone to a call or message type or to a specific contact. Shop to browse for other items to download. Keyguard Use Keyguard to lock the side buttons and the keys on the front panel to prevent accidental key presses. -
Page 89: Phone Information
Next Word Complete to automatically display the word that may follow the current text input. Phrase Complete to predict possible phrases after one word with a space is entered. Word Scan to allow the predictive text input system to recognize words by searching Contacts. -
Page 90: Lock Phone
Lock Phone When your phone is locked using the Lock Phone feature, you can only make calls to 9-1-1 and the ICE contacts. 1. From standby mode, press > Settings > Lock Phone. 2. Enter your lock code. 3. Select Lock Now. Tip: The first time you access the Lock Phone menu, you will be advised to change the default lock code by pressing CHANGE (left softkey). -
Page 91: Reset Your Phone And Phone Content
3. Edit the hint and press – or – Delete the hint by pressing and press Tip: If you can’t recall your lock code, try using the last four digits of your wireless phone number or check your lock code hint. Reset Your Phone and Phone Content This option lets you clear different types of personal information stored on your phone, reset your phone to factory settings, or both. -
Page 92: Accessibility Settings
My Photos to delete all pictures stored in My Photos. All Stuff to delete all user-added data. 4. Read the message and press DELETE (left softkey). Accessibility Settings The Accessibility menu lets you enable and manage accessibility-related features. Voice Guide Voice Guide allows you to hear voice prompts and spoken numbers or key names as you press a key, and also to hear menus and options, Contacts names, email addresses, URLs, etc., as you... -
Page 93: Voice Recognition
Voice Recognition You can use your phone’s built-in automatic speech recognition (ASR) software to dial a phone number in your contacts or to launch phone functions. See Automatic Speech Recognition (ASR) details. To configure the Voice Recognition settings, see Settings. TTY Mode A TTY (teletypewriter, also known as a TDD or Text Telephone) is a telecommunications device that allows people who are deaf, hard of hearing, or who have speech or language disabilities, to... -
Page 94: Font Size
Font Size Adjust the font size for the screen. This setting does not affect all screens. See Change the Font Size. Vibrate Type You can select vibration types for incoming calls, messages, voicemail, etc. Select Vibrate T ype for Incoming Calls and Messages 1. -
Page 95: Screen Contrast
Off to use your phone without a hearing aid device. Screen Contrast You can make your screen easier to read with a high contrast color scheme. 1. From standby mode, press > Settings > Others > Accessibility > Screen Contrast. 2. -
Page 96: Call Setup
Alerts Notification Set your phone to alert you with an audible tone once a minute during a voice call, when you change service areas, or when a call has been connected. 1. From standby mode, press > Settings > Others > Alerts. 2. -
Page 97: Headset Mode
Enable Data Services Although your phone’s data services are turned off by default, you may enable them at any time. 1. From standby mode, press > Settings > Others > Data Settings > Data > On. (A message is displayed.) 2. -
Page 98: Language Settings
2. Select an option and press Normal to play the sound through both the headset and the speaker. Headset Only to play the sound through the headset only. Language Settings You can choose to display your phone’s onscreen menus in English or in Spanish. 1. -
Page 99: Navigation Key Shortcuts
Navigation Key Shortcuts You can use the navigation keys as shortcuts to access specific menu items directly from standby mode. You can reassign the default shortcuts to the menu items you choose. 1. From standby mode, press > Settings > Others > Navigation Keys. 2. -
Page 100: Copyright Information
® The Bluetooth word mark and logos are registered trademarks owned by Bluetooth SIG, Inc. and any use of such marks by Kyocera Corporation is under license. Other trademarks and trade names are those of their respective owners. ® Nuance, the Nuance logo, VSuite and XT9 are trademarks or registered trademarks of Nuance Communications, Inc. -
Page 101: Index
Index 3-way Calling 28 Calculator 75 Calendar 63 Add a To Do 64 Add event 63 Abbreviated Dialing 30 Erase events 65 Accessibility 86 Event alerts 64 Accessory Jack 9 View events 65 Account 3 Call Answer Mode 30 Manage 4 Call Forwarding 28 Accounts 42 Call Options 26 Activate This Device 62 Call Settings 30 Activate Your Phone 4 Call Setup 90 Activation 3 Call Waiting 27... - Page 102 ICE contacts 39 Greeting 79 List 33 Make call from 20 Remove Members from Group 38 Headset 91 Save a phone number 35 Headset Jack 9 Secret entries 40 Hearing Aid Device Contacts List Options 33 Compatibility (HAC) Mode 88 Countdown Timer 75 History 31 Delete 32 Icons 31 Data 52 Make call from 19 Data Services 52 Options 32 Disable 91 View 31...
- Page 103 Menu Using history 19 Navigation 12 Using phone keypad 19 Style 80 Using speed dialing 20 Menu/OK Key 8 Using the plus (+) code 20 Message Using your voice 20 Make call from 21 With pauses 21 Messaging 42 Phone Number Access Messages” 43 Display 13 Callback number” 45 Save to contacts 35 Clear alerts icon” 45 With pauses 21 Emergency alerts” 46 Picture ID 79...
- Page 104 Alerts” 89 Voice Services 69 Camera 59 Automatic speech recognition (ASR) 70 Display 77 Voice memos 73 Language” 92 Voicemail 25 Messaging 45 Notification 25 Phone setup options 89 Retrieve messages 26 Ringtones 81 Setup 5, 25 Security 83 Volume 80 Text entry 82 Adjust 80 Volume 80 Button 9 Signature 45 Silence all 80 Silence All 80 Simple Data Exchange 47 Slide-out Keyboard 13 Wallpaper 77 Social Networking Accounts 48 Web 52...
Need help?
Do you have a question about the VERVE and is the answer not in the manual?
Questions and answers