Table of Contents
Advertisement
Advertisement
Table of Contents

Related Manuals for VIVIBright DU8090Z


Summary of Contents for VIVIBright DU8090Z
- Page 1 User's Manual User's Manual DU8090Z...
-
Page 2: Table Of Contents
DU8090Z DLP Projector - User Manual Table of Contents Copyright ................................2 Copyright ..............................2 Disclaimer ..............................2 About the Manual ............................2 Important Safety Guidelines ..........................3 Safety Notification ............................3 Installation and Use Notices ......................... 5 Disposal of Old Electric and Electronic Equipment ..................5 ... -
Page 3: Copyright
DU8090Z DLP Projector - User Manual Copyright Copyright The User's Manual (including all pictures, illustrations and software) is protected by the international copyright right law. All rights are reserved. No duplication of the manual or any content included in the manual is allowed without the written consent of the manufacturer. -
Page 4: Important Safety Guidelines
DU8090Z DLP Projector - User Manual Important Safety Guidelines Thank you for purchasing the high quality product! Read the Manual carefully to obtain the best performance. The Manual provides instructions to use the menu and implement operation. Safety Notification To turn off main power, ensure to unplug from power outlet. - Page 5 DU8090Z DLP Projector - User Manual These laser diodes are sealed in the light module. It is recommended to ask dealer for maintenance or repair services of the light module. End user is not allowed to replace the light module.
-
Page 6: Installation And Use Notices
DU8090Z DLP Projector - User Manual Installation and Use Notices Read and keep this manual properly. Pay attention to all the noted warnings, and follow all the guidelines and descriptions in this manual. Do not use the projector near water. -
Page 7: Introduction
You can find the latest version of the Manual and the manual of other Vivitek products on www.vivitekcorp.com. Packing Checklist The following items are included in the packaging box of the DU8090Z series projector. If any loss or damage to any item, contact your dealer or the VIVITEK customer service department. -
Page 8: Projector Overview
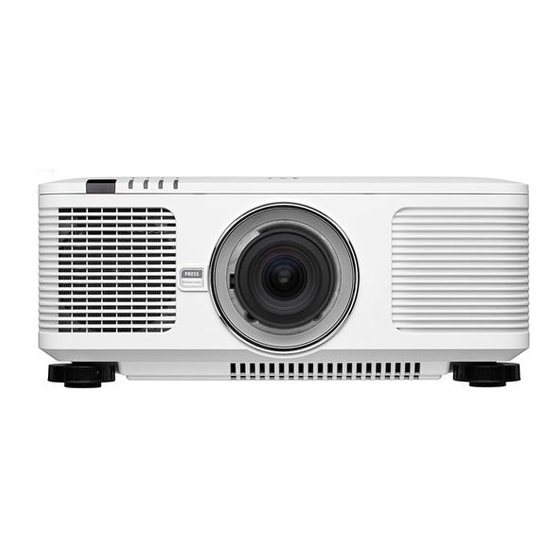
DU8090Z DLP Projector - User Manual Projector Overview Front-right View 1. Front IR Receiver The Receiver for IR signals from remote control. 2. LED Indicator Display current projector status such as power, light source status and warning. 3. Air Intake The fan pulls the cool air to the projector for system cooling. - Page 9 DU8090Z DLP Projector - User Manual Bottom View 15. Anti-thief Screw hole The anti-thief screw can be fastened to prevent Lens removing by unauthorized person. 16. Mounting Holes of Support Kit These two screws holes can be used to fix support kits of ultra-short throw lens.
-
Page 10: Io Panel
DU8090Z DLP Projector - User Manual IO Panel TRIGGER(12V +/-1.5V) HDBaseT/LAN When connected to the screen thtough a 3.5mm cable, Connect an Ethernet cable (Cat5/Cat6, not supplied) from the screen deploys automatically on start up of the a computer, network device, or HDBaseT transmitter. -
Page 11: Control Panel
DU8090Z DLP Projector - User Manual Control Panel POWER CENTER LENS User the button to turn on/off the projector. Push the button to center the lens and calibrate the parameter of lens shift, focusing and zooming. Note: The lens memory function requires the accurate INPUT Push the button to select the input signal. -
Page 12: Remote Control
DU8090Z DLP Projector - User Manual Remote Control Use the button to turn on the projector. Use the button to turn off the projector. FOCUS Adjust the focus of the projected image. ZOOM Zoom in/out the projected image. TEST PATTERN Use the button to show the test pattern. - Page 13 DU8090Z DLP Projector - User Manual Remote Control Operating Range The remote control uses infrared transmission to control the projector. It is not necessary to point the remote directly at the projector. Provided you are not holding the remote perpendicular to the sides or the rear of the projector, the remote will function well within a radius of about 10 meters (25 feet) and 15 degrees above or below the projector level.
-
Page 14: Installing Or Removing The Optional Lens
DU8090Z DLP Projector - User Manual Installing or Removing the Optional Lens Caution: Do not shake or place excessive pressure on the projector or the lens components as the projector and lens components contain precision parts. When shipping the projector with the optional lens, remove the optional lens before shipping the projector. The lens ... - Page 15 DU8090Z DLP Projector - User Manual Removing the Existing Lens Push the LENS RELEASE button all the way in and rotate the lens counterclockwise. The existing lens will be disengaged Pull out the existing lens slowly. Caution: When installing the lens into the projector, be sure to remove the lens cap from the back of the optional lens before installing the optional lens into the projector.
-
Page 16: Lens Shift Range
Lens Shift Range The DU8090Z projector has the lens shift feature; the image can be shifted vertically or horizontally without moving the projector. The lens shift range is shown in the percentage of the screen height, the maximum vertical shift range of the image can be up 50% and down 30%, maximum horizontal range is 10% to the right, 10% to the left. - Page 17 The image can be shifted horizontally to the right or left by 10% (0.1H) without moving the projector. Note: Above adjustable lens shift range is preset in DU8090Z for more flexible in installation, the best performance range of the lens may vary with projection lens. Please refer to the projection lens specification.
-
Page 18: Making Connections
DU8090Z DLP Projector - User Manual Making Connections Follow the instructions below to connect DU8090Z projector to the video source, external control equipment (if any). When connecting to the equipment, use the correct signal cable to connect to the signal source and ensure that the cable is securely connected. -
Page 19: Connecting To The Control Equipment
DU8090Z DLP Projector - User Manual Connecting to the Control Equipment The projector has the following control port for connecting to the control equipment: HDBaseT/LAN (Network control): The projector supports network control. LAN and Digital share the port. If only network control is used, you can connect the LAN on the projector to PC or through the local network. -
Page 20: Connecting To The Screen Trigger
DU8090Z DLP Projector - User Manual Connecting to the Screen Trigger If your projection system includes the Electric projection screen and other 12V trigger device, you can connect these devices to the 12V trigger to output and configure the output 12V signal settings, such as automation and the aspect ratio of 16:10 through OSD control to Trigger. -
Page 21: Connecting To External Hdbaset Transmitter
RJ-45 cable. If the HDbaseT Transmitter you purchased supports the input and output of the IR remote control, the control signals from the IR remote control can be sent to the DU8090Z projector via the RJ-45 cable. -
Page 22: Using The Projector
DU8090Z DLP Projector - User Manual Using the projector Note: The projector is equipped with safety switch inside the lens mount hole; the projection lens must be installed in the projector before turning on the power. Or the projection can’t be started. -
Page 23: Turning Off The Projector
DU8090Z DLP Projector - User Manual 2. Press the POWER button on the control panel or ON button on the remote control. 3. The Power LED and LIGHT LED flashes green till power on process is finished. 4. After few seconds, both LEDs keep green, the projector is ready for use. -
Page 24: Using On-Screen Display
DU8090Z DLP Projector - User Manual Using On-Screen Display Using the OSD Menu The projector has an On-Screen Display (OSD) that lets you make image adjustments, change various settings and check current projector status. Navigating the OSD You can use the remote control or the control buttons on the projector to navigate and make changes to the OSD. -
Page 25: Menu Tree
DU8090Z DLP Projector - User Manual Menu Tree Use the following table to quickly find a setting or determine the range for a setting. Main Menu Submenu INPUT Input Selection HDMI1 HDMI2 Component 3G-SDI HDBaseT PIP Option PIP Input Position... - Page 26 DU8090Z DLP Projector - User Manual 6500K 7500K 9300K Native Gamma 1.0 / 1.8 / 2.0 / 2.2 / 2.35 / 2.5 / S-Curve Input Balance Red Offset Green Offset Blue Offset Red Gain Green Gain Blue Gain Green Blue...
- Page 27 DU8090Z DLP Projector - User Manual Auto Power On Network Standby Power DHCP IP Address Subnet Mask Gateway Mac Address Light Power Normal Custom Custom Power Level Background Logo Black Blue Startup Logo Remote Sensor Trigger Screen 16:10 16:9 1.88 2.35...
-
Page 28: Osd Operation - Input
DU8090Z DLP Projector - User Manual OSD Operation – INPUT Input Selection Use the shortcut key on the remote control or this function to select the input source, the Input options are as below. The available input source of the product is HDMI 1, HDMI 2, VGA, Component (BNC), HDBaseT, DVI and 3G-SDI. - Page 29 DU8090Z DLP Projector - User Manual Position Find preferred location of PIP window. Top Left: Display sub picture at top left of the screen. Bottom Left: Display sub picture at bottom left of the screen. Top Right: Display sub picture at top right of the screen.
- Page 30 DU8090Z DLP Projector - User Manual 3D This function is to set the 3D format and sync method. The projector detects the type of input signals and provides relevant options for setting. Before performing 3D setting, make sure that the input signal is connected.
-
Page 31: Osd Menu - Picture
DU8090Z DLP Projector - User Manual OSD MENU – PICTURE Picture Mode Use ◄or► to select desired picture mode High Bright: The highest brightness output mode is suitable for the application where the highest brightness output is needed. Presentation: The best projection effect is suitable for the presentation or picture. -
Page 32: Osg Menu - Alignment
DU8090Z DLP Projector - User Manual Offset: These three options will shift the color spectrum for the whole image and change its brightness, if minimal amount of red, green or blue appears in the gray areas, you can adjust the offset of the corresponding color accordingly. By increasing the offset, the image brightness will become lower. - Page 33 Lens Type There are eight projections lens can be used in DU8090Z, the initial projection position of Ultra Short Throw (UST) Lens is different to other seven projection lenses. The projector preset two initial projection positions for these two types accordingly, Center Lens function can moves the lens to the initial position (center) automatically per the setting.
- Page 34 DU8090Z DLP Projector - User Manual Blanking: This function can adjust the edges of the image and hide surplus sections of the projection. Top: Press▲▼ to adjust the top blanking area on the projected picture. Bottom:Press▲▼ to adjust the bottom blanking area on the projected picture.
-
Page 35: Osd Menu - Control
DU8090Z DLP Projector - User Manual OSD MENU – CONTROL Language Select desisted OSD language, the available languages options are English, Española, Deutsch, Portuguese, 简体中文, 繁體中文, 日本語, 한국어. Projection Mode Use The projection mode option can be used to change the direction of the projected image. - Page 36 DU8090Z DLP Projector - User Manual prefer to set it by manual, you can select On or Off. Off: Turn off High Altitude mode if the projector is installed in an area under 5000 feet. On: Turn on High Altitude mode if the projector is installed in an area over 5000 feet.
- Page 37 DU8090Z DLP Projector - User Manual Background User can use this function to specify the image displayed on the blank screen when there is no input signal. The selectable items are Logo, Black and Blue, the default setting is Logo.
-
Page 38: Osd Menu - Service
DU8090Z DLP Projector - User Manual OSD MENU – SERVICE Model Display the project model name. Serial Number Display the serial number of the projector. Software Version 1 / Software Version 2 Display the software version in the projector. -
Page 39: Product Specification
DU8090Z DLP Projector - User Manual Product Specification Display Type Single Chip 0.67" DLP Technology Brightness 8,000 ANSI Lumens Native Resolution WUXGA (1920 x 1200) Maximum Resolution WUXGA (1920 x 1200)@60Hz (Reduced Blanking) Contrast Ratio 10,000:1 Illumination Type Laser Phosphor... -
Page 40: Supported Signal Input Timing
DU8090Z DLP Projector - User Manual Supported Signal Input Timing Signal Format Resolution Frame Rate VGA, BNC HDMI / HDBaseT HD/SDI/3G (HZ) RGBHV 8-bit 10-bit 12-bit 640x480 59.94 640x480 74.99 640x480 800x600 60.32 800x600 800x600 85.06 848x480 47.95 848x480 59.94... - Page 41 DU8090Z DLP Projector - User Manual 720p 720p 59.94 720p 1080p 23.98 1080p 1080p 1080p 29.97 1080p 1080p 1080p 59.94 1080p PsF formats 1080sf 1080sf Supported 3D Signal 3D Format Resolution V-Freq (Hz) V-Total H-Freq (kHz) HDMI I, HDMI II...
-
Page 42: Product Dimensions
DU8090Z DLP Projector - User Manual Product Dimensions... -
Page 43: Led Indication
DU8090Z DLP Projector - User Manual LED Indication Several indicators messages are used to display the current projector status or alert the abnormal message. Power LED LED Display Projector status Procedure AC Power is turned off Green Projector is turning on. -
Page 44: About The Vivitek Support
DU8090Z DLP Projector - User Manual About the VIVITEK Support If you cannot find solutions from this user guideline, please contact us using the contact information below: North America Vivitek Service Center 15700 Don Julian Road, Suite B City of Industry, CA. 91745 U.S.A...
Need help?
Do you have a question about the DU8090Z and is the answer not in the manual?
Questions and answers