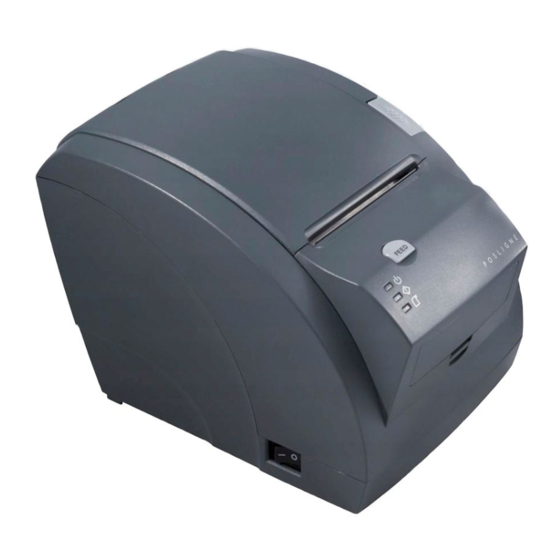
Summary of Contents for Posligne ODP 200 H-II
- Page 1 3” Thermal Printer ODP 200 H-II All specifications are subject to change without notice...
-
Page 3: Table Of Contents
TABLE OF CONTENTS 1. Parts Identifications 2. Setting up the printer 2.1 Unpacking 2.2 Connecting the cables 2.3 Loading the roll paper 2.4 Dip switch setting 3. Control panel and other functions 4. Self Test 5. Hexadecimal Dump 6. Specifications 6.1. -
Page 4: Parts Identifications
ODP 200H-II User’s Manual ODP 200H-II User’s Manual 2. Setting Up the Printer 1. Parts Identifications 2-1. Unpacking Your printer box should include these items. If any items are damaged or missing, please contact your dealer for assistance. The Printer User's Manual Roll Paper Adaptor(Option) -
Page 5: Connecting The Cables
ODP 200H-II User’s Manual ODP 200H-II User’s Manual 2-2. Connecting the Cables 2-2-1. Interface Connector You can connect up the cables required for printing to the printer. They all connect to the connector panel on the back of the printer, which is shown below : <D-SUB 25 Female Serial>... - Page 6 ODP 200H-II User’s Manual ODP 200H-II User’s Manual Centronics Parallel Interface 2-2-2. Cash Drawer Connector The printer can operate two cash drawers with a 6 pin RJ-11 modular connector. SIGNAL DESCRIPTION The driver is capable of supplying a maximum current of 1.0A/24VDC for 510ms or less STROBE- Input Synchronize signal Data received...
-
Page 7: Loading The Roll Paper
ODP 200H-II User’s Manual ODP 200H-II User’s Manual 5. Be sure to note the correct direction that the paper comes off the roll. 2-3. Loading the Roll Paper Notes: Be sure to use paper rolls that meet the specifications. Do not use paper rolls that have the paper glued to the core because the printer cannot detect the paper end correctly. -
Page 8: Dip Switch Setting
ODP 200H-II User’s Manual ODP 200H-II User’s Manual 2-4. Dip Switch Setting ♣CAUTION: The printer is set up at the factory to be appropriate for almost all users. On the other hand, Turn off the printer while removing the DIP switch cover to prevent an electric short, which can offers some more settings for users with special requirements. -
Page 9: Control Panel And Other Functions
ODP 200H-II User’s Manual ODP 200H-II User’s Manual ♣CAUTION: 3. Control panel and other functions. When the paper is jammed with cutter, the top cover might be stuck. In this case, repeat power 3-1. Control panel on and off several times. You can control the basic paper feeding operations of the printer with the button on the control If the top cover is still stuck, please follow the steps to release the papers from jamming. -
Page 10: Self Test
ODP 200H-II User’s Manual ODP 200H-II User’s Manual 4. Self Test 5. Hexadecimal Dump The self-test lets you know if your printer is operating properly. It checks the control circuits, This feature allows experienced users to see exactly what data is coming to the printer. This can printer mechanisms, print quality, ROM version and DIP switch settings. -
Page 11: Specifications
ODP 200H-II User’s Manual ODP 200H-II User’s Manual 6. Specifications (8) Overall dimension Appendix A : Specifications 6-1. General Specifications (1) Printing Method Direct line thermal printing. (2) Print speed 200mm/sec. (3) Dot density 180 DPI (Hor / Ver) 180 / 180 (0.142mm / 0.142mm dot) 203 DPI (Hor / Ver) 203 / 180 (0.125mm / 0.142mm dot) (4) Printing Width... -
Page 12: Auto Cutter Specifications
ODP 200H-II User’s Manual ODP 200H-II User’s Manual ♣Important! 6-2. Auto Cutter Specifications When connecting or disconnecting the power supply from the printer, be sure that the (1) Cutting Frequency Max. 30 cuts per minute following cautions are observed. (1) Use a power supply (Limited Power Supply) of DC 24V±10% and more than 2.5A. (2) Thickness of paper 0.06 ~ 0.09 mm (2) Be careful about installing the printer in an area where there is noise. -
Page 13: Command List
ODP 200H-II User’s Manual ODP 200H-II User’s Manual 7. Command List Command Function REMARKS Command Function REMARKS ESC { Turn upside-down printing mode on/off Horizontal tab FS p Print NV bit image Print and line feed FS q Define NV bit image Print and carriage return GS ! Select character size... - Page 14 ODP 200H-II User’s Manual ODP 200H-II User’s Manual...
- Page 15 Rev. 1.0...


Need help?
Do you have a question about the ODP 200 H-II and is the answer not in the manual?
Questions and answers