Table of Contents
Advertisement
Advertisement
Table of Contents
Troubleshooting

Subscribe to Our Youtube Channel
Related Manuals for Hot Spot Tempo


Summary of Contents for Hot Spot Tempo
- Page 2 Before you begin reviewing the manual, please take a moment to register your warranty. Doing so will assist us in contacting you for any important product notification. Prior to registering, you will need the serial number that is located within the equipment compartment of your HOT SPOT spa. To register please go to http:/www.hotspring.com/owners/product-registration...
-
Page 3: Table Of Contents
FILTER SYSTEM ..............25 GETTING STARTED FILTER CARTRIDGES REMOVAL & CLEANING .............25 SPA FEATURES TEMPO RELAY & RHYTHM MODELS ... 4 CARE OF THE SPA PILLOWS ..........25 SPA FEATURES SX & TX MODELS ........5 CARE OF THE EXTERIOR ..........26 QUICK START-UP INSTRUCTIONS ........6 CARE OF THE SPA CABINET ..........26... -
Page 4: Safety Information
• Make sure you always lock the child resistant locks after using the • A ground terminal is provided on the terminal block (TB-1, system spa for your children’s safety. Every HOT SPOT spa is equipped with ground terminal) located inside the control box. To reduce the risk... - Page 5 • Persons taking medications which induce drowsiness, such as DANGER - RISK OF ELECTRICAL SHOCK tranquilizers, antihistamines, or anticoagulants should not use the spa. • Install at least 5 feet (1.5 m) from all metal surfaces. A spa may be installed within 5 feet of a metal surface if each metal surface is HEALTH PROBLEMS AFFECTED BY SPA USE permanently connected by a minimum No.
-
Page 6: Important Spa Instructions
• Use only approved accessories and recommended spa chemicals and cleaners. DON'T • Leave the HOT SPOT spa exposed to the sun without water or the cover in place. Exposure to direct sunlight can cause solar distress of the shell material. -
Page 7: Getting Started
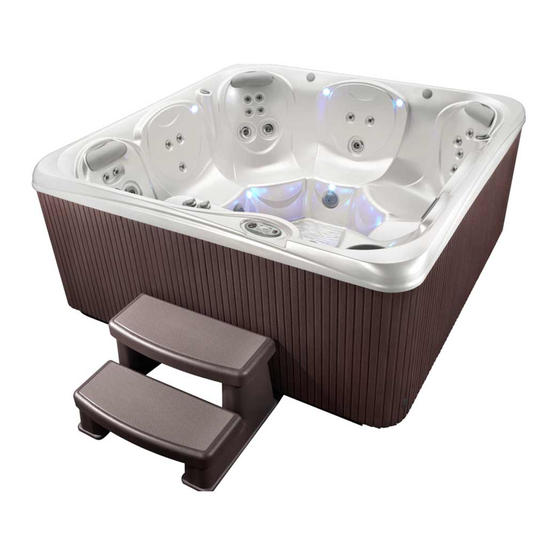
SPA FEATURES TEMPO, RELAY & RHYTHM MODELS 1) Standard LCD Control Panel. The control panel is accessible from inside or outside the spa and is designed for ease of use. 2) The Air Control lever lets you dial in the ideal amount of air for the Precision ®... -
Page 8: Spa Features Sx & Tx Models
ettInG tarted SPA FEATURES SX & TX MODELS 1) Standard LCD Control Panel. The control panel is accessible from inside or outside the spa and is designed for ease of use. 2) The Air Control lever lets you dial in the ideal amount of air for the Moto-Massage ®... -
Page 9: Quick Start-Up Instructions
WATERFALL VALVE (TEMPO, RELAY & RHYTHM MODELS ONLY) The TEMPO, RELAY & RHYTHM spas are equipped with a cascading water feature. It is activated by pressing the JETS button up to 3 times when the jets are off and turning the waterfall valve clockwise. The flow is regulated by turning the valve to the desired position. -
Page 10: Start-Up
Cleaning mode. manufacturing process to ensure reliability and long-term customer All HOT SPOT spas are equipped with a Cleaning mode. When satisfaction. A small amount of water may have remained in the... -
Page 11: Priming The Pump(S)
PRIMING THE PUMP(S) Upon filling or refilling the spa, if a pump is operating and water is not flowing from any of its jets, the pump may not be properly primed. To correct, refer to the illustration below and perform the following procedures: •... -
Page 12: Water Quality And Maintenance
CHEMICAL SAFETY ater ualIty and When using chemicals, read the labels carefully and follow directions aIntenance precisely. Though chemicals protect you and your spa when used correctly, they can be hazardous in concentrated form. Always observe the following guidelines: BASIC INFORMATION •... -
Page 13: Fundamentals Of Water Maintenance
• Water Filtration: The 100% no by-pass 24 hour filtration used in VANISHING ACT – High levels of calcium and some minerals HOT SPOT spas provides the best approach to keeping water clean can be removed from the water with the single use VANISHING by constantly circulating sanitizer and removing waste from the spa. -
Page 14: The Hot Spotspa Water Maintenance Program
EVERFRESH WATER CARE SYSTEM IMPORTANT: DO NOT use tri-chlor chlorine, bromo-chloro-dimethyl- hydantoin (BCDMH), or any type of compressed bromine or chlorine, (OPTIONAL) acid or any type of sanitizer which is not recommended by Watkins Manufacturing Corporation. The EVERFRESH water care system is comprised of the following products: THE HOT SPOTSPA WATER •... -
Page 15: Vacation Water Care Instructions
CLEAN SCREEN pre-filter) will help to remove many of VACATION WATER CARE the larger particles during the filling of the spa. In-line pre-filters can be purchased at your local HOT SPOT dealer. INSTRUCTIONS Foam Inhibitors If you plan to be away from home, follow these instructions to ensure Spa water requires changing due to the buildup of soap in the water. -
Page 16: Water Terminology
WATER TERMINOLOGY Oxidizer: The use of an oxidizing chemical is to prevent the buildup of contaminants, maximize sanitizer efficiency, minimize combined chlorine The following chemical terms are used in this Water Quality and and improve water clarity. See MPS and Ozone. Maintenance section. -
Page 17: Operating Instructions
POWER READY To stop the Cleaning Cycle before the ten Pressing the JET button for the TEMPO, RELAY & minutes is complete, Press the MODE ( or RHYTHM changes the jet pump functions, depending ) button several times until the CLEAN menu on the number of presses: is displayed on the screen then press the (-) ... -
Page 18: Tools Menu
) button until EXIT is displayed, then press the (+) button to exit the LIGHT - MULTI-COLOR MENU CONTROLS submenu. (TEMPO , RELAY & RHYTHM ONLY) LOCKING FEATURES Your spa lights can display a variety of different colors as well as run The two locking features, SPA LOCK and TEMPERATURE LOCK, through a continuous sequence of colors (loop) at different speeds. -
Page 19: Audio Menu (Optional)
To activate the Summer Mode, simply follow these steps: To modify the length of either filter cycle: Set the temperature control to 80°F (26°C) if desired to prevent the Press the MODE ( or ) button until the heater from turning on during cooler times. TOOLS menu is displayed. - Page 20 POWER POWER POWER TO TURN AUDIO SYSTEM ON/OFF TO CHANGE AUDIO SOURCE From the SETUP screen: From the AUDIO screen: the (+) b utton Press the (+) b utton to display POWR -. Press to display one of four POWER POWER POWER POWER...
- Page 21 TO CHANGE AMPLIFIER CHANNEL (TO MATCH WIRELESS DOCK TRANSMITTER INSIDE HOUSE IF INSTALLED) From the SETUP screen: the (+) b utton Press to display one of four audio sources, IPOD,TV, AUX, BLUE. Press the MODE () button to display TRE. Press the MODE () button to display BAS.
-
Page 22: Jet Menu
HOT SPOT TEMPO (MODEL TEM) Jet Pump 1 2 Directional PRECISION Jets and 1 Directional Hydromassage Jet 2 Directional Hydromassage Jets C. 1 Water Feature D. 6 Directional PRECISION Jets in Lounge (foot Jets) 4 Directional PRECISION Jets in Lounge (calf Jets) -
Page 23: Relay (Model Rel)
JET MENU RELAY (MODEL REL) Jet Pump 1 2 Directional PRECISION Jets and 1 Directional Hydromassage Jet 8 Directional PRECISION Jets C. 2 Directional Hydromassage Jets D. 1 Water feature. 3 Directional PRECISION Jets 2 Directional PRECISION Jets Jet Pump 2 4 Directional PRECISION Jets (calf Jets) 2 Directional Hydromassage Jets, 1 Rotary Hydromassage Jet and 2 Directional PRECISION Jets... -
Page 24: Rhythm (Model Rhy)
JET MENU RHYTHM (MODEL RHY) Jet Pump 1 3 Directional PRECISION Jets 8 Directional PRECISION Jets C. 6 Directional PRECISION Jets and 1 Directional Hydromassage Jet D. 1 Water feature. 4 Directional PRECISION Jets Jet Pump 2 2 Directional Hydromassage Jets 2 Directional Hydromassage Jets, 1 Rotary Hydromassage Jet and 2 Directional PRECISION Jets C. -
Page 25: Sx (Model Sx)
JET MENU SX (MODEL SX) Jet System 8 Directional PRECISION Jets 1 MOTO-MASSAGE Jet C. 2 Directional PRECISION Jets D. 2 Directional Precision Jets Page 22 Jet Menus... -
Page 26: Tx (Model Tx)
JET MENU TX (MODEL TX) Jet System 8 Directional PRECISION Jets 1 MOTO-MASSAGE Jet C. 1 Rotary Hydromassage Jet Jet Menus Page 23... -
Page 27: Spa Care And Maintenance
If you leave the spa unused for a long period of time in severely cold Your HOT SPOT spa is manufactured from the highest quality, most weather, you should drain the spa and winterize it to avoid accidental durable materials available. Even so, the spa care and maintenance freezing due to a power or equipment failure. -
Page 28: Filter System
PURIFIER INSIDE under the warranty. debris lodged STANDPIPE HOT SPOT spas are equipped with one filter cartridge, sized to meet the between the needs of the jet pump system. filter pleats. At least once a week, check and clean the skimmer basket and weir to To reinstall the ensure proper filter flow. -
Page 29: Care Of The Exterior
Rinse off the underside of the cover with water only (use no soap), and wipe it clean with a dry rag. Your HOT SPOT spa has an acrylic shell. Stains and dirt generally will not adhere to your spa’s surface. A soft rag or a nylon scrubber should To condition the cover after cleaning, apply a thin film of HOT easily remove most dirt. - Page 30 HOW TO CLOSE THE COVER If no rear access is available, stand to the side of the spa directly adjacent to the hinge area of the folded cover. Standing along side the cover, place one hand on the upper corner For the COVERCRADLE retractable cover systems: Using of the cover and gently push forward in the direction of the spa.
-
Page 31: Electrical Requirements
ON (up) position. If you don't wait 30 LOW or HIGH speed and the thermostat is calling for heat. seconds, the spa’s power indicator may continue to blink – try • The TEMPO, RELAY and RHYTHM models require a dedicated 230 again. volt power supply. -
Page 32: 230 Volt Conversion 30 Or 50 Amp
(SX & TX ONLY) Conversion instructions Power Jumper Position 230 VAC Wiring NOTE: An Authorized HOT SPOT Spa Technician must reconfigure (50A Converted) spa using the soft jumpers. A licensed electrician must install the sub-panel (available from your 2 Position Power Jumper... -
Page 33: 115 Volt Gfci Sx & Tx
NEVER CONNECT THE SPA TO AN IMPORTANT: Should you ever find the need to move or relocate your HOT SPOT spa, it is essential that you understand and apply these EXTENSION CORD! installation requirements. Your HOT SPOT spa has been carefully A pressure wire connector is provided on the exterior surface of the engineered to provide maximum safety against electric shock. -
Page 34: Service Information
This will often cause the circuit breaker to trip repeatedly. Your HOT SPOT spa has been designed to provide years of trouble- free use. As with any appliance, problems may occasionally occur that IMPORTANT: require the expertise of a qualified service person. -
Page 35: Watkins Customer Service
WATKINS CUSTOMER SERVICE If you have any questions about any aspect of your HOT SPRING spa set-up, operation or maintenance that have not been answered by this manual, consult your HOT SPRING dealer. Watkins Manufacturing Corporation can be reached at: 800-999- 4688 (Extension 8432), Monday through Friday, 8 am to 5-pm Pacific Standard Time (PST), or e-mail customerservice@watkinsmfg.com. -
Page 36: Troubleshooting
TROUBLESHOOTING Should you experience any problem, do not hesitate to contact your authorized HOT SPRING dealer. Here are some tips to help you to diagnose and rectify some more common sources of trouble yourself, if you choose to do so. GENERAL OPERATION TROUBLESHOOTING GUIDE Problem Probable causes... -
Page 37: Spa Specifications
Heater Water Filled Dead Electrical Requirements Dimension Filter (Watts) Capacity Weight Weight* Weight* Area TEMPO 7'5" x 7'5" 39" 4,000 415 gallons 910 lbs. 5,420 lbs. 120 lbs 230 volt, 50 amp Single (Model TEM) 2.26 m square per sq. -
Page 38: Limited Warranty
LIMITED WARRANTY... - Page 40 (MODEL SX/SXC) (MODEL TX/TXC) ©2015 Watkins Manufacturing Corporation All Rights Reserved. Hot Spot, Tempo, Relay, Rhythm, Precision, No-Fault, FreshWater, FreshWater Ag+ , EverFresh, Clean Sc r e e n a n d Va n i sh i n g Ac t a r e tra d e ma r k s o f Wa tki n s M a n u fa ctu r i n g C o rp o ra ti o n .
Need help?
Do you have a question about the Tempo and is the answer not in the manual?
Questions and answers
Plumbing diagram