Table of Contents
Advertisement
Advertisement
Table of Contents

Related Manuals for SABINE GRAPHI-Q


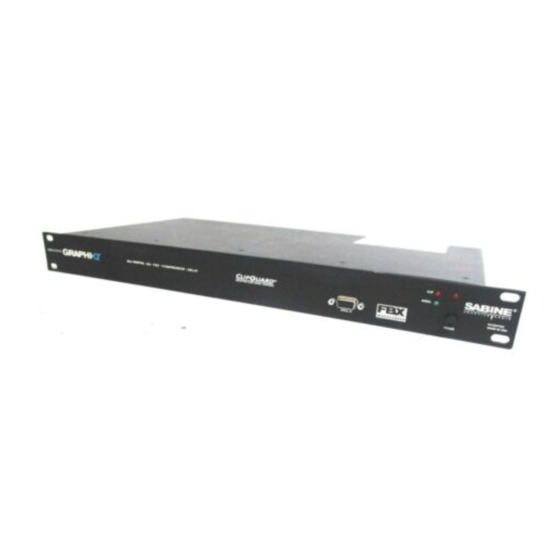
Summary of Contents for SABINE GRAPHI-Q
- Page 1 Click here for Table of Contents Version 7 This manual written for Sabine GRAPHI-Qs with: • GRQ Firmware Version 3.10 • GRQ Remote Software Version 3.10 Visit Sabine’s website for the latest information and FREE software/firmware and operating guide updates www.SabineUSA.com...
-
Page 2: Declaration Of Conformity
Serial No.: Year of Manufacture: 1999 and on I, the undersigned, hereby declare that the equipment specified above conforms to the above Directive and Standard. Place: Alachua, Florida, USA Signature: Date: February 20, 2000 Full Name: Doran Oster, Sabine President... -
Page 3: Version
• Remote switching (7-position contact closure switch; allows switch selection of all 69 stored GraphiQ presets) GRAPHI-Q Remote Software Features: All front panel controls, plus more, including: • FBX filter depth & width adjustments; switchable to parametric filters (depth, width & frequency adjustments) •... -
Page 4: Table Of Contents
5.3. USE WITH A POWERED MIXER......................12 5.4. USE AT A MIXER INSERT POINT......................12 5.5. SINGLE CHANNEL GRAPHI-Q: ONE INPUT TWO OUTPUTS............12 5.6. WHAT NOT TO DO ..........................13 Section Six: Using GRAPHI-Q Front Panel Controls ............14 6.1. - Page 5 8.9. NAVIGATING WITH MULTIPLE UNITS ....................39 8.10. UPGRADING GRAPHI-Q FIRMWARE AND SOFTWARE ..............39 8.10.1 How to Upgrade Your Firmware ....................39 Section Nine: Suggestions for Optimal Use of the GRAPHI-Q .......... 41 9.1. SYSTEM SETUP SUGGESTIONS ...................... 41 9.1.1. Acoustics............................ 41 9.1.2.
-
Page 6: Front Panel Control
Analog AND Digital - Best of Both Worlds. The GRAPHI-Q combines the best of both worlds. If you need to put your hands on faders and knobs to fully experience audio, we offer you the ease and comfort of our “analog-style”... - Page 7 The GRAPHI-Q truly offers the best of both worlds — or maybe even the best of three worlds and five dimensions.
-
Page 8: Front Panel Control
Digital Delay / Tweek-n-Peek Display Digital delay time value displayed. Also momentarily displays current firmware at power up, or value of any front panel control altered. Status LEDs TURBO - Fast FBX Setup REMOTE - GRQ Remote active EQ Range - EQ fader range indicator Input signal &... - Page 11 The most common placement of the GRAPHI-Q in a sound system is between the output of a mixing console and the input to a power amplifier. If your system requires a crossover or additional delays (such as the Sabine DQX-206), put the GRAPHI-Q in line after the mixer, but before those units.
- Page 12 The GRAPHI-Q may also be used at a mixer insert point, either for a single input channel, or for a group or bus insert point. This will dedicate all of the features and processing power of the GRAPHI-Q to one or two single channels on your mixer, or to a subgroup of inputs (for example, all the drums in your mix).
- Page 13 2. Do NOT use the GRAPHI-Q in an auxiliary or effects loop, such as would be used to add reverb to different channels in your mixer. Effects loops are designed to split signal paths, and then mix “wet”...
-
Page 14: Front Panel Control
Many GRAPHI-Q owners will be immediately familiar with the simple operation of the front panel controls. Operation of these controls will be very similar when using an RS-232 connection to control GRAPHI- Q functions from a Windows-based computer platform (see Section Eight). - Page 15 (for low cut filter) or below (for high cut) the chosen frequency. Operation of the FBX Feedback Exterminator section of the front panel of your GRAPHI-Q is simple, but may require a brief explanation for those of you unfamiliar with Sabine FBX products and/or terminology.
- Page 16 EQ slider position. Some EQ units on the market are Constant Q; others are Proportional Q, meaning the filter gets wider as it gets deeper. All Sabine products use Constant Q filters, to prevent affecting any more sound than necessary.
- Page 17 • TURBO MODE refers to Sabine’s unique, exceptionally fast method of placing FBX filters during sound system setup. TURBO MODE is less “fussy” about analyzing the sound it hears and is more likely to regard audio signals over a minimum threshold as feedback. It’s also designed to allow feedback to occur at lower input levels, and, finally, it imposes a strong limiter on the feedback output as it occurs.
- Page 18 The GRAPHI-Q allows two stages of filter resetting. You may reset only the Dynamic filters, or you may elect to reset all (both Fixed and Dynamic). To RESET DYNAMIC FILTERS ONLY, press and hold the RESET button long enough for the Dynamic filter LEDs to flash three times, then release.
-
Page 19: Front Panel Control
These filters are accessible only through GRQ-Remote software. Each channel of your GRAPHI-Q can have up to 12 total filters, which can be configured as any combination of parametric, fixed FBX, or dynamic FBX filters. See Section Eight for a complete look at GRQ-Remote Software. -
Page 20: Bypass
DIGITAL DELAY controls are located to the right of the COMPRESSOR controls. You may delay the output of the GRAPHI-Q audio signal by up to 999.96 mSec (essentially one second) by using the up/ down increment buttons just below the display showing the amount of delay in mSec. Delay adjustments may be made with 20-microsecond precision. -
Page 21: Front Panel Control
In order for you to experience the full impressive capability of the GRAPHI-Q, however, we recommend using the GRQ-Remote Software, which opens up a whole new level of programmability. Here are a few of the control features accessible using the Remote Software: •... -
Page 22: Connections
You may connect and control up to eight GRAPHI-Qs from one COM port. If your computer offers two COM ports, you may set up two distinct GRAPHI-Q networks of up to eight units each—one for each port. Simply connect units in series from the SERIAL OUT jack of the previous unit to the SERIAL IN jack of the next in line. -
Page 23: Installing The Software
Refer to Section Seven for instructions about installing the software and connecting your computer to up to eight GRAPHI-Qs, or 16 channels of audio. If you use two COM ports on your computer, you can set up two distinct networks of GRAPHI-Qs, each consisting of up to eight units. (NOTE: one COM port chain cannot communicate directly to another, only within its own chain.) Double click your GRQ icon and you are presented with the Welcome Screen. - Page 24 The Main Remote screen (see page 26) is designed for easy access to all of the vital functions and controls of the GRAPHI-Q. Most can be accessed directly on the Main screen, and no control screen is more than a single keystroke away.
- Page 25 8.2.3.1. View Curve You can customize the Response Curve Display to show any or all of the various types of EQ programmable with the GRAPHI-Q (the default mode is to show all EQ). Select View Curve from the Options Menu, or press F9 to access the screen at right:...
- Page 26 MAIN GRQ REMOTE SCREEN Click to toggle EQ boost/cut range between ± 6 dB and ± 12 dB. Graphic EQ link Low Cut High Cut indicator: Response Slider Slider 1 line = Relative Link Curve Display 2 lines = Absolute Link Shows re- sponse curve of Click to open...
- Page 27 Raise the master gain slowly (only for the appropriate channel for a 2-channel system) until you hear the first hint of feedback, then click on AUTO. At this point, the GRAPHI-Q will take over, and slowly raise its output gain, setting FBX filters sequentially as the gain increases. You will see the filters being set in the FBX/Parametrics screen (the response curve will change and the actual frequency value of the feedback will be displayed) and a display of the amount of gain increase.
- Page 28 1. DO NOT USE TURBO DURING A PERFORMANCE. It is a setup tool only. If you play audio through the GRAPHI-Q while it is in Turbo Mode (Manual or Auto), the audio may sound distorted, and FBX filters will set inappropriately.
- Page 29 Active front panel units will display the appropriate bypass status as well. The Remote Control allows all GRAPHI-Q processing to be bypassed individually by function and/or by channel. Use Bypass to customize the processing you need on each GRAPHI-Q channel.
- Page 30 NOT subject to linked control (see next section). One of the most powerful features of the GRAPHI-Q Remote Software is its capability to control multiple units from a single central computer. Up to two sets of eight units can be linked via serial cables and controlled from a single laptop computer.
- Page 31 ABS LINKED or REL LINKED (e.g., cells labeled A1 and R1). The links you program will not actually be applied to your GRAPHI-Q set up until you click APPLY at the bottom left of the Link Table Screen.
- Page 32 True Stereo linking will not apply to such units. 2. In a multiple unit GRAPHI-Q network, you may NOT apply a True Stereo link from one unit to another, but only between the left and right channels of a single unit. All the units in a network may have their L- R channels linked, but each link will be independent of other units.
-
Page 33: High/Low Cut Filters
8.3.2.10. Front Panel Mode and Linking. Any GRAPHI-Q under front panel control CANNOT be part of a linked network. Any GRAPHI-Q that is linked, then changed to front panel control, will be removed from the linked network. The unit will remain unlinked even if remote control is restored. You must use the Link Table to restore linking to any unit after it is placed in front panel control and then returned to remote control. -
Page 34: Output Level
GRQ in a linked chain. Printing can be accomplished in In addition to printing a record of parameter settings for an individual GRAPHI-Q, you may elect to print a record of how controls are linked for a multiple-unit GRAPHI-Q system. Simply select “PRINT” from within the link table. - Page 35 You may store and recall all settings of the GRAPHI-Q, either within the GRAPHI-Q memory itself, or as an external file. 8.6.1.1. Storage within the GRAPHI-Q memory. There are two methods of storing memories inside the GRAPHI-Q itself: 1. using “Snapshot” memory storage. You may save and recall (load) up to three Snapshots of GRAPHI-Q settings.
- Page 36 8-pin Euro or Phoenix block connector included with your purchase of the GRAPHI-Q. This connector plugs into its mate in the back of the GRAPHI-Q chassis. The far left pin (as you look from the back) of the connection is the ground (common). The other end of the cable must be wired such that switch position one grounds pin one, position two grounds pin two, etc.
- Page 37 GRAPHI-Q operation. VISITOR. No password is required for VISITOR access to the GRAPHI-Q. At this level, the GRAPHI-Q will display its current settings, but will be unresponsive to all commands. This level of access is appropriate for unauthorized or unsophisticated users.
- Page 38 GRAPHI-Q will be allowed ADMINISTRATOR access. Therefore, if security is a concern, the first person to use the GRAPHI-Q should set passwords. To do this, open the PASSWORD screen from the Tool Bar at the top of the main screen. The PASSWORD screen looks like this: Click the EDIT PASSWORD box.
- Page 39 Remote Control software for the GRAPHI-Q. This means your GRAPHI-Q can be updated easily and at no charge, right from your own home or office. This guarantees the GRAPHI-Q is a “future-proof” product and will offer state-of-the-art performance for years to come.
- Page 40 Make sure the serial port of your computer is connected to the Serial IN on the GRAPHI-Q. If you have a multiple unit GRAPHI-Q setup in a serial network, you may update only one unit at a time. The unit being updated must be the first one connected, so you must connect and update each unit individually.
- Page 41 You may not be able to build a bass trap in a boomy room, or convince a night club owner to carpet the dance floor. But if you are putting the GRAPHI-Q in a permanent installation, or your own rehearsal or project studio, there may be some easy-to-implement ideas that will help the acoustics prior to the introduction of amplification.
- Page 42 Likewise, a perfectly optimized acoustical space with an ideal sound system is as rare as a humble lead guitarist. Fortunately, the GRAPHI-Q is an ideal tool for overcoming the shortcomings of the real world. Better sound through electronics is easy and affordable.
- Page 43 ±6 dB or ±12 dB range of adjustment. The unit arrives from the factory preset to 12 dB range. To change to 6 dB, simultaneously press both the delay up and down buttons on the GRAPHI-Q front panel (for two channel units, either channel’s buttons will produce the same result). (NOTE: this toggles the selection of 12 and 6dB ranges, and will switch back to 6 if you’re already set to 12).
- Page 44 REFERENCE MICROPHONE. If you’re using a reference microphone and a Real Time Analyzer (such as those integral to the Sabine POWER-Q or REAL-Q2), you may also wish to study the results with the microphone at several locations. We recommend using a flat response, free-field reference microphone such as the Sabine SQ 1001.
-
Page 45: Bypass
These conversion delays are often called processing (or group) delays, and usually range between 0.9 and 5 milliseconds. You will notice that Sabine delays always display the processing delay as the smallest possible delay value. For the GRAPHI-Q, the processing delay is 1.38 milliseconds. You can bypass the unit for 0 seconds delay. - Page 46 Studies have shown that people can detect even small horizontal changes in the direction of a sound source, but vertical shifts are much less noticeable. This suggests that the sound from center-cluster speakers is more likely to be visually aligned with the performer than loudspeakers placed on each side of the stage.
- Page 47 Delay Figure 2: COMB FILTERS. Input signal mixed with a 2 msec. delayed signal. (Delayed signal has 10dB less amplitude. Max. filter gain is +2.5dB, and max. depth is - 3.) Reducing the amplitude of the delayed signal reduces the comb filters' effect.
-
Page 48: Acoustics
Stack two identical full-range loudspeakers as shown in Delay Figure 4. Carefully align the HF horns and wire the speakers in mono. Stand in front while listening to your favorite full-spectrum CD. Ask a friend to move the top speaker slowly away from you. The degradation in sound quality you hear is caused by comb filters. -
Page 49: Comb Filter Distortion
We must delay the sound from the under-balcony speaker to synchronize the signals. Do we set the GRAPHI-Q delay to 55 or 69 milliseconds? Obviously, the geometry will not allow us to exactly synchronize every location under the balcony; we have to compromise. - Page 50 Delay them so that their sound arrives 5 to 8 milliseconds after the direct sound from the performer. Experiment by bypassing the GRAPHI-Q in and out to hear how the source of the sound seems to move from the loudspeakers to the performer and back. Now your ears have the same directional information as your eyes, so the performance will sound more natural and exciting.
- Page 51 The dynamic range (how loud we can hear to how quiet a sound we can detect) of the human ear is far greater than the capacity of sound systems to reproduce. Although some of this equipment limitation is at the upper extreme of the dynamic range (where too loud a signal will produce distortion), much of the restriction occurs at the low level end, where the signal disappears below the “noise floor”...
- Page 52 VOCAL COMPRESSION. The renowned expressive- ness of the human voice is due in large part to its dynamics. A vocal that varies from a whisper to a scream has a strong emotional impact, but those same dynamics present a challenge to the sound engineer. Ideal vocal compression maintains some dynamic range while keeping the vocal the focal point of the mix.
- Page 53 Check filter availability. Make sure unit is not in BYPASS. REMOVED GRAPHI-Q APPEARS TO See Sections 6.3 & 8.2.5. If you have the GRAPHI-Q patched in BE CATCHING FEEDBACK, an effects or auxiliary loop, you will only catch the feedback in the BUT FEEDBACK STILL effects loop, and not the mixer input channel.
- Page 54 Bypass the GRAPHI-Q. If noise is still there, it’s not the GRAPHI-Q. If noise goes away, check your gain structure. Make sure the input level to the GRAPHI-Q is robust. Turn down gain downstream. Either your unit is (or was) connected to GRQ-Remote or FRONT PANEL CONTROLS switched via contact closure, and the front panel is disabled.
- Page 55 Low Cut Filter, user-controllable between 20 Hz and 1 KHz; 12 dB/ Operating system firmware stored in FLASH RAM. All future octave roll-off upgrades for firmware and software downloadable from Sabine High Cut Filter, user-controllable between 3 KHz and 20 KHz; 12dB/ website using GRQ Remote.
- Page 56 S'addresser à un technicien qualifié. Attention! Pour réduire le risque d'incendie ou de choc électrique, ne pas laisser The GRAPHI-Q is supplied with one of the following AC power cords: l'appareil sous la plouie ou à l'humidité. Japan 100 VAC U.S./North America...
- Page 57 Sabine’s negligence. Sabine does not assume liability for WARRANTY AND SERVICES TO BE SPECIFIED AND PROVIDED BY THE AUTHORIZED personal injury or property damage arising out of or caused by a non-Sabine alteration or DISTRIBUTOR FOR EACH COUNTRY.
Need help?
Do you have a question about the GRAPHI-Q and is the answer not in the manual?
Questions and answers