Table of Contents
Advertisement
SERVICE MANUAL
LCD Color Television
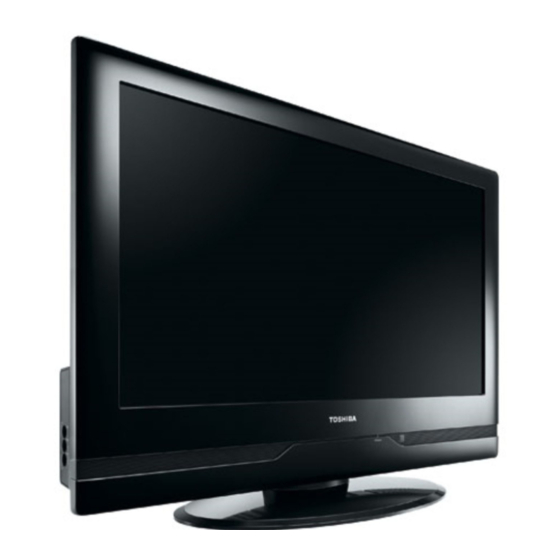
32AV555D
Ver. 2.01
This model is classified as a
green product
(*1), as indicated by the underlined serial number.
This Service Manual describes replacement parts for the green product. When repairing this
green product, use the part(s) described in this manual and
lead-free solder
(*2).
GREEN PRODUCT PROCUREMENT
LEAD-FREE
For (*1) and (*2), refer to
and
SOLDER.
© TOSHIBA CORPORATION
Advertisement
Table of Contents

Related Manuals for Toshiba 32AV555D


Summary of Contents for Toshiba 32AV555D
- Page 1 This Service Manual describes replacement parts for the green product. When repairing this green product, use the part(s) described in this manual and lead-free solder (*2). GREEN PRODUCT PROCUREMENT LEAD-FREE For (*1) and (*2), refer to SOLDER. © TOSHIBA CORPORATION...
-
Page 2: Important Notice
WARRANTY OF MERCHANTABILITY AND FITNESS FOR A PARTICULAR PURPOSE. Toshiba shall not be liable for any damages, losses, expenses or costs, if any, incurred in connection with or as a result of use of any information or data provided herein. -
Page 3: Internet Explorer Settings
IMPORTANT NOTICE User's Guide Contents: Install Autodesk DWF Viewer Internet Explorer Settings Operating Environment Functions Provided on Each Drawing Page Using with Network Install Autodesk DWF Viewer Autodesk DWF Viewer is necessary to view drawings and to activate the functions of this system. Please download and install. - Page 4 2. Internet Explorer setting [Tools] - [Internet Options] for Internet Explorer 7...
- Page 5 for Windows Vista...
-
Page 6: Operating Environment
Operating Environment : Pentium III or higher recommended Monitor : 1024 x 768 or higher resolution recommended Mouse : A mouse with wheel recommended : Microsoft Windows 2000 SP4 / XP / Vista Browser Microsoft Internet Explorer 6.0 / 7.0 Drawing viewer : Autodesk DWF Viewer 6.0 / 7.0 * Use the software following respective license terms and conditions. - Page 7 Layer Display Changing Function When any of the color buttons on the toolbar is clicked, it can be selected to display desired layer in its color or not to display each layer. This allows you to see the pattern layer only by setting other layers to "non- display".
- Page 8 4. Move the ZEUS Engine Program of step 2 to the folder created at step 3 in the Server. 5. Detach the ZEUS Service Manual Ver.2 to the folder created at step 3 in the Server. 6. Unzip the ZEUS Service Manual Ver.2 within the folder in the Server. Example of folder Procedure of File-Path The zeusFPch is the exclusive program to exchange the file-path names written in both source files of ZEUS...
- Page 9 1. Whenever changing the file-path of both ZEUS Engine Program and ZEUS Service Manual to use with network, pay the attention to set the "Exchange to" column that should have a proper relation between ZEUS Engine Program and ZEUS Service Manual with referring the following. Run the zeusFPch and set "Exchange to"...
- Page 10 2. Run the zeusFPch to change the path in the ZEUS Engine Program Ver.2. 3. Set ZEUS Engine Program in the created folder in the server to the "Target Folder", and then press "START". (This procedure is one time only)
- Page 11 4. Run the ZeusFPch to change the path in the ZEUS Service Manual Ver2. 5. Set unzipped ZEUS Service Manual in the created folder in the server to the "Target Folder", and then press "START". (This procedure is required whenever placing service manual.) Confirmation Confirm that service manual on the server can be operated normally by client PC.
- Page 12 Through WEB, ver. 6.5 has been released but with it, the linking function in this manual may not work properly. If ver. 6.5 has been installed, uninstall it and reinstall ver. 6.0. To get ver. 6.0, click the icon, or contact to the nearest Toshiba Service Centre for further assistance. Freezing windows opened (Cannot close the open windows) This may happen occasionally.
- Page 13 Continue to use by operating the windows. Precaution when opening the diagrams While opening the diagrams, the menu in the left frame changes its color to GRAY. This is an indication that the viewer is processing. With this condition, the menu indication color may stick to the GRAY color or Windows may freeze if clicking other menu.
-
Page 14: Green Product Procurement
Corporation recognizes environmental protection as a key management tasks, and is doing its utmost to enhance and improve the quality and scope of its environmental activities. In line with this, Toshiba proactively promotes Green Procurement, and seeks to purchase and use products, parts and materials that have low environmental impacts. -
Page 15: Lead-Free Solder
LEAD-FREE SOLDER This product is manufactured using lead-free solder as a part of a movement within the consumer products industry at large to be environmentally responsible. Lead-free solder must be used in the servicing and repair of this product. WARNING: This product is manufactured using lead free solder. - Page 16 SAFETY INSTRUCTION WARNING: BEFORE SERVICING THIS CHASSIS, READ THE "SAFETY PRECAUTION" AND "PRODUCT SAFETY NOTICE" INSTRUCTIONS BELOW. Safety Precaution WARNING: SERVICING SHOULD NOT BE ATTEMPTED BY ANYONE UNFAMILIAR WITH THE NECESSARY PRECAUTIONS ON THIS RECEIVER. THE FOLLOWING ARE THE NECESSARY PRECAUTIONS TO BE OBSERVED BEFORE SERVICING THIS CHASSIS.
- Page 17 inflammability, voltage resistance, etc. therefore, use only replacement parts that have these same characteristics. Use only the specified parts when the mark is indicated in the circuit diagram or parts list. 7. Parts mounting and routing dressing of wirings should be the same as that used originally.
- Page 18 Resistance values in orms ( ). V: Voltmeter or oscilloscope (r.m.s. or peak reading) Input resistance : Input capacitance : 200 pF Frequency range : 15 Hz to 1 MHz and d.c. respectively Note: Appropriate measures should be taken to obtain the correct value in case of non sinusoidal waveforms.
-
Page 19: Product Safety Notice
Product Safety Notice Many electrical and mechanical parts in this chassis have special safety-related characteristics. These characteristics are often passed unnoticed by a visual inspection and the protection afforded by them cannot necessarily be obtained by using replacement components rated for higher voltage, wattage, etc. Replacement parts which have these special safety characteristics are identified in this manual and its supplements;... -
Page 20: Safety Instruction
SAFETY INSTRUCTION Handling the LCD Module Safety Precaution In the event that the screen is damaged or the liquid crystal (fluid) leaks, do not breathe in or drink this fluid. Also, never touch this fluid. Such actions could cause toxicity or skin irritation. If this fluid should enter the mouth, rinse the mouth thoroughly with water. - Page 21 3. If the panel surface becomes soiled, wipe with cotton or a soft cloth. If this does not remove the soiling, breathe on the surface and then wipe again. If the panel surface is extremely solied, use a CRT cleaner as a cleaner. Wipe off the panel surface by drop the cleaner on the cloth.
- Page 22 6. CMOS-LSI circuitry is used in the LCD module, so avoid damage due to static electricity. When handling the module, use a wrist ground or anchor ground. 7. Do not expose the LCD module to direct sunlight or strong ultraviolet rays for an extended period of time.
- Page 23 10. When transporting the LCD module, do not use packing containing epoxy resin (amine) or silicon resin (alcohol or oxim). The gas generated by these materials can cause loss of polarity.
-
Page 26: Schematic Diagram
SCHEMATIC DIAGRAM Precaution WARNING: BEFORE SERVICING THIS CHASSIS, READ THE "X-RAY RADIATION PRECAUTION" FOR DIRECT VIEW CTV ONLY, "SAFETY PRECAUTION" AND "PRODUCT SAFETY NOTICE" OF THIS MANUAL. CAUTION: The international hazard symbols " " in the schematic diagram and the parts list designate components which have special characteristics important for safety and should be replaced only with types identical to those in the original circuit or specified in the parts list. - Page 27 = Electrolytic capacitor = Mylar capacitor 3. The parts indicated with " " have special characteristics, and should be replaced with identical parts only. 4. Voltages read with DIGITAL MULTI-METER from point indicated to chassis ground, using a color bar signal with all controls at normal, line voltage at nominal AC volts. 5.
-
Page 87: Entering To Service Mode
ADJUSTMENT Service Mode Entering to Service Mode 1. Set VOLUME to minimum and press button once on remote control. ↓ 2. Press button again and hold button down. ↓ Service Mode display 3. While holding the button, press MENU button on TV set. - Page 88 Displaying the Adjustment Menu Press MENU button on TV. Service Mode Press ↑ ↓ Press Adjustment Mode Key Function in the Service Mode The following key entry during display of adjustment menu provides special functions. CAUTION: Never try to perform initialization unless you have changed the memory IC.
-
Page 89: Setting & Adjusting Data
Test signal selection (on TV) Selection of the adjustment items or MENU (on remote control) Volume +/- (on TV) Change of the data value or MENU RIGHT/LEFT (on remote control) Adjustment menu mode ON/OFF MENU button (on TV) Initialization of the memory (IC152) CALL + CH button on TV Automatic A/D Adjustment... - Page 90 PLLW5 PLL WAIT TIME OPT1 TV SET OPTION 1 OPT2 TV SET OPTION 2 OPT3 TV SET OPTION 3 OPT4 TV SET OPTION 4 (PANEL OPT DATA FOR VENDOR) OPT5 TV SET OPTION 5 (PANEL OPT DATA FOR INCH) OPT6 TV SET OPTION 6 (HOTEL MODE) OPT7 TV SET OPTION 7 (HOTEL MODE)
- Page 91 CONTRAST MAX FOR YPBPR SD MILD CNTX YPBPR SD MOVIE CONTRAST MAX FOR YPBPR SD MOVIE CNTX HDMI PC DYNAMIC CONTRAST MAX FOR HDMI PC DYNAMIC CNTX HDMI PC STANDARD CONTRAST MAX FOR HDMI PC STANDARD CNTX HDMI PC MILD CONTRAST MAX FOR HDMI PC MILD CNTX HDMI PC MOVIE CONTRAST MAX FOR HDMI PC MOVIE...
- Page 92 BRIGHTNESS CENTER FOR YPBPR SD MOVIE BRTC HDMI PC DYNAMIC BRIGHTNESS CENTER FOR HDMI PC DYNAMIC BRTC HDMI PC STANDARD BRIGHTNESS CENTER FOR HDMI PC STANDARD BRTC HDMI PC MILD BRIGHTNESS CENTER FOR HDMI PC MILD BRTC HDMI PC MOVIE BRIGHTNESS CENTER FOR HDMI PC MOVIE BRTC HDMI HD DYNAMIC BRIGHTNESS CENTER FOR HDMI HD DYNAMIC...
- Page 93 COLOR CENTER FOR HDMI PC DYNAMIC COLC HDMI PC STANDARD COLOR CENTER FOR HDMI PC STANDARD COLC HDMI PC MILD COLOR CENTER FOR HDMI PC MILD COLC HDMI PC MOVIE COLOR CENTER FOR HDMI PC MOVIE COLC HDMI HD DYNAMIC COLOR CENTER FOR HDMI HD DYNAMIC COLC HDMI HD STANDARD COLOR CENTER FOR HDMI HD STANDARD...
- Page 94 BASE BAND TINT FOR HDMI PC STANDARD UVTT HDMI PC MILD BASE BAND TINT FOR HDMI PC MILD UVTT HDMI PC MOVIE BASE BAND TINT FOR HDMI PC MOVIE UVTT HDMI HD DYNAMIC BASE BAND TINT FOR HDMI HD DYNAMIC UVTT HDMI HD STANDARD BASE BAND TINT FOR HDMI HD STANDARD UVTT HDMI HD MILD...
- Page 95 After selecting OPT4 or OPT5, press + or - to set OPT4 or OPT5 value as table below. Panel option data Series Model name Panel vendor OPT4 value OPT5 value AV555D EU Digital 32AV555D/554D SHARP 0x02 0x05 AV554D 37AV555D/554D 0x01 0x06 42AV555D/554D 0x01 0x07 OPT4 Ex.
- Page 96 Backlight Status Positive Logic Negative Backlight Status Execute Check Unexecuted Backlight Force Execute Twice On Unexecuted Convert from Bit (Binary) to Hex The table for converting from bit (D7-D0) to hex (0x**). BIT (Binary) High nibble Low nibble...
-
Page 97: Exit From Service Mode
E.g. If Bit D7-0 = 0101 1010, Hex data is 0x5A. Exit from Service Mode Pressing POWER button to turn off the TV once. Test Signal Selection Every pressing of button on the remote control changes the built-in test patterns on screen as described below in Service Mode. -
Page 98: Self-Diagnostic Function
All White Self Diagnostic Function 1. Press "9" button on remote control during display of adjustment menu in the service mode. The diagnosis will begin to check if interface among IC's is executed properly. 2. During diagnosis, the following displays are shown. * Self check display and Item are subject to the models. - Page 99 (5) Bus cont : --- "OK" is normal. NG is abnormal (Red indication). (6) Block : TV reception mode V1 - V6 : VIDEO 1-6 input mode : DTV mode (SCART (FULL)) (SCART (S+AV)) (Component) (Composite) HDMI1 HDMI2 Version Check Mode 1.
- Page 100 EDID data check item. OK : EDID data is enable. NG : EDID data is disable. (5) BL Ver Version information of Boot Loader software as Toshiba release. (6) AP Ver Version information of Application software as Toshiba release. (7) A/D Adjust A/D adjustment item.
- Page 101 --RGB : RGB Signal (SCART input) --NTSC : NTSC (60 Hz) SD signal (composite input). --PAL : PAL (50 Hz) SD signal (composite input). --OK : A/D adjustment set correctly. --NG : A/D adjustment set incorrect. (8) Memory Data Version Version information of EEPROM.
-
Page 102: Screen Size
(1) MAIN : Main source information : Display RF position number (0 - 999) on the main screen, or Input Source (EXT1/2/3/HDMI etc.) (2) MAIN FORMAT : Display Video format information (3) MAIN PLL : Main PLL information : Display 1 byte data at eight. (4) SCREEN SIZE : Display the screen size as follows. -
Page 103: Setting Hotel Mode
(5) OTHER STATUS : Other status information : Display three numbers of 2 byte data. Setting Hotel Mode Enter to service mode and select Hotel Mode menu by pressing MENU UP or DOWN . After selecting Hotel Mode, press MENU RIGHT or LEFT to enter details setting in Hotel Mode. - Page 104 of D1 from to D7) (Normal) VOLUX Set VOLUX as following. 1) Set speaker volume to 100. (Any value is OK, but 100 is better to check sound level.) 2) Down value of VOLUX until finding suitable sound volume level. VOLUX FUNCTION DESCRIPTION 0 (Normal)
-
Page 105: Led Indications
OPT8 FUNCTION DESCRIPTION 0 (Normal) D7 (bit7) ~ - (no use) D3 (bit3) D2 (bit2) Enable mode that picture mode will be set in Enable Disable forced when turn ON the main power (Display the language only) D1 (bit1) ~ Forced picture mode 0 [dec]: Dynamic (mode-1) D0 (bit0) -
Page 106: Software Upgrade
SOFTWARE UPGRADE Software Upgrade 1. Unplug AC Power. 2. Insert USB Flash memory containing software to TV set. 3. Plug AC Power. 4. Progress bar is shown on TV screen while upgrading. "100 %" is shown when completed. Never power off while upgrading. 5. - Page 107 TECHNICAL BULLETIN File Name Title issuing date...
-
Page 109: Panel Identification
PANEL IDENTIFICATION Panel Identification If the several panels are alternatively used in the same model without amending the model name, the identification marking will be shown at the last digit of the set serial number on the specification label on the back cover. In servicing, do not alter the panel because several setting and parts are different. -
Page 110: Parts List
PARTS LIST Precaution WARNING: BEFORE SERVICING THIS CHASSIS, READ THE "X-RAY RADIATION PRECAUTION" FOR DIRECT VIEW CTV ONLY, "SAFETY PRECAUTION" AND "PRODUCT SAFETY NOTICE" OF THIS MANUAL. CAUTION: The international hazard symbols " " in the schematic diagram and the parts list designate components which have special characteristics important for safety and should be replaced only with types identical to those in the original circuit or specified in the parts list. - Page 111 : Metal Film : Fusible Resistor All CD and PF capacitors are ±5 %, 50 V and all resistor, ±5 %, 1/6 W unless otherwise noted.
- Page 112 PARTS LIST ↓Select Block : Search 1 / 1 Jump Location : Page : Jump Search Parts No. :...
- Page 113 PARTS LIST All Block Block : Loading ...
- Page 114 Block Location Parts No. Description U02A KEY/LED/RMT (PE0491) U02A 75010694 PC BOARD ASSY, PE0491A1, KEY/LED/RMT U02A KEY/LED/RMT (PE0491) CB02 75005969 CAPACITOR ELECTROLYTIC 10V 221M, ESRE100ETC2 U02A KEY/LED/RMT (PE0491) CB03 76100104 CAPACITOR, CERAMIC CHIP, 25V F 0.1UF Z U02A KEY/LED/RMT (PE0491) CB04 76100104 CAPACITOR, CERAMIC CHIP, 25V F 0.1UF Z U02A KEY/LED/RMT (PE0491)
- Page 115 U03AS MAIN (PE0630) C1013 75009867 CAPACITOR, CERAMIC CHIP (1005), CM05B104K10AH U03AS MAIN (PE0630) C1014 75009867 CAPACITOR, CERAMIC CHIP (1005), CM05B104K10AH U03AS MAIN (PE0630) C1015 75012559 CAPACITOR CHIP CERA 10V JB 473K 1005 SIZE, C1005JB1A473KT U03AS MAIN (PE0630) C1016 75012559 CAPACITOR CHIP CERA 10V JB 473K 1005 SIZE, C1005JB1A473KT U03AS MAIN (PE0630) C1017 75012559 CAPACITOR CHIP CERA 10V JB 473K 1005 SIZE, C1005JB1A473KT...
- Page 116 U03AS MAIN (PE0630) C1303 75012453 CAPACITOR, CERAMIC CHIP, 50V CH 150J, C1005CH1H150JT U03AS MAIN (PE0630) C1310 75007603 CAPACITOR, CERAMIC CHIP(1005), CM05CH101J50AH U03AS MAIN (PE0630) C1401 75009867 CAPACITOR, CERAMIC CHIP (1005), CM05B104K10AH U03AS MAIN (PE0630) C1402 75009867 CAPACITOR, CERAMIC CHIP (1005), CM05B104K10AH U03AS MAIN (PE0630) C1403 75009867 CAPACITOR, CERAMIC CHIP (1005), CM05B104K10AH...
- Page 117 U03AS MAIN (PE0630) C2106 75005814 CAPACITOR, CERAMIC CHIP, 2012 GRM21BB31C106KE15L U03AS MAIN (PE0630) C2107 75007611 CAPACITOR, CERAMIC CHIP(1005), GRM155B11H152KA01D U03AS MAIN (PE0630) C2108 75007611 CAPACITOR, CERAMIC CHIP(1005), GRM155B11H152KA01D U03AS MAIN (PE0630) C2109 75009872 CAPACITOR, ELECTROLYTIC CHIP, EEEHB1C100R U03AS MAIN (PE0630) C2203 75005814 CAPACITOR, CERAMIC CHIP, 2012 GRM21BB31C106KE15L U03AS MAIN (PE0630)
- Page 118 U03AS MAIN (PE0630) C3022 75009867 CAPACITOR, CERAMIC CHIP (1005), CM05B104K10AH U03AS MAIN (PE0630) C3501 75009867 CAPACITOR, CERAMIC CHIP (1005), CM05B104K10AH U03AS MAIN (PE0630) C3502 75009867 CAPACITOR, CERAMIC CHIP (1005), CM05B104K10AH U03AS MAIN (PE0630) C3503 75009861 CAPACITOR, CERAMIC CHIP (1608), CM105B105K06ATN U03AS MAIN (PE0630) C5201 75007603 CAPACITOR, CERAMIC CHIP(1005), CM05CH101J50AH...
- Page 119 U03AS MAIN (PE0630) C6133 75009877 CAPACITOR, CERAMIC CHIP (1005), GRM155B11E103KA01D U03AS MAIN (PE0630) C6134 75009878 CAPACITOR, CERAMIC CHIP (1608), GRM188B11A105KA61D U03AS MAIN (PE0630) C6136 75006008 CAPACITOR, CERAMIC CHIP (2012), GRM21BB31C475KA87L U03AS MAIN (PE0630) C6137 75009927 CAPACITOR, CERAMIC CHIP (1608), CM105B104K25AT U03AS MAIN (PE0630) C6138 75010144 CAPACITOR, CERAMIC CHIP (1608), CM105CH470J50AT...
- Page 120 U03AS MAIN (PE0630) C8004 75009867 CAPACITOR, CERAMIC CHIP (1005), CM05B104K10AH U03AS MAIN (PE0630) C8005 75010711 CAPACITOR, CERAMIC CHIP (1005), CM05W5R223K16AH U03AS MAIN (PE0630) C8006 75009867 CAPACITOR, CERAMIC CHIP (1005), CM05B104K10AH U03AS MAIN (PE0630) C8008 75009869 CAPACITOR, CERAMIC CHIP (1005), CM05X5R105K06AH U03AS MAIN (PE0630) C8009 75009869 CAPACITOR, CERAMIC CHIP (1005), CM05X5R105K06AH...
- Page 121 U03AS MAIN (PE0630) C9513 75009881 CAPACITOR, CERAMIC CHIP (2012), C2012JB1A106KT U03AS MAIN (PE0630) C9514 75006005 CAPACITOR, CERAMIC CHIP (1005), CM05X7R682K25AH U03AS MAIN (PE0630) C9515 75009877 CAPACITOR, CERAMIC CHIP (1005), GRM155B11E103KA01D U03AS MAIN (PE0630) C9516 75009877 CAPACITOR, CERAMIC CHIP (1005), GRM155B11E103KA01D U03AS MAIN (PE0630) C9517 75012557 CAPACITOR CHIP CERA 50V JB 102K 1005 SIZE, C1005JB1H102KT...
- Page 122 U03AS MAIN (PE0630) C9620 75009856 CAPACITOR, CERAMIC CHIP (1608), CM105W5R104K16AT U03AS MAIN (PE0630) C9621 75009876 CAPACITOR, CERAMIC CHIP (1608), GRM188B31C105KA92D U03AS MAIN (PE0630) C9622 75009876 CAPACITOR, CERAMIC CHIP (1608), GRM188B31C105KA92D U03AS MAIN (PE0630) C9649 75009875 CAPACITOR, CERAMIC CHIP (1608), GRM188B31H104KA92D U03AS MAIN (PE0630) C9650 75009869 CAPACITOR, CERAMIC CHIP (1005), CM05X5R105K06AH...
- Page 123 PARTS LIST U02A KEY/LED/RMT (PE0491) Block : Block Location Parts No. Description U02A KEY/LED/RMT (PE0491) U02A 75010694 PC BOARD ASSY, PE0491A1, KEY/LED/RMT U02A KEY/LED/RMT (PE0491) CB02 75005969 CAPACITOR ELECTROLYTIC 10V 221M, ESRE100ETC2 U02A KEY/LED/RMT (PE0491) CB03 76100104 CAPACITOR, CERAMIC CHIP, 25V F 0.1UF Z U02A KEY/LED/RMT (PE0491) CB04 76100104 CAPACITOR, CERAMIC CHIP, 25V F 0.1UF Z...
- Page 124 PARTS LIST U03AS MAIN (PE0630) Block : Loading ...
- Page 125 Block Location Parts No. Description U03AS MAIN (PE0630) U03AS 75012704 PC BOARD ASSY, PE0630A, MAIN U03AS MAIN (PE0630) C1001 75008342 CAPACITOR, CERAMIC CHIP(1005), CM05B473K10AH U03AS MAIN (PE0630) C1002 75008342 CAPACITOR, CERAMIC CHIP(1005), CM05B473K10AH U03AS MAIN (PE0630) C1003 75008342 CAPACITOR, CERAMIC CHIP(1005), CM05B473K10AH U03AS MAIN (PE0630) C1004 75008342 CAPACITOR, CERAMIC CHIP(1005), CM05B473K10AH...
- Page 126 U03AS MAIN (PE0630) C1123 75005754 CAPACITOR, CERAMIC CHIP, GRM188B31A225KE33D U03AS MAIN (PE0630) C1124 75009875 CAPACITOR, CERAMIC CHIP (1608), GRM188B31H104KA92D U03AS MAIN (PE0630) C1125 75012562 CHIP CERAMIC CAPACITOR (1005), EMK105BJ153KV-F U03AS MAIN (PE0630) C1126 75012562 CHIP CERAMIC CAPACITOR (1005), EMK105BJ153KV-F U03AS MAIN (PE0630) C1127 75005814 CAPACITOR, CERAMIC CHIP, 2012 GRM21BB31C106KE15L U03AS MAIN (PE0630)
- Page 127 U03AS MAIN (PE0630) C1602 75009867 CAPACITOR, CERAMIC CHIP (1005), CM05B104K10AH U03AS MAIN (PE0630) C1603 75009867 CAPACITOR, CERAMIC CHIP (1005), CM05B104K10AH U03AS MAIN (PE0630) C1604 75009867 CAPACITOR, CERAMIC CHIP (1005), CM05B104K10AH U03AS MAIN (PE0630) C1605 75009867 CAPACITOR, CERAMIC CHIP (1005), CM05B104K10AH U03AS MAIN (PE0630) C1606 75009867 CAPACITOR, CERAMIC CHIP (1005), CM05B104K10AH...
- Page 128 U03AS MAIN (PE0630) C3006 75009856 CAPACITOR, CERAMIC CHIP (1608), CM105W5R104K16AT U03AS MAIN (PE0630) C3007 75009867 CAPACITOR, CERAMIC CHIP (1005), CM05B104K10AH U03AS MAIN (PE0630) C3008 75009877 CAPACITOR, CERAMIC CHIP (1005), GRM155B11E103KA01D U03AS MAIN (PE0630) C3009 75009867 CAPACITOR, CERAMIC CHIP (1005), CM05B104K10AH U03AS MAIN (PE0630) C3010 75009877 CAPACITOR, CERAMIC CHIP (1005), GRM155B11E103KA01D...
- Page 129 U03AS MAIN (PE0630) C6117 75009853 CAPACITOR, CERAMIC CHIP (1608), CM105W5R103K50AT U03AS MAIN (PE0630) C6118 75009853 CAPACITOR, CERAMIC CHIP (1608), CM105W5R103K50AT U03AS MAIN (PE0630) C6119 75006010 CAPACITOR, CERAMIC CHIP (1608), GRM188B31E105KA75D U03AS MAIN (PE0630) C6120 75009927 CAPACITOR, CERAMIC CHIP (1608), CM105B104K25AT U03AS MAIN (PE0630) C6121 75009927 CAPACITOR, CERAMIC CHIP (1608), CM105B104K25AT...
- Page 130 U03AS MAIN (PE0630) C7014 75009867 CAPACITOR, CERAMIC CHIP (1005), CM05B104K10AH U03AS MAIN (PE0630) C7015 75009864 CAPACITOR, CERAMIC CHIP (1005), CM05Y5V104Z16AH U03AS MAIN (PE0630) C7018 75009877 CAPACITOR, CERAMIC CHIP (1005), GRM155B11E103KA01D U03AS MAIN (PE0630) C7019 75009925 CAPACITOR, CERAMIC CHIP (1608), CM105Y5V105Z10AT U03AS MAIN (PE0630) C7020 75009925 CAPACITOR, CERAMIC CHIP (1608), CM105Y5V105Z10AT...
- Page 131 PARTS LIST Miscellaneous Block : Search 1 / 1 Jump Location : Page : Jump Search Parts No. : Block Location Parts No. Description Miscellaneous B001A 75012574 DISPLAY G8SHP32, LK315T3LA31 Miscellaneous H001 75010735 TUNER, ENG37E05KF Miscellaneous MZ01A 75012575 WIRE, MF0319 Miscellaneous P801 23372353 POWER CORD, UK 250V3A FL/FUSE13...
- Page 132 PARTS LIST Accessory Block : Search 1 / 1 Jump Location : Page : Jump Search Parts No. : Block Location Parts No. Description Accessory Y101 75012576 MANUAL ENGLISH Accessory Y101E 75012578 MANUAL, MANUAL EURO Accessory Y102E 75012579 MANUAL, MANUAL NORDIC Accessory Y105 75010347 OWNERS MANUAL, STD EU...
- Page 133 PARTS LIST Cabinet Block : Search 1 / 1 Jump Location : Page : Jump Search Parts No. : Block Location Parts No. Description Cabinet A201 75010344 FRONT BEZEL ASSY Cabinet A205 75011368 LABEL, TRIM INDICATOR Cabinet A401 75010346 BACK COVER ASSY Cabinet A412 75010345 SCREW, BITTB3X8 SBN...
- Page 134 PARTS LIST Packing Block : Search 1 / 1 Jump Location : Page : Jump Search Parts No. : Block Location Parts No. Description Packing A701 75010351 CARTON BOX, (TPO) Packing A702A 75010353 PAD, TOP PACKING Packing A702B 75010354 PAD, BOTTOM PACKING...
-
Page 135: Function And Operation
FUNCTION AND OPERATION The Remote Control Simple at-a-glance reference of your remote control. -
Page 137: Using The Remote Control
FUNCTION AND OPERATION Using the Controls Whilst all the necessary adjustments and controls for the television are made using the remote control, the buttons on the television may be used for some functions. Switching On Using the Remote Control... - Page 138 Using the Controls...
-
Page 139: Startup Application
FUNCTION AND OPERATION Startup Application Before switching on the television put your decoder and media recorder to Standby if they are connected. To set up the television use the buttons on the remote control as detailed. Quick Setup... -
Page 140: Auto Tuning
Auto Tuning... - Page 141 Auto Programme Update...
-
Page 142: Analogue Switch-Off
Analogue switch-off... - Page 143 FUNCTION AND OPERATION DTV Settings Programmes...
-
Page 144: Dtv Manual Tuning
DTV Manual Tuning... - Page 146 FUNCTION AND OPERATION DTV Settings Programmes...
- Page 147 DTV Manual Tuning...
- Page 149 FUNCTION AND OPERATION ATV Manual Tuning Tuning...
- Page 153 FUNCTION AND OPERATION Software Upgrade Version Auto Upgrade...
- Page 154 Searching for New Software Reset TV...
-
Page 156: Specification
SPECIFICATION...
Need help?
Do you have a question about the 32AV555D and is the answer not in the manual?
Questions and answers