Whirlpool AWOC 0714 Instructions For Use Manual
Hide thumbs
Also See for AWOC 0714:
- Instructions for use manual (14 pages) ,
- Programme chart (2 pages)
Table of Contents
Advertisement
DEFINITION OF USE
This washing machine is exclusively destined to wash
and spin machine washable laundry in quantities which
are usual for private households.
• Observe the instructions given in these Instructions
for Use and the Programme Chart when using the
washing machine.
BEFORE USING THE WASHING MACHINE
1. Removing the packaging and inspection
• After unpacking, make sure that the washing
machine is undamaged. If in doubt, do not use the
washing machine. Contact After-Sales Service or
your local retailer.
• Check that the accessories and supplied parts are
all present.
• Keep the packaging materials (plastic bags,
polystyrene parts, etc.) out of reach of children,
as they are potentially dangerous.
• If the appliance was exposed to the cold prior to
delivery, keep it at room temperature for a few
hours before operating.
2. Remove the transport bolts
• The washing machine is fitted with transport
bolts to avoid any possible damage to the interior
during transport. Before using the machine, it is
imperative that the transport bolts are removed.
• After their removal, cover the openings with the
4 enclosed plastic caps.
3. Install the washing machine
• Remove the protective film from the control panel
emove the protective film from the control panel
emove the protective film from the control panel
(if available on your model).
• Move the appliance without lifting it by the worktop.
Move the appliance without lifting it by the worktop.
Move the appliance without lifting it by the worktop.
• Install the appliance on a solid and level floor
ce on a solid and level floor
ce on a solid and level floor
surface, preferably in a corner of the room.
surface, preferably in a corner of the
surface, preferably in a corner of the
• Make sure that all four feet are stable and resting
l four feet are stable and resting
l four feet are stable and resting
on the floor and then check that the
on the floor and then check that the
on the floor and then check that the washing
machine is perfectly level (use a spirit level).
tly level (use a spirit level).
tly level (use a spirit level).
• In case of wooden or so-called "floating floors"
In case of wooden or so
In case of wooden or
(for instance certain parquet or laminate floors),
ain parquet or laminate floors),
ain parquet or laminate floors),
place the appliance on a 60 x 60 cm sheet of
e on a 60 x 60 cm sheet of
e on a 60 x 60 cm sheet of
plywood at least 3 cm in thickness which is
secured to the floor.
• Make sure that the ventilation openings in the base
of your washing machine (if available on your
model) are not obstructed by a carpet or other
material.
4. Water inlet
• Connect the water inlet hose(s) to the drinking
water supply in accordance with the regulations
of your local water company.
• For models with one inlet valve: cold water
• For models with two inlet valves: cold AND hot
water, or cold water only (see chapter "Installation
Guide").
• Water tap:
3/4" threaded hose connector
room.
room.
so-called "floating floors"
-called "floating floors"
• Keep these Instructions for Use and the
Programme Chart; if you pass on the washing
machine to another person, also give him/her
Instructions for Use and Programme Chart.
• Water pressure
(flow pressure):
• Use only new hoses to connect the washing
machine to the water supply. Used hoses must
not be used and should be discarded.
• For models with hot fill: the hot water inlet
temperature must not exceed 60°C.
5. Drain
• Firmly connect the drain hose to the siphon, or
onnect the drain hose to the siphon, or
onnect the drain hose to the siphon, or
another outlet for drain water.
• If the washing machine is connected to an
If the washing ma
If the washing ma
integrated drainage system, ensure the latter is
integrated drainage system, ensure th
integrated drainage system, ensure th
equipped with a vent to avoid simulta
equipped with a vent to avoid simultaneous
equipped with a vent to avoid simulta
loading and draining of water (siphoning effect).
loading and draining of water (siphoning effect).
loading and draining of water (siphoning effect).
6. Electrical connection
6. Electrical connection
6. Electrical connection
• Electrical connections must be carried out by a
Electrical connec
Electrical connec
qualified technician in compliance with the
qualified technicia
qualified technicia
manufacturer
manufacturer
manufacturer's instructions and current standard
safety regulations
safety regulations
safety regulations.
•
•
• Data regarding voltage, power consumption and
protection requirements is given on the inside of
the door.
• The appliance must be connected to the mains by
means of a socket with an earth connection in
accordance with current regulations.
The washing machine must be earthed by law.
The manufacturer declines all liability for damage
to property or injury to persons or animals due to
non-compliance with the directions given above.
• Do not use extension leads or multiple sockets.
• Before any maintenance on the washing machine
disconnect it from the mains supply.
• After installation, access to the mains plug or to
disconnection from mains supply must be
ensured at all times via a double-pole switch.
• Do not operate the washing machine if it has
been damaged during transport. Inform the
After-Sales Service.
• Mains cable replacement is only to be carried out
by After-Sales Service.
• The appliance must only be used in the
household for the prescribed uses.
Minimum housing dimensions:
Width:
600 mm
Height:
850 mm
Depth:
600 mm
GB 1
100-1000 kPa (1-10 bar).
r drain water.
r drain water.
chine is connected to an
chine is connected to an
Advertisement
Table of Contents

Related Manuals for Whirlpool AWOC 0714


Summary of Contents for Whirlpool AWOC 0714
-
Page 1: Before Using The Washing Machine
DEFINITION OF USE This washing machine is exclusively destined to wash • Keep these Instructions for Use and the and spin machine washable laundry in quantities which Programme Chart; if you pass on the washing are usual for private households. machine to another person, also give him/her •... -
Page 2: Precautions And Recommendations
PRECAUTIONS AND RECOMMENDATIONS 1. Safety instructions The symbol on the product, or on the documents accompanying the product, indicates • The washing machine is appropriate for indoor that this appliance may not be treated as use only. household waste. Instead it shall be handed over •... -
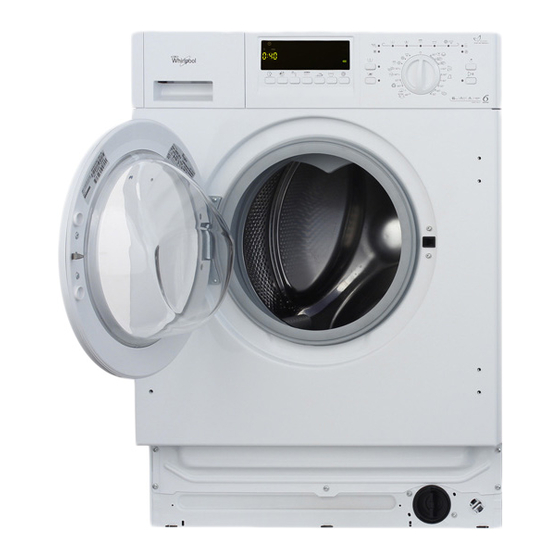
Page 3: Description Of The Washing Machine
DESCRIPTION OF THE WASHING MACHINE Depending on the model 1. Worktop 2. Control panel 3. Detergent dispenser 4. Service plate (inside the door) 5. Door 6. Pump access with filter and emergency drain hose (if available) behind the plinth filter and emergency drain hose (if available) behind the plinth filter and emergency drain hose (if available) behind the plinth 7. -
Page 4: Preparation Of The Washing
PREPARATION OF THE WASHING 1. Sort the laundry according to... Stain removal • Blood, milk, eggs etc. are generally removed by • Type of fabric / care label symbol the automatic enzyme phase of the programme. Cottons, mixed fibres, easy care/synthetics, •... -
Page 5: Using Chlorine Bleach
Where to put detergent and additives The detergent drawer has three chambers (picture “A”). Prewash Chamber • Detergent for the prewash Main Wash Chamber • Detergent for the main wash • Stain remover • Water softener Softener Chamber • Fabric softener •... -
Page 6: Draining Residual Water/Cleaning Filter
DRAINING RESIDUAL WATER/ CLEANING THE FILTER We recommend that you check and clean the filter regularly, at least two or three times a year, especially: • If the “Clean pump” indication lights up: • If the appliance is not draining properly or if it fails to perform spin cycles. -
Page 7: Water Inlet Hose
CARE AND MAINTENANCE Appliance exterior and control panel Door seal • Clean with a soft damp cloth. • Dry the door seal after each washing with an • If necessary, use some soapy water or a mild absorbent cotton cloth; make sure that the door neutral detergent (do not use detergents containing seal is completely dry before closing the door of solvents, abrasive detergents, window or general-... -
Page 8: Troubleshooting Guide
TROUBLESHOOTING GUIDE Your washing machine is equipped with various automatic safety functions. These enable faults to be detected in good time and the safety system can react appropriately. These faults are frequently so minor that they can be removed within a few minutes. Problem Causes - Solutions - Tips Appliance does not start,... - Page 9 Description of failure indications Failure indication Description - Causes - Solutions lights up Appliance has no or insufficient water supply. The “Start(Pause)” light blinks. Check whether: • Water tap is fully open and water supply pressure is sufficient. • Kinks are present in the water inlet hose. •...
- Page 10 Failure Indication on display indication (if available) Description - Causes - Solutions lights up “Electrical module fault” from “F03” to “F43” Push the “Reset” button for at least 3 seconds. (except “F18” and “F24”) May appear for very water-soaking laundry, or if you “F24”...
-
Page 11: Before Contacting After-Sales Service
AFTER-SALES SERVICE Before contacting After-Sales Service: Specify: • The nature of the problem. 1. Try to remedy the problem yourself (see • The exact model of the washing machine. “Troubleshooting Guide”). • The service code (number after the word 2. Restart the programme to check whether the SERVICE). -
Page 12: Electrical Connection
ELECTRICAL CONNECTION For Great Britain only Warning - this appliance must be earthed Fuse replacement If the mains lead of this appliance is fitted with a BS 1363A 13amp fused plug, to change a fuse in this type of plug use an A.S.T.A. approved fuse to BS 1362 type and proceed as follows: 1. -
Page 13: Installation Guide
INSTALLATION GUIDE Pictures are on the cover of this Instruction for Use Noise, excessive vibrations and water leakages If you need a longer waterstop hose, contact can be caused by incorrect installation of washing our After Sales Service or your dealer. machine.
Need help?
Do you have a question about the AWOC 0714 and is the answer not in the manual?
Questions and answers