Table of Contents
Advertisement
Quick Links
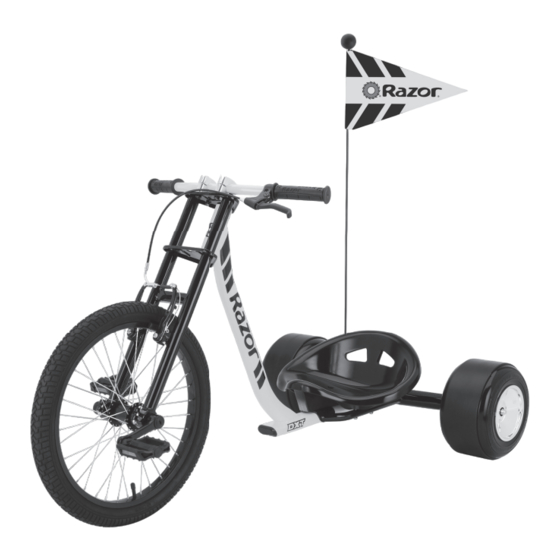
DXT
DRIFT TRIKE
™
OWNER'S MANUAL
Read and understand this entire manual before allowing
child to use this product! For assistance contact Razor.
DO NOT RETURN TO STORE.
NOTE: Manual illustrations are for demonstration purposes only.
Illustrations may not refl ect exact appearance of actual product.
Specifi cations subject to change without notice.
Please have your product along with the 22 character product I.D. code with you
before contacting Razor for warranty assistance and/or replacement parts.
Product I.D. Code: _____________ - ____________ - ____________
Advertisement
Table of Contents

Related Manuals for Razor DXT


Summary of Contents for Razor DXT
- Page 1 ™ OWNER’S MANUAL Read and understand this entire manual before allowing child to use this product! For assistance contact Razor. DO NOT RETURN TO STORE. NOTE: Manual illustrations are for demonstration purposes only. Illustrations may not refl ect exact appearance of actual product.
-
Page 2: Table Of Contents
WARNING: The DXT Drift Trike is not the same as an “ordinary” tricycle and therefore may require greater skill to ride than an ordinary tricycle. It is not for young children. The DXT is designed to allow movement forward and extreme sideways drifting. Using this product requires open space, free of other traffic or obstacles, and it is best ridden by a practiced rider aware of the product’s capabilities and willing to accept risks associated with drifts and... -
Page 3: Before You Begin
Need Help? Visit our web site for replacement parts, product support, a list of authorized service centers in the US and customer service contact information at www.razor.com. Please have the product I.D. code (located on the white label of your product) available for better assistance. Additional Customer Service... -
Page 4: Assembly And Set-Up
ASSEMBLY AND SET -UP Assembling the Frame Required Tools: Two (2) 5 mm Allen Wrenches B (Longer) Grip Side Up A (Shorter) Using two (2) 5 mm Connect the downtube to the Re-insert the longer coupling Allen wrenches, remove the rear frame and align the holes on bolt (B) through downtube and two (2) coupling bolts from the... -
Page 5: Attaching The Handlebars
Need Help? Visit our web site for replacement parts, product support, a list of authorized service centers in the US and customer service contact information at www.razor.com. Please have the product I.D. code (located on the white label of your product) available for better assistance. Additional Customer Service... - Page 6 The tire is infl ated when shipped, but will invariably lose some pressure between the point of manufacturing and your Do not use the DXT for the fi rst time purchase. Infl ate the tire to the correct PSI before fi rst time use.
-
Page 7: Pre-Ride Checklist
Need Help? Visit our web site for replacement parts, product support, a list of authorized service centers in the US and customer service contact information at www.razor.com. Please have the product I.D. code (located on the white label of your product) available for better assistance. Additional Customer Service... -
Page 8: Usage
• Place both hands on the handlebars and both feet WARNING: on the pedals. Drifting while pedaling may involve • Pedal the DXT to desired riding speed sharp turns of the front wheel, • Coast when drifting which may cause the wheel to make contact with rider’s lower... -
Page 9: Usage
Need Help? Visit our web site for replacement parts, product support, a list of authorized service centers in the US and customer service contact information at www.razor.com. Please have the product I.D. code (located on the white label of your product) available for better assistance. Additional Customer Service... -
Page 10: Repair And Maintenance
REPAIR AND MAINTENANCE Rear Wheel Replacement Required Tool: 16 mm Wrench Loosen the 16 mm locknut and remove rear wheel(s). Rear Wheel Hardware Sequence 13-3 13-2. Flat Washer 13-3. Spring Washer 13-4 13-4. Locknut 13-2 13-4 13-3 13-2 Install replacement wheel(s) and tighten securely in place. Note the sequence of the hardware. - Page 11 Need Help? Visit our web site for replacement parts, product support, a list of authorized service centers in the US and customer service contact information at www.razor.com. Please have the product I.D. code (located on the white label of your product) available for better assistance. Additional Customer Service...
- Page 12 REPAIR AND MAINTENANCE Front Wheel Replacement (Continued) Required Tools: 5 mm Allen Wrench, 10 mm Wrench Correct Incorrect Install replacement front wheel and re-tighten bolts until front wheel is securely in place. Note: Make sure clamps are tightened evenly on both side.
- Page 13 Need Help? Visit our web site for replacement parts, product support, a list of authorized service centers in the US and customer service contact information at www.razor.com. Please have the product I.D. code (located on the white label of your product) available for better assistance. Additional Customer Service...
-
Page 14: Repair And Maintenance
Razor Warranty. Wheels other than genuine Razor wheels may not be compatible with your DXT. The use of anything other than genuine Razor replacement parts may affect your safety and will void your warranty. -
Page 15: Product Parts
DXT PARTS Keep your product running for years with genuine Razor parts. Visit our website to purchase replacement parts. (Specifications subject to change without notice.) 1. Handlebar Grips (x2) 8. Crank (L/R) 13. Rear Wheel (x2) 2. Brake Lever Assembly 9. -
Page 16: Warranty And Contact Information
Need Help? Visit our web site for replacement parts, product support, a list of authorized service centers in the US and customer service contact information at www.razor.com. Please have the product I.D. code (located on the white label of your product) available for better assistance. Additional Customer Service...
Need help?
Do you have a question about the DXT and is the answer not in the manual?
Questions and answers