Table of Contents
Advertisement
Quick Links
Advertisement
Table of Contents

Related Manuals for Q Acoustics Q-TV2


Summary of Contents for Q Acoustics Q-TV2
-
Page 1: User Manual
Q-TV2 User Manual for 30”- 42” Screens... -
Page 2: Table Of Contents
Fitting Q-TV2 Adjusting Q-TV2 arms Connections Warranty Your Connections Q Acoustics offers a One Year Warranty on parts and Connecting via Mini Jack labour from date of purchase. Connecting via PHONO (RCA) Connecting Optical (Toshlink) Products must be purchased from an authorised AUX Inputs (e.g iPod®) - Page 3 Quick Start Guide Important Information- Please Read Carefully Safety This symbol indicates that there are important operating and CAUTION! maintenance instructions in the literature accompanying this unit. RISK OF ELECTRIC SHOCK DO NOT OPEN TO REDUCE THE RISK OF ELECTRIC SHOCK DO NOT REMOVE COVER (OR BACK) This symbol indicates that dangerous voltage constituting a risk of NO USER-REMOVEABLE PARTS INSIDE electric shock is present within this unit.
- Page 4 Q Acoustics Q-TV2 upgrades the sound of your existing TV setup by integrating a 2.1 system on to the rear of your flat screen TV. Using the TV’s audio outputs Q-TV2 gives a no fuss solution to HD Sound. Q-TV 2 requires only one audio connection between the TV and itself to significantly improve the acoustic performance of your flat screen TV.
-
Page 5: Carton Contents
Quick Start Guide Carton Contents 2 x Fixing Rails 1x Q-TV2 1 x 16VDC Power Supply 1 x UK Mains Power Cable 1 x Fixing Kit 1 x EU Mains Power Cable 1 x Mini Jack Cable 1 x RCA / PHONO Cable... - Page 6 Orange - Set Delay Active Remote Important Note In some cases Q-TV2’s volume can be controlled by your existing TV remote. This option is only available on certain TV’s when connected via the TV’s HEADPHONE OUT and Q-TV2’s TV IN.
- Page 7 Quick Start Guide Fixing Points Fixing Q-TV2 mounts directly to the rear of your TV using the screens fixing points. Located on the rear of your screen will be threaded fixing points designed for wall mounting. Use these fixings to attach Q-TV2.
- Page 8 Before fastening the subwoofer in place you may Fitting Important Note want to fit your connections to the rear of the TV. Angle Q-TV2 back slightly and position on the lower rail fixing. Ensure the connections panel is at the top.
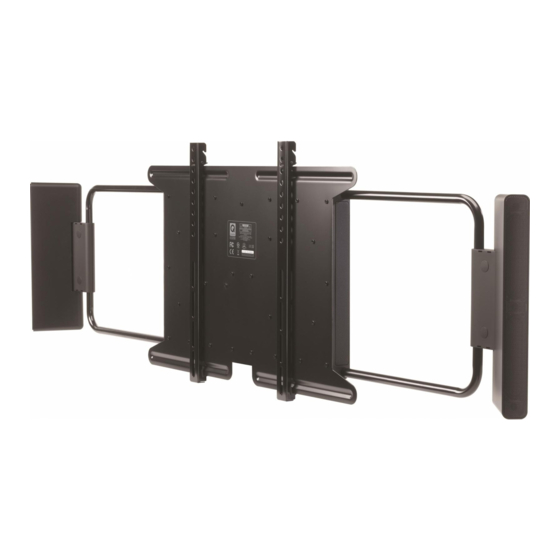
- Page 9 Quick Start Guide The satellite speakers are attached to adjustable arms. These arms Adjustments are designed to be extended to match the width of your screen. Loosen all 4 fixing points and extend the arms to match your screen. Once happy with the positioning tighten the fixings. Loosen Tighten Adjustments...
-
Page 10: Your Connections
Better quality audio Simple connection to the TV connection. Volume will be connection. Volume will be headphone socket gives full controlled by the Q-TV2 handled by Q-TV2 remote. audio control with the use remote. (Optical (Toshlink) cable not of your existing remote provided) control. - Page 11 Locate the Mini Jack lead provided (See page 4), Position both switches on the top of Q-TV2 to normal and select the most appropriate room position setting, (see page 14). Insert the mini jack cable from the TV’s HEADPHONE OUT to the TV IN socket on the top of Q-TV2.
- Page 12 Connect the power supply provided to Q-TV2. The LED will illuminate when connected. Silence your TV speakers by turning the TV volume down to zero, do not mute the TV. Use the Q-TV2 Remote to turn up the volume on Q-TV2. If you experience bad synchronisation between sound and...
- Page 13 Optical Lead (Not Provided) Q-TV2 does not include an optical lead so you will need to purchase one if you wish to connect via this method. Locate the Q-TV2 remote control. Position both switches on the top of Q-TV2 to normal and select the most appropriate room position setting.
- Page 14 (page 4) to make this connection. Volume can be controlled via the source (e.g iPod®). When the TV is connected via LINE IN or OPTICAL IN the Q-TV2 remote can also control the volume. Connect a mini jack lead from AUX IN to the headphone jack of your chosen device.
-
Page 15: Setup
If you are unhappy with the changes you have made you can reset the delay to the default setting by pressing the button on the remote control. There are 16 delay settings to choose from. Once you are happy with the setup, position the SET DELAY switch on the top of Q-TV2 back to Normal. Page 14... -
Page 16: Alternative Connections
It is likely that your TV will have a setting for headphone volume in the menu system. We recommend that you adjust this level to an appropriate volume and from then on use the Q-TV2 Remote to control the volume. If you are unsure how to do this see the manufactures handbook. - Page 17 SCART Connection (Not Provided) If you are unable to connect your TV to Q-TV2 via any other methods on page 9 then it is possible to use your TV’s SCART Connection. To connect via this method you will need a SCART to 2 X RCA / PHONO connector or equivalent lead.
-
Page 18: Troubleshooting
Troubleshooting Sound Indicator Light check Green - Signal being received, Check the volume of your source equipment / Q-TV2 Red - No Signal received, Check AUDIO connections. Orange - SET DELAY switch is in operation, set to NORMAL position No Light - Check power connections / Check switch on power supply... -
Page 19: Specification
Make sure that the TV IN Connection on Q-TV2 is vacant Make sure that you have a line of sight with Q-TV2 within a 5 metre range Make sure that the SET DELAY switch is set to NORMAL (LED indicator not orange)
Need help?
Do you have a question about the Q-TV2 and is the answer not in the manual?
Questions and answers