Advertisement
Litho U.S.A.
2014
WARNING
Improper installation, adjustment, alteration, ser
vice or maintenance can cause property damage,
personal injury or loss of life. Installation and ser
vice must be performed by a licensed professional
HVAC installer or equivalent or service agency.
Table Of Contents
Dimensions
. . . . . . . . . . . . . . . . . . . . . . . . . . . . . . . . .
Shipping and Packing List
. . . . . . . . . . . . . . . . . . . .
General
. . . . . . . . . . . . . . . . . . . . . . . . . . . . . . . . . . . .
Safety
. . . . . . . . . . . . . . . . . . . . . . . . . . . . . . . . . . . . .
Unit Support
. . . . . . . . . . . . . . . . . . . . . . . . . . . . . . . .
Duct Connection
. . . . . . . . . . . . . . . . . . . . . . . . . . . .
Rigging Unit For Lifting
. . . . . . . . . . . . . . . . . . . . . . .
Condensate Drains
. . . . . . . . . . . . . . . . . . . . . . . . . .
RETAIN THESE INSTRUCTIONS FOR FUTURE REFERENCE
TB1 LOW VOLTAGE
TERMINAL STRIP
CONDENSER
FANS
CONDENSER
COIL
Page 2
Page 3
Page 3
Page 3
Page 4
Page 4
Page 5
Page 5
EVAPORATOR
TB13 HIGH VOLTAGE
COIL
TERMINAL STRIP
COMPRESSORS
INSTALLATION
INSTRUCTIONS
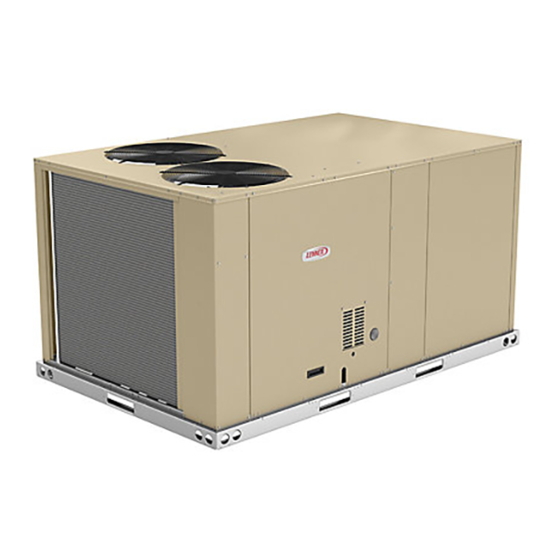
ZHA092
(7.5- Ton)
ZHA102
(8.5 -Ton)
ZHA120
(10 -Ton)
HEAT PUMP PACKAGED UNITS
507257-01
7/2014
Electrical Connections
. . . . . . . . . . . . . . . . . . . . . . .
Unit Power-Up
. . . . . . . . . . . . . . . . . . . . . . . . . . . . . .
Blower Operation and Adjustments
Heating Start-Up
. . . . . . . . . . . . . . . . . . . . . . . . . . . .
Cooling Start-Up
. . . . . . . . . . . . . . . . . . . . . . . . . . . .
Electric Heat Start-Up
. . . . . . . . . . . . . . . . . . . . . . . .
Defrost Control Board
. . . . . . . . . . . . . . . . . . . . . . . .
Service
. . . . . . . . . . . . . . . . . . . . . . . . . . . . . . . . . . . .
F4 FUSE
20 x 24 x 2"
BLOCK
FILTERS
(OPTIONAL)
(BEHIND COIL)
ELECTRIC HEAT
CONTROLS
TB2 TERMINAL
BLOCK (OPTIONAL)
Page 6
Page 6
. . . . . . . . . . . .
Page 7
Page 13
Page 13
Page 17
Page 18
Page 19
INVERTER
(OPTIONAL)
BLOWER
HOUSING
BLOWER
MOTOR
ELECTRIC HEAT
(OPTIONAL)
Advertisement
Table of Contents

Subscribe to Our Youtube Channel
Related Manuals for Lennox ZHA092


Summary of Contents for Lennox ZHA092
- Page 1 INSTALLATION Litho U.S.A. INSTRUCTIONS 2014 WARNING ZHA092 (7.5- Ton) Improper installation, adjustment, alteration, ser ZHA102 vice or maintenance can cause property damage, (8.5 -Ton) personal injury or loss of life. Installation and ser ZHA120 vice must be performed by a licensed professional (10 -Ton) HVAC installer or equivalent or service agency.
- Page 2 ZH 092, 102 & 120 DIMENSIONS BOTTOM POWER ENTRY Holes required for Optional Bottom Power Entry Kit Threaded Hole Diameter Wire Conduit Fittings Required in (Provided in Kit) Unit Base (Max.) ACC. 7/8 (23) 7/8 (23) 1-1/4 POWER 1-3/4 (44) 10-1/2 (991) (267)
-
Page 3: Shipping And Packing List
CAUTION WARNING Danger of sharp metallic edges. Can cause injury. Electric shock hazard and danger of Take care when servicing unit to avoid accidental explosion. Can cause injury, death or contact with sharp edges. product or property damage. Turn off electrical power unit... -
Page 4: Unit Support
If this unit has been used for heating or cooling of Installer's Roof Mounting Frame buildings or structures under construction, the following Many types of roof frames can be used to install the unit conditions must be met or the warranty will be void: depending upon different roof structures. -
Page 5: Condensate Drains
Rigging Unit For Lifting UNIT ALIGNMENT BRACKETS Rig unit for lifting by attaching four cables to holes in unit NEW ROOF CURBS (89-3/8” IN LENGTH): Remove all three brackets. base rail. See figure 2. EXISTING ROOF CURBS (81-3/4” LONG): Set unit on roof curb positioning alignment brackets as shown. 1- Detach wooden base protection before rigging. -
Page 6: Electrical Connections
3- Connect thermostat wiring to TB1 terminal board on Electrical Connections the left side of the controls area. Wire as shown in POWER SUPPLY figure 5 for electro-mechanical and electronic thermostats. If using other temperature control Do not apply power or close disconnect switch until devices or energy management systems see installation is complete. - Page 7 B-Blower Operation Blower Operation and Adjustments Initiate blower demand at thermostat according to A-Three Scroll Compressor Voltage Phasing instructions provided with thermostat. Unit will cycle on thermostat demand. The following steps apply to Three phase scroll compressors must be phased applications using typical...
- Page 8 D-Determining Unit CFM TABLE 1 MINIMUM AND MAXIMUM PULLEY ADJUSTMENT 1- The following measurements must be made with a Minimum Maximum Belt dry indoor coil and air filters in place. Turns Open Turns Open A Section Units Not Equipped With An Inverter - B Section Run blower without a cooling demand.
- Page 9 3- Measure belt deflection force. For a new 2 and 3hp PULLEY ALIGNMENT belt, the deflection force should be 5.0-7.0 lbs. ALIGNED (35-48kPa). For a new 5hp belt, the deflection force should be 7-10lbs. (48-69kPa). force below these values indicates undertensioned belt.
- Page 10 BLOWER DATA 092S STANDARD EFFICIENCY BELT DRIVE BLOWER − BASE UNIT BLOWER TABLE INCLUDES RESISTANCE FOR BASE UNIT ONLY (NO HEAT SECTION) WITH DRY INDOOR COIL AND AIR FILTERS IN PLACE. FOR ALL UNITS ADD: 1 − Wet indoor coil air resistance of selected unit. 2 −...
- Page 11 BLOWER DATA 102S, 120S STANDARD EFFICIENCY BELT DRIVE BLOWER − BASE UNIT BLOWER TABLE INCLUDES RESISTANCE FOR BASE UNIT ONLY (NO HEAT SECTION) WITH DRY INDOOR COIL AND AIR FILTERS IN PLACE. FOR ALL UNITS ADD: 1 − Wet indoor coil air resistance of selected unit. 2 −...
- Page 12 BLOWER DATA FACTORY INSTALLED BELT DRIVE KIT SPECIFICATIONS Nominal Maximum Drive Kit Number RPM Range 590 - 890 800 - 1105 795 - 1195 3.45 730 - 970 3.45 940 - 1200 3.45 1015 - 1300 5.75 900 - 1135 5.75 1040 - 1315 5.75...
- Page 13 TABLE 2 MANUFACTURER'S NUMBERS DRIVE COMPONENTS DRIVE ADJUSTABLE SHEAVE FIXED SHEAVE BELT BROWNING NO. OEM PART NO. BROWNING NO. OEM PART NO. BROWNING NO. OEM PART NO. 1VP34x7/8 31K6901 AK61x1 100244-20 44L5501 1VP40x7/8 79J0301 AK59x1 31K6801 AX45 100245-23 1VP34x7/8 31K6901 AK46x1 100244-17 100245-18...
- Page 14 IMPORTANT - Charge unit in standard cooling mode. C-Compressor Controls 1- High Pressure Switches (S4, S7) 1- Make sure outdoor coil is clean. Attach gauge Compressor circuits are protected by a high pressure manifolds and operate unit at full CFM in cooling mode switch which cuts out at 640 psig + 10 psig (4413 kPa with economizer disabled until system stabilizes + 70 kPa).
- Page 15 TABLE 3 092S Normal Operating Pressures Outdoor Coil Entering Air Temperature 65 F 75 F 85 F 95 F 105 F 115 F Suct Disc Suct Disc Suct Disc Suct Disc Suct Disc Suct Disc (psig) (psig) (psig) (psig) (psig) (psig) (psig) (psig)
- Page 16 TABLE 4 102S Normal Operating Pressures Outdoor Coil Entering Air Temperature 65 F 75 F 85 F 95 F 105 F 115 F Suct Disc Suct Disc Suct Disc Suct Disc Suct Disc Suct Disc (psig) (psig) (psig) (psig) (psig) (psig) (psig) (psig)
- Page 17 TABLE 5 120S Normal Operating Pressures Outdoor Coil Entering Air Temperature 65 F 75 F 85 F 95 F 105 F 115 F Suct Disc Suct Disc Suct Disc Suct Disc Suct Disc Suct Disc (psig) (psig) (psig) (psig) (psig) (psig) (psig) (psig)
- Page 18 defrost control will ignore the test pins. When the jumper Defrost Control Board is placed across the TEST pins for two seconds, the The defrost thermostat, defrost pressure switch and the control will enter the defrost mode. If the jumper is removed before an additional 5-second period has defrost control work together to ensure that the heat elapsed (7 seconds total), the unit will remain in defrost...
- Page 19 13. NOTE-Filters must be U.L.C. certified or equivalent for use in Canada. FIGURE 13 B-Compressor C-Lubrication All motors are lubricated at the factory. No further If Interlink compressor replacement is necessary, call 1-800-4-LENNOX (1-800-453-6669). lubrication is required. Page 19...
- Page 20 G-Indoor Coil On units with two slabs, dirt and debris may become trapped between the slabs. To clean between slabs, Inspect and clean coil at beginning of each cooling season. carefully separate coil slabs and wash them thoroughly. See figure 14. Flush coils with water following cleaning. Clean using mild detergent or commercial coil cleaner.
Need help?
Do you have a question about the ZHA092 and is the answer not in the manual?
Questions and answers