Table of Contents
Advertisement
Quick Links
SPARK MODERN FIRES
WARNING: This
fireplace requires
one foot of vertical
venting before
any horizontal runs
INSTALLATION AND OPERATING INSTRUCTIONS
WARNING: FIRE OR EXPLOSION HAZARD
Failure to follow safety warnings exactly could result in
serious injury, death, or property damage.
– Do not store or use gasoline or other flammable
vapors and liquids in the vicinity of this or any other
appliance.
–
WHAT TO DO IF YOU SMELL GAS
• Do not try to light any appliance.
• Do not touch any electrical switch; do not use any
phone in your building.
• Leave the building immediately.
• Immediately call your gas supplier from a neighbor's
phone. Follow the gas supplier's instructions.
• If you cannot reach your gas supplier, call the fire
department.
– Installation and service must be per formed
by a qualified installer, service agency or the
gas supplier.
WARNING: Improper installation, adjustment, alteration,
services or maintenance can cause injury or property
damage. Refer to this manual. For assistance or
additional information consult a qualified installer,
service agency or the gas supplier.
This appliance may be installed in an aftermarket,
permanently
located,
only) or mobile home where not prohibited by local
codes.
This appliance is only for use with the type of gas
indicated on the rating plate. This appliance is not
conver tible for use with other gases, unless a certified
kit is used.
Version française de ce manuel est disponible à partir du site WEB : www.sparkfires.com
French version of this Owners Manual is available at www.sparkfires.com
Direct Vent Gas Fireplaces
with Electronic Ignition System
MODELS: DV48N-E, DV48P-E
manufactured
home (USA
DUE
TO
HIGH TEMPERATURES, THE
APPLIANCE SHOULD BE LOCATED OUT
OF TRAFFIC AND AWAY FROM FURNITURE
AND DRAPERIES.
CHILDREN AND ADULTS
ALERTED TO THE HAZARDS
SURFACE TEMPERATURE AND SHOULD
STAY
AWAY
TO
CLOTHING IGNITION.
Y OUNG
CHILDREN
S UPERVISED WHEN THEY ARE IN THE
S AME ROOM AS THE APPLIANCE.
C LOTHING OR
OTHER FLAMMABLE
M ATERIAL SHOULD NOT BE PLACED ON
O R NEAR THE APPLIANCE.
K EEP THE ROOM AREA CLEARAND F REE
FROM COMBUSTIBLE MATERIALS, G ASO-
LINE, AND OTHER FLAMMABLE V APORS
.
AND LIQUIDS
INSTALLER: Leave this manual with the appliance.
CONSUMER: Retain this manual for future reference.
Report # 0321GF009S
SHOULD BE
OF HIGH
AVOID
BURNS
OR
SHOULD
BE
Advertisement
Table of Contents

Related Manuals for Spark DV48N-E


Summary of Contents for Spark DV48N-E
- Page 1 Direct Vent Gas Fireplaces venting before with Electronic Ignition System any horizontal runs MODELS: DV48N-E, DV48P-E INSTALLATION AND OPERATING INSTRUCTIONS WARNING: FIRE OR EXPLOSION HAZARD Failure to follow safety warnings exactly could result in serious injury, death, or property damage.
-
Page 2: Table Of Contents
CONTENTS Important Safety Information ......3 Electrical Installation........28 Electrical Wiring ........28 Product Features..........5 Wall Switch ..........28 Code Approval ..........5 Glass Removal ..........29 Pre-Installation Information......6 Final Installation........... 30 ...... Placement ..30 Media T r a y Installing Above 2000 Feet ...... -
Page 3: Important Safety Information
IMPORTANT SAFETY INFORMATION INSTALLER OWNER Please leave these instructions with the owner. Please retain these instructions for future reference. WARNING • Read this owner’s manual carefully and completely before trying to assemble, operate, or service this fireplace. • Any change to this fireplace or its controls can be dangerous. •... - Page 4 IMPORTANT SAFETY INFORMATION Continued from page 3 IMPORTANT: 12. Do not use this fireplace to cook food or burn paper or PLEASE READ THE FOLLOWING CAREFULLY other objects. It is normal for fireplaces fabricated of steel to give off some expansion and/or contraction noises during the start up or 13.
-
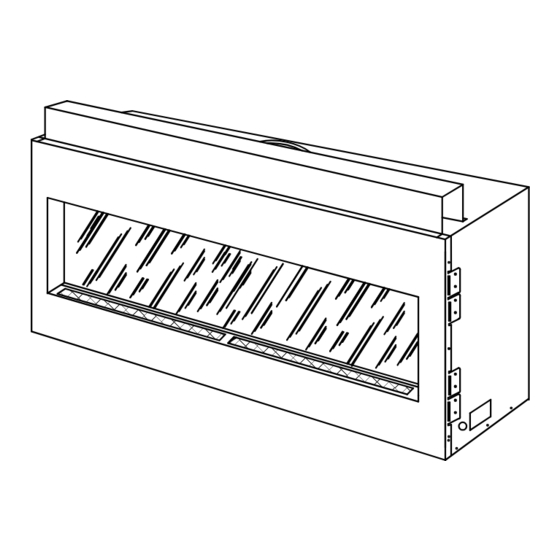
Page 5: Product Features
PRODUCT FEATURES CODE APPROVAL FIREPLACE CONTROLS PRODUCT SPECIFICATIONS (see Figure 1) • This appliance has been certified for use with either natural or 1 - R e m o t e C o n t r o l R e c e i v e r propane gas. -
Page 6: Pre-Installation Information
Maximum Supply Pressure 13" Minimum Supply Pressure 4.5" Minimum Supply Pressure 11" Input Rate, Btu/hr Model # Gas Type Orifice Size DV48N-E Natural 39,000 27,000 DV48P-E Propane 38,000 27,000 BEFORE YOU START Read this homeowner manual thoroughly and follow all instructions carefully. Inspect all contents for shipping damage and... -
Page 7: Fireplace Framing
PLEASE NOTE: Natural stone products may react to heat by discoloring or cracking. Spark Modern Fires is not responsible " for any damages due to covering materials used. If tiles are to be applied covering the fireplace face, a layer of cement board must be used as a substrate. -
Page 8: Fireplace Dimensions
PRE-INSTALLATION INFORMATION Top view 57.25" 5" 8" 1" 1" Flue collar 22.25" Front view 48.75" " 7.125 34.25" 28" 13.75" 7.125" 57.25" 1" 59.25" 1" Right side view 34.25" 28" Electric access both sides Figure 3 - Fireplace Dimensions 23.25" Gas line access both sides... -
Page 9: Fireplace Location
PRE-INSTALLATION INFORMATION FIREPLACE LOCATION Plan for the installation of your appliance. This includes determining where the unit is to be installed, the vent configuration to be used, framing and finishing details, and whether any optional accessories (i.e. wall switch, or remote control) are desired. Consult your local building code agency to ensure compliance with local codes, including permits and inspections. -
Page 10: Securing Fireplace To Floor Or Framing
SECURING FIREPLACE TO FLOOR OR FRAMING The fireplace must be secured to the floor and/or to framing studs as shown in Figure 5. Use two (2) wood screws or masonry/ concrete screws to secure fireplace to the floor. Use four (4) screws to attach fireplace to framing. The side brackets are adjustable from 1/2"... -
Page 11: Clearances
CLEARANCES CLEARANCES TO COMBUSTIBLES WARNING Follow these instructions carefully to ensure safe installation. Failure to follow instructions exactly can create a fire hazard. The appliance cannot be installed on a carpet, tile or other combustible material other than wood flooring. If installed on carpet or vinyl flooring, the appliance shall be installed on a metal, wood or noncombustible material panel extending full width and depth of the appliance. -
Page 12: Installation Information
The following actions will void the warranty on your fireplace: • Installation of any damaged venting component. • Unauthorized modification of the venting system. • Installation of any component part not manufactured or approved by Spark Modern Fires. • Installation other than permitted by these instructions. -
Page 13: Vent Installation
VENT INSTALLATION WARNING This fireplace must be vented to the outside. The venting system must NEVER be attached to a chimney serving a separate solid fuel burning appliance. Each gas appliance must use a separate vent system. Do not use common vent systems. WARNING A Minimum of 3"... -
Page 14: Installation Planning
VENT INSTALLATION INSTALLATION PLANNING There are two basic types of direct-vent installation: • Horizontal Termination • Vertical Termination It is important to select the proper length of vent pipe for the type of termination you choose. It is also important to note the wall thickness. - Page 15 VENT INSTALLATION FOR HORIZONTAL TERMINATION Inside Corner Detail � � � � � � � � � � � � � ����� � � ������ ������ ����� � ��� ������ � � �������� � � � � � � � �...
-
Page 16: How To Use The Vent Graph
VENT INSTALLATION TERMINATION CLEARANCES FOR BUILDINGS WITH COMBUSTIBLE AND NONCOMBUSTIBLE EXTERIORS � � � ���� ������� � � � � � ���� ������� ������ ������ ������� ������ � � ������� ����� �� ��� �������� � ��� ������ �������� � � ������� ����� ��� ���� ���� �� �... -
Page 17: Rear Wall Vent Installation
VENTING INSTALLATION REAR WALL VENT INSTALLATION When installed as a rear vent unit this appliance may be vented directly to a termination located on the rear wall behind the appliance with 1' of vertical rise minimum. The maximum horizontal distance between the rear of the appliance and the outside of termination is 20" (508 m). See Figure 11. - Page 18 VENT INSTALLATION REAR WALL VENT INSTALLATION (continued) 4. Apply a bead of non-hardening mastic around the outside edge of vent cap. Position the vent cap in the center of hole on the exterior wall with the word “UP” on the vent cap facing up.
-
Page 19: Horizontal Termination Configuration
VENT INSTALLATION HORIZONTAL TERMINATION CONFIGURATIONS — RIGID VENTING Since it is very important that the venting system maintain its balance between the combustion air intake and the flue gas exhaust, certain limitations as to vent configurations apply and must be strictly adhered to. The Vent Graph, showing the relationship between vertical and horizontal side wall venting, will help to determine the various dimensions allowable. - Page 20 VENT INSTALLATION 90° HORIZONTAL TERMINATION CONFIGURATION — RIGID VENTING (Continued) • If a 90° elbow is used in the horizontal vent run (level height maintained) the horizontal vent length is reduced by 36" (914 mm) (Fig. 21 A and B) This does not apply if the 90° elbows are used to increase or redirect a vertical rise.
-
Page 21: Below Grade Installation
VENT INSTALLATION BELOW GRADE INSTALLATIONS — RIGID VENTING When it is not possible to meet the required vent terminal clearances of 12" above grade level, a snorkel kit is recommended. It allows installation depth down to 7" (178mm) below grade level. The 7" (178mm) is measured from the center of the horizontal vent pipe as it penetrates through the wall. -
Page 22: Vertical Through-The-Roof Installation
VENT INSTALLATION VERTICAL THROUGH-THE-ROOF APPLICATIONS — RIGID VENTING ONLY This Gas Fireplace has been approved for : • Vertical installations up to 50' (15m) in height. Up to a 10' (3m) horizontal vent run can be installed within the vent system using a maximum of two 90°... -
Page 23: Installation For Vertical Termination
VENT INSTALLATION INSTALLATION FOR VERTICAL TERMINATION 1. Determine the route your vertical venting will take. If ceiling joist, Roof roof rafters or other framing will obstruct the venting system, consider Flashing an offset. See Figure 27 to avoid cutting load bearing members. NOTE: Pay special attention to these installation instructions for required clearances (air space) to combustibles when passing Wall Strap... -
Page 24: Cathedral Ceiling Installation
VENT INSTALLATION 4. Connect a section of pipe and extend up through the hole. NOTE: If an offset is needed to avoid obstructions, you must support the vent pipe every three (3) feet. Use wall straps for this purpose. See Figure 25, page 22. Whenever possible, use 45° elbows instead of 90° elbows. The 45° elbow offers less restriction to the flow of the flue gases and intake air. -
Page 25: Fireplace Installation
FIREPLACE INSTALLATION CHECK GAS TYPE Use proper gas type for the fireplace you are installing. If you have conflicting gas type, do not install fireplace. See dealer where you purchased the fireplace for proper fireplace for your gas type or conversion kit. INSTALLING GAS PIPING TO FIREPLACE / BURNER SYSTEM LOCATION WARNING A qualified installer or service person must... - Page 26 FIREPLACE INSTALLATION CAUTION WARNING Only persons licensed to work with gas piping A manual shutoff valve must be installed upstream may make the necessary gas connections to of the appliance. Union tee and plugged " this appliance. NPT pressure tapping point should be installed upstream of the appliance.
-
Page 27: Checking Gas Pressure
CHECKING GAS PRESSURE Outlet Pressure Tap Check gas type. The gas supply must be the same as Inlet Pressure Tap stated on the appliance’s rating decal. If the gas supply is different from the fireplace, STOP! Do not install the appliance. -
Page 28: Electrical Installation
ELECTRICAL INSTALLATION ELECTRICAL WIRING This fireplace requires 110V AC electrical supply for normal operation in order to power up blower and 7V DC adapter which is required to operate Remote Control. However, during power outage situation, its electronic system (DFC board) can be temporary powered with 9V DC batery and main valve can be operated manually using ON/OFF position of the remote control (or optional Wall Switch if installed). -
Page 29: Glass Removal
GLASS REMOVAL GLASS FRAME REMOVAL GLASS REMOVAL 1. Remove the front air panel. 2. Remove the left and right side panels by lifting up and moving to the center. . Loosen and remove the five nuts and washers at the top of the glass door frame. 4. -
Page 30: Final Installation
FINAL INSTALLA TION MEDIA TRAY PLACEMENT 1. Place media tray (see figure 37) on the support brackets as shown on figure 38. Fill the tray with media supplied. Do not place media on burner or block air flow between burner and tray (see figure 39). Figure 37 - One piece media tray Figure 38 - Placing media tray Figure 39 - Filling the tray with media... -
Page 31: Safety Screen
SAFETY SCREEN WARNING: A barrier (safety screen) designed to reduce the risk of burns from the hot viewing glass is provided with this appliance and sh a ll be installed for the protection of children and other at-risk individuals. IMPORTANT: Safety Screen must be in place when the fireplace is in operation. If the barrier becomes damaged, the barrier shall be replaced with the manufacturer's barrier for this appliance. - Page 32 SAFETY SCREEN INSTALLATION (continued) STEP 5: Insert the right side panel into the STEP 6: Match up the tabs in the panel with opening angling in at the top. the slots in the face and slide downward. Make sure the side panel is secured properly. Repeat Steps 5 and 6 for the Left Side Panel.
-
Page 33: Operating Instructions
OPERA TING INSTRUCTIONS 6 . Set remote receiver switch to OFF position. OPERATING FIREPLACE FOR YOUR SAFETY READ BEFORE LIGHTING WARNING: If you do not follow these Figure 40a Remote Receiver Switch in OFF Position instructions exactly, a fire or explosion may result causing property damage, personal 7 . -
Page 34: Remote Control Operation
OPERA TING INSTRUCTIONS (continued) Manually Turning ON the Appliance REMOTE CONTROL If pilot does not stay lit, contact a qualified Slide the remote receiver switch to the ON position. OPERATION service person or gas supplier for repairs. This will allow the main burner to ignite. -
Page 35: Flame Height Control
OPERA TING INSTRUCTIONS (continued) 2. Press the up-arrow key to increase the flame hcight. If y ou press the up-arrow key while the remote Note: system is ON but the flame is OF F, the flame will come on in the high position, A single "beep" from will confirm the receiver... -
Page 36: Low Battery Power Detection
OPERA TING INSTRUCTIONS (continued) Low Battery Power Detection Smart Thermostat (Transmitter Operation" Proflame GTM ) Receiver The life span of the receiver batteries depends upon The Smart Thermostat function adjusts the flame height various factors: battery quality, Humber of appliance in accordance to the difference between... -
Page 37: Pilot Flame
CLEANING AND MAINTENANCE CLEANING AND MAINTENANCE WARNING Turn off gas before servicing fireplace. It is recommended that a qualified service technician perform these check-ups at the beginning of each heating season. BURNER, PILOT AND CONTROL COMPARTMENT BURNER, PILOT AND CONTROL COMPARTMENT Keep the control compartment and burner areas clean by vacuuming or brushing at least twice a year. -
Page 38: Vent System
CLEANING AND MAINTENANCE VENT SYSTEM The fireplace and venting system should be inspected before initial use and at least annually by a qualified field service person. Inspect the external vent cap on a regular basis to make sure that no debris is interfering with the airflow. Inspect entire venting system to ensure proper function. -
Page 39: Vent Components
ILLUSTRATED PARTS LIST RIGID VENT COMPONENTS REQUIRED FOR FIREPLACE INSTALLATION � � � Direct Vent Pro Item Qty/Box Description Simpson Duravent 58DVA-HC Simpson Horizontal High Wind Horizontal Termination Cap 58DVA-VCH High Wind Vertical Termination 58DVA-06 6” Pipe Length 58DVA-09 9” Pipe Length 58DVA-12 12”... -
Page 40: Firebox Components
ILLUSTRATED PARTS LISTS CONTROL COMPARTMENT BURNER COMPARTMENT ACCESS AND MEDIA COMPONENTS... -
Page 41: S I T P Ro F L Am E Wi R I Ng Di A G Ra M
ILLUSTRATED PARTS LISTS (continued) Proflame Wiring Diagram This diagram shows replaceable SIT Pro ame parts used in your replace. 120 Vac INPUT 7 Vdc STABILIZED REMOTE SUPPLY OUTPUT REMOTE DC SUPPLY Orange Pilot Green Receiver 14 Pin Connector RECEIVER 885 PROFLAME SPLIT FLOW Chassis connection... -
Page 42: Replacement Parts 3
ILLUSTRATED PARTS LISTS (continued) This list contains replaceable parts used in your fireplace. All replacement parts should be ordered from your installer or from Spark Modern Fires at 1- 866-938-3846 or on-line at www. sparkfires .com PART NUMBER DESCRIPTION 48P-E 48N-E H200010 .. -
Page 43: Troubleshooting
Check wiring connections at the DFC module and gas triggering of piezo. valve. B. Check for spark at electrode and pilot. If no spark and electrode B. Defective ignitor. wire is properly connected, replace pilot assembly. C. Check remote/manual shut off valve from fireplace. Low pressure C. - Page 44 NOTES...
- Page 45 NOTES...
- Page 46 NOTES...
- Page 47 The installer should keep a duplicate of this form for their records. Accurate com- pletion of this form is required for warranty coverage and for any technical support by Spark Modern Fires. Date Purchased:...
-
Page 48: Warranty Information
Spark Modern Fires in the appliance are found to be defective in materials or workman- ship, Spark Modern Fires will, at its option, replace or repair the defective components at no charge to the origi- nal owner. Spark Modern Fires will also pay for reasonable labor cost incurred in replacing or repairing such com- ponents for a period of two years from date of installation.
Need help?
Do you have a question about the DV48N-E and is the answer not in the manual?
Questions and answers