Table of Contents
Advertisement
Quick Links
Advertisement
Table of Contents

Related Manuals for Logik LCX17LN2


Summary of Contents for Logik LCX17LN2
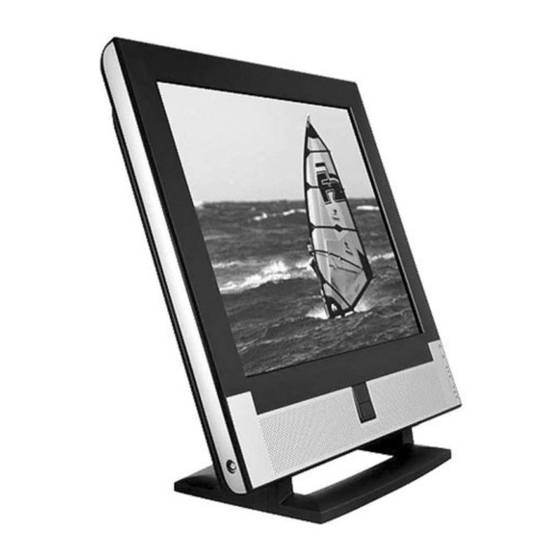
- Page 1 LCX17LN2 LCDTV INSTRUCTION MANUAL...
-
Page 2: Table Of Contents
CONTENTS CAUTIONS REMOTE FUNCTIONS 2A - 2B SAFETY INSTRUCTION REAR VIEW CONNECTING WITH EXTERNAL EQUIPMENT 5 - 6 BUTTONS ON THE FRONT OF YOUR LCD TV 7 - 8 TUNING YOUR LCD TV CONTROLS AND FUNCTIONS 10 - 16 TROUBLE SHOOTING GUIDE SPECIFICATIONS... -
Page 3: Cautions
CAUTIONS NEVER REMOVE THE BACK COVER Removal of the back cover should be carried out only by qualified personnel. TO ELIMINATE EYE FATIGUE Do not use the unit against a bright back ground and where sunlight or other light sources will shine directly on the monitor. BE CAREFUL OF HEAVY OBJECT Neither the monitor itself nor any other heavy object should rest on the power cord. -
Page 4: Remote Functions 2A - 2B
REMOTE FUNCTIONS A. REMOTE CONTROLLER 12~19 1. POWER( Turns the power ON or OFF. There will be a few seconds delay before the display appears. 2. SOURCE Select pc or video(TV / Video / S-Video / SCART) sources. 3. MUTE Mute the sound. - Page 5 REMOTE FUNCTIONS 8. DISPLAY Channel display in TV Source. 9. TV Change Input Source to TV. 10. AUTO Auto geometry adjustment in PC Source. 11. EXIT Exit the On Screen Display. 12. TEXT ( Select Teletext display / Return to TV picture display. 13.
-
Page 6: Safety Instruction
SAFETY INSTRUCTION Damage Temperature Never use your LCD TV if it is damaged in Avoid extremes of temperature, either any way. Always place your LCD TV on a hot or cold, place your LCD TV well away flat level surface avoiding anywhere from heat sources such as radiators or gas/electric which may be subject to strong vibration. -
Page 7: Rear View
REAR VIEW A. AC CONNECTOR C. ANTENNA(aerial) Connect the AC connector into the AC inlet Use an RF lead (not supplied) to connect socket on the back of your LCD TV and plug your LCD TV to on aerial socket. into the main power supply. -
Page 8: Connecting With External Equipment
CONNECTING WITH EXTERNAL EQUIPMENT B e sure to turn off the power of your computer before connecting the monitor. 1. CONNECT THE VIDEO SIGNAL CABLE A. Connect one end of the signal cable to the back panel of the monitor and connect the other end to the graphic card on back of the computer. - Page 9 CONNECTING WITH EXTERNAL EQUIPMENT 5. If you have connected your LCD TV to a piece of external equipment select the correct input on the ‘input source’ screen shown below. This screen can be accessed by pressing the ‘MENU’ button on the remote control once.
-
Page 10: Buttons On The Front Of Your Lcd Tv
BUTTONS ON THE FRONT OF YOUR LCD TV B. SOURCE BUTTON C. MENU BUTTON D. CHANNEL BUTTONS (DOWN & UP) E. VOLUME BUTTONS (LEFT & RIGHT) REMOCON SENSOR POWER INDICATOR(LED) A. POWER SWITCH A. ON/STANDBY( Turns the LCD TV ON or to STANDBY. There will be a few seconds delay before the display appears. - Page 11 BUTTONS ON THE FRONT OF YOUR LCD TV C. CHANNEL( CH: DOWN , UP) Increases or decreases the channel number. (In PC mode, down key operates as “Auto adjust”) This button allows user to enter the sub-menu of the activated function when down key is pressed on the main menu.
-
Page 12: Tuning Your Lcd Tv
TUNING YOUR LCD TV Press the AUTOSCAN button on the remote control. NOTE:Your LCD TV will now automatically search for all available channels. Please be patient, this will take a few minutes. Ch.Auto Searching..SORTING YOUR CHANNELS Press the ‘O’number button. Press the ‘teletext’... -
Page 13: Controls And Functions
CONTROLS AND FUNCTIONS : Screen : Brightness Increase or decrease the intensity of the image. : Contrast Increase or decrease the intensity(lightness or dimness) of the image. : H. position (PC Mode Only) Move image horizontally on screen right or left. : V. - Page 14 CONTROLS AND FUNCTIONS : Audio : Volume Adjust audio volume. : Equalizer (Loudspeaker Only) Boost / Cut specific frequency or compensate for frequency distortion of the sound . Select preferred Sound setting: flat, music, movie, speech and Adjust the level of the Sound frequency in user mode. : Balance (Loudspeaker Only) Adjust the balance of left and right speaker sound .
- Page 15 CONTROLS AND FUNCTIONS : OSD : H. Position Move the OSD position to right( ) or left( ). : V. Position Move the OSD position to up( ) or down( ). : Transparency Select the OSD background. : OSD Timer Select the OSD display timing.
- Page 16 CONTROLS AND FUNCTIONS : Color (PC Mode) : Color Temp Adjust color temperature to 9300, 6500, user. (note : 9300 is factory default) : Red Adjust red color for user. : Green Adjust green color for user. : Blue Adjust blue color for user. INSTRUCTION MANUAL...
- Page 17 CONTROLS AND FUNCTIONS : Utility : Recall Select to reset all setting to the factory default values. : Full Auto (PC Mode Only) Auto geometry and color adjustment. : Caption (NTSC Only) Enable or disable closed caption feature(CC1, CC2, CC3, CC4). : Vchip (NTSC, US Only) Initial passwords is “0000”.
-
Page 18: Auto Search
CONTROLS AND FUNCTIONS : TV Channel (Program) This menu is possible to select, Input Source must be set ‘TV’. : Auto Search Find available channels(Program) and save automatically. : Fine Tuning Adjust a mismatch between real and programmed channel(Program). : Store / Clear Select “Store”... - Page 19 CONTROLS AND FUNCTIONS : Exit : Exit Turn off OSD Menu. INSTRUCTION MANUAL...
-
Page 20: Troubleshooting Guide
TROUBLESHOOTING GUIDE TROUBLE TROUBLESHOOTING TIP No image on display screen 1. Check that power cord of the Monitor have been connected securely into wall outlet or grounded extension cable or strip. 2. Power switch should be in the ON position and LED is lit. -
Page 21: Specifications
SPECIFICATIONS LCD Type 17.0 Diagonal AM-TFT(Active-Matrix) DOT PITCH: 0.264mm BRIGHTNESS: 250cd/ (Typical) CONTRAST RATIO: 350:1(Typical) RESPONSE TIME: Tr -5msec, Tf-20msec(Typical) RESOLUTION(H x V) 1280X1024 @60Hz FREQUENCY HORIZONTAL: 31-80KHz VERTICAL: 56-75Hz INPUT SIGNAL VIDEO(Analog 0.7Vp-p / 75 ) SYNC(Separate TTL Level) SCART, S-VIDEO, AV(Sound L/R) PC Stereo Sound, RF(Tuner option) ACTIVE DISPLAY AREA (W x H)
Need help?
Do you have a question about the LCX17LN2 and is the answer not in the manual?
Questions and answers