Table of Contents
Advertisement
Quick Links
Thank you for buying this energy efficient water heater.
We appreciate your confidence in our products.
ALL TECHNICAL AND WARRANTY QUESTIONS: SHOULD BE DIRECTED TO THE LOCAL DEALER FROM WHOM THE WATER HEATER WAS
PURCHASED. IF YOU ARE UNSUCCESSFUL, CALL THE TECHNICAL SUPPORT PHONE NUMBER SHOWN ON THE WATER HEATER LABELING.
PRINTED 0415
RESIDENTIAL GAS WATER HEATERS
KEEP THIS MANUAL IN THE POCKET ON HEATER FOR FUTURE REFERENCE
WHENEVER MAINTENANCE ADJUSTMENT OR SERVICE IS REQUIRED.
Instruction Manual
POWER VENT/POWER DIRECT VENT GAS MODELS
MODELS 650(Y,H)TPDT/675(Y,H)TPDT SERIES 140/141
•
For Your Safety
AN ODORANT IS ADDED TO THE GAS USED
BY THIS WATER HEATER.
1
WITH DIRECT SPARK IGNITION
•
331985-000
Advertisement
Table of Contents

Subscribe to Our Youtube Channel
Related Manuals for Reliance Water Heaters 650YTPDT


Summary of Contents for Reliance Water Heaters 650YTPDT
-
Page 1: For Your Safety
Instruction Manual RESIDENTIAL GAS WATER HEATERS POWER VENT/POWER DIRECT VENT GAS MODELS WITH DIRECT SPARK IGNITION MODELS 650(Y,H)TPDT/675(Y,H)TPDT SERIES 140/141 • • For Your Safety AN ODORANT IS ADDED TO THE GAS USED Thank you for buying this energy efficient water heater. BY THIS WATER HEATER. -
Page 2: Table Of Contents
TABLE OF CONTENTS SAFE INSTALLATION, USE AND SERVICE.........3 Filling The Water Heater ............23 APPROVALS .................3 INSTALLATION REQUIREMENTS FOR THE COMMONWEALTH GENERAL SAFETY INFORMATION ..........4 OF MASSACHUSETTS ...............24 Precautions ................4 VENTING INSTALLATION ............25 Grounding Instructions .............4 Vent Installation Considerations ..........25 Hydrogen Gas Flammable ............4 Polypropylene Installations .............26 INTRODUCTION ................7 Vent Pipe Termination.............27... -
Page 3: Safe Installation, Use And Service
SAFE INSTALLATION, USE AND SERVICE The proper installation, use and servicing of this water heater is extremely important to your safety and the safety of others. Many safety-related messages and instructions have been provided in this manual and on your own water heater to warn you and others of a potential injury hazard. -
Page 4: General Safety Information
GENERAL SAFETY INFORMATION PRECAUTIONS HYDROGEN GAS FLAMMABLE DO NOT USE THIS APPLIANCE IF ANY PART HAS BEEN EXPOSED TO FLOODING OR WATER DAMAGE. Immediately call a qualified service technician to inspect the water heater and to make a determination on what steps Explosion Hazard should be taken next. - Page 5 GENERAL SAFETY INFORMATION...
- Page 6 GENERAL SAFETY INFORMATION Fire or Explosion Hazard Fire Hazard Do not store or use gasoline or other flammable vapors and For continued protection against liquids in the vicinity of this or any other appliance. risk of fire: Do not install water heater on Avoid all ignition sources if you smell gas.
-
Page 7: Introduction
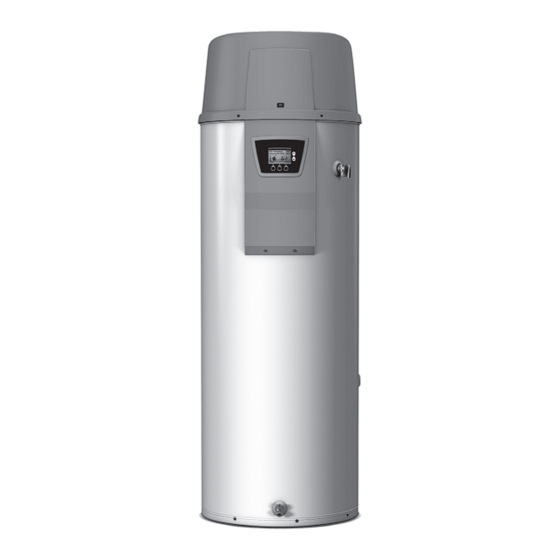
INTRODUCTION Thank You for purchasing this water heater. Properly installed and The principal components of the water heater are identified in maintained, it should give you years of trouble free service. Features And Components on Page10 & Page 11 in this manual. Use this reference to locate and identify various components on ABBREVIATIONS USED the water heater. -
Page 8: Dimensions And Capacity Data
DIMENSIONS AND CAPACITY DATA ROUGH IN DIMENSIONS: 50 GALLON UNIT Figure 1: DIMENSIONS FOR 50 GALLON UNIT ROUGH IN DIMENSIONS: 75 GALLON UNIT Figure 1A: DIMENSIONS FOR 75 GALLON UNIT Table 1 – ROUGH-IN-DIMENSIONS Units Inches 66.75 49.25 22.00 15.75 3.00 8.00 8.00... - Page 9 DIMENSIONS AND CAPACITY DATA Table 2 – CAPACITY, GAS AND ELECTRICAL CHARACTERISTICS Approximate Capacity *Manifold Pressure Electrical Characteristics U.S. Gals. Liters Gas Type “WC Volts/Hz Amperes Nat./LP 120/60 <5 Nat/LP 120/60 <5 * The manifold pressure is the factory setting and is not adjustable. A negative pressure will be seen with just the blower running without the Gas Control Valve open.
-
Page 10: Features And Components
FEATURES AND COMPONENTS 50 GALLON UNIT **29 **14 **15 ACCESS PANEL Caution: This access panel covers a 2” NPT plug that was required during the manufacturing of this water heater. This 2” NPT flange is not a cleanout fitting, removing the 2”... - Page 11 FEATURES AND COMPONENTS (CONT.) 75 GALLON UNIT **29 **14 **15 26, 27 VACUUM RELIEF VALVE *INSTALL PER LOCAL CODES * CAUTION HARNESS HAS 120 VAC. IN OPERATION. ** See Venting Installation and Condensate Piping for more information. Figure 1C: 75 GALLON UNIT...
- Page 12 FEATURES AND COMPONENTS (CONT.) Control Assembly Blocked Intake Switch Blocked Outlet Switch Blower Prover Switch Blower Assembly Burner Assembly Flame Sensor Igniter Assembly Junction Box 10: Gas Control Valve Assembly 11: Display Board 12: Top Plastic Enclosure 13: Display Enclosure ** 14: Exhaust Elbow Assembly ** 15: Condensate Drain Outlet 16: Enable / Disable Switch...
-
Page 13: Controls And Switches
CONTROLS AND SWITCHES close. The pressure switch is connected to the blower pressure tap by a piece of tygon tubing. This tubing must be connected in order for This model is provided with three pressure switches. These switches the switch to change the electrical contacts. The controller requires are essential to the safe and proper operation of the unit. -
Page 14: Installation Considerations
INSTALLATION CONSIDERATIONS LOCATING THE WATER HEATER (such as adhesives, etc.) emit flammable vapors which can be ignited by a gas water heater’s ignition device or main burner. Carefully choose a location for the new water heater. The The resulting flashback and fire can cause death or serious placement is a very important consideration for the safety of the burns to anyone in the area. -
Page 15: Insulation Blankets
mentioned below, see Figure 1B & Figure 1C). Failure to follow these instructions can restrict the air flow required for proper combustion, potentially resulting in fire, asphyxiation, serious personal injury or death. • Do not apply insulation to the top of the water heater, as this will interfere with safe operation of the blower assembly. -
Page 16: Unconfined Space
UNCONFINED SPACE FRESH AIR OPENINGS FOR CONFINED SPACES An Unconfined Space is one whose volume IS NOT LESS THAN The following instructions shall be used to calculate the size, number 50 cubic feet per 1,000 Btu/hr (4.8 cubic meters per kW) of the and placement of openings providing fresh air for combustion, total input rating of all appliances installed in the space. -
Page 17: Outdoor Air Through Two Horizontal Ducts
AIR FROM OTHER INDOOR SPACES Alternatively a single permanent opening, commencing within 12 inches (300 mm) of the top of the enclosure, shall be provided. See Figure 6. The water heater shall have clearances of at least 1 inch (25 mm) from the sides and back and 6 inches (150 mm) from the front of the appliance. -
Page 18: Installation Requirements
INSTALLATION REQUIREMENTS CHEMICAL VAPOR CORROSION Corrosion of the flueways and vent system may occur if air for combustion contains certain chemical vapors. Such corrosion may result in failure and risk of asphyxiation. Spray can propellants, cleaning solvents, refrigerator and air conditioning refrigerants, swimming pool chemicals, calcium and sodium chloride (water softener salt), waxes, and process This water heater shall not be connected to any heating... -
Page 19: Mixing Valves
MIXING VALVES SEDIMENT TRAPS Water temperature over 125°F (52°C) can cause severe burns instantly resulting in severe injury or death. Children, the elderly and the physically or mentally disabled are at highest risk for scald injury. Feel water before bathing or showering. -
Page 20: Gas Supply Systems
GAS SUPPLY SYSTEMS 5. When installing multiple water heaters in the same gas supply system it is recommended that individual positive lock-up gas Low pressure building gas supply systems are defined as those pressure regulators be installed at each unit. systems that cannot under any circumstances exceed 14”... -
Page 21: Space Heating And Potable Water System
THERMAL EXPANSION SPACE HEATING AND POTABLE WATER SYSTEM As water is heated, it expands (thermal expansion). In a closed Your water heater is equipped with inlet/outlet connections for use system the volume of water will grow when it is heated. As the in space heating applications (see Figure 9). -
Page 22: Temperature-Pressure Relief Valve
TEMPERATURE-PRESSURE RELIEF VALVE T&P VALVE DISCHARGE PIPE REQUIREMENTS: • Shall not be smaller in size than the outlet pipe size of the valve, This water heater is provided with a properly rated/sized and certified or have any reducing couplings or other restrictions. combination Temperature-Pressure Relief Valve (T&P relief valve) by •... -
Page 23: Condensate Drain Installation
7. Condensate clean out cap must be on and tight when unit is in THIS SIDE VIEW EXHAUST (VENT) operation. OF EXHAUST ELBOW ELBOW AND ARROW INDICATE HIGH ALTITUDE INSTALLATIONS CONDENSATE THE LOCATION OF DRAIN LINE THE PRESSURE CONNECTION PORT DRAIN LINE TO TERMINATE NO MORE THAN 6 INCHES (15.2cm) ABOVE DRAIN... -
Page 24: Installation Requirements For The Commonwealth Of Massachusetts
INSTALLATION REQUIREMENTS FOR THE COMMONWEALTH OF MASSACHUSETTS For all side wall terminated, horizontally vented power vent, direct vent, and power direct vent gas fueled water heaters installed in every dwelling, building or structure used in whole or in part for residential purposes, including those owned or operated by the Commonwealth and where the side wall exhaust vent termination is less than seven (7) feet above finished grade in the area of the venting, including but not limited to decks and porches, the following requirements should be satisfied: INSTALLATION OF CARBON MONOXIDE DETECTORS At the time of installation of the side wall horizontal vented gas fueled... -
Page 25: Venting Installation
VENTING INSTALLATION combustion air intake during severe cold weather. To prevent the recirculation of flue gases, maintain as much distance as possible between the combustion air intake and the exhaust vent terminal refer to Figure 16 and Figure 17 on Page 29 & Page 30 respectively. -
Page 26: Polypropylene Installations
POLYPROPYLENE INSTALLATIONS Polypropylene vent systems do not use cement to connect the pipe and elbow sections but use a push together gasket seal method. The water heater has been approved to be installed with Do not attempt to connect Polypropylene with sealant cement. All Polypropylene vent material as shown in Table 5 and Table 6. -
Page 27: Vent Pipe Termination
VENT PIPE TERMINATION INSTALLATION OF HORIZONTAL THROUGH THE WALL VENT SYSTEM The first step is to determine where the vent pipe will terminate. See Figures 12 through 20. The vent may terminate through a sidewall If you are installing your system so that it vents through roof, please as shown in Figures 12, 14 and 15 or through the roof as shown refer to section titled VERTICAL VENT TERMINAL INSTALLATION. -
Page 28: Direct Vent Terminal Installation
DIRECT VENT TERMINAL INSTALLATION B.) WOODEN SIDE WALLS Drill a pilot hole approximately one quarter inch outside of the marked circle. This The air intake provided on the unit contains an air intake screen to pilot hole is used as a starting point for a saws-all or prevent large particles from entering the unit. -
Page 29: Termination Clearances Sidewall Power Vent
TERMINATION CLEARANCES SIDEWALL POWER VENT POWER VENT (using room air for combustion) EXTERIOR CLEARANCES FOR SIDEWALL VENT TERMINATION F IX E D C L O S E D O P E R A B L F IX E D C L O S E D O P E R A B L VENT TERMINAL AIR SUPPLY INLET... -
Page 30: Termination Clearances Sidewall Direct Vent
TERMINATION CLEARANCES SIDEWALL DIRECT VENT DIRECT VENT (using outdoor air for combustion) EXTERIOR CLEARANCES FOR SIDEWALL VENT TERMINATION F IX E D C L O S E D O P E R A B L F IX E D C L O S E D O P E R A B L VENT TERMINAL AIR SUPPLY INLET... -
Page 31: Vertical Vent Terminal Installation
VERTICAL VENT TERMINAL INSTALLATION WHEN TERMINATING THROUGH A ROOF, THE FOLLOWING SPECIFICATIONS PERTAINING TO TERMINAL LOCATION MUST BE FOLLOWED. 1. Proper support must be provided for all pipe protruding through the roof. 2. The vertical roof terminations should be sealed with a plumbing roof boot or equivalent flashing. -
Page 32: Direct Vent Diagram
DIRECT VENT DIAGRAM 12” MINIMUM CLEARANCE ABOVE HIGHEST ANTICIPATED SNOW LEVEL 12” MINIMUM CLEARANCE ABOVE HIGHEST ANTICIPATED SNOW LEVEL Figure 21 Figure 22 24” MINIMUM SEPARATION. EXHAUST MUST BE AT SAME LEVEL OR ABOVE INTAKE TERMINAL. SNORKELING IS ALLOWED TO ACHIEVE PROPER CLEARANCE. -
Page 33: Concentric Vent Installation
CONCENTRIC VENT INSTALLATION INSTALLATION VERTICAL ROOF TERMINATION This water heater is certified for concentric venting with concentric 1. Determine best location for termination kit. vent kit #9006328005. Follow instructions below for proper installations. N O T E : R o o f t e r m i n a t i o n i s p r e f e r r e d s i n c e i t i s l e s s susceptible to damage, has reduced chances to intake contaminants, Table 8 –... - Page 34 INSTALLATION SIDE WALL TERMINATION NOTE: Do not allow insulation or other materials to accumulate inside pipe assembly when installing through hole. 5. Secure assembly to roof structure as shown in Figure 28 using field supplied metal strapping or equivalent support material.
- Page 35 MULTI-CONCENTRIC VENT TERMINATIONS 6. Ensure the Y connection is oriented so the air intake side of Y is on top, see Figure 31. When two or more water heaters are direct vented with concentric vent terminations near each other, each water heater must be 7.
-
Page 36: Low Profile Termination Installation
LOW PROFILE TERMINATION INSTALLATION This water heater is certified for sidewall direct venting with IPEX System 636 Low Profile Vent Kit. Follow instructions below for proper installations. To Boiler Intake Air Connection All termination kits must be located and installed in accordance with local codes or the current editions of the National Fuel Gas Code From Boiler Vent (ANSI Z223.1/NFPA 54). -
Page 37: Lighting And Operation Labels
LIGHTING AND OPERATION LABELS Set the “ENABLE/DISABLE” switch on the control panel to the “DISABLE” position. Operating Set Point: 130° F Status: Heating Wait five (5) minutes to clear out any gas. Then smell for gas, including near the floor. If you smell gas, STOP! Follow “B”... -
Page 38: Temperature Regulation
TEMPERATURE REGULATION It is recommended that lower water temperatures be used to avoid Valves for reducing the point-of-use temperature by mixing cold and the risk of scalding. It is further recommended, in all cases, that the hot water are available. Also available are inexpensive devices that water temperatures be set for the lowest temperature which satisfies attach to faucets to limit hot water temperatures. -
Page 39: Control System Operation
CONTROL SYSTEM OPERATION OVERVIEW • The operational buttons are used to enter/exit menus, select menu items, activate adjustment modes and confirm or cancel new user settings. The operational buttons are multifunctional, The water heaters covered in this manual are equipped with an their current function is defined by the text that appears directly electronic control system that regulates water temperature inside above each button on the LCD screen. - Page 40 STATUS ICONS The Status Icons are displayed on the Desktop screen and convey operational and diagnostic information. The icons are described in the table below. Table 12 – STATUS ICONS Icon Description Water temperature in the tank has fallen. Shaded area of the animated thermometer icon will rise and fall in response to water temperature in the storage tank as sensed from the Temperature Probe.
- Page 41 OPERATING STATES The current operational state of the water heater is displayed on the Desktop screen as the Status. The common operational states are described in the table below. Table 13 – OPERATING STATES State Description The water heater is not in an active heating cycle. IE: the Tank Temperature is at or above the Operating Set Point minus Standby temperature differential.
-
Page 42: User Settings & Control System Menus
USER SETTINGS & CONTROL SYSTEM MENUS TEMPERATURES OPERATING SET POINT AND DIFFERENTIAL ADJUSTMENT The Operating Set Point is adjustable from 90°F (42°C) to 160°F (71°C). The factory setting is 120°F (49°C). The Differential is adjustable from 2° to 20°. The factory setting is 8°. These user settings are accessed from the Temperatures menu. These instructions explain how to adjust these settings and navigate the control system. - Page 43 TEMPERATURES (CONT) DESCRIPTION/ACTION DISPLAY • Tank Probe Offset - adjustable user setting, range -5° to +5°F (factory setting 0°F). Temperatures The Tank Probe Offset is used to calibrate control system Operating Set Point 140°F temperature sensing. This offsets to more effectively read Differential 8°F point of use temperature in the tank.
- Page 44 DISPLAY SETTINGS DESCRIPTION/ACTION DISPLAY Select Display Settings from the Main Menu and press the Display Settings Operational Button under "SELECT" to enter this menu. This menu contains adjustable display options for viewing information on the Temperature Units °F LCD screen. Use the Up & Down Buttons to navigate the menu. Backlight Delay •...
-
Page 45: Blocked Exhaust
CURRENT FAULT DESCRIPTION/ACTION DISPLAY Select Current Fault from the Main Menu and press the Operational Button under "SELECT" to enter this menu. This menu contains non Blocked Exhaust adjustable operational information. Use the Up & Down Buttons to Fault occurred 2 mins ago navigate the menu. - Page 46 SERVICE CONTACT INFORMATION The control system has a discrete menu that Installing contractors and/or qualified service technician can access to enter contact information for their customers. This contact information will be displayed with all Fault and Alert messages. DESCRIPTION/ACTION DISPLAY From the Desktop Screen press and hold down the middle Service Contact Information (unmarked) Operational Button for 30 seconds and then release it.
-
Page 47: For Your Information
FOR YOUR INFORMATION START UP CONDITIONS the anode rod is one of a rotten egg smell in the hot water. The smell is a result of four factors which must all be present for the odor to develop: SMOKE/ODOR It is not uncommon to experience a small amount of smoke and odor a. -
Page 48: Periodic Maintenance
PERIODIC MAINTENANCE VENTING SYSTEM INSPECTION by protecting the glass-lined tank from corrosion. Adverse water quality, hotter water temperatures, high hot water usage, hydronic heating devices, and water softening methods can increase the rate of anode rod depletion. Once the anode rod is depleted, the tank will start to corrode, eventually developing a leak. -
Page 49: Powered Anode Rod (Optional Models)
POWERED ANODE ROD (OPTIONAL MODELS) If the Temperature-Pressure Relief Valve on the water heater weeps or discharges periodically, this may be due to thermal To insure a long, trouble-free operating life, certain models of expansion. water heaters covered in this manual are factory equipped with a powered anode system. -
Page 50: Service
TO DRAIN THE WATER HEATER STORAGE TANK: 7. Flush the water heater storage tank to remove sediment and allow the water to flow until it runs clean. 1. Turn off the electrical supply to the water heater. 8. Close the water heater drain valve when flushing is completed. 2. -
Page 51: Leakage Checkpoints
LEAKAGE CHECKPOINTS Never use this water heater unless it is completely filled with water. To prevent damage to the tank, the tank must be filled with water. B:Anode Water must flow from the hot water faucet before turning “ON” gas to the water heater. -
Page 52: Troubleshooting
TROUBLESHOOTING INSTALLATION CHECKLIST Flow Chart. When the control system is first powered, during boot up, the The list below represents some of the most critical installation requirements that, when overlooked, often result in operational blower will run momentarily and stop, and the control system problems, down time and needless parts replacement. -
Page 53: Sequence Of Operation Flow Chart
SEQUENCE OF OPERATION FLOW CHART If tank temperature drops below Operating Set Point minus Differential setting a heating cycle is activated Control System performs diagnostic checks Normal State of all pressure switches and ECO are checked Control System Locks Out Blower Prover pressure switch verified open Displays Fault Msg All other pressure switches and ECO are verified closed... -
Page 54: Operational Problems
OPERATIONAL PROBLEMS If the Main Burner ignites momentarily but does not sustain ignition allow the water heater to try to ignite up to two more times until control system locks out and the Ignition Failure Fault message is displayed on the control system's LCD. -
Page 55: Fault And Alert Conditions
FAULT AND ALERT CONDITIONS are operational problems. This is not a complete list. Along with each of the Fault and Alert messages described there will be a list FAULT CONDITIONS of possible causes and things to check and repair. When the control system declares a Fault condition it will display a Only qualified service technician, as defined in Qualifications using Fault message on the control system's LCD with an exclamation "!"... -
Page 56: Blower Operation Error
FAULT AND ALERT MESSAGES (CONT) Call the technical support phone number listed on the back cover for further technical assistance or to locate a qualified service technician in your area. POSSIBLE CAUSES - CHECK/REPAIR DISPLAYED FAULT/ALERT MESSAGE Blower Operation Error •... -
Page 57: Wiring Diagram
WIRING DIAGRAM CAUTION LABEL ALL WIRES PRIOR TO DISCONNECTION WHEN SERVICING CONTROLS. WIRING ERRORS CAN CAUSE IMPROPER AND DANGEROUS OPERATION. VERIFY PROPER OPERATION AFTER SERVICING. Figure 42: WIRING SCHEMATIC... -
Page 58: Notes
NOTES... - Page 59 NOTES...
Need help?
Do you have a question about the 650YTPDT and is the answer not in the manual?
Questions and answers