Table of Contents
Advertisement
Quick Links
Advertisement
Table of Contents

Related Manuals for THOR Palazzo 2015


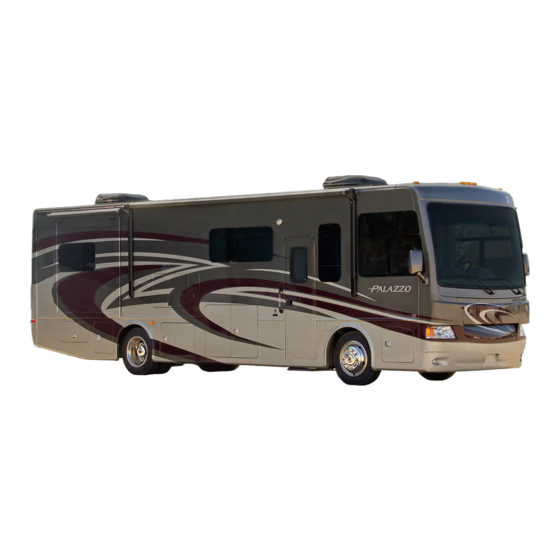
Summary of Contents for THOR Palazzo 2015
- Page 2 Congratulations on your recent purchase of a Thor Motor Coach Recreational Vehicle. We sincerely thank you for choosing and putting your faith in Thor Motor Coach. We want you to know that your satisfaction is of great importance to us. Our major goal is to provide you with a quality recreational vehicle at a reasonable price.
- Page 3 This page intentionally left blank...
- Page 4 I agree that the vehicle is to be used only for travel on improved roads. I also agree that the selling dealer is not an agent for Thor Motor Coach but is an independent company with no authority to make any representation or promise for Thor Motor Coach.
- Page 5 FOLD HERE PLACE STAMP HERE THOR MOTOR COACH P.O. Box 1486 ELKHART, INDIANA 46516 FOLD HERE TAPE - PLEASE DO NOT STAPLE...
-
Page 6: Table Of Contents
Table of Contents Introduction Living Room Television How to Use this Manual Doors & Drawers Reporting Safety Defects Under Bed Storage Warranty Sofa/Hide-A-Bed Production changes Air Hide-A-Bed Owner Responsibility Expandable J-Lounge Major Equipment Suppliers Euro Chair Planning and Preparation Dinette Read the Book Captain’s Chairs Licenses... - Page 7 Table of Contents Inverter High Pressure Laminate Countertop Inverter Remote Panel Hardware Power Control System Kitchen Fixtures Ground Fault Circuit Interrupter Blinds & Shades Battery Control Center Sinks 12V System Fuses Solid Surface Countertop Circuit Breakers Upholstery & Fabrics Chassis Alternator Wall Coverings Generator Pre-Finished Panels...
-
Page 8: Introduction
This manual is not model specific, which means that it is used for a variety of different models that Thor Motor Coach manufactures. It is of a general nature, so the illustrations and descriptions may not be exactly as they are in your particular motorhome. - Page 9 You must include the dealer’s name as well as the model and serial number of your motorhome. The Thor Motor Coach serial number is located on the bottom of the federal sticker, which is located in the driver’s compartment area. Thank you for choosing our product.
-
Page 10: Warranty
Warranty... - Page 11 “What is Not Covered”. “Defect” means the failure of the workmanship performed and/or materials used to conform to the design and manufacturing specification and tolerances of Thor Motor Coach (“TMC”). The Limtied Warranty is not transferable. WHAT IS NOT COVERED: Any motorhome used for rental purposes or sold or registered outside of the United States or Canada;...
- Page 12 If the primary repair remedy fails to successfully cure any defect after a reasonable number of repair attempts, your sole and exclusive remedy shall be to have Thor Mortor Coach pay an independent service shop of your choice to perform repairs to the defect ORif the defect is incurable, have TMC pay diminution in value damages.
- Page 13 Before I purchased my motorhome, I received,read and agreed to the terms and conditions of this Limited Warranty. I understand and agree that the selling dealership is not an agent for Thor Motor Coach but is an independent entity. I understand and acknowledge that the chassis and components and appliances that are covered by a warranty issued by their manufacturer are excluded from coverage under the terms of this Limited Warranty.
-
Page 14: Production Changes
CHANGES Vehicles previously built and/or sold by Thor Motor Coach. As the proud owner of a Thor Motor Coach, you want to trust that your unit will continue OWNER to perform at its peak. To ensure this Thor Motor Coach has provided you this checklist RESPONSIBILITY of the responsibilities of the Thor Motor Coach owner. - Page 15 Thor Motor Coach dealer at their service center or facility only. If you are unable to bring your unit in for repairs, Thor Motor Coach is not responsible for the cost of the actual service call charged to come out to your unit.
-
Page 16: Major Equipment Suppliers
Warranty SUPPLIERS PROVIDING SEPARATE WARRANTIES The following list of components has been compiled to help you know which products on your motorhome may have their own warranties. If you have any of these components on your motorhome, be sure to check the literature supplied by the manufacturer to see if they require that you register your purchase with them to validate their warranty. - Page 17 Warranty...
-
Page 18: Planning And Preparation
Your motorhome is considerably larger and heavier than your car, therefore certain precautions should be exercised. A CDL license may not be required to operate your motorhome, but Thor Motor Coach recommends you attend a CDL class to better understand the motorhomes driving and handling characteristics. -
Page 19: Opening Checklist
Planning and Preparation Wheel Lugs Must be tightened to the specifications in the Chassis Manufacturer’s Owner’s Manual. Windshield Should be clean, wiper blades inspected, and windshield washer reservoir filled. Lights Should be tested, including brake lights, warning flashers, clearance lights, tail lights, turn signals and headlights. - Page 20 Planning and Preparation • Changing the wiper blades on your motorhome is similar to your car. Remove the screw, take off the old blade, and replace with a similar style and length blade. Lubricating pivot points with thin lubricating oil is also recommended. •...
-
Page 21: Weights
Federal Weight Label WEIGHT SPECIFICATIONS The Thor Motor Coach Motorhome yellow label concisely states the occupant and cargo carrying capacity of your motorhome ( per the requirements of 49 CFR part 571.120 as issued by the National Highway Traffic Safety Administration - NHTSA). -
Page 22: Weighing Your Motorhome
Planning and Preparation The total weight of passengers, cargo, trailer tongue weight, and water should never exceed the value shown on the label. A typical example of this label is shown below for reference purposes only. The numbers shown on this page may not be applicable to your vehicle. Please reference the Yellow label affixed directly to the door of your motorhome for your actual Occupant and Cargo Carrying Capacity: MOTOR HOME OCCUPANT AND CARGO CARRYING CAPACITY... - Page 23 Association. Used with permission. ( http:// www.rma.org/tire_safety/ ) For improved accuracy, Thor Motor Coach recommends using a segmented 4-pad scale, when possible, to determine individual wheel weights. The corner weights should not exceed half of the respective Gross Axle Weight Rating (GAWR) or the maximum load rating for the tire or set of dual tires at the rear, whichever is less.
- Page 24 Planning and Preparation The following is an explanation of commonly used weight abbreviations: • Gross Vehicle Weight Rating (GVWR) is the maximum permissible weight of this motorhome. • Unloaded Vehicle Weight (UVW) is the weight of this motorhome as manufactured at the factory with full fuel, engine oil, and coolants. •...
-
Page 26: Identification And Safety
Identification and Safety LAWS OF THE It is advisable to contact the Department of Motor Vehicles in each respective state, for up-to-date information regarding operation and licensing requirements for your ROAD particular motorhome. The state of California currently requires operators of motorhomes over 40 feet in length to obtain a non-commercial class B license. -
Page 27: Fire Safety
Identification and Safety FIRE SAFETY ANY MOTORIZED VEHICLE OR ANY MOTORIZED EQUIPTMENT POWERED WITH FLAMMABLE LIQUID CAN CAUSE FIRE, EXPLOSION, OR ASPHYXIATION IF STORED OR TRANSPORTED WITHIN THE RECREATIONAL VEHICLE. tO REDUCE THE RISK OF FIRE, EXPLOSION, OR ASPHYSIATION: 1. Do not ride in the vehicle storage area while vehicles are present. 2. -
Page 28: Smoke Detector
Identification and Safety Underwriter Laboratories classify fires into three types: Class A: Fires in wood, paper, fabric, rubber, and certain plastics Class B: Flammable liquids such as grease, cooking oils, gasoline, or kerosene Class C: Electrical fires started from live electrical wires, from short circuits, motors, or switches The fire extinguisher, which is located by the entry door of the motorhome, is a chemical type suitable for extinguishing small fires of the class B or C type. - Page 29 Identification and Safety The smoke alarm will only indicate the presence of smoke that reaches the sensor. The smoke alarm is not designed to sense gas, heat or flames. For instruction on programming the alarm refer to the Smoke Alarm User’s Manual within your Owner’s Packet for detailed setup information.
-
Page 30: Carbon Monoxide Safety Precautions
Identification and Safety Choosing a Your Smoke Alarm requires one standard 9V battery. The following batteries are acceptable as replacements: Duracell #MN1604, (Ultra) #MX1604; Eveready Replacement Battery (Energizer) #522. You may also use a Lithium battery like the Ultralife U9VL-J for longer service life between battery changes. -
Page 31: Lp Gas/Carbon Monoxide Detector
Identification and Safety Only personnel trained in the handling of Propane may fill, test or repair the Propane gas system. Propane gas regulators must always be installed with the diaphragm vent facing downward. Regulators that are not in compartments have been equipped with a protective cover. - Page 32 Identification and Safety Checking the ROAD VIBRATION CAN LOOSEN PROPANE FITTINGS. It is important to check the Propane system for leaks at least Propane System for every 5,000 miles, and whenever the tank is filled. It is also Leaks a good idea to have the entire Propane system checked annually by a qualified Propane service representative.
-
Page 33: Chemical Sensitivity
This is a normal function of the LP Gas Detector. See your Thor Motor Coach Dealer or a qualified Propane Service Center should service be required. If they are not familiar with this product, have them call the detector manufacturer for assistance. -
Page 34: Seat Belts
Child Restraints If your child requires a child safety restraint system (seat), Thor Motor Coach recommends installing the child safety seat in the forward facing booth dinette position. For rear-facing child seats and infant carriers, the dinette table can be placed in the “down”... -
Page 35: Egress Window
Identification and Safety Note: Always follow the instructions and warnings that come with any infant or child restraint you might use. If the child is the proper size, restrain the child in a safety seat. Children who are too large for child safety seats (as specified by your child safety seat manufacturer) should always wear safety belts. - Page 36 Damage to the motorhome, towed vehicle or towing device will result. Note: Thor Motor Coach accepts no responsibility for damage to the chassis and other components resulting from towing loads greater than its designated class specifications. Also consider the gross combined weight rating of the motorhome before towing a trailer or vehicle.
-
Page 38: Chassis
Chassis Note: All issues regarding the chassis warranty, parts and service should be directed to the chassis manufacturer. The following section is for reference only. For detailed information regarding product information and proper maintenance of the chassis, refer to the chassis manufactures owner’s manual. -
Page 39: Engine Access
Chassis ENGINE ACCESS IF THE ENGINE COVER IS NOT SEATED CORRECTLY, EXHAUST GASES MAY LEAK INTO THE MOTORHOME, CREATING A DANGEROUS AND POTENTIALLY LETHAL SITUATION. The motorhome engine can be accessed for service from inside the motorhome. The access hatch is typically in the floor at the rear of the coach. When reinstalling the engine cover, make sure that it is seated correctly without obstruction from carpet, floor mats, etc. - Page 40 Chassis Exterior Checks • Security of any auxiliary equipment such as TV and awning, etc. • Windshield wiper blades • Generator compartment • Fresh and waste water connections/drains and supplies such as high pressure hose. Undercarriage Checks • Propane compartment/tank •...
- Page 41 Chassis...
-
Page 42: On The Road Safety
On the Road Safety DRIVING When driving your motorhome, you’re driving a large vehicle, and you should become accustomed to the feel of the controls and the reference points from the driver’s seat. Become familiar with the position of the motorhome in traffic, and be cautious while maneuvering to allow for the length and width of the vehicle. -
Page 43: Tire Care
On the Road Safety Never place the jack under a bumper or under the edge of the sidewall. Always place the jack as specified by the chassis owner’s manual. Never use the rear differential as a jacking point. Use the jack only for changing tires. NEVER get underneath the vehicle when using the jack;... - Page 44 Storing a jack, a tire, or other equipment in the passenger compartment of the vehicle could cause injury. Store and secure all of these items in a proper place. Note: Thor Motor Coach does not provide jacks with our motorhomes.
-
Page 46: Controls And Operations
Controls and Operations AUTOMOTIVE DASH Driving a motorhome is similar to driving a car. You have an ignition switch, gearshift controls, turn signals, and dash components. As you sit in the driver’s seat the center of the cluster may include a tachometer, speedometer, fuel gauge, oil gauge, temperature gauge, and amp meter. - Page 47 Controls and Operations WIPERS: This switch is for HIGH, LOW or intermittent operation. WASH: This switch located on the wiper switch provides washer fluid to the windshield. Check the washer fluid level prior to trips. Some washer fluid can freeze, so be aware of the temperature conditions where you will be traveling in order to add the proper type of fluid to your washer reservoir.
-
Page 48: Smart Wheel
Controls and Operations Smart Wheel (Option) The Smart Wheel allows you to control the windshield wiper, cruise control, and ICC button functions from the steering wheel as well as offering a headlight interrupt button. Please reference the Freightliner Chassis Owner’s Manual for detailed instructions on the Smart Wheel option STEERING WHEEL Never attempt to adjust the steering wheel while the... -
Page 49: Rear Vision System/Dash Radio - No Navigation
Satellite-Ready means that the in-dash radio will work with a satellite radio tuner should you decide to install one. Thor Motor Coach does not provide the optional remote control for this system. Basic Operations are listed below. For complete information, consult the product owner’s manual provided in your unit packet. -
Page 50: Rear Vision System/Dash Radio - With Navigation
Satellite-Ready means that the in-dash radio will work with a satellite radio tuner should you decide to install one. Thor Motor Coach does not provide the optional remote control with this system. Basic Operations are listed below. For complete information, consult the product owner’s manual provided in your unit packet. - Page 51 Controls and Operations 14. Map Cover - Covers the Mini SD card slot. The Mini SD card is used for the Navigation Map only, not for music or other files. This may be used for firmware updates if required. MAKE SURE TO CHECK THE MIRRORS WHEN DRIVING AND BACKING FOR A MORE COMPLETE FIELD OF VISION.
-
Page 53: Automatic Hydraulic Power Levelers
Controls and Operations AUTOMATIC FAILURE TO ACT IN ACCORDANCE WITH THE FOLLOWING MAY RESULT IN SERIOUS PERSONAL INJURY OR DEATH. HYDRAULIC Read the entire operators manual and all precautions POWER LEVELERS prior to operating this equipment. Do not use the jacks to change the tires. The system is designed as a leveling and stabilizing system and is not meant to lift the motorhome off the ground. - Page 54 Controls and Operations Turn on power Press auto-level touch pad Retracting the jacks...
- Page 55 Controls and Operations FOLLOWING MANUAL OVERRIDE OPERATION, FAILURE Emergency CAUTION TO RETURN ALL VALVES TO NORMAL POSITION MAY Retraction Procedure RESULT IN ONE OR MORE JACK LEGS DRIFTING DOWN FROM THEIR RETRACTED (STOWED) POSITION. FOR CARTRIDGE VALVES, ROTATE THE CENTER SCREW FULLY COUNTER-CLOCKWISE.
- Page 56 Controls and Operations Hydraulic Pump Function Wiring...
-
Page 57: Slide Outs
3. Install the room locking devices if equipped. 4. If the room will not retract, refer to the “Manual Retract Procedure”. Electric Slide Out Note: Please consult Thor Motor Coach for information regarding - Manual Room this procedure. Retraction Procedure... - Page 58 Controls and Operations InWall Slide Out 1. Completely retract the slide out. 2. Allow the motors to amp out and hold the switch for an additional 3-5 seconds. Timing the 3. Extend the slide out anywhere from 2-4 inches (enough to break the seal) and Schwintek slide stop.
- Page 59 Controls and Operations Electronic Manual Override 1. Locate the circuit board. 2. Press the “mode button” six times quickly, then press a seventh time and hold for approximately five seconds. 3. The red and green LED lights will begin to flash, confirming the override mode. 4.
- Page 60 Controls and Operations Motor direction switches are used to change the direction of individual motors. If when trying to extend or retract the room, one side goes in and the other side goes out, then there is a problem in the wiring. The motor direction switches can be used to correct this problem.
-
Page 61: Windows
Controls and Operations WINDOWS All the windows that open in the motorhome are operated by sliding them back and forth. To operate, pivot the latch to release it from the locked position, and slide the window to open. When closing, slide the window fully closed, and pivot the latch back to the fully locked position. -
Page 62: Sofa/Hide-A-Bed
Controls and Operations DO NOT OCCUPY BEDS OR ANY OTHER SEATS THAT ARE NOT EQUIPPED WITH SAFETY SEAT BELTS WHILE THE MOTORHOME IS IN MOTION. DO NOT USE A SEAT BELT ON MORE THAN ONE PERSON. The sleeping accommodations in this motorhome are designed for occupancy only while the motorhome is parked. -
Page 63: Euro Chair
Controls and Operations Note: Make sure you close the J-lounge or return any sofa to its original seating position before retracting the slide rooms to avoid damage. EURO RECLINER The euro recliner, where equipped, has controls on the left side of the chair that release the footrest. -
Page 64: Bedroom Door & Latch
Controls and Operations BEDROOM DOOR & Some Thor Motor Coach bedroom doors slide conveniently out of the way beside the wall. Thor Motor Coach provides a latch to secure the door while LATCH the motorhome is in motion. SHADES To lower the shade, pull down the bottom of the shade down to the desired level and release. -
Page 65: Refrigerator
Controls and Operations REFRIGERATOR Your motorhome may be equipped with a residential style refrigerator. These refrigerators operate only on 120 Volt power. Please refer to the Refrigerator Owner’s Manual in your Owner’s Information Kit for detailed operating instructions. The microwave operates on 120 Volt power provided by the generator or shoreline. MICROWAVE/ It will de-program when the power is discontinued and must be reprogrammed when... -
Page 66: Entry Door
The main entry door is a two piece door. You can use the screen door separately from the main door by unlatching it. Slide the screen handle cover closed to keep insects out of your motorhome. If the door needs adjustment, see a Thor Motor Coach dealer for service. -
Page 67: Compartment Doors & Storage Compartments
Controls and Operations THE UNDER STEP LIGHT OPERATION: 1. The light is ON when the step is extended. 2. The light is OFF when the step is retracted. 3. Turn the override switch to the ON position. The step should remain in the extended position with the under step light OFF when the door is closed. -
Page 68: Awnings
Controls and Operations Thor Motor Coach motor coaches have plywood reinforced roofs which are strong enough to walk on. Use the ladder to climb up on the roof for inspecting the roofing seal and components. Take the ladder into consideration when backing up or parking your motorhome. -
Page 69: Fireplace
Refer to the Generator Owner’s Manual for operating and maintenance information. FURNACE DOOR The furnaces used by Thor Motor Coach have electronic ignition, and there is no need to access this panel except for service. As with all appliances, service is best left for your dealer. -
Page 70: Power Cord Reel
Controls and Operations Your motorhome may be equipped with a power cord reel to aid in the storage of your POWER CORD REEL shoreline power cord. Your motorhome may be equipped with a slide out battery tray. To extend the tray, BATTERY SLIDE push the two ends of the latch together, slide the tray out to the desired position, then TRAY... -
Page 71: Entertainment
If you cannot find a resolution to your issue you may contact a Thor Motor Coach Dealer with questions or contact the Thor Motor Coach Customer Service Department at 877-855-2867. -
Page 72: A/V Quick Guide
This guide is not model year specific and your coach may differ based on time of A/V QUICK GUIDE manufacturing. Any further questions should be directed towards a Thor Motor Coach authorized dealer, You may also contact Thor Motor Coach Customer Service at... - Page 73 Entertainment Home Theater System Turn on the TV power. Main Living Area TV 1. Insert DVD into Home Theater. (See EX. 1) 2. On the Home theater front panel, press the function button until the display shows “CD/DVD” 3. Using the TV remote, set the living room TV input to “HDMI 1” Turn on the TV power.
-
Page 74: Sample A/V Hook-Up Diagram
2. Using the TV remote, find and depress the “input” button to set the TV input to “HDMI 1”. SAMPLE A/V HOOK - The following pages contain examples of the audio/visual hook-ups used in Thor UP DIAGRAMS Motor Coach Units. The charts shown may differ from that of your unit due to the differences in floor plan and options that may or may not be installed on your coach. -
Page 80: Heating And Air Conditioning
Warranty/Service If repairs are necessary during the terms of the motorhome warranty, please contact the nearest authorized Thor Motor Coach dealer for service. In the event repairs are necessary during transit, contact Thor Motor Coach Customer Service. Certain individual parts of the Heating and Air Conditioning System such as the compressor, dryer and condenser are covered under the chassis manufacturer warranty. -
Page 81: Roof Mounted Air Conditioner
Heating and Air Conditioning The motorhome is equipped with a roof mounted air conditioner. This air conditioner ROOF MOUNTED operates from 120 Volt AC only, either from shore power or the on-board generator. AIR CONDITIONER Air conditioner functions are controlled by the comfort control panel. You can expect to see up to 15 to 20 degree differences in temperature between the Performance closest A/C outlet vent and the return air inlet grill under most operating conditions. -
Page 82: Thermostats
Heating and Air Conditioning Note: For detailed information regarding the thermostat refer to the THERMOSTATS manufacturer’s operating instruction manual. Single Zone A Cool, Fan and Heat thermostat, with a manual, “Cool”, "Fan" and “Off” and "HEAT" comfort switch. The thermostat can be operated in both manual (ON) and automatic mode (AUTO), on either high or low. - Page 83 SYSTEM Button The SYSTEM button is used to put the thermostat into either heating, cooling or off. When in OFF, the system will not operate any heating or cooling appliances. However, the LCD display will still show the room temperatures in each zone. When in HEAT, the system is in heating.
-
Page 84: Ceiling Vents
2. Pressing the MODE button will toggle through the available speeds. • “COOL AUTO” setting allows the fan speed to vary depending on the cooling needs. This is the default setting. • “COOL HIGH” or “COOL LOW” setting will set the fan speed to run continuously at high or low, but the upper unit will cycle when cooling is needed. -
Page 85: Hydronic Heating
HYDRONIC HEATING Your motorhome may be equipped with a hydronic heating system. this system will provide heat as well as hot water for your coach. Please see the owner’s manual for detaited operating and matenance instructions. WHEN THE AQUA-HOT IS AT MAXIMUM OPERATING TEMPERATURE, THE COOLANT WILL BE VERY HOT! IF THE AQUA-HOT’S HEATING SYSTEM IS ACCESSED, SCALDING BY HOT VAPOR OR... - Page 86 Activating the Aqua-Hot Heating System Diesel-Burner: Turn the Burner switch ON. This will activate the Diesel-Burner and the indicator light located adjacent to the Diesel-Burner switch. Allow 10-20 minutes for the Aqua- Hot System to reach operating temperature. Please note that the Diesel-Burner is the primary heat source for heating both the interior and the domestic hot water (such as when cool ambient temperatures exist and/or when there is a high demand for domestic hot water).
- Page 87 Heating and Air Conditioning...
-
Page 88: Electrical Systems
(DC) 12 Volt service. Because of the many model variations and options, it is not possible to provide wiring diagrams in this manual. We recommend that any electrical work be done by a Thor Motor Coach dealer or a qualified RV electrician. Note: The electrical system is engineered and tested for safety. -
Page 89: Batteries
Electrical Systems DO NOT USE A STANDARD HOUSEHOLD EXTENSTION CORD TO CONNECT YOUR MOTORHOME TO ELECTRICAL SERVICE. IF SHORE POWER SERVICE IS LIMITED TO 15 OR 20 AMPS, USE OF LIGHT DUTY EXTENSION CORDS AND ELECTRICAL ADAPTERS WILL CREATE A VOLTAGE LOSS THROUGH THE CORD AND AT EACH ELECTRICAL CONNECTION. - Page 90 Electrical Systems BATTERIES CAN EXPLODE! Always wear splash proof safety glasses when working near batteries. Do not smoke or expose any battery to electric sparks or flame. Batteries, when charging or discharging, generate hydrogen. Hydrogen and air is a very explosive mixture.
- Page 91 Electrical Systems has been operated continually in a state of partial discharge. Use a baking soda solution to neutralize the acid accumulations on the battery top. Do not allow the soda solution to enter the battery. Make sure the vent caps are secure. Flush with water. Thoroughly dry all cables and terminals, reinstall, and use a plastic ignition spray to protect the terminals.
-
Page 92: Power Converter
Electrical Systems Battery Charging The converter/inverter also operates as a battery charger when it is connected to a 120V power source. If the battery is below its full charge, the converter/inverter charger will begin operation at a rate that reflects the level of discharge. When the battery is again fully charged, the converter charger drops its charging level back to a maintenance level to keep the battery fully charged. -
Page 93: Inverter Remote Panel
Electrical Systems INVERTER REMOTE Note: Please refer to the Magnum Remote panel owner’s manual provided in your unit pack for detailed instructions. CONTROL The front panel contains LEDs and a LCD display for viewing system Front Panel status, pushbuttons to control system operation, and a rotary knob that allows an easy way to select and find system information. -
Page 94: Power Control System
Electrical Systems Menu Pushbuttons SHORE: This pushbutton allows you to set the appropriate breaker size for the incoming utility/shore power and is used to control the amount of AC amps the battery charger uses from the HOT 1 IN input. AGS: This pushbutton allows the networked Auto Generator Start controller to be configured to specific system preferences and check status of the AGS, when connected. - Page 95 Electrical Systems Inverter Standby: The inverter is in standby when the inverter is active (green INV LED is on) and an external AC power (utility/shore or generator) is passing through the inverter to power the AC loads. During normal operation, the AC loads will be powered by the external AC power.
- Page 96 Electrical Systems Charger not charging even though CHG LED is on steady and the unit says “Charging”: Full charge rates are not obtained in Charging mode, only after this mode changes to Bulk Charging, Absorb Charging, or Float Charging modes. Charger not charging even though CHG LED is on steady and the unit says “Bulk Charging”...
- Page 97 Electrical Systems Note: Some older inverter models do not allow an inverter reset. If the inverter reset fails, you will need to power-down the inverter using the procedure below. In either case, if an internal fault does not clear, the inverter will require repair at an authorized service facility. Note: The Power ON/OFF pushbutton is a small momentary type switch which operates by lightly pressing and releasing.
- Page 98 Electrical Systems Central Monitor Panel The PCS Monitor displays pertinent power control system status information. The Up and Down buttons are used to step through each individual screen of information. Pressing & releasing either the Up or Down button will step to either the Previous or Next Display Screen.
- Page 99 Electrical Systems Operation Mode This Screen gives the general information about Load Status. The first line shows the status of the battery charger. It will show one of the following: BatChargeNormal: Under complete battery charger control. BatChargeReduced: An owner activated appliance would have caused a circuit breaker to trip but instead the Bat Charger Rate has been reduced.
- Page 100 Electrical Systems Power Management When the current exceeds the limit, possibly because the owner has turned on an appliance such as a microwave, the PCS will independently limit the current on each line by performing the following in order: Reduce Battery Charge Rate Inverter Assist Load Shed.
-
Page 101: Ground Fault Circuit Interrupter
Electrical Systems GROUND Even with GFCI protection, persons with severe heart or other health problems may still be seriously affected by FAULT CIRCUIT an electrical shock. The GFCI outlet is not a substitute INTERRUPTER for good electrical safety. It DOES NOT protect against contact of the hot and neutral wire at the same time. -
Page 102: System Fuses
Your motorhome also has a 12 Volt fuse panel, electrical distribution box, located in one of the front compartments. These fuses protect the automotive features which are installed by Thor Motor Coach. There is a complete breakdown on the various fuses printed on the backside of this fuse panel cover. -
Page 103: Chassis Alternator
Electrical Systems Note: Should you lose 12 Volt power inside your motorhome, there is a 50 Amp Reset Button in the Battery Control Center. Remove cover from the black box to access. CHASSIS The automotive chassis 12 volt system alternator supplies power to both the ALTERNATOR automotive systems as well as any auxiliary battery if equipped, and directly to the motorhome living quarters while the vehicle’s motor is running. - Page 104 Electrical Systems • Dizziness • Vomiting • Nausea • Muscular twitching • Intense headache • Throbbing in the temples • Weakness and sleepiness • Inability to think coherently If you or anyone else experience any of these symptoms get to fresh air immediately. Shut the generator down and do not operate it until it has been inspected and repaired by a professional.
-
Page 106: Water Systems
Water Systems The motorhome plumbing system has the dual ability to be self-contained with on-board storage, or use facilities provided by an external pressurized source. In either case, the components of the system operate like those in your home. Components of the plumbing system consist of strong, lightweight, corrosion-resistant materials that provide long life, and easy cleaning. -
Page 107: Water Pump
Water Systems Note: Never leave the hose unattended while you are filling the fresh water tank. Note: Water will overflow through the vent located at the top of the fresh water tank If the tank is filled beyond capacity. When traveling, you may want to drain the tank, or keep the quantity of water in it to a minimum. -
Page 108: Low Point Drains
Water Systems Note: When filling the system, you may want to add additional water to the tank to replace the water used when filling the hot water tank and water lines. The fresh water storage tank supplies potable water to all fixtures within your motorhome by means of a 12 Volt water pump. -
Page 109: Monitor Panel
Water Systems Chlorine is poisonous. Recap bottle and clean any appliances used with soap and water. MONITOR PANEL The monitor panel allows you to quickly check the levels in the fresh water and waste water tanks. Electrical sensors at various points on the tanks send signals to the monitor panel. -
Page 110: Dumping The Holding Tanks
Water Systems DUMPING THE As mentioned previously, your holding tanks terminate together at one location for HOLDING TANKS convenience in dumping your tanks. A twist-on cap is located at the terminal outlet to help prevent leakage of materials. The holding tanks are enclosed sewer systems, and CAUTION must be drained into an approved dump station. -
Page 111: Termination Compartment Components
Water Systems TERMINATION The termination compartment has many operations. Please note that because of the various configurations of each individual motohome, the items listed below may or may COMPARTMENT not pertain to your unit. Listed below are the fixture call outs and functions: COMPONENTS 1. - Page 112 Water Systems Tecma - Silence Plus Water Saver Flush Press and release left button. Recommended for flushing liquids and small amounts Electric Toilet of toilet paper only. Normal Flush Press and release right button. Recommended for flushing solids and toilet paper. Empty Bowl Press both buttons simultaneously and release.
- Page 113 Dometic Electric Toilet ADD WATER SWITCH (1): Press to add water to the toilet bowl. FLUSH SWITCH (2): Press to empty toilet bowl. “POWER ON” INDICATOR (3) On the Dometic flush switch panel, a steady green “Power On” light indicates when electrical power to the toilet is activated.
-
Page 114: Lp System
LP System PROPANE GAS IS HIGHLY VOLATILE AND EXTREMELY EXPLOSIVE. DO NOT USE MATCHES OR A FLAME TO TEST FOR LEAKS. USE ONLY APPROVED PROPANE GAS LEAK TESTING SOLUTIONS FOR LEAK DETECTION. Unapproved solutions can damage copper tubing and brass fittings. Never attempt to adjust propane gas regulators. -
Page 115: Propane Regulator
LP System lights or appliances. This will allow any minimal leakage which occurred while filling the tank to dissipate. DO NOT light pilot lights if you continue to smell propane gas. Shut off the Supply Valve. Allow the motorhome to ventilate for 30 minutes. - Page 116 LP System Because air is required for proper operation of the regulator, it is very important that the regulator vent is kept clean and free of dirt and debris. This is why it is necessary to keep the vent facing downward and the regulator covered to protect if from contamination.
-
Page 117: Propane Gas Hoses
LP System propane gas tank as full as possible in cold weather, and reviewing the BTU/hr plates on propane gas appliances for proper propane management. PROPANE GAS Although the hoses, pipes, tubes, and fittings used in the propane gas system are HOSES PIPES designed to withstand pressures far exceeding those of the propane system, because environment and time can both contribute to the deterioration of these components,... -
Page 118: Care And Maintenance
Note: Performing periodic maintenance is not covered under the Thor Motor Coach Limited Warranty. Note: The following instructions are guidelines for the care and maintenance of your motorhome. -
Page 119: Water System
Owner’s Information Kit for the care and maintenance required on a regular basis. If you experience electrical problems with your recreational vehicle, make sure to have it checked by an authorized Thor Motor Coach dealer or a qualified RV technician. Generator power plant service, recommended by the generator manufacturer, should be performed at an authorized service center. -
Page 120: Propane System
Care and Maintenance PROPANE SYSTEM All service procedures should be performed only by a CAUTION certified propane service technician. The propane system should be checked regularly for leaks and road damage. Follow the lines, looking for kinks or flattened spots that may have occurred during travel or maintenance on the recreational vehicle. -
Page 121: Chassis
Care and Maintenance For an acrylic material, periodically hose off the fabric with water then let dry completely before rolling it back up. The acrylic material is water repellent, not water proof. The fabric is pretreated with a water retardant finish. Mildew cannot form on the fabric, but rather will form on dirt or dust on the fabric. -
Page 122: Fiberglass
Care and Maintenance When cleaning your head lamps, please observe the following: do not rub them dry, and never use abrasives or strong solvents. Remove dirt and contamination, such as insects, by soaking with shampoo and then rinsing with plenty of water. Always use a de-icer spray to remove accumulated ice and snow;... -
Page 123: Exterior Graphics/Paint
Care and Maintenance If you travel roads that have been salted for ice, wash your motorhome as soon as possible. The most common causes of corrosion are accumulation of road salt, dirt, and moisture in hard to reach areas under the motorhome. Make sure you wash the undercarriage and wheel wells as well as the exterior of the motorhome. -
Page 124: Extrusions And Aluminum Surfaces
If surface deterioration is apparent, contact a Thor Motor Coach dealer for assistance with finish restoration. Physical damage to the fiberglass, such as cracks, holes, and chips, must be attended to immediately to avoid moisture from entering and causing problems with interior walls and components. -
Page 125: Roof Vents
(TPO) roofs and the correct methods of resealing. Silicones and synthetic sealers cannot be used on the rubber roofs. Special sealers are also required for the skylights. Your Thor Motor Coach dealer may perform the periodic roof seals for you if desired. -
Page 126: Slide Out
Care and Maintenance • Check roof seals every six months to see if they are cracked or peeling. • Check engine covers and firewall every six months to see if they are cracked or peeled. Your motorhome may be equipped with a slide-out room for added space and comfort. SLIDE OUT Proper care and maintenance is required to achieve the maximum performance. -
Page 127: Underbody
Care and Maintenance cargo you can still carry and remain within your GVWR and GAWR limits. Check the condition of the frame regularly. Keep it clean, and repaint as necessary UNDERBODY to help avoid rust. Corrosive materials such as those used for ice and snow removal accumulate on the underside of the motorhome. -
Page 128: Bathtub Seal
Care and Maintenance BATHTUB SEAL We recommend dry cleaning for your bedspread and draperies just as you would for your draperies and comforters at home. Although this is more expensive, proper care of material will help ensure a longer life. Care of headboard and bedroom valance fabric BEDSPREAD &... -
Page 129: Upholstery & Fabrics
Care and Maintenance UPHOLSTERY & your upholstered fabrics: FABRICS • Clean with mild soap and water. Air dry. • Remove tougher stains with mild detergent or mild cleaning agent like Fantastic ® or Formula 409 ®. • Disinfect with 5:1 bleach solution. •... - Page 130 Care and Maintenance Inhibiting Mold By controlling relative humidity, the growth of mold and mildew can be inhibited. In warm climates, use of the air conditioner will reduce the relative humidity. Vents are Growth located in the bathing and cooking areas and constant use is advised during food preparation and bathing, even during colder weather.
- Page 131 Care and Maintenance Tips for Controlling To avoid condensation problems, try to follow these tips to help alleviate excess moisture: Condensation • Allow excess moisture to escape to the outside when bathing, washing dishes, hair drying, laundering, and using appliances and non-vented gas burners.
- Page 132 Care and Maintenance devoted to ensure the slide outs are functioning properly. Each time a slide out is used, it should be inspected to ensure proper operation and sealing. The slide out gaskets should also be inspected to ensure proper sealing when the slide out is operated. During those periods when the motorhome is not in use, care must be taken to ensure Storage of the moisture sources are addressed.
-
Page 134: Winter Use And Storage
Winter Use and Storage TIPS FOR WINTER Many people choose to use their motorhomes throughout the entire year. Extensive usage is not recommended in severe cold weather. However, winter traveling can be safe for you and your motorhome if you follow the precautions outlined in this chapter. For those who choose to use their motorhomes only during the warmer months, winter storage is necessary. - Page 135 Winter Use and Storage the flexible hose drain line. You may now add a commercial holding tank chemical cleaner Driving the unit around for a few miles will allow the cleanser to circulate within the tanks and drains. Drain and flush once more with fresh water. 3.
-
Page 136: Water Heater Bypass
Draining the tanks and water lines in your motorhome is half the battle of winterization. Complete the Storage and Winterization Checklist to ensure protection of your motorhome. An authorized Thor Motor Coach service dealer can help you in the winterization process for your convenience. - Page 137 Winter Use and Storage Curtains Close all the drapes and curtains, and protect the curtains from sun fading by placing foil or paper between the windows and the & Blinds curtains/blinds. Close and lock. Inspect and reseal if necessary. Windows Holding Tanks Drain and rinse.
-
Page 139: Travel Preparation Checklist
Travel Preparation Checklist CLOTHING SLEEPING GEAR MISCELLANEOUS Dresses Blankets Alarm Clock Gloves Pillows, Pillow Cases Batteries Hat or Cap Sheets Bucket Jackets, Coats Sleeping Bags Clothes Hangers Jeans, Dress Pants Clothes Line, Clothes Pins Pajamas Electronics Chargers Shirts, Blouses PERSONAL COMFORT Fresh Water Hose Shoes, Sandals Anti-Bacterial Wet Wipes... -
Page 140: Maintenance Schedule
Maintenance Schedule PROCEDURE TO BE PREFORMED: Maintenance schedules are minimum requirements. Heavy use, unusual temperatures or humidity, or other extreme conditions may require more frequent maintenance. ITEM Roof & Components Inspect & reseal roof & exterior attachment areas. Clean roof. Lubricate roof vent mechanism w/ light oil. - Page 141 Maintenance Schedule Date Service Preformed Mileage Date Service Preformed Mileage...
- Page 142 Maintenance Schedule Date Service Preformed Mileage Date Service Preformed Mileage...
-
Page 143: Fuel/Oil Record
Fuel / Oil Record Date Mileage Fuel Date Mileage Fuel (Gallon) (Quarts) (Gallon) (Quarts) - Page 144 Fuel / Oil Record Date Mileage Fuel Date Mileage Fuel (Gallon) (Quarts) (Gallon) (Quarts)
-
Page 145: Notes
Notes... - Page 146 Notes...
-
Page 147: Index
Index 12V System Fuses Electric Slide Out 12V System Fuses - Automotive Electric Slide Out Manual Retraction Procedure 12V System Fuses - Interior Electric Step 50 Amp Shore Power 79, 110 Electrical System A/V Quick Guide Emergency Retraction Procedure ABS Plastic Parts Emergency Stopping Air Hide-A-Bed Sofa Engine Access... - Page 148 InWall Slide Out Refrigerator Door 18, 68 Kitchen Cabinets Refrigerator Kitchen Drawers Reporting Safety Defects Kitchen Faucet Return Air Filters Kitchen Fixtures Roller Shades Kitchen Pantry Roof Kitchen Sink Roof A/C Performance Characteristics Laws of the Road Roof Mounted Air Conditioner Licenses Roof Vents Lights...
- Page 149 Washer/Dryer Hookup Waste Water System 100, 110 Water Fill Water Heater Bypass Water Heater Door Water Heater Switch Water Pump Water System 110, 125 Water Systems Weighing Your Motorhome Weight Capacity Weight Distribution Weights Wheel Lugs Where to Weigh Your Motorhome Windows Windows &...
Need help?
Do you have a question about the Palazzo 2015 and is the answer not in the manual?
Questions and answers