Table of Contents
Advertisement
Quick Links
www.kucht.com
PRO
BE A
IN YOUR KITCHEN
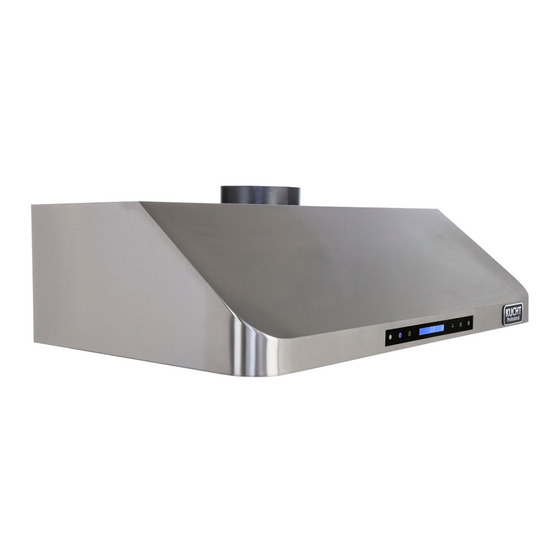
30"
36"
48"
900
CMF
RANGE HOOD
Installation GUIDE AND USER MANUAL
APPLICABLE MODEL: KRH3001U, KRH3601U, KRH4801U, KRH3002U, KRH3602U
KRH4802U, KRH3003U, KRH3603U, KRH3004U, KRH3604U
Advertisement
Table of Contents

Related Manuals for Kucht KRH3001U


Summary of Contents for Kucht KRH3001U
- Page 1 BE A IN YOUR KITCHEN 30” 36” 48” RANGE HOOD INSTALLATION GUIDE AND USER MANUAL APPLICABLE MODEL: KRH3001U, KRH3601U, KRH4801U, KRH3002U, KRH3602U KRH4802U, KRH3003U, KRH3603U, KRH3004U, KRH3604U...
- Page 2 To reduce the risk of fire and to properly exhause air, be sure that the pipe is leading outside, do not exhause air into the space between the walls, ceilings, attics, crawl spaces or garages. FOR MORE DETAILS AND INFORMATION, PLEASE VISIT OUR WEBSITE WWW.KUCHT.COM...
- Page 3 The manufacturer declines all responsibility for any injury caused by negligence. This product is manufactured for internal use. Do not use this appliance outdoors. FOR MORE DETAILS AND INFORMATION, PLEASE VISIT OUR WEBSITE WWW.KUCHT.COM...
- Page 4 CFM. The number of ft3/min varies from one region to another. Consult your HVAC professional for specific requirements in your area. Remove the packaging. CAUTION Carefully remove the cardboard, gloves to protect against sharp edges. FOR MORE DETAILS AND INFORMATION, PLEASE VISIT OUR WEBSITE WWW.KUCHT.COM...
- Page 5 The hood is equipped with a vertical transition to remove fumes outside. Recommended diameter conduit model and wall chimney hood and hood island: vertical round pipe 7'' tolerance + or – 1. Models Chimney hood Wall: KRH3003U, KRH3004U FOR MORE DETAILS AND INFORMATION, PLEASE VISIT OUR WEBSITE WWW.KUCHT.COM...
- Page 6 You can determine for yourself how high you install the hood above the stove. Over the hood near the stove, it is more effective to capture cooking odours, grease and smoke. FOR MORE DETAILS AND INFORMATION, PLEASE VISIT OUR WEBSITE WWW.KUCHT.COM...
- Page 7 So the installation height requirement is: the distance between the bottom of the hood to the surface of the cooktop is Max 30”/ Min 27”(as figure showing) FOR MORE DETAILS AND INFORMATION, PLEASE VISIT OUR WEBSITE WWW.KUCHT.COM...
- Page 8 • Measure at least 26 - 1/4 "(the measure may vary elbow used) above the pencil line indicating the height of the bottom of the system, the circle of a conduit hole 7 - ½ "in diameter (the hole may be enlarged for the passage of the elbow). FOR MORE DETAILS AND INFORMATION, PLEASE VISIT OUR WEBSITE WWW.KUCHT.COM...
- Page 9 INSTALLATION GUIDE AND USER MANUAL Necessary Tools FOR MORE DETAILS AND INFORMATION, PLEASE VISIT OUR WEBSITE WWW.KUCHT.COM...
- Page 10 INSTALLATION GUIDE AND USER MANUAL FOR MORE DETAILS AND INFORMATION, PLEASE VISIT OUR WEBSITE WWW.KUCHT.COM...
- Page 11 INSTALLATION GUIDE AND USER MANUAL KRH3003U FOR MORE DETAILS AND INFORMATION, PLEASE VISIT OUR WEBSITE WWW.KUCHT.COM...
- Page 12 INSTALLATION GUIDE AND USER MANUAL Installation dimension figure of KRH3004U as below: FOR MORE DETAILS AND INFORMATION, PLEASE VISIT OUR WEBSITE WWW.KUCHT.COM...
- Page 13 INSTALLATION GUIDE AND USER MANUAL FOR MORE DETAILS AND INFORMATION, PLEASE VISIT OUR WEBSITE WWW.KUCHT.COM...
- Page 14 INSTALLATION GUIDE AND USER MANUAL KRH3004U Installation dimension figure of KRH3001U and KRH3002U as below: Fix 6pcs screws( see figure 4) to the installation dead plate Fix the installation dead plate to the wall by screws( see figure 5) Use double-faced aluminum foil sealed-joint( see figure 6)
- Page 15 INSTALLATION GUIDE AND USER MANUAL Figure4 Figure5 FOR MORE DETAILS AND INFORMATION, PLEASE VISIT OUR WEBSITE WWW.KUCHT.COM...
- Page 16 INSTALLATION GUIDE AND USER MANUAL KRH3001U KRH3002U FOR MORE DETAILS AND INFORMATION, PLEASE VISIT OUR WEBSITE WWW.KUCHT.COM...
- Page 17 INSTALLATION GUIDE AND USER MANUAL FOR MORE DETAILS AND INFORMATION, PLEASE VISIT OUR WEBSITE WWW.KUCHT.COM...
- Page 18 Off time-delay function just could close the fan, not affected the lamplight setting. 15 minutes time-delay When fan working, press A4 button, digital screen will blink several seconds, default setting is 1minute,after that, will shut off automatically. FOR MORE DETAILS AND INFORMATION, PLEASE VISIT OUR WEBSITE WWW.KUCHT.COM...
- Page 19 Press F5 again, time-delay function starts, when F5 indicator light starts to blink, time-delay function unadjustable, default setting time is 5 minutes. Press F5 button again, time-delay and fan both close, LED light still on, which is indipendent switch. FOR MORE DETAILS AND INFORMATION, PLEASE VISIT OUR WEBSITE WWW.KUCHT.COM...
- Page 20 2. Take off the grease filters, press both sides of the elastic clamps on the bulb, make which loose. 3.Gently push outward, take out the bulbs. P.S: If necessary, wear gloves when taking out the bulbs. FOR MORE DETAILS AND INFORMATION, PLEASE VISIT OUR WEBSITE WWW.KUCHT.COM...
- Page 21 WE TRANSFORM A SIMPLE KITCHEN INTO A PRO ONE. THIS IS WHY WE CARE ABOUT MAKING VERY HIGH PERFORMANCE RANGES AND HOODS, TO MAKE YOU FEEL LIKE A PRO AND STYLISH COOKER. DESIGN: LONDON DC - WWW.LONDON-DC.COM FOR MORE DETAILS AND INFORMATION, PLEASE VISIT OUR WEBSITE WWW.KUCHT.COM...