FLIR FX Instruction Manual
Hide thumbs
Also See for FX:
- Quick start manual (4 pages) ,
- Quick start manual (2 pages) ,
- Quick start manual (4 pages)
Table of Contents
Advertisement
Advertisement
Table of Contents

Related Manuals for FLIR FX


Summary of Contents for FLIR FX
- Page 1 Instruction Manual FLIR FX™...
- Page 3 Instruction Manual FLIR FX™ #LX400067; r.27354/27358; en-US...
-
Page 5: Table Of Contents
Connect to your camera in Cloud Mode..........38 How to mount your FLIR FX camera ........... 41 How to mount your FLIR FX camera to your windshield......46 Using your FLIR FX camera with a sports case ........48 Viewing your FLIR FX camera in high definition........53 How to change the name of your camera .......... -
Page 7: Safety Precautions
• If using an accessory with replaceable batteries, only use replacement batteries specified by FLIR. Use of other types of batteries may damage the product. • The camera makes a clicking noise when changing between day and night modes. -
Page 8: What Is Included With My Flir Fx Camera
What is included with my FLIR FX camera? The standard model FXV101–H comes with the following components: • Camera with indoor stand • microUSB cable • 8GB class 10 microSD card pre-installed in the camera • Power adapter (US 120V) •... -
Page 9: Get To Know Your Flir Fx Camera
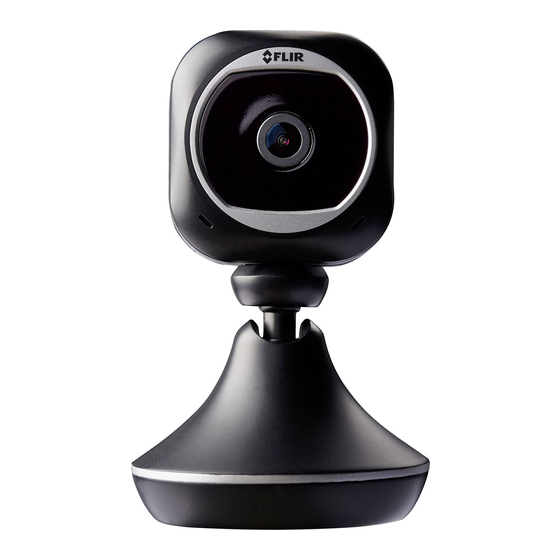
Get to know your FLIR FX camera 3.1 Front 1. Infrared night vision LEDs: Allows the camera to see up to 33ft / 10m in total darkness. 2. Lens: Provides a wide-angle 160 degree field of view. 3. Microphone: Allows you to hear the area around the camera. -
Page 10: Left
Get to know your FLIR FX camera 3.3 Left 1. WPS button: Used to connect the camera to a WPS-compatible router (not included). Press the WPS button on the router and then press the WPS button on the camera to make the connection. -
Page 11: Back
6. Device ID label: Contains the Device ID and QR code used for initial setup using the mobile app. NOTE When performing firmware updates be sure to connect your FLIR FX camera to a power source using the included USB cable and power adapter. #LX400067; r.27354/27358; en-US... -
Page 12: Optimizing Wi-Fi Performance
Optimizing Wi-Fi performance Follow the steps below to get the best possible performance from your FLIR FX camera. Router and camera placement The most important factor affecting the performance of your FLIR FX camera is the placement of the router and camera. Install your router in an open space and as high off the floor as possible. - Page 13 Optimizing Wi-Fi performance Testing connection speed A slow connection may also affect the performance of your FLIR FX camera. It is recom- mended to have an upload speed of at least 1Mbps or higher per camera. You can check with your Internet Service Provider or a third party website like speedtest.net...
-
Page 14: How To Set Up Your Flir Fx Camera
5.1 FLIR FX Android™ setup 1. Download the FLIR FX app from the Google Play Store. 2. Connect the included USB cable to the power adapter. Connect the other end of the USB cable to the camera or the camera stand and connect the power adapter to a power outlet. - Page 15 How to set up your FLIR FX camera 4. Open the app and tap New User to create a new account or tap Existing User if you already have an account (for example, if you bought the camera from the FLIR website).
- Page 16 How to set up your FLIR FX camera 6. Tap Add your first camera. 7. Select either Indoor or Outdoor, depending on your camera type. #LX400067; r.27354/27358; en-US...
- Page 17 How to set up your FLIR FX camera 8. Charge your camera for at least 20 minutes before continuing the setup then tap Continue. 9. Scan your camera’s QR code, which is located on the bottom of the indoor stand. Or, to manually enter the number beneath the QR code.
- Page 18 How to set up your FLIR FX camera 10. Wait for the app to automatically connect your smartphone to the camera’s Wi-Fi network. NOTE In some cases, the app may not be able to connect your phone to the camera’s Wi-Fi network. To continue the setup, you will need to select the color of the LED on the back of the camera.
- Page 19 How to set up your FLIR FX camera 11. Give your camera a name and password and press Set. The camera name can be anything you want, such as the location of the camera (e.g., “Front Door”) or how the camera will be used (e.g., “Sports Camera”).
- Page 20 How to set up your FLIR FX camera 13. The LED on the back of the camera flashes while the camera is connecting to the Wi-Fi network. When it connects, it glows green and the app displays the screen below.
-
Page 21: Flir Fx Iphone® Setup
How to set up your FLIR FX camera 5.2 FLIR FX iPhone® setup 1. Download the FLIR FX app from the App Store. 2. Connect the included USB cable to the power adapter. Connect the other end of the USB cable to the camera or camera stand and connect the power adapter to a power outlet. - Page 22 How to set up your FLIR FX camera 4. Open the app and tap New User to create a new account or tap Existing User if you already have an account (for example, if you bought the camera from the FLIR website).
- Page 23 How to set up your FLIR FX camera 6. Tap Add your first camera. 7. Select either Indoor or Outdoor, depending on your camera type. #LX400067; r.27354/27358; en-US...
- Page 24 How to set up your FLIR FX camera 8. Charge your camera for at least 20 minutes before continuing the setup then tap Continue. 9. Scan your camera’s QR code, which is located on the bottom of the indoor stand. Or, press to manually enter the number beneath the QR code.
- Page 25 How to set up your FLIR FX camera 10. Check the LEDs on the back of the camera. If the LED is glowing, select Steady Orange. NOTE If you are using the outdoor camera, the app will prompt you to remove the camera from the out- door housing to check the LED color.
- Page 26 How to set up your FLIR FX camera 12. Tap the Home button twice to exit the Settings menu and return to the FLIR FX app. The app will connect to your camera's Wi-Fi network. 13. Give your camera a name and password and press Set. The camera name can be anything you want, such as the location of the camera (e.g., “Front Door”) or how the...
- Page 27 How to set up your FLIR FX camera 15. The LED on the camera will flash while the camera is connecting to the Wi-Fi network. When it finishes connecting, it will glow green and the app will show the screen below.
-
Page 28: Flir Fx Android™ Tablet Setup
How to set up your FLIR FX camera 5.3 FLIR FX Android™ tablet setup 1. Download the FLIR FX app from the Google Play Store. 2. Connect the included USB cable to the power adapter. Connect the other end of the USB cable to the camera or camera stand and connect the power adapter to a power outlet. - Page 29 How to set up your FLIR FX camera 4. Open the app. Tap New User to create a new account or tap Existing User if you al- ready have an account (for example, if you bought the camera from the FLIR website).
- Page 30 How to set up your FLIR FX camera 6. Tap Add your first camera. 7. Select either Indoor or Outdoor, depending on your camera type. #LX400067; r.27354/27358; en-US...
- Page 31 How to set up your FLIR FX camera 8. Charge your camera for at least 20 minutes before continuing the setup then tap Continue. 9. Scan your camera’s QR code, which is located on the bottom of the indoor stand. Or, press to manually enter the number beneath the QR code.
- Page 32 LED on the back of camera. Then connect your Android device to the camera's Wi-Fi network (will look something like "FX-fxvdb30b2744"). 11. Give your camera a name and password and press Set. The camera name can be anything you want, such as the location of the camera (e.g., “Front Door”) or how the...
- Page 33 How to set up your FLIR FX camera 12. Select your Wi-Fi network from the list. Enter the password for your Wi-Fi network and tap Connect. 13. The LED will flash while the camera is connecting to the Wi-Fi network. When it finishes connecting, it will glow green and the app will display the screen below.
-
Page 34: Flir Fx Ipad® Setup
How to set up your FLIR FX camera 5.4 FLIR FX iPad® setup 1. Download the FLIR FX app from the App Store. 2. Connect the included USB cable to the power adapter. Connect the other end of the USB cable to the camera and connect the power adapter to a power outlet. - Page 35 How to set up your FLIR FX camera 4. Open the app. Tap New User to create a new account or tap Existing User if you al- ready have an account (for example, if you bought the camera from the FLIR website).
- Page 36 How to set up your FLIR FX camera 6. Tap Add your first camera. 7. Select either Indoor or Outdoor, depending on your camera type. #LX400067; r.27354/27358; en-US...
- Page 37 How to set up your FLIR FX camera 8. Charge your camera for at least 20 minutes before continuing the setup then tap Continue. 9. Scan your camera’s QR code, which is located on the bottom of the indoor stand. Al- ternatively, press to manually enter the number beneath the QR code.
- Page 38 LED color. 11. After selecting , tap the Home button . Open the Settings menu and connect your iPad® to the Wi-Fi network created by the camera. NOTE The network will be listed similarly to something like "FX-litfcce54fc4". #LX400067; r.27354/27358; en-US...
- Page 39 How to set up your FLIR FX camera 12. Tap the Home button twice to exit the Settings menu and return to the FLIR FX app. The app will connect to your camera's Wi-Fi network. 13. Give your camera a name and password and press Set. The camera name can be anything you want, such as the location of the camera (e.g., “Front Door”) or how the...
- Page 40 How to set up your FLIR FX camera 15. The LED will flash while the camera is connecting to the Wi-Fi network. When it finishes connecting, it will glow green and the app will display the screen below. 16. Tap Done. Tap on the camera in the camera list to connect.
-
Page 41: Connect To Camera In Direct Mode
Connect to your camera in Direct Mode Direct Mode lets you connect to the camera and view live video even in areas without a Wi-Fi signal. Direct Mode uses the built-in Wi-Fi access point in the camera to create a Wi-Fi hotspot. - Page 42 2. Navigate to Settings on your smartphone or tablet. Select the Wi-Fi network created by your camera. The network name will be in the format "FX-Camera-name". For ex- ample, if you’ve manually changed your camera's name to Driveway, the network name will be FX-Driveway.
- Page 43 Mode. If using a tablet, the app will automatically connect to the camera. NOTE Direct Mode will only enable you to connect to your FLIR FX camera. While connected to your cam- era in Direct Mode, you will not be able to connect your smartphone or tablet to the Internet.
-
Page 44: Connect To Your Camera In Cloud Mode
• Complete the initial setup of the camera to add it to your account and connect it to your Wi-Fi network. Connect to your camera in Cloud Mode (smartphones): 1. Open the FLIR FX app. 2. Tap the camera in your camera list to connect in Cloud Mode. #LX400067; r.27354/27358; en-US... - Page 45 Connect to your camera in Cloud Mode Connect to your camera in Cloud Mode (tablets): 1. Open the FLIR FX app. 2. Tap and drag the desired camera into one of the four viewing areas. You can view up to four cameras at the same time.
- Page 46 Cloud Mode LED is flashing: This indicates the camera is attempting to connect to the FLIR Cloud servers. Once the connection is successful, it will stop flashing and glow solidly. If the Cloud Mode LED is still flashing after 20 seconds, check the following: •...
-
Page 47: How To Mount Your Flir Fx Camera
How to mount your FLIR FX camera Instructions on how to wall mount your camera depend on whether you have an indoor camera (for example FXV101-H) or outdoor camera (FXV101-W or FXAW01 accessory). Mounting the indoor camera The indoor stand allows you to simply mount the camera to a wall. An extra mounting plate is provided so you can have a permanent mounting place for the camera while still being able to move the camera around when needed. - Page 48 How to mount your FLIR FX camera 2. Use a pencil to mark holes for the mounting screws. 3. Drill holes where marked using a drill. Tap the included anchors into the holes gently using a hammer. Attach the mounting plate to the wall using the included mounting screws.
- Page 49 Before permanently installing the camera, it is recommended to complete the setup using the FLIR FX app to connect the camera to your Wi-Fi network. It is also a good idea to install the camera in an area with a strong Wi-Fi signal from your router.
- Page 50 How to mount your FLIR FX camera 4. Adjust the camera position. 1. Loosen adjustment ring to adjust the horizontal position. 2. Use the included Allen key to adjust the vertical position. 3. Use the included Allen key to twist the camera on the stand.
- Page 51 How to mount your FLIR FX camera 7. Remove the protective film from the lens cover after you have finished installation. #LX400067; r.27354/27358; en-US...
-
Page 52: How To Mount Your Flir Fx Camera To Your Windshield
The FLIR FX dash mount stand (FXAD01, sold separately) adds additional functionality to your FLIR FX camera. 1. Attach your FLIR FX camera to the windshield mount by sliding the camera along the mount’s accessory connector. 2. Release the lever to unlock the suction cup. - Page 53 How to mount your FLIR FX camera to your windshield 3. Position the suction cup against the windshield and press lever towards the base to lock the suction cup. 4. Connect one end of the USB cable to the camera and the other to the car charger.
-
Page 54: Using Your Flir Fx Camera With A Sports Case
3. Close the case and push the latch forward to lock it. NOTE • Always secure the camera in the sports case when using the FLIR FX around water. Failure to properly lock the sports case can result in leaks that may damage or destroy your camera. •... - Page 55 Using your FLIR FX camera with a sports case 4. To mount the camera, screw the case onto the included 3M surface mount and peel the adhesive to stick the camera to different objects. NOTE You can also use standard 1/4”- 20 camera tripods or accessories to mount the camera in the sports case.
- Page 56 Using your FLIR FX camera with a sports case Sports case overview 1. Record Button: Press to take a photo. Hold to start and stop video recording. 2. Lens Cover: Clean the lens cover with a damp cloth. Do not use harsh or chemical cleaners to clean the lens cover as they can damage the plastic.
- Page 57 11. Direct Mode LED: View live video or recordings on the microSD card directly from your FLIR FX camera without an Internet connection. Live video is disabled while the camera records. 12. Cloud Mode LED: Flashes when the camera is attempting to connect to a Wi-Fi net- work, glows when the camera is connected to a Wi-Fi network.
- Page 58 Using your FLIR FX camera with a sports case 13. Surface Mount: Enables the camera to attach to a surface for sporting activities. 14. Thumbscrew: Tighten to secure the camera position. Loosen to remove ball and socket from stand. 15. 3M Adhesive: Peel to stick the mount to a surface.
-
Page 59: Viewing Your Flir Fx Camera In High Definition
Viewing your FLIR FX camera in high definition The default resolution for viewing the camera on a smartphone or tablet is standard defi- nition (WVGA). You can increase the resolution to high-definition 720p (1280x720) using the app. NOTE If your Internet upload speed is too low, selecting High Definition may affect your ability to connect to the camera. - Page 60 Viewing your FLIR FX camera in high definition 3. Scroll down to Video quality. Tap to select High Definition (720p) or Standard Def- inition (WVGA). 4. Tap Save. To switch live view resolution (tablets): 1. Tap and drag the desired camera into one of the four viewing areas. You can view up to four cameras at the same time.
- Page 61 Viewing your FLIR FX camera in high definition 2. Tap the gear icon to open the settings menu. 3. Use the Resolution slider to select SD (WVGA) or HD (720p). 4. Tap Save. #LX400067; r.27354/27358; en-US...
-
Page 62: How To Change The Name Of Your Camera
(e.g., “Front Door”) or how the cam- era will be used (e.g., “Dashboard Camera”). You can change the camera name using the FLIR FX app. To change the Camera name (smartphones): 1. - Page 63 How to change the name of your camera 3. Enter the new Camera name you would like to use. 4. Tap Save. To change the Camera name (tablets): 1. Tap and drag the desired camera into one of the four viewing areas. You can view up to four cameras at the same time.
- Page 64 How to change the name of your camera 2. Tap the gear icon to open the settings menu. 3. Tap Camera details. Enter the new Camera name you would like to use. 4. Tap Save. #LX400067; r.27354/27358; en-US...
-
Page 65: How To Change Your Camera's Password
How to change your camera’s password The camera password is saved in the app, so you only need to enter it the first time you are connecting to the camera on a smartphone or tablet. You will need to enter the cam- era password again if you connect to the camera on a new smartphone or tablet. - Page 66 How to change your camera’s password 3. Enter the new Camera name you would like to use. 4. Tap Save. When connecting with a different smartphone or tablet, you will be prompted to enter the new camera password. To change the camera password (tablets): 1.
- Page 67 How to change your camera’s password 2. Tap the gear icon to open the settings menu. 3. Tap Camera details. Enter the new Password you would like to use. 4. Tap Save. #LX400067; r.27354/27358; en-US...
- Page 68 This resets the camera to factory defaults. 2. Go to the Settings app on your smartphone or tablet and select the Wi-Fi network created by your camera. The network name will be in the format "FX-Camera-ID". It will appear something like: "FX-fxvdb30b2744".
- Page 69 How to change your camera’s password 3. Open the FLIR FX app. It will detect your camera has been reset. Press Setup Cam- era to continue. 4. Select Steady Orange. #LX400067; r.27354/27358; en-US...
- Page 70 How to change your camera’s password 5. Enter a new Camera name and Password for your camera and then tap Set. 6. Select your Wi-Fi network from the list and then enter the password for your Wi-Fi network. The camera will connect to the new Wi-Fi network. The LED will glow when it has successfully connected.
- Page 71 This resets the camera to factory defaults. 2. Go to the Settings app on your smartphone or tablet and select the Wi-Fi network created by your camera. The network name will be in the format "FX-Camera-ID". It will appear something like: "FX-fxvdb30b2744".
- Page 72 How to change your camera’s password 3. Open the FLIR FX app. It will detect your camera has been reset. Press Setup Cam- era to continue. 4. From the available options, select Steady Orange. 5. Enter a new Camera name and Password for your camera and then tap Set.
- Page 73 How to change your camera’s password 6. Select your Wi-Fi network from the list and then enter the password for your Wi-Fi network. The camera will connect to the new Wi-Fi network. The LED will glow when it is successfully connected. NOTE If the camera cannot connect to the network after 60 seconds because the password entered was incorrect or the router is out of range, the camera will return to Direct Mode.
-
Page 74: Setting Temperature And Humidity Alerts
Setting temperature and humidity alerts The FLIR FX app can send you push notifications if the temperature or humidity near the camera goes outside of a specified range. To use these features, you must install the camera in a stand that includes the appropriate sensors. The indoor stand includes a temperature and humidity sensor. - Page 75 Setting temperature and humidity alerts 3. Scroll down to the Automatic recording triggers section. Check Automatic Record- ing Triggers. Tap to activate temperature alerts. 4. Tap °F or °C to switch between Fahrenheit and Celsius. 5. Adjust the slider to select the normal temperature range for the camera. When the temperature goes above or below this range, you receive a notification.
- Page 76 Setting temperature and humidity alerts To set up temperature and humidity alerts and recording (tablets): 1. Tap and drag the desired camera into one of the four viewing areas. You can view up to four cameras at the same time. 2.
- Page 77 Setting temperature and humidity alerts 4. Check Automatic Recording Triggers. Tap to activate temperature alerts. 5. Tap °F or °C to alternate between Fahrenheit and Celsius. 6. Adjust the slider to select the normal temperature range for the camera. When the temperature goes above or below this range you will receive a notification.
-
Page 78: How To Control The Camera's Night Vision Leds
By default, night vision is enabled when there is insufficient light in the immediate envi- ronment. Using the FLIR FX app, you can set when the night vision turns on or disable the feature entirely. This can be useful in certain low light conditions where you wouldn’t want the night vision to turn on automatically. - Page 79 How to control the camera’s night vision LEDs 2. Tap the gear icon to open the settings menu. 3. Scroll to the Night Vision section and tap to select Automatic. Doing so will ena- ble the night vision LEDs to automatically turn on in low light conditions. Tapping when the feature is enabled will disable the night vision.
- Page 80 How to control the camera’s night vision LEDs To control the night vision LEDs (tablets): 1. Tap and drag the desired camera into one of the four viewing areas. You can view up to four cameras at the same time. 2.
- Page 81 How to control the camera’s night vision LEDs 3. Select Configuration. Tap to select Automatic. Doing so will enable the night vision LEDs to automatically turn on in low light conditions. Tapping when the feature is enabled will disable the night vision. NOTE The camera emits a clicking noise when switching between day and night modes.
-
Page 82: Manual Recording
Manual recording While the camera is on, press the REC button on the top of the camera. The button will begin flashing red to indicate recording is in progress. Press the REC button again to stop recording. #LX400067; r.27354/27358; en-US... -
Page 83: Setting Motion Detection Alerts And Recording
Setting motion detection alerts and recording Your FLIR FX camera can be set to record when motion is detected. You will receive a push notification on your smartphone or tablet when one of your cameras detects motion. Motion detection recording must be activated in order to use the FLIR Recap; a feature that analyzes motion recordings to provide a detailed summary of detection events. - Page 84 Setting motion detection alerts and recording 3. Scroll down to the Automatic recording triggers section. Check Automatic Record- ing Triggers. Tap to activate motion detection recording and alerts. The icon will glow green when motion detection is activated. 4. Use the slider to adjust the sensitivity. Low sensitivity means more motion is required to trigger an event.
- Page 85 Setting motion detection alerts and recording 6. A grid overlay opens over the video. By default, the entire video area is enabled for motion detection. To configure SmartZone: • Tap inside the grid to configure. Activated areas will turn blue. •...
- Page 86 Setting motion detection alerts and recording 2. Tap the gear icon to open the settings menu. 3. Scroll down to the Automatic recording triggers section. Check Automatic Record- ing Triggers. Tap to activate motion detection recording and alerts. The icon will glow green when motion detection is activated.
- Page 87 Setting motion detection alerts and recording 5. Tap to configure the SmartZone feature. SmartZone allows you to only receive alerts when motion occurs in the areas that matter most to you as well as disable alerts in other areas. 6. A grid overlay opens over the video. By default, the entire video area is enabled for motion detection.
-
Page 88: Setting Sound Alerts And Recording
Setting sound alerts and recording Your camera can detect the volume of sounds in a room. Like the motion detection fea- ture, if the volume of sound exceeds the specified sensitivity level, it will record and send a notification to your smartphone or tablet. This is particularly useful if you want to use your camera as a baby or child monitor, as it can alert you when your child wakes up from a nap. - Page 89 Setting sound alerts and recording 4. Use the slider to select the audio sensitivity level for the camera. 5. Tap Save at the top of the settings menu to save your changes. To set up sound alerts and recording (tablets): 1.
- Page 90 Setting sound alerts and recording 2. Tap the gear icon to open the settings menu. 3. Tap Automatic Triggers. 4. Check Automatic Recording Triggers. Tap to activate sound alerts. Use the slider to select the audio sensitivity level for the camera. 5.
-
Page 91: Viewing Recordings Via The Flir Fx App
Viewing recordings via the FLIR FX app You can view manual recordings, automatic (triggered recordings), and FLIR Recaps™ on the FLIR FX app. You can also share them with friends and family using social media sites like YouTube or Facebook. Available recording types include: •... - Page 92 Viewing recordings via the FLIR FX app Playback controls: The playback controls for recordings are shown below. 1. Back: Tap to return to your recordings list. 2. Share: Tap to share the video file (icon may appear differently depending on your device).
- Page 93 Viewing recordings via the FLIR FX app 2. Tap Recordings to open the list of recordings. Playback controls The playback controls for recordings are shown below. 1. Back: Tap to return to your recordings list. 2. Video file: Tap to select a video file. Shows the date and time the file was recorded as well as the recording trigger.
-
Page 94: How To Create A Rapid Recap
How to create a Rapid Recap™ Rapid Recap™ gives you a summary of all the motion events that your camera has de- tected over a predetermined period of time. The summary lists each occurrence of peo- ple and objects that passed in front of the camera. Also, a Rapid Recap allows you to view one-minute summary videos recapping the day’s motion events. - Page 95 How to create a Rapid Recap™ 2. Tap the Actions button and then tap Rapid Recap. 3. Select the start time and end time for your Rapid Recap. • Select the day at the top of the screen. • To move the entire time range, drag anywhere on the screen. •...
- Page 96 How to create a Rapid Recap™ 5. The app returns to live view and starts creating your recap. Creating a recap may take up to 10 minutes while our servers process the video. You will get a notification when it is ready. To create a Rapid Recap (tablet): 1.
- Page 97 How to create a Rapid Recap™ 2. Tap Rapid Recap. 3. Select the start time and end time for your Rapid Recap. 4. Press Create to confirm the time range and order the recap. 5. The app returns to live view and starts creating your recap. Creating a recap may take up to 10 minutes while our servers process the video.
-
Page 98: How To View A Rapid Recap
How to view a Rapid Recap Rapid Recap™ gives you a summary of all the motion events that your camera has de- tected for a predetermined period of time. The summary lists each occurrence of people and objects that passed in front of the camera. Also, it allows you to view one minute summary videos recapping the day’s motion events. - Page 99 How to view a Rapid Recap Rapid Recap playback controls: 1. Back: Return to your list of recordings. 2. Time-line: Shows the start and end times of the selected Rapid Recap. The green highlighted area shows the time range for the current chapter. 3.
- Page 100 How to view a Rapid Recap 2. Tap Recordings to open the recording list. 3. Tap Rapid Recap to view recaps. #LX400067; r.27354/27358; en-US...
- Page 101 How to view a Rapid Recap Rapid Recap playback controls: 1. Back: Return to live view. 2. Recaps: List of recaps for the selected camera. Shows the time range, number of ob- jects and chapters in the recap. 3. Recording types: Tap to select a different recording type. 4.
-
Page 102: How To View Recordings On A Computer
This section covers local recordings saved to the camera’s microSD card only. If you have a subscrip- tion plan and have recordings saved in the cloud, you will need to use the FLIR FX app to view those re- cordings. See 19 Viewing recordings via the FLIR FX app, page 85... - Page 103 How to view recordings on a computer 3. The camera saves videos and images onto the microSD card in folders based on the type of recording. For example, the USER folder contains manual video recordings. Double-click on the folders to access the video files. NOTE The camera saves video files to the microSD card in .mp4 format and saves images in .jpg format.
-
Page 104: Taking Photos Using The Flir Fx App
Taking photos using the FLIR FX You can use the FLIR FX app to take photos from anywhere in the world. Once taken, you can then share them with family and friends on social media. To take a photo (smartphones): 1. - Page 105 Taking photos using the FLIR FX app 3. Select the app you would like to share the photo with. For example, you can email the photo to a family member or share it on Facebook. The list of apps depends on which apps you have installed on your phone.
- Page 106 Taking photos using the FLIR FX app 3. Select the app you would like to share the photo with. For example, you can email the photo to a family member or share it on Facebook. The list of apps depends on which apps you have installed on your phone.
-
Page 107: Using The Digital Zoom Feature
3. Pinch outwards to zoom in. Pinch inwards to zoom out. When zoomed in, drag to pan. 4. Turn your smartphone to portrait mode to return to normal live viewing. To use digital zoom (tablet): 1. Open the FLIR FX app. #LX400067; r.27354/27358; en-US... - Page 108 Using the digital zoom feature 2. Tap and drag the desired camera into one of the four viewing areas. You can view up to four cameras at the same time. 3. Double-tap the camera to view in full screen. 4. Pinch outwards to zoom in. Pinch inwards to zoom out. When zoomed in, drag to pan. #LX400067;...
-
Page 109: Using The Intercom
Using the intercom The intercom feature allows you to transmit your voice through the camera using the mi- crophone on your smartphone or tablet. This feature is particularly useful to communi- cate with people in the camera’s immediate area. To use the intercom (smartphones): 1. - Page 110 Using the intercom 3. Press and hold Intercom. A icon appears on the live video. You can now speak into the microphone on your smartphone to talk through the camera. There may be a delay when using the intercom while the sound is sent over the Internet. 4.
- Page 111 Using the intercom 2. Press and hold Intercom. A icon appears on the live video. You can now speak into the microphone on your tablet to talk through the camera. There may be a delay when using the intercom while the sound is sent over the Internet. 3.
-
Page 112: Notices
Changes or modifications made to this equipment not expressly approved by FLIR Sys- tems, Inc. may void the FCC authorization to operate this equipment. - Page 113 Notices Visit www.flir.com/fx to access the FLIR FX knowledgebase or contact technical support or customer service. #LX400067; r.27354/27358; en-US...
- Page 116 © 2015, FLIR Systems, Inc. All rights reserved worldwide. Names and marks appearing herein are either registered trademarks or trademarks of FLIR Systems and/or its subsidiaries. All other trademarks, trade names or company names referenced herein are used for identification only and are the property of their respective owners.
Need help?
Do you have a question about the FX and is the answer not in the manual?
Questions and answers