Advertisement
Available languages
Available languages
Quick Links
JR300 JR400 JR500
Owner's Manual
Introduction
Thank you for choosing this JENSEN Universal Remote Control. The new JENSEN line of universal remotes has been
designed with the consumer in mind. Months of market research and focus groups helped develop an ergonomically
correct remote control with all the latest features and benefits to enhance your viewing experience.
Before you begin using your new JENSEN remote control, you must first read the instructions carefully and install
a set of two "AA" batteries (not included). This manual was written for use with the JR300, JR400, and JR500.
Please note that not all modes will be available in all models.
Installing The Batteries:
1. Locate the battery cover on the back of the remote control.
2. Pull down the lever on the battery door to open battery compartment.
3. Install two "AA" batteries, making sure that the "+" and "-" marks on the batteries match the diagram inside
the battery compartment.
4. A battery test can be performed by pressing any of the "mode keys": TV, VCR, CBL/SAT/ANT
(cable/satellite/antenna), DVD, and Audio. The red LED indicator will blink once.
Note: Y our JENSEN Universal Remote Control has a built-in memory backup that allows you to remove the
batteries for up to 10 minutes without losing programmed information. If you wait longer than 10 minutes
to replace the batteries, you may have to reprogram your universal codes.
Programming the Remote Control:
There are two methods available to program your new remote control. The first method is "Manual Programming;"
the second method is "Standard Step-and-Set." Please choose which of the following best fits your needs.
Manual Programming:
Locate the four-digit codes for your device and brand in the code listing included with this manual. You will notice
that there will be more than one four-digit code for some devices next to some brands. This is the result of many
manufacturers using different codes for different models. Once you have located the codes that you will be using,
you are ready to start programming your remote. Please follow the steps below for best results.
1. Manually turn on the device that you are trying to set up (TV, VCR, Cable/Satellite/Antenna, DVD, or Audio)
2. Press down and release the device "mode key" (TV, VCR, CBL/SAT/ANT, DVD, or AUD) on the remote control.
The red LED indicator will blink once.
3. Press down and hold the SETUP key until the red LED indicator blinks twice, then release.
4. Enter the first four-digit code for the device you are trying to program. The LED will blink once on each digit
entry except for the last digit, where it will blink twice to confirm that a valid code has been programmed.
5. Aim the remote control at the device that you programmed and press POWER. If the device turns off, you have
programmed the correct code. If the device does not turn off, return to step 2 and use the next four-digit code
for that brand and model.
6. Repeat the steps above to program the next device.
• If any other key is pressed besides a digit key during programming, the unit will display one long blink, exit
programming state, and restore the last preprogrammed code.
• Upon entry of an invalid key sequence or invalid code, the remote control will display one long blink and return
to the last preprogrammed code.
• The unit will exit programming state and return to the last preprogrammed code if 10 seconds have elapsed
between digit entries.
Standard Step-and-Set Programming:
If the device code for a particular brand is unknown, you will be able to cycle the remote through the available codes
for that device mode and sample functions from each code in order to find the code that operates the desired
device. The keys which are available to be sampled (provided they are applicable to that mode) are: 0, 1, 2, 3,
POWER, CHANNEL UP, VOLUME UP, PLAY and STOP. Invalid key presses will be ignored while in the programming
state. Follow the steps below to cycle through each available device code and sample its functions.
1. Manually turn on the device that you are trying to set up (TV, VCR, Cable/Satellite/Antenna, DVD, or Audio).
2. Press down and release the device "mode key" (TV, VCR, CBL/SAT/ANT, DVD, or AUD) on the remote control.
The red LED indicator will blink once.
3. Press down and hold the SETUP key until the red LED indicator blinks twice, then release.
4. Enter the digits 9, 9, 1. The red LED will blink twice. Press the first function you want to test, i.e., POWER. If
the device turns off, you have located the correct code. If the device does not turn off, press the "mode key"
again to go to the next code in the library. Repeat the procedure above until locating the correct code or until
you have gone through the entire code library.
5. When the correct code has been located, press SETUP and release. The red LED will blink twice, locking
in the code for that device.
6. Repeat the steps above to program the next device.
Note: The available functions within a code may be sampled as many times as desired until advancing to the next
code by pressing a specific device mode key. For the selected mode, the search will begin with the most
popular device code when no code is currently programmed or will begin with the current programmed code.
The search function has an end of cycle designator (LED will blink three times) to indicate when a cycle has
been completed. The unit will begin to cycle through the available codes again. The LED will light each time
a function is sent. If no key is pressed within 10 seconds, the remote will exit the setup mode and return
to the code previously set up before Step-and-Set was initiated. The unit will blink two times after successful
completion of the programming sequence.
• Upon entry of an invalid key sequence, the LED will display one long blink and return to normal operation.
• The unit will exit programming state and return to normal operation if 10 seconds have elapsed between
key presses.
Code Verification:
To find the four-digit device code that you have programmed in the remote, follow the procedure outlined below.
This is used to get feedback on the device code selected. The number of blinks that occur after pressing the
numeric keys 1,2,3 and 4 represents the 4-digit ID code set up for that mode. There is a 0.5-second delay
between each blink. There is also a 0.5-second time delay after each key press.
1. Press down and release the device "mode key" (TV, VCR, CBL/SAT/ANT, DVD or AUD) on the remote control.
2. Press down and hold the SETUP key until the red LED blinks twice, then release.
3. Enter the digits 9, 9, 0. The red LED indicator will blink twice. Press numbers 1, 2, 3, and 4, observing the
number of blinks after each number has been pressed. Write down the number for future use.
Note: The digit "0" will not blink.
Using Your JENSEN Remote Control:
After you have programmed the JENSEN Universal Remote Control for use with one or more devices, you are ready
to start using the remote. Follow the steps below to get acquainted with your remote.
1. Press the mode key of the component that you want to control (TV, VCR, CBL/SAT/ANT, DVD, or AUD).
2. Press the POWER key to turn on the component if it is not already on.
3. Press the key of the function you wish to perform. (See Key Function Diagram for a complete listing of key
descriptions.)
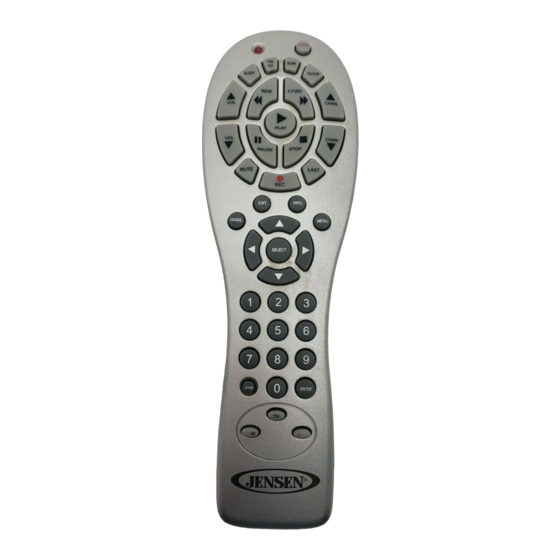
Key Description:
Key Function Diagram:
1.
Red LED Indicator – This light will turn on or
blink depending on the function that you are
JR500 featured
performing. The instructions in this manual
will explain the normal operation.
1. Red LED Indicator
2.
POWER – Turns the selected device
on or off.
3.
SCAN – Automatically changes channels
18. Favorite Channel
every 3 seconds.
4.
TV/VCR – Selects inputs on TV, VCR,
17. Sleep
Cable/Satellite, or DVD.
FAV
SCAN
CH
5.
CHANNEL UP (Skip Forward) – Press this
SLEEP
16. Volume Up (+)
key to move up one channel. When in DVD
REW
F.FWD
or CD mode, press this key to move up one
track.
VOL
15. Rewind
6.
FAST FORWARD – Fast-forwards
PLAY
a videotape, CD, or DVD.
14. Pause
VOL
7.
PLAY – Press this key to start or resume
PAUSE
STOP
playing videotape, CD or DVD.
13. Volume Down (-)
8.
STOP – Press this key to stop the playback,
MUTE
recording, rewinding or fast-forwarding of a
REC
12. Mute
videotape. In CD or DVD mode, press this
EXIT
key to stop the playback of a CD or DVD.
9.
CHANNEL DOWN (Skip Back) – Press this
GUIDE
11. Record
key to move down one channel. When in
DVD or CD mode, press this key to move
SELECT
27. Menu Exit
down one track.
10. LAST – Also known as "channel recall."
Press this key to switch to the last channel
26. Menu Guide
1
2
that you were viewing. In CD or DVD mode,
press this key to repeat a CD or DVD track
25. Menu Up
or for random play.
4
5
11. RECORD – Press this key to start recording
a program.
24. Menu Left
7
8
Note: As an added safety feature, you must
0
press the RECORD key twice in order to start
23. Select
SETUP
recording.
TV
12. MUTE – Press this key to mute the sound.
30. Setup
CBL/ S AT/ A NT
AUDIO
13. VOLUME (-) – Press this key to decrease
DVD
the volume level.
14. PAUSE – Press this key to pause the
recording or playback of a videotape.
Press again to resume recording or play-
back. In CD or DVD mode, press this key to
pause the playback of a CD or DVD.
15. REWIND – Press this key to rewind
*Highlighted Keys are used
a videotape, CD or DVD.
for on-screen menu control.
Functional Key Chart
Mode 1
Mode 2
Mode 3
Key Label
TV
VCR
Recoton Antenna
SAT
(JR300, 400, 500)
(JR300, 400, 500) (JR300, 400, 500)
(JR300, 400, 500)
Setup
Setup
Setup
Setup
Setup
POWER
Power
Power
Power
Power
TV *
---
---
---
---
VCR
---
---
---
*
CBL/SAT/ANT
---
---
*
*
DVD
---
---
---
---
AUDIO
---
---
---
---
GUIDE
---
-------
Rotate Left
GUIDE
MENU
MENU
MENU
Rotate Right
MENU
INFO
INFO
-------
Memory
INFO
EXIT
Exit
Exit
Clear
Exit
UP
UP
UP
Right Dipole Left
UP
DOWN
Down
Down
Right Dipole Right
Down
LEFT
Left
Left
Left Dipole Left
Left
RIGHT
Right
Right
Left Dipole Right
Right
SELECT
Select
Select
---
Select
VOL+
VOL+
VOL+(1)
---
VOL+ (1)
VOL-
VOL-
VOL- (1)
---
VOL- (1)
CH+
CH+
CH+
---
CH+
CH-
CH-
CH-
---
CH-
MUTE
MUTE
MUTE(1)
---
MUTE(1)
LAST
PREVIOUS CHANNEL PREVIOUS CHANNEL
PREVIOUS CHANNEL
Digit 1
DIGIT 1
DIGIT 1
DIGIT 1
DIGIT 1
Digit 2
DIGIT 2
DIGIT 2
DIGIT 2
DIGIT 2
Digit 3
DIGIT 3
DIGIT 3
DIGIT 3
DIGIT 3
Digit 4
DIGIT 4
DIGIT 4
DIGIT 4
DIGIT 4
Digit 5
DIGIT 5
DIGIT 5
DIGIT 5
DIGIT 5
Digit 6
DIGIT 6
DIGIT 6
DIGIT 6
DIGIT 6
Digit 7
DIGIT 7
DIGIT 7
DIGIT 7
DIGIT 7
Digit 8
DIGIT 8
DIGIT 8
DIGIT 8
DIGIT 8
Digit 9
DIGIT 9
DIGIT 9
DIGIT 9
DIGIT 9
Digit 0
DIGIT 0
DIGIT 0
DIGIT 0
DIGIT 0
ENTER
ENTER
ENTER
---
ENTER/SELECT
TV/VCR
TV/VIDEO
TV/VCR
A/B BYPASS-TV/DSS/TV/SAT
SCAN
SCAN
SCAN
SCAN
SCAN
SLEEP
Sleep
----
---
---
FAV Channel
-------
----
---
FAV Channel
REW
Punch to VCR(2)
REWIND
---
---
PLAY
Punch to VCR(2)
PLAY
---
---
FFWR
Punch to VCR(2)
FFWD
---
---
REC
Punch to VCR(2)
RECORD
---
---
STOP
Punch to VCR(2)
STOP
---
---
PAUSE
Punch to VCR(2)
PAUSE
---
---
NOTES: 1. Volume and Mute will punch through to TV by default. When the volume is unlocked,
all the devices will have their own volume if their ID has volume data.
2. Will punch through to VCR .
16. VOLUME UP (+) – Press this key to increase
Additional Remote
the volume level.
Control Features:
17. SLEEP – Press this key to activate the
Record
automatic sleep timer.
To prevent accidental recording over videotape,
the new line of JENSEN remotes requires that the
18. FAVORITE CHANNEL – Press this key to access
2. Power
RECORD key be pressed twice in order to begin
favorite channel mode of Cable Box and
recording.
Satellite Receiver.
3. Scan
Mode Reassignment
19. INFO – Press this key to access the on-
This feature allows you to reassign a selected
screen information menu function of the
POWER
device mode key (TV, VCR, CBL/SAT/ANT, DVD
TV, VCR, Cable Box, Satellite Receiver,
4. TV/VCR
or AUD) to the desired device mode key. For
or DVD player.
example, a VCR device mode key (destination
20. MENU – Press this key to access the
TV/VCR
5. Channel Up
mode) can be changed to an additional TV device
on-screen menu of the TV, VCR, Cable
mode key (source mode) to facilitate the operation
(Skip Forward)
Box, Satellite Receiver, or DVD.
of two different TVs. Follow the steps below for
CHAN
21. Menu Right (
) – Press this key to navigate
best results.
on-screen menu functions to the right.
6. Fast Forward
1. Press down and hold the SETUP key until
22. Menu Down (
) - Press this key to
CHAN
navigate on-screen menu functions down.
7. Play
2. Enter the digits 9, 9, 2. The red LED indicator
23. SELECT – Press this key to select an option
while in on-screen menu mode.
LAST
3. Press the source "mode key", i.e., TV, VCR,
8. Stop
24. Menu Left (
) - Press this key to navigate
on-screen menu functions to the left.
INFO
4. Press the destination "mode key", i.e., TV,
9. Channel Down
25. Menu Up (
) - Press this key to navigate
MENU
(Skip Back)
on-screen menu functions up.
Note: The ID in the destination mode now is the
26. GUIDE - Press this key to access the on-
10. Last
screen menu guide function of the Cable Box,
Satellite Receiver, and some CD players.
27. EXIT – Press this key to exit the on-screen
19. Menu Info
menu display.
5. Pressing the same mode key twice after entering
3
28. 0 – 9 Keys – Press these keys for direct key
20. Menu
entry. In CD or DVD mode, press these keys
6
Volume Lock/Unlock
to select a track. In Receiver mode, press
Note: This feature does not apply to any device
these keys to select source input.
9
21. Menu Right
keys which have been copied using the key copier
29. ENTER – In menu mode, press to select
feature.
an option. Otherwise, press this key to enter
The volume controls (VOLUME
ENTER
22. Menu Down
in a channel. In CD or DVD mode, press this
MUTE) on the remote can be configured in one of
after entering a track number.
three ways:
28. 0-9 Keys
30. SETUP – Press this key to enter the setup
1. They can be assigned to control a single device
VCR
mode.
29. Enter
31. Mode Keys (TV, VCR, CBL/SAT/ANT, DVD
and AUD) – Press these keys to select device
mode (TV, VCR, Cable/Satellite/ Antenna,
31. Mode Keys:
DVD, or Audio).
2. The controls can control each individual device.
TV, VCR,
CBL/SAT/ANT,
DVD and AUD
3. The volume controls can be assigned to control
Mode 4
Mode 5
CBL
DVD
CD
Amp
Tuner
(JR300, 400, 500)
(JR 400, 500)
(JR500)
(JR500)
(JR500)
Setup
Setup
Setup
Setup
Setup
Note: The remote ships from the factory with the
Power
Power
Power
Power
Power
volume controls assigned to control the TV regard-
---
---
---
---
less of selected device mode (case 1 above).
---
---
---
---
---
---
---
---
---
*
To "unlock" the volume controls (case 2 above):
---
---
---
---
*
1. Press and hold the SETUP key until the red
---
---
*
*
*
GUIDE
---
Random
Balance left
MENU
MENU
---------
SUP
Balance Right
2. Enter the digits 9, 9, 3. The red LED light will
INFO
INFO
---------
Delay +
Delay +
Exit
Exit
---------
Delay -
Delay -
UP
UP
---
SU+
To "lock" the volume controls to a particular device
Down
Down
---
SU-
(case 1 above):
Left
Left
---
Balance left
R Rear -
1. Press and hold the SETUP key until the red LED
Right
Right
---
Balance Right
R Rear +
Select
Select
---
Select
Select
VOL+ (1)
VOL+ (1)
---
VOL+
VOL+
2. Enter the digits 9, 9, 3. The red LED light will
VOL- (1)
VOL- (1)
VOL-
VOL-
CH+
Skip Forward
Skip Forward
CH+
CH+
CH-
Skip Reverse
Skip Reverse
CH-
CH-
3. Press the device key (e.g. TV, VCR, CBL/SAT)
MUTE(1)
MUTE(1)
--------
MUTE(1)
MUTE(1)
PREVIOUS CHANNEL
Repeat
Repeat
DIGIT 1
DIGIT 1
DIGIT 1
Tuner
Tuner
DIGIT 2
DIGIT 2
DIGIT 2
LD
LD
To "unlock" the volume controls for a particular
DIGIT 3
DIGIT 3
DIGIT 3
DSP Mode
DSP Mode
device (case 3 above):
DIGIT 4
DIGIT 4
DIGIT 4
FM Mono
FM Mono
1. Press the DEVICE key for the mode you wish
DIGIT 5
DIGIT 5
DIGIT 5
3 channel logic
3 channel logic
DIGIT 6
DIGIT 6
DIGIT 6
AUX
AUX
2. Press and hold the SETUP key until the red LED
DIGIT 7
DIGIT 7
DIGIT 7
TV
TV
DIGIT 8
DIGIT 8
DIGIT 8
Phono
Phono
DIGIT 9
DIGIT 9
DIGIT 9
ANT
ANT
DIGIT 0
DIGIT 0
DIGIT 0
CD
CD
3. Enter the digits 9, 9, 3. The red LED light will
ENTER/SELECT
ENTER
-----
---
-------
A/B
TV/VCR
A-B
---
Band
4. Press the VOLUME
SCAN
Scan
Scan
Scan
Scan
SLEEP
----
----
---
FAV Channel
----
----
---
---
REWIND
REWIND
REW
REW
Channel Scan
---
PLAY
PLAY
PLAY
PLAY
For convenient "channel surfing," press the SCAN
---
FFWD
FFWD
FFWR
FFWR
key. This activates the remote to change channels
---
----
REC
REC
REC
once every three seconds until any key is pressed
---
STOP
STOP
STOP
STOP
or until 100 channel changes occur.
---
PAUSE
PAUSE
PAUSE
PAUSE
Channel Scan searches by using two methods: sending the Channel Up command (if found), and by sending the
digits 0-9 for repeat cycling for a maximum of 10 iterations. The modes available for Channel Scan are TV, VCR,
CABLE, SATELLITE and DVD.
Note: If above MODES have been reassigned, Channel Scan is still valid. For example, if the TV has been reassigned
to VCR (TV2), pressing <TV2> <SCAN> will cause Channel Scan to activate. If a mode which does not allow
Channel Scan has been reassigned, i.e., VCR (CD2), pressing <CD2> <SCAN> will not cause Channel Scan to
activate, because CD is an invalid Channel Scan mode.
Sleep Timer
In the TV, SATELLITE, DVD and CABLE modes, the remote's built-in sleep timer will be activated by pressing the
SLEEP key when the target device ID does not have a code for sleep. The first press of the SLEEP key will activate
a 15-minute timer. Additional key presses within 10 seconds will increase the timer value in 15-minute increments,
up to a maximum of 60 minutes. Fifth and subsequent key presses will be ignored and the timer will remain at 60
minutes.
Each key press is acknowledged by a series of blinks indicating how many increments have been programmed.
For example: one blink for the first press, two blinks for the second press, etc.
Sleep timer activates 10 seconds after the last press of the SLEEP key. The visible LED will blink approximately once
every 15 seconds to indicate that the timer is running. When running, the sleep timer is automatically canceled if
any other key on the keypad is pressed. Pressing the sleep key itself initializes the timer sequence to 15 minutes.
the red LED blinks twice, then release.
When the timer expires, the remote sends the target device's power function, or power off when separate power
on and off commands exist.
will blink twice.
If your device has a sleep timer function, you may still enable the built-in sleep timer by following the steps outlined
below.
CBL/SAT/ANT, DVD or AUD.
1. Press the "mode key" of the component for which you want to set the sleep timer (TV, VCR, CBL/SAT/ANT,
or DVD).
VCR, CBL/SAT/ANT, DVD or AUD.
2. Press down and hold the SETUP key until the red LED indicator blinks twice, then release.
3. Enter the digits 9, 7, 0. The red LED indicator will blink twice.
default ID of the source mode, i.e., VCR
4. Press the SLEEP key once for 15 minutes, twice for 30 minutes, three times for 45 minutes and four times
mode could become TV2. The unit will blink
for 60 minutes.
twice after successful completion of the
Resetting Sleep Timer to Factory Default
programming sequence.
1. Press down and hold the SETUP key until the red LED blinks twice, then release.
2. Enter the digits 9, 7, 0. The red LED indicator will blink four times, indicating that the sleep timer has been
9, 9, 2, will return key to original mode.
reset to the factory default.
Note: If the TV, SATELLITE or CABLE modes have been reassigned, Sleep Timer is still valid provided it is set up
on the logical mode. For example, if the TV has been reassigned to VCR (TV2), TV2 is programmed for
Sleep Timer. Pressing <TV2> <SLEEP> will cause Sleep Timer to activate.
Low Battery Condition
, VOLUME
and
When the batteries installed in the remote become low on power, the remote will enter in a LOW BATTERY
CONDITION. While in the low voltage condition, the unit will not operate. This is to protect RAM and user
settings. When new batteries are installed, full operation will be restored. The typical duration is 10 minutes.
Stuck Key Time Out
regardless of which device mode key is
The remote will stop transmitting IR to conserve power upon any key depressed for longer than 30 seconds.
pressed. For example, if the volume controls
are "locked" to the TV, pressing the volume
controls will adjust the TV volume even if the
Recoton Corporation ("Company") warrants to the original retail purchaser of this product that should the product or any part thereof
remote is in VCR mode.
be proven defective in material or workmanship within one year from the date of original purchase, such defects will be repaired or
replaced, at the Company's option, without charge for parts or labor.
For instance, the volume controls will adjust
To obtain replacement within the terms of this warranty, the product should be delivered, transportation prepaid, to the Dealer where
the TV volume when the remote is in TV mode,
purchased or to the Company, along with proof of date of purchase. Call 1-800-RECOTON to obtain information regarding the proce-
and the cable (or satellite) volume when in
dure for proper return of your product, if your Dealer does not honor the warranty. This warranty is valid in the USA and Canada only.
CBL/SAT mode.
THIS WARRANTY DOES NOT APPLY TO ANY PRODUCT OR PART THEREOF WHICH HAS BEEN DAMAGED
THROUGH ALTERATION, MISHANDLING, MISUSE, NEGLECT, ACCIDENT, IMPROPER INSTALLATION OR
UNAUTHORIZED REPAIR.
a single device (as in the first example) then
"unlocked" for individual device modes you
THIS WARRANTY IS EXCLUSIVE AND IN LIEU OF ANY AND ALL OTHER WARRANTIES, EXPRESSED OR
choose. For example, you want the volume
IMPLIED, INCLUDING WITHOUT LIMITATION THE IMPLIED WARRANTIES OF MERCHANTABILITY AND
FITNESS FOR A PARTICULAR PURPOSE AND ANY OBLIGATION, LIABILITY, RIGHT, CLAIM OR REMEDY
controls to affect only the TV if you are in the
IN CONTRACT OR TORT, WHETHER OR NOT ARISING FROM THE COMPANY'S NEGLIGENCE, ACTUAL
TV or VCR modes, but you want the volume
OR IMPUTED. NO PERSON OR REPRESENTATIVE IS AUTHORIZED TO ASSUME FOR THE COMPANY ANY
controls to affect your cable box if you change
OTHER LIABILITY IN CONNECTION WITH THE SALE OF THIS PRODUCT. IN NO EVENT SHALL COMPANY
to the CBL/SAT mode.
BE LIABLE FOR INDIRECT INCIDENTAL OR CONSEQUENTIAL DAMAGES.
This warranty gives you specific legal rights and you may also have other rights which vary from state
to state/province to province, so some of the above limitations or exclusions may not apply to you.
If non-warranty service is required, the product may be sent to the Company for repair/ replacement, transportation prepaid, by calling
1-800-RECOTON for details, complete instructions, and service fee charges.
LED light blinks once, pauses and blinks twice
more. Then release the key.
Recoton Corporation (la "Compañía") garantiza al comprador minorista original de este producto que si el producto o cualesquiera de
blink twice after pressing the 3 key.
sus partes estuvieran defectuosas en cuanto al material o su fabricación, dentro del año a partir de la fecha de compra original, dichos
defectos serán reparados o repuestos, a criterio de la Compañía, sin cargo alguno por las piezas o mano de obra.
Para obtener el repuesto dentro de los términos de esta garantía, el producto deberá ser enviado, con envío prepagado, al Distribuidor
donde fue adquirido o a la Compañía, junto con el comprobante de fecha de compra. Sírvase llamar al +1-800-RECOTON para obtener
light blinks once, pauses, and blinks twice
más información acerca del procedimiento adecuado de devolución de su producto, si su Distribuidor no se apega a las condiciones de
more. Then release the key.
esta garantía. Esta garantía es válida únicamente en los EE.UU. y Canadá.
ESTA GARANTÍA NO ES APLICABLE AL PRODUCTO O PIEZA DEL PRODUCTO QUE HAYAN SIDO DAÑADOS
POR ALTERACIONES, MAL MANEJO, MAL USO, NEGLIGENCIA, ACCIDENTE, INSTALACIÓN INADECUADA O
blink twice after pressing the 3 key.
REPARACIÓN NO AUTORIZADA.
ESTA GARANTÍA ES EXCLUSIVA Y REEMPLAZA A CUALQUIERA Y TODAS LAS DEMÁS GARANTÍAS, EXPRE-
for the device you want to assign the volume
SAS O IMPLÍCITAS, INCLUIDAS A MANERA DE EJEMPLO, LAS GARANTÍAS IMPLÍCITAS DE COMERCIABILI-
controls to. The red LED will blink four times
DAD Y ADECUACIÓN A LOS FINES ESPECÍFICOS Y A CUALQUIER OBLIGACIÓN, RESPONSABILIDAD, DERE-
to confirm the volume controls are locked.
CHO, RECLAMACIÓN O RECURSO CONTRACTUAL O EN MATERIA DE HECHOS ILÍCITOS, YA SEA QUE
SURJA O NO DE LA NEGLIGENCIA, REAL O IMPUTADA, DE LA COMPAÑÍA. NINGUNA PERSONA O REPRE-
SENTANTE ESTÁ AUTORIZADO A ASUMIR EN NOMBRE DE LA COMPAÑÍA NINGUNA OTRA RESPONSABILI-
DAD EN RELACIÓN CON LA VENTA DE ESTE PRODUCTO. EN NINGÚN CASO LA COMPAÑÍA SERA RESPON-
SABLE DE LOS DAÑOS INCIDENTALES O INDIRECTOS.
to unlock.
Esta garantía le otorga derechos legales específicos y otros derechos que pueden variar de un estado a
otro, de una provincia a otra, de manera que algunas de las limitaciones o exclusiones antes mencionadas
light blinks once, pauses, and blinks twice
no se aplicarán a su caso.
more. Then release the key.
Si se requiere un servicio sin garantía, puede enviar el producto a la Compañía para su reparación/cambio, con envío prepagado, lla-
blink twice after pressing the 3 key.
mando al +1-800-RECOTON para obtener información detallada sobre lo que debe hacer y los cargos por el servicio.
key. The red LED will blink
four times the volume controls have been
Customer Info Line
unlocked for that mode.
Toll Free 1-800-962-3986
Recoton
®
Accessories, Inc.
2950 Lake Emma Road
Lake Mary, FL 32746
© 2003 Recoton Corp.
www.jensen.com
MADE IN CHINA
HECHO EN CHINA
ONE YEAR WARRANTY
NON-WARRANTY SERVICE
GARANTÍA POR UN AÑO
SERVICIO SIN GARANTÍA
Línea telefónica de información al cliente:
Línea gratuita de teléfono al: +1-800-962-3986 en EE.UU.
AD39025 11/02
Advertisement

Subscribe to Our Youtube Channel
Related Manuals for Jensen JR300


Summary of Contents for Jensen JR300
- Page 1 “AA” batteries (not included). This manual was written for use with the JR300, JR400, and JR500. When the timer expires, the remote sends the target device’s power function, or power off when separate power 7.
- Page 2 21. Menú hacia la derecha ( ): Presione esta e instalar un juego de dos pilas "AA" (no incluidas). Este manual está escrito para el uso de los modelos JR300, 3. Ingrese los dígitos 9, 9, 0. El indicador LED Cómo "desbloquear"...
Need help?
Do you have a question about the JR300 and is the answer not in the manual?
Questions and answers