Olympus DS-30 Instructions Manual
Digital
Hide thumbs
Also See for DS-30:
- Instructions manual (260 pages) ,
- Online instructions manual (163 pages) ,
- Owner's manual (87 pages)
Table of Contents
Advertisement
Quick Links
Advertisement
Chapters
Table of Contents
Troubleshooting

Related Manuals for Olympus DS-30


Summary of Contents for Olympus DS-30
-
Page 51: Ds-50 Ds
DS-30 INSTRUCTIONS INSTRUCTIONS MODE D’EMPLOI INSTRUCCIONES Thank you for purchasing an Olympus Digital Voice Recorder. Please read these instructions for information about using the product correctly and safely. Keep the instructions handy for future reference. To ensure successful recordings, we recommend that you test the record function and volume before use. - Page 52 Any liability for passive damages or damage of any kind occurred due to data loss incurred by a defect of the product, repair performed by the third party other than Olympus or an Olympus authorized service station, or any other reasons is excluded from the Olympus’s liability.
- Page 53 INDEX INDEX INDEX Table of Contents Safe and Proper Usage Getting Started About Recording About Playback Erase and other functions Display and Sound Functions Menu Setting Using the Recorder on Your PC Managing Files on Your PC DSS Player Expanded Functions Importing Content for Listening on the Recorder Other Practical Use Methods...
- Page 54 Table of Contents Introduction ..........2 3 About Playback INDEX ............3 Playing ........... 34 Table of Contents ........4 Select Play Mode (Play Mode) ....39 Safe and Proper Usage ......6 How to begin segment repeat playback .. 41 General Precautions .........
- Page 55 Table of Contents 11 Other Practical Use Methods 7 Using the Recorder on Your PC Using as External Memory of Saving Files in Your PC ......65 the Computer ........80 Using DSS Player Software ....67 Installing Software ........69 12 Other Information Using Online Help ........
- Page 56 If the DSS Player is installed, click on the Joining Files ......... 130 [Start] button, select [All Programs], then Splitting Files ........132 [OLYMPUS DSS Player], then click on Menu Setting of this Recorder ....134 [DS-50/40/30 ONLINE INSTRUCTIONS]. Using Windows Media Player ....136...
-
Page 57: General Precautions
If you than Olympus or an Olympus authorized experience noise, move to another service station, or any other reasons is place, or move the recorder further excluded from the Olympus’s liability. - Page 58 • ... you notice anything unusual when yourself, and; using the AC adapter such as abnormal 2 call your dealer or local Olympus noise, heat, smoke, or a burning odor: representative for service. 1 do not touch any of the exposed parts;...
-
Page 59: Getting Started
☞ files. P34, 65) LP mode: 136hours15minutes ● A exclusive remote control (supplied with DS-30 (256MB) the DS-50 only) can be attached to the ST XQ mode: 4hours10minutes recorder to control recording and stop ST HQ mode: 8hours30minutes HQ mode: 17hours00minutes operations. - Page 60 PC, you can easily play back, organize, and edit the files. conventional Olympus models. • If you connect the recorder to a computer, you ● The guidance feature (in English and other...
-
Page 61: Identification Of Parts
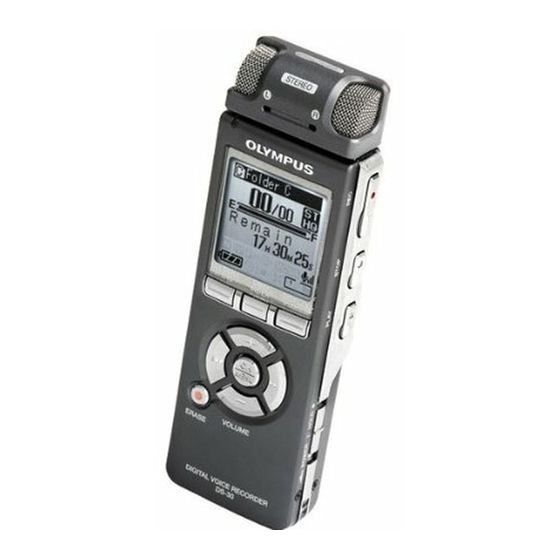
Identification of Parts & # FOLDER/ button $ VOLUME ( ) button 1 Exclusive stereo microphone % 9(Fast Forward) button ^ VOLUME ( (ME53S) ) button 2 MIC (Microphone) / REMOTE jack & 0(Rewind) button 3 Built-in monaural microphone * OK/MENU button 4 REC (Record) button ( ERASE button 5 STOP button... - Page 62 Identification of Parts Display (LCD Panel) Remote Controller (RS29 supplied with the DS-50 only) Recording and stop operations can be performed by connecting the remote controller to the recorder. The remote controller can also be used as a remote controlled stereo microphone by connecting it to the exclusive stereo microphone (ME53S).
-
Page 63: Inserting Batteries
When the battery is too weak, “Battery Low” appears on the display and the recorder shuts down. When changing batteries, AAA alkaline batteries or Olympus Ni-MH batteries (☞P14) are recommended. -
Page 64: Using The Ac Adapter
Model A321 or A322) into a household Optional Ni-MH rechargeable batteries power outlet and connect the power plug to from Olympus can be used in the the recorder’s power connector (DC 3V). recorder. Use them with the BU-400 Always turn the recorder's power off or stop Olympus Ni-MH Rechargeable Battery recording before connecting. -
Page 65: Power Supply
Power Supply When the recorder is not being used, turn the power off to reduce battery consumption to a minimum. Even if the power is turned off, existing data, mode settings, and clock settings will be maintained. Turning On the Power While the recorder's power is off, slide the POWER/HOLD switch in the direction indicated by the arrow. - Page 66 HOLD If you bring the POWER/HOLD switch to the HOLD position, the current conditions will be preserved, and all buttons and switches will be disabled.This feature is useful when the recorder has to be carried in a bag or pocket. Set the recorder to HOLD mode Slide the POWER/HOLD switch to the HOLD position.
- Page 67 Setting Time/Date (Time&Date) If you set the date and time beforehand, the information when the file is recorded is automatically stored for each file. Setting the date and time beforehand enables easier file management. When you use the recorder for the first time after purchasing it, or turn the power on after having removed the batteries for one minute or longer to change them or for other purposes, the “Set Time &...
- Page 68 Setting Time/Date (Time&Date) Press the OK button to complete the setup screen. The clock will start from the set date and time. Press the OK button according to the time signal......................Notes • If you press the OK button during the setup operation, the recorder will save the items that were set to that point.
-
Page 69: Notes On The Folders
Notes on the Folders There are a total of eight folders in the recorder that are in a tree format. Under the “Root” folder are “Folder A” through “Folder E”, “Audible” and “Music” folders, and recorded or transferred language and music data from a computer can be saved as “files”. “Folder A” through “Folder E” are voice-recording folders, so choose one of these five folders when recording on this recorder. -
Page 70: Selecting The Folders And Files
Notes on the Folders Selecting the Folders and Files File display List display Information of the selected file is displayed. The folders and files recorded Enters in playback standby mode. in this recorder are displayed. Upper (selected) folder aUpper (selected) folder Scroll bar bName of the file... - Page 71 Notes on the Folders How to select a folder and file You can select a desired folder and file even without using the Folder button or the Podcast button. button: Moves the cursor up and down. 9 or OK button: Opens the Selecting Selecting If a folder or file is...
- Page 72 File number : A serial number automatically assigned by a Digital Voice Recorder. User ID : The name that has been set on the Digital Voice Recorder. The default name on the Digital Voice Recorder is “DS-50” , “DS-40” or “DS-30” . The user ID can be modified with DSS Player.
-
Page 73: Before Recording
About Recording Before recording This recorder offers a wide range of recording options by using the exclusive stereo microphone, built-in monaural microphone, and exclusive remote control (provided with the DS-50 only). Choose a recording method according to your need. Stereo recording using the exclusive stereo microphone Plug the exclusive stereo microphone into the recorder's MIC/ REMOTE jack for stereo recording in ST XQ and ST HQ modes and monaural recording in HQ, SP, and LP modes. - Page 74 Before recording Use the remote control for operation Plug the exclusive remote control into the recorder's MIC/REMOTE jack to use the remote control to operate the recorder. Connect the exclusive remote control to the recorder's MIC/REMOTE jack. ➥ Use the REC/STOP switch on the exclusive remote control to start and stop recording with the recorder's built-in microphone (☞...
- Page 75 Recording Before starting recording, select a folder between Folder A to Folder E.These five folders can be selectively used to distinguish the kind of recording; for example, Folder A might be used to store private information, while Folder B might be dedicated to holding business information. Newly recorded audio will be saved as the last file in the selected folder.
- Page 76 Recording Notes • If you select a folder other than A through E and press the REC button, an “Illegal Folder” message will flash. Select a folder from A through E and start recording again. • To ensure recording from the beginning, start speaking after you see the red record/play indicator light on. •...
- Page 77 Recording Listening While Audio is Recorded If you start recording after inserting the earphone into the EAR jack on the recorder, you can hear the sound being recorded. The sound volume on the recording monitor can be adjusted by pressing the VOLUME (+) or VOLUME (–) button.
- Page 78 Using the Variable Control Voice Actuator (VCVA) When the microphone senses that sounds have reached a preset threshold volume level, the built-in Variable Control Voice Actuator (VCVA) starts recording automatically, and stops when the volume drops below the threshold level. The VCVA feature extends recording time and conserves memory by stopping recording during silent periods, which helps the playback to be more efficient.
- Page 79 Using the Variable Control Voice Actuator (VCVA) Press the REC button to start recording. When the sound volume is lower than the preset threshold sound level, recording automatically stops after 1 sec approximately, and “Standby” flashes on the display. The record/play indicator light glows red when recording starts and flashes when recording pauses.
- Page 80 Recording Modes (Rec Mode) The recording mode can be chosen from ST XQ (stereo extra high quality sound recording), ST HQ (stereo high quality sound recording), HQ (high quality sound recording), SP (standard recording), and LP (long-term recording). While the recorder is stopped, press the MENU button for 1 second or longer.
-
Page 81: Microphone Sensitivity
Microphone Sensitivity Microphone sensitivity is adjustable to meet recording needs. While the recorder is stopped or during recording, slide the Mic Sense switch and select a microphone sensitivity among “LECTURE”, “CONF”, and “DICT”. Every time the setting is switched, it cycles through the display's microphone sensitivities. - Page 82 Set the Low Cut Filter (LowCut Filter) The recorder has a Low Cut Filter function to minimize low-frequency sounds and record voices more clearly. This function can reduce noise from air conditioners, projectors and other similar noises. While the recorder is stopped or during recording, press the MENU button for 1 second or longer.
-
Page 83: Recommended Settings By Recording Condition
Set the Low Cut Filter (LowCut Filter) Press the OK button to complete the setup screen. If the 0 button is pressed, the setting will be canceled and it will return to the menu. Press the STOP button to close the menu. -
Page 84: About Playback
About Playback Playing The recorder can play back WMA and MP3 format files. To play back a file recorded with other machines, you need to transfer (copy) it from a computer. Files saved in the Audible folder can play back in the Audible mode. For operation methods in the Audible mode, see Online manual. - Page 85 Playing Press the PLAY or OK button to start playback. The record/play indicator light glows green. For files created using machines other than this recorder, the file format will appear on the display..MP3 files ..WMA files a Play position bar indicator b Current playback time c File name d File format indicator...
- Page 86 Playing Forwarding Press and hold the 9 button while the recorder is stopped. ➥ If you release the button, it will stop. Press the PLAY or OK button to start playing back from where it was stopped. a File length Press and hold the 9 button while playing a file.
- Page 87 Playing Locating the Beginning of the File Press the 9 button during playback, slow playback, or fast playback. ➥ The next file is cued and playback starts at the previously set speed. Press the 0 button during playback, slow playback, or fast playback.
- Page 88 Playing Playback Through Earphone An earphone can be connected to the EAR jack of the recorder for listening. ➥ When the earphone is used, the recorder speaker will be switched-off......................Notes • To avoid irritation to the ear, insert the earphone after turning down the volume level.
- Page 89 Select Play Mode (Play Mode) There are six play modes. You can choose whether to play by file or folder, or all files stored in the recorder. While the recorder is stopped or during playback, press the MENU button for 1 second or longer. The menu opens.
- Page 90 Select Play Mode (Play Mode) Press the OK button to complete the setup screen. If the 0 button is pressed, the setting will be canceled and it will return to the menu. Press the STOP button to close the menu. If the recorder goes to the menu screen during playback, press the 0 button to close the menu screen.
-
Page 91: How To Begin Segment Repeat Playback
How to begin segment repeat playback This function enables repeated playback of part of the file being played. Choose a file that contains a segment you want to play back repeatedly, and press the PLAY or OK button. File playback begins. Press the button at the point you want to start segment repeat... - Page 92 How to begin segment repeat playback Å@ Cancel the Segment Repeat Playback Function Press the OK button. ➥ Pressing the OK button will release segment repeat playback and stop playback. Press the STOP button. ➥ Pressing the STOP button will release segment repeat playback and stop playback.
- Page 93 Noise Cancel Function (Noise Cancel) If recorded audio is difficult to understand because of noisy surroundings, adjust the Noise Cancel setting level. Noise will be reduced in the file when it’s played back for better sound quality. While the recorder is stopped or during playback, press the MENU button for 1 second or longer.
- Page 94 Noise Cancel Function (Noise Cancel) Press the STOP button to close the menu. If the recorder goes to the menu screen during playback, press the 0 button to close the menu screen. will appear on the display. a Noise Cancel indicator ..............................
- Page 95 Set the Voice Filter (Voice Filter) The recorder has a Voice Filter Function to cut low and high frequency tones during normal, fast, or slow playback, and enable clear audio playback. While the recorder is stopped or during playback, press the MENU button for 1 second or longer.
- Page 96 Set the Voice Filter (Voice Filter) Press the STOP button to close the menu. If the recorder goes to the menu screen during playback, press the 0 button to close the menu screen. If it is set to “On”, will appear on the display.
-
Page 97: Erasing One File At A Time
Erase and other functions Erasing Erasing One File at a Time A selected file can be erased from a folder. Press the FOLDER button to choose a folder. Every time the FOLDER button is pressed, it cycles through folders and the List display will appear (☞P20). -
Page 98: Erase All Files From A Folder
Erasing Erase All Files from a Folder All files in a folder can be erased simultaneously. The locked files and the files set to read-only on the PC will not be erased. Press the FOLDER button to select the folder in which you want to erase all files. - Page 99 Erasing Notes • An erased file cannot be restored. • The locked files and the files that are set to read-only will not be erased. • If an action is not selected within eight seconds on the “Cancel”, “Erase”, or “All Erase” screens, the recorder will return to stop status.
-
Page 100: Index Marks And Temp Marks
If index marks and temp marks are placed, you can quickly find a location you want to listen to in fast forward and fast rewind (☞P36) and when cuing a file (☞P37). Index marks cannot be placed on files created on machines other than Olympus IC recorders, but temp marks can be placed instead to temporarily remember desired locations. - Page 101 Index Marks and Temp Marks Clearing an Index Mark or a Temp Mark Follow the procedures below to erase index or temp marks. Locate the index or temp mark you want to clear. Press the 9 or 0 button to select an index or temp mark to erase.
- Page 102 Formatting the Recorder (Format) If you format the recorder, all files will be removed and all function settings will return to defaults except date and time settings. Transfer any important files to a computer before formatting the recorder. If the recorder is formatted, data for guidance (☞P57), alarm playback, and starting/ closing tune when the power is turned On/Off (☞P15) will also be erased and these features will not be available in the future.
- Page 103 Formatting the Recorder (Format) Press the OK button. After the “Data Will Be Cleared” message is on for two seconds, “Cancel” will turn on. Press the button again to choose “Start”. Press the OK button. Formatting begins and an indicator flashes on the display.
- Page 104 Formatting the Recorder (Format) Notes • Never turn the power off or remove batteries during formatting because data may be corrupted. It may take over 10 seconds to complete erasing. • Never format the recorder from a PC. • After formatting, recorded audio file names may start from 0001. •...
-
Page 105: Lcd Display Information
Display and Sound Functions LCD Display Information The LCD screen on the recorder can display 3 different format of information by pressing the DISPLAY button. This help review and confirm different recorder settings and file information. Press the DISPLAY button. The LCD display views will switch every time the DISPLAY button is pressed in the File Display screen. -
Page 106: While In Record Mode
LCD Display Information While recording in VCVA mode While in record mode Displays 1 and 2 alternately. Displays 1 and 2 alternately. 1 Remaining memory 1 Remaining memory bars/recording time/ bars/recording time/ Recording level meter VCVA recording level meter Current elapsed recording time displayed The current elapsed recording... - Page 107 Guidance (Voice Guide) This feature gives audio announcements of recorder operating conditions. Adjust the speed and the volume of guidance announcements. While the recorder is stopped, press the MENU button for 1 second or longer. The menu opens. (☞ P.60, 62) –...
- Page 108 Guidance (Voice Guide) “On/Off” setting – 1 Press the button to choose between “On” and “Off”. On: Guidance will be provided. Off: Guidance will be canceled. 2 Press the OK button to exit “On/Off” selection. “Speed”setting – 1 Press the button to choose from “Fast”, “Normal”, and “Slow”.
- Page 109 Guidance (Voice Guide) Press the OK button to complete the setup screen. If the 0 button is pressed, the setting will be canceled and it will return to the menu. Press the STOP button to close the menu..............................Notes •...
-
Page 110: Menu Setting Method
Menu Setting Menu Setting Method Items in menus are categorized by tabs, so select a tab first and move to a desired item to quickly set it. You can set each menu item as follows. While the recorder is stopped, press the MENU button for 1 second or longer. - Page 111 Menu Setting Method Press the OK or 9 button. Moves to the setting of the selected item. – Press the button to change the setting. Press the OK button to complete the setup screen. If the 0 button is pressed, the setting will be canceled and it will return to the menu.
-
Page 112: Menu List
Menu List *Please see online manual for details. - Page 113 Menu List *Please see online manual for details.
- Page 114 Menu List *Please see online manual for details. *“Play Mode” and “Skip Space” cannot be set in the Audible mode.
-
Page 115: Saving Files In Your Pc
Using the Recorder on Your PC Saving Files in Your PC By being connected to a PC, the recorder enables you to do the following: • Playback voice files on your PC. Audio files recorded using the recorder can be played using the DSS Player software included on the provided CD-ROM or Windows Media Player. - Page 116 Saving Files in Your PC ● Data can be written or uploaded to the recorder even though the attribute of the recorder drive is shown as Read-only by the operating system of the PC. ● As the noise may cause adverse effects on electronics devices nearby the recorder, unplug the earphone when you connect the recorder to a PC.
-
Page 117: Using Dss Player Software
Using DSS Player Software Basic Operating Environment of DSS Player IBM PC/AT compatible PC Operating Microsoft Windows 2000 Professional/XP Professional,Home Edition System: CPU: Intel Pentium II class 333 MHz processor or more (If recording to a hard disk directly with the WMA format, please use in the range of 500 MHz or more) RAM: 128 MB or more (256MB or more is recommended) - Page 118 Using DSS Player Software Notes • The support service will not cover if your PC has been updated from Windows 95/98/Me to Windows 2000/XP. • Any failure on a self-modified PC will not be covered under the operational warranty.
-
Page 119: Installing Software
Installing Software Before you connect the recorder to your PC and use it, you must first install the DSS player software from the included Software CD. Applications included with “DSS Player” • DSS Player: Recorded voice files can be downloaded to the PC for complete file management and playback solution. - Page 120 Installing Software Installing DSS Player Select a program menu folder. You may change the program menu Register user information. folder to another one, such as [Start Enter your name, company name and Up]. To accept the default folder, click serial number. For the serial number, [Next].
- Page 121 Installing Software Installing the Device Driver Connect the recorder to your PC, referring to “Connecting to ☞ Your PC” ( P73). When you connect the recorder to your PC for the first time after installing DSS Player, the recorder’s driver will be installed automatically.
-
Page 122: Using Online Help
Using Online Help To open Online Help, you have the following options. • Click the [start] button, select [All Programs], then [Olympus DSS Player], then click [Help]. • While DSS Player is running, choose [Contents] from the [Olympus DSS Player Help] menu. -
Page 123: Connecting To Your Pc
Connecting to Your PC Be sure to finish installing DSS Player before connecting the recorder (☞ P69). Connecting to your PC using the USB cable Turn the recorder's power ON. Connect the USB connection cable to the USB port or the USB hub of the PC. -
Page 124: Disconnecting From Your Pc
Connecting to Your PC Disconnecting from Your PC Click the on the task bar located at the lower-right corner of the screen. Click [Safely Remove Hardware]. The drive letter will differ depending on the PC being used. Disconnect the USB cable.............................. -
Page 125: Running Dss Player
For automatic start, select and click DSS Player to reinstate again. Manual start Start Windows. Click the [start] button, select [All Programs], then [Olympus DSS Player]. Click [Olympus DSS Player]..............................Note • You cannot run more than one DSS Player program or multiple copies of the same program simultaneously. -
Page 126: Copying Voice Guide Data
Managing Files on Your PC Copying Voice Guide Data If you format the recorder and erase data by mistake, you can copy the voice guide data from DSS Player to the recorder. Make sure that the recorder's voice guide is set to “On”. If the recorder's voice guide is set to “Off”... -
Page 127: Upgrade Function
DSS Player Expanded Functions Upgrade Function Plus The “DSS Player” enables upgrades (Options) to the “DSS Player Plus” which is equipped with more functions. In addition to the DSS Player functions, voice recognition using voice recognition software, joining of files, sharing of files and the menu setting of this recorder can be utilized. - Page 128 Upgrade Function Select [Upgrade to DSS Player Plus] from the [Help] menu. The “Upgrade to DSS Player Plus” dialog will be displayed. In the [Upgrade to DSS Player Plus] dialog, enter the license number of your purchase, and click the [OK] button.
-
Page 129: Importing Content For Listening On The Recorder
Importing Content for Listening on the Recorder Importing Content for Listening on the Recorder You can transfer language content and music files imported from language CDs and the Internet using Windows Media Player for playing on the recorder. You can also use DSS Player to import and enjoy Podcast content found on the Internet. The recorder is compatible with WMA and MP3 language content. - Page 130 Other Practical Use Methods Using as External Memory of the Computer With the recorder connected to your PC, you can download data from the memory to your PC and upload data stored on your PC to the memory. Example: Copying Data from PC to Recorder using Explorer Start Windows.
-
Page 131: Other Information
Error in the internal memory. This is a malfunction, so go to the store Memory Error internal where you purchased the recorder or an memory Olympus service station for repair. Licence Illegally copied The music files copied Delete the file (☞ P47). Mismatch file illegally. -
Page 132: Troubleshooting
Troubleshooting Symptom Probable cause Action Nothing appears The batteries are not loaded properly. Verify polarity is correct. on the display The batteries are dead. Replace with new batteries (☞ P13). The power is off. Turn the power on (☞ P15). The power is off. - Page 133 Troubleshooting Symptom Probable cause Action Cannot find the Wrong folder. Switch to the right folder. recorded voice The recorder The clock has not been set properly. Verify the “Current Time” to reset the date does not start at (☞ and time if they are not properly set the set time with P18) “Timer Rec”...
- Page 134 ME53SH which is the same color as (BR401) as a pack. This charger can quick charge the DS-30 model, the ME53SS which is the same Olympus AA or AAA Ni-MH rechargeable batteries. color as the DS-40 model, and the ME53SA which is the same color as the DS-50 model.
-
Page 135: Specifications
Built-in flash memory SP mode: 138 hours 30 minutes DS-50: 1 GB LP mode: 275 hours 20 minutes DS-40: 512 MB DS-30: 256 MB DS-40: 512 MB STEREO XQ mode: 8 hours 40 minutes Speaker STEREO HQ mode: 17 hours 20 minutes Built-in ø23 mm round dynamic speaker... -
Page 136: Technical Assistance And Support
(without protrusions) and the conditions of use. Technical Assistance and Support The following are contact information for technical support for Olympus recorders and software only. ◆ Technical Hotline Number in the U.S. and Canada 1-888-553-4448 ◆ User Support E-mail address in the U.S. and Canada distec@olympus.com... - Page 137 Informieren Sie sich über das in Ihrem Land gültige in your country for the disposal of this product. Rücknahmesystem und nutzen dieses zur Entsorgung. Applicable Product : DS-30/40/50 Anwendbare Produkte : DS-30/40/50 Знак "CE" обозначает, что этот пpодукт L’indication “CE” signifie que ce produit est conforme соответствует...
- Page 138 U1-BZ8197-01 AP0612...
- Page 139 RECORDER DS-50 DS-40 DS-30 ONLINE INSTRUCTIONS Thank you for purchasing an Olympus Digital Voice Recorder. Please read these instructions for information about using the product correctly and safely. Keep the instructions handy for future reference. To ensure successful recordings, we recommend that you test the record function and volume before use.
-
Page 140: Introduction
Any liability for passive damages or damage of any kind occurred due to data loss incurred by a defect of the product, repair performed by the third party other than Olympus or an Olympus authorized service station, or any other reasons is excluded from the Olympus’s liability. -
Page 141: Index
INDEX INDEX INDEX Table of Contents Safe and Proper Usage Getting Started P.23 About Recording P.41 About Playback P.63 Erase and other functions P.82 Display and Sound Functions P.91 Menu Setting P.96 Using the Recorder on Your PC P.109 Managing Files on Your PC P.120 DSS Player Expanded Functions Importing content for listening... -
Page 142: Table Of Contents
Table of Contents Introduction ..........2 Set Skip Space (Skip Space) ....46 INDEX ............3 Changing the Playback Speed (Play Speed) . 48 Table of Contents ........4 Select Play Mode (Play Mode) ....51 Safe and Proper Usage ......6 How to begin segment repeat playback .. - Page 143 Table of Contents 10 Importing Content for Listening 7 Using the Recorder on Your on the Recorder Importing Content for Listening on the Saving Files in Your PC ......96 Recorder ........135 Using DSS Player Software ....98 Using Windows Media Player ....136 Installing Software ........
-
Page 144: Safe And Proper Usage
Safe and Proper General Precautions Usage ● Do not leave the recorder in hot, humid locations such as inside a Before using your new recorder, read this closed automobile under direct manual carefully to ensure that you know sunlight or on the beach in the how to operate it safely and correctly. -
Page 145: General Precautions
Olympus or an Olympus authorized 1 remove the batteries immediately service station, or any other reasons is while being careful not to burn excluded from the Olympus’s liability. yourself, and; 2 call your dealer or local Olympus representative for service. - Page 146 1 do not touch any of the exposed parts; 2 immediately disconnect the power supply plug from the power outlet, and; 3 call your dealer or local Olympus representative for servicing. Continued use of the AC adapter under these circumstances could result in electric...
-
Page 147: Getting Started
68hours30minutes ☞ files. P41,96) LP mode: 136hours15minutes ● A exclusive remote control (supplied with DS-30 (256MB) the DS-50 only) can be attached to the ST XQ mode: 4hours10minutes recorder to control recording and stop ST HQ mode: 8hours30minutes HQ mode: 17hours00minutes operations. - Page 148 PC, you can easily play back, organize, and edit the files. conventional Olympus models. (☞ P84) • If you connect the recorder to a computer, you ● The guidance feature (in English and other...
-
Page 149: Identification Of Parts
Identification of Parts & # FOLDER/ button $ VOLUME ( ) button 1 Exclusive stereo microphone % 9(Fast Forward) button ^ VOLUME ( (ME53S) ) button 2 MIC (Microphone) / REMOTE jack & 0(Rewind) button 3 Built-in monaural microphone * OK/MENU button 4 REC (Record) button ( ERASE button 5 STOP button... - Page 150 Identification of Parts Display (LCD Panel) Remote Controller (RS29 supplied with the DS-50 only) Recording and stop operations can be performed by connecting the remote controller to the recorder. The remote controller can also be used as a remote controlled stereo microphone by connecting it to the exclusive stereo microphone (ME53S).
-
Page 151: Inserting Batteries
When the battery is too weak, “Battery Low” appears on the display and the recorder shuts down. When changing batteries, AAA alkaline batteries or Olympus Ni-MH batteries (☞P14) are recommended. -
Page 152: Using The Ac Adapter
Model A321 or A322) into a household Optional Ni-MH rechargeable batteries power outlet and connect the power plug to from Olympus can be used in the the recorder’s power connector (DC 3V). recorder. Use them with the BU-400 Always turn the recorder's power off or stop Olympus Ni-MH Rechargeable Battery recording before connecting. -
Page 153: Power Supply
Power Supply When the recorder is not being used, turn the power off to reduce battery consumption to a minimum. Even if the power is turned off, existing data, mode settings, and clock settings will be maintained. Turning On the Power While the recorder's power is off, slide the POWER/HOLD switch in the direction indicated by the arrow. -
Page 154: Hold
HOLD If you bring the POWER/HOLD switch to the HOLD position, the current conditions will be preserved, and all buttons and switches will be disabled.This feature is useful when the recorder has to be carried in a bag or pocket. Set the recorder to HOLD mode Slide the POWER/HOLD switch to the HOLD position. -
Page 155: Setting Time/Date (Time&Date)
Setting Time/Date (Time&Date) If you set the date and time beforehand, the information when the file is recorded is automatically stored for each file. Setting the date and time beforehand enables easier file management. When you use the recorder for the first time after purchasing it, or turn the power on after having removed the batteries for one minute or longer to change them or for other purposes, the “Set Time &... - Page 156 Setting Time/Date (Time&Date) Press the OK button to complete the setup screen. The clock will start from the set date and time. Press the OK button according to the time signal......................Notes • If you press the OK button during the setup operation, the recorder will save the items that were set to that point.
-
Page 157: Notes On The Folders
Notes on the Folders There are a total of eight folders in the recorder that are in a tree format. Under the “Root” folder are “Folder A” through “Folder E”, “Audible” and “Music” folders, and recorded or transferred language and music data from a computer can be saved as “files”. “Folder A” through “Folder E” are voice-recording folders, so choose one of these five folders when recording on this recorder. - Page 158 Notes on the Folders Selecting the Folders and Files File display List display Information of the selected file is displayed. The folders and files recorded Enters in playback standby mode. in this recorder are displayed. Upper (selected) folder aUpper (selected) folder Scroll bar bName of the file...
- Page 159 Notes on the Folders How to select a folder and file You can select a desired folder and file even without using the Folder button or the Podcast button. button: Moves the cursor up and down. 9 or OK button: Opens the Selecting Selecting If a folder or file is...
- Page 160 User ID : The name that has been set on the Digital Voice Recorder. The default name on the Digital Voice Recorder is “DS-50” , “DS-40” or “DS-30” . The user ID can be modified with DSS Player (☞ P114).
-
Page 161: About Recording
About Recording Before recording This recorder offers a wide range of recording options by using the exclusive stereo microphone, built-in monaural microphone, and exclusive remote control (provided with the DS-50 only). Choose a recording method according to your need. Stereo recording using the exclusive stereo microphone Plug the exclusive stereo microphone into the recorder's MIC/ REMOTE jack for stereo recording in ST XQ and ST HQ modes and monaural recording in HQ, SP, and LP modes. - Page 162 Before recording Use the remote control for operation Plug the exclusive remote control into the recorder's MIC/REMOTE jack to use the remote control to operate the recorder. Connect the exclusive remote control to the recorder's MIC/REMOTE jack. ➥ Use the REC/STOP switch on the exclusive remote control to start and stop recording with the recorder's built-in microphone (☞...
-
Page 163: Recording
Recording Before starting recording, select a folder between Folder A to Folder E.These five folders can be selectively used to distinguish the kind of recording; for example, Folder A might be used to store private information, while Folder B might be dedicated to holding business information. Newly recorded audio will be saved as the last file in the selected folder. - Page 164 Recording Notes • If you select a folder other than A through E and press the REC button, an “Illegal Folder” message will flash. Select a folder from A through E and start recording again. • To ensure recording from the beginning, start speaking after you see the red record/play indicator light on. •...
- Page 165 Recording Listening While Audio is Recorded If you start recording after inserting the earphone into the EAR jack on the recorder, you can hear the sound being recorded. The sound volume on the recording monitor can be adjusted by pressing the VOLUME (+) or VOLUME (–) button.
-
Page 166: Using The Variable Control Voice Actuator (Vcva)
Using the Variable Control Voice Actuator (VCVA) When the microphone senses that sounds have reached a preset threshold volume level, the built-in Variable Control Voice Actuator (VCVA) starts recording automatically, and stops when the volume drops below the threshold level. The VCVA feature extends recording time and conserves memory by stopping recording during silent periods, which helps the playback to be more efficient. - Page 167 Using the Variable Control Voice Actuator(VCVA) Press the REC button to start recording. When the sound volume is lower than the preset threshold sound level, recording automatically stops after 1 sec approximately, and “Standby” flashes on the display. The record/play indicator light glows red when recording starts and flashes when recording pauses.
-
Page 168: Recording Modes (Rec Mode)
Recording Modes (Rec Mode) The recording mode can be chosen from ST XQ (stereo extra high quality sound recording), ST HQ (stereo high quality sound recording), HQ (high quality sound recording), SP (standard recording), and LP (long-term recording). While the recorder is stopped, press the MENU button for 1 second or longer. -
Page 169: Microphone Sensitivity
Microphone Sensitivity Microphone sensitivity is adjustable to meet recording needs. While the recorder is stopped or during recording, slide the Mic Sense switch and select a microphone sensitivity among “LECTURE”, “CONF”, and “DICT”. Every time the setting is switched, it cycles through the display's microphone sensitivities. -
Page 170: Set The Low Cut Filter (Lowcut Filter)
Set the Low Cut Filter (LowCut Filter) The recorder has a Low Cut Filter function to minimize low-frequency sounds and record voices more clearly. This function can reduce noise from air conditioners, projectors and other similar noises. While the recorder is stopped or during recording, press the MENU button for 1 second or longer. -
Page 171: Playing
Set the Low Cut Filter (LowCut Filter) Press the OK button to complete the setup screen. If the 0 button is pressed, the setting will be canceled and it will return to the menu. Press the STOP button to close the menu. -
Page 172: Recording From External Microphone Or Other Devices
Recording from External Microphone or Other Devices The external microphone and other devices can be connected and the sound can be recorded. Connect as follows by the device to be used. Recording with External Microphone To MIC (microphone) jack Connect an external microphone to the MIC jack of the recorder or the exclusive remote control connected to the recorder. -
Page 173: Recording From External Microphone Or Other Devices
Recording from External Microphone or Other Devices To MIC Recording the Sound of Other (microphone) jack Devices with This Recorder The sound can be recorded when connecting to the audio output terminal (earphone jack) of the other device, and the microphone jack of the recorder with the connecting cord (optional KA333)(☞... -
Page 174: Timer Recording (Timer Rec)
Timer Recording (Timer Rec) Timer recording is the function to execute a recording at a set time. You can program up to three desired settings (Preset 1-3) (“On/Off”, “Day”, “Time”, “Rec Mode”, “Folder”, and “Mic Sense”). While the recorder is stopped, press the MENU button for 1 second or longer. - Page 175 Timer Recording (Timer Rec) “On/Off” setting – 1 Press the button to choose between “On” and “Off”. On: Setting will be applied. Off: Setting will not be applied. 2 Press the OK button to exit “On/Off” selection. “Day” setting – 1 Press the button to choose from “Only once”, “Everyday”, and “Every week”.
- Page 176 Timer Recording (Timer Rec) “Rec Mode” setting Regardless of the regular Rec mode (☞P30), timer recording will start in a set recording mode. – 1 Press the button to select a recording mode. 2 Press the OK button to exit “Rec Mode” selection.
- Page 177 Timer Recording (Timer Rec) Completing the setting. 1 Press the + or – button to choose “Finish”. 2 Press the OK button to complete the setup screen. Programmed settings will be applied and the screen will return to the preset number selection menu.
- Page 178 Timer Recording (Timer Rec) Notes • If the recorder is in use at the preset start time, the timer recording will start directly after stopping the recorder. • Even if the power if turned off or the recorder is put on Hold, timer recording will start at a specified time. •...
-
Page 179: About Playback
About Playback Playing The recorder can play back WMA and MP3 format files. To play back a file recorded with other machines, you need to transfer (copy) it from a computer (☞P112). Files saved in the Audible folder can play back in the Audible mode. For operation methods in the Audible mode, see P153. - Page 180 Playing Press the PLAY or OK button to start playback. The record/play indicator light glows green. For files created using machines other than this recorder, the file format will appear on the display..MP3 files ..WMA files a Play position bar indicator b Current playback time c File name d File format indicator...
- Page 181 Playing Forwarding Press and hold the 9 button while the recorder is stopped. ➥ If you release the button, it will stop. Press the PLAY or OK button to start playing back from where it was stopped. a File length Press and hold the 9 button while playing a file.
- Page 182 Playing Locating the Beginning of the File Press the 9 button during playback, slow playback, or fast playback. ➥ The next file is cued and playback starts at the previously set speed. Press the 0 button during playback, slow playback, or fast playback.
- Page 183 Playing Playback Through Earphone An earphone can be connected to the EAR jack of the recorder for listening. ➥ When the earphone is used, the recorder speaker will be switched-off......................Notes • To avoid irritation to the ear, insert the earphone after turning down the volume level.
-
Page 184: Set Skip Space (Skip Space)
Set Skip Space (Skip Space) This function enables you to skip (forward) or reverse skip (rewind) a file being played for a set period. This function is convenient for quickly skipping to another playback position or repeatedly playing back short phrases. While the recorder is stopped or during playback, press the MENU button for 1 second or longer. - Page 185 Set Skip Space (Skip Space) – Press the button to select space. F. Skip: File Skip/10Sec/30Sec/1Min/5Min/ 10Min R. Skip: File Skip/1Sec/2Sec/3Sec/4Sec/ 5Sec/10Sec/30Min/1Min/5Min/10Min Press the OK button to complete the setup screen. If the 0 button is pressed, the setting will be canceled and it will return to the menu.
-
Page 186: Changing The Playback Speed (Play Speed)
Changing the Playback Speed (Play Speed) The playback speed of the file can be changed between 0.5 and 1.5 times speed in increments of 0.125. Change the speed according to need such as listening to meeting content at a fast speed or reviewing spots that you couldn't catch in a language lesson at a slow speed. - Page 187 Changing the Playback Speed (Play Speed) – Press the button to choose “Play Speed”. Press the OK or 9 button. The playback speed setup process begins. – Press the button to choose between “S. Play” and “F. Play”. Press the OK or 9 button. Start setting each of “S.
- Page 188 Changing the Playback Speed (Play Speed) Press the STOP button to close the menu. If the recorder goes to the menu screen during playback, press the 0 button to close the menu screen. As in Regular Play mode, you can stop playback, cue a file, or insert an index mark (☞P66) in F.
-
Page 189: Select Play Mode (Play Mode)
Select Play Mode (Play Mode) There are six play modes. You can choose whether to play by file or folder, or all files stored in the recorder. While the recorder is stopped or during playback, press the MENU button for 1 second or longer. The menu opens (☞... - Page 190 Select Play Mode (Play Mode) Press the OK button to complete the setup screen. If the 0 button is pressed, the setting will be canceled and it will return to the menu. Press the STOP button to close the menu. If the recorder goes to the menu screen during playback, press the 0 button to close the menu screen.
-
Page 191: How To Begin Segment Repeat Playback
How to begin segment repeat playback This function enables repeated playback of part of the file being played. Choose a file that contains a segment you want to play back repeatedly, and press the PLAY or OK button. File playback begins. Press the button at the point you want to start segment repeat... - Page 192 How to begin segment repeat playback Å@ Cancel the Segment Repeat Playback Function Press the OK button. ➥ Pressing the OK button will release segment repeat playback and stop playback. Press the STOP button. ➥ Pressing the STOP button will release segment repeat playback and stop playback.
-
Page 193: Noise Cancel Function (Noise Cancel)
Noise Cancel Function (Noise Cancel) If recorded audio is difficult to understand because of noisy surroundings, adjust the Noise Cancel setting level. Noise will be reduced in the file when it’s played back for better sound quality. While the recorder is stopped or during playback, press the MENU button for 1 second or longer. - Page 194 Noise Cancel Function (Noise Cancel) Press the STOP button to close the menu. If the recorder goes to the menu screen during playback, press the 0 button to close the menu screen. will appear on the display. a Noise Cancel indicator ..............................
-
Page 195: Set The Voice Filter (Voice Filter)
Set the Voice Filter (Voice Filter) The recorder has a Voice Filter Function to cut low and high frequency tones during normal, fast, or slow playback, and enable clear audio playback. While the recorder is stopped or during playback, press the MENU button for 1 second or longer. - Page 196 Set the Voice Filter (Voice Filter) Press the STOP button to close the menu. If the recorder goes to the menu screen during playback, press the 0 button to close the menu screen. If it is set to “On”, will appear on the display.
-
Page 197: Alarm Playback Function (Alarm)
Alarm Playback Function (Alarm) The alarm playback function can be set to play a selected file at a pre-set time. You can program up to three desired settings (Preset 1-3) (“On/Off”, “Day”, “Start Time”,“Volume”, “Alarm” and “Playback File”). While the recorder is stopped, press the MENU button for 1 second or longer. - Page 198 Alarm Playback Function (Alarm) “On/Off” setting – 1 Press the button to choose between “On” and “Off”. On: Setting will be applied. Off: Setting will not be applied. 2 Press the OK button to exit “On/Off” selection. “Day” setting – 1 Press the button to choose from “Only once”, “Everyday”, and “Every week”.
- Page 199 Alarm Playback Function (Alarm) “Volume” setting – 1 Press the button to adjust the volume. 2 Press the OK button to exit “Volume” selection. Press the PLAY button to check the volume. “Alarm” setting – 1 Press the button to choose an alarm sound from among “Alarm1”, “Alarm2”...
- Page 200 Alarm Playback Function (Alarm) Completing the setting. – 1 Press the button to choose “Finish”. 2 Press the OK button to complete the setup screen. Programmed settings will be applied and the screen will return to the preset number selection menu. If the On/Off setting is set to On, (Alarm indicator) will appear on the display.
-
Page 201: Erase And Other Functions
Erase and other functions Erasing Erasing One File at a Time A selected file can be erased from a folder. Press the FOLDER button to choose a folder. Every time the FOLDER button is pressed, it cycles through folders and the List display will appear (☞P20). - Page 202 Erasing Erase All Files from a Folder All files in a folder can be erased simultaneously. The locked files (☞ P.68) and the files set to read-only on the PC will not be erased. Press the FOLDER button to select the folder in which you want to erase all files.
- Page 203 Erasing Notes • An erased file cannot be restored. • The locked files and the files that are set to read-only will not be erased (☞ P.68). • If an action is not selected within eight seconds on the “Cancel”, “Erase”, or “All Erase” screens, the recorder will return to stop status.
-
Page 204: Index Marks And Temp Marks
If index marks and temp marks are placed, you can quickly find a location you want to listen to in fast forward and fast rewind (☞P43) and when cuing a file (☞P44). Index marks cannot be placed on files created on machines other than Olympus IC recorders, but temp marks can be placed instead to temporarily remember desired locations. - Page 205 Index Marks and Temp Marks Clearing an Index Mark or a Temp Mark Follow the procedures below to erase index or temp marks. Locate the index or temp mark you want to clear. Press the 9 or 0 button to select an index or temp mark to erase.
-
Page 206: Locking Files (Lock)
Locking Files (Lock) Locking a file keeps important data from being accidentally erased. Locked files are not erased when you choose to erase all files from a folder (☞ P64). Press the FOLDER button to choose a folder. – List display Press the button to choose the file you want to lock. - Page 207 Locking Files (Lock) Press the OK button to complete the setup screen. Press the STOP button to close the menu. a Erase lock indicator If a file is locked, a lock indicator appears in the file list screen to conveniently distinguish important files from others.
-
Page 208: Changing Folder Names (Folder Name)
Changing Folder Names (Folder Name) You can change the folder names of Folder A to Folder E for audio recording into names preset in the template (such as “Meeting”, “To Do”, and “Memo”). You can also change folder names registered in the template with DSS Player (☞P116). While the recorder is stopped, press the MENU button for 1 second or longer. - Page 209 Changing Folder Names (Folder Name) – Press the button to select the folder name in the template you want to change to. Press the OK button to change the folder name. If the 0 button is pressed, the screen goes back to Step 4 without changing the folder name.
-
Page 210: Rearranging Files (File Move)
Rearranging files (File Move) You can move a file in a folder to change the order of playback. First select the folder (file) for which you want to change the playback order. Press the FOLDER button to choose a folder. Press the hold the MENU button for 1 second or longer. - Page 211 Rearranging files (File Move) – Press the button to select the location to move it to. Press the OK button. The file will be moved. If there are more files to move, repeat Steps 5 through 8. If the OK button is pressed for one second or longer, file order rearrangement will close and the recorder will return to the File Move screen.
-
Page 212: Formatting The Recorder (Format)
Formatting the Recorder (Format) If you format the recorder, all files will be removed and all function settings will return to defaults except date and time settings. Transfer any important files to a computer before formatting the recorder. If the recorder is formatted, data for guidance (☞P87), alarm playback (☞P60), and starting/closing tune when the power is turned On/Off (☞P15) will also be erased and these features will not be available in the future. - Page 213 Formatting the Recorder (Format) Press the OK button. After the “Data Will Be Cleared” message is on for two seconds, “Cancel” will turn on. Press the button again to choose “Start”. Press the OK button. Formatting begins and an indicator flashes on the display.
- Page 214 Formatting the Recorder (Format) Notes • Never turn the power off or remove batteries during formatting because data may be corrupted. It may take over 10 seconds to complete erasing. • Never format the recorder from a PC. • After formatting, recorded audio file names may start from 0001. •...
-
Page 215: Changing The Usb Class (Usb Class)
Changing the USB Class (USB Class) When using this recorder as a USB microphone or USB speaker in the voice recognition software or other applications, it is necessary to set the USB class of this recorder to “Audio Class”. By using the USB microphone function, it enables enroll (= voice learning) operations of the voice recognition software. -
Page 216: Changing Power Save (Power Save)
Changing Power Save (Power Save) If the recorder is on and stops for 10 minutes or longer (default), the display shuts off and it goes into power save mode. You can set the time to enter power save from among “5 min”, “10 min”, “30 min”, “1 hour”, and “Off”. -
Page 217: Changing External Input Setting (Ext. Input)
Changing External Input Setting (Ext. Input) This recorder is designed to recognize microphone jack conditions (including if a exclusive stereo microphone or a exclusive remote-control stereo microphone is plugged in) for proper recording according to recording mode. If another manufacturer's stereo external microphone is used, it may be incorrectly recognized as a monaural microphone. -
Page 218: Monaural Recording
Changing External Input Setting (Ext.Input) When a stereo recording is made using the monaural microphone or a monaural recording is made using the stereo microphone, the recording will be changed by using the “Ext. Input” setting described below. Recording data when “Auto” is selected If something is plugged into ☞... -
Page 219: Viewing System Information (System Info.)
Viewing system information (System Info.) You can check the recorder's information on the menu screen. While the recorder is stopped, press the MENU button for 1 second or longer. The menu opens (☞ P91,93). – Press the button to choose “System Info.”. -
Page 220: Display And Sound Functions
Display and Sound Functions LCD Display Information The LCD screen on the recorder can display 3 different format of information by pressing the DISPLAY button. This help review and confirm different recorder settings and file information. Press the DISPLAY button. The LCD display views will switch every time the DISPLAY button is pressed in the File Display screen. - Page 221 LCD Display Information While in record mode While recording in VCVA mode Displays 1 and 2 alternately. Displays 1 and 2 alternately. 1 Remaining memory 1 Remaining memory bars/recording time/ bars/recording time/ Recording level meter VCVA recording level meter Current elapsed recording time displayed The current elapsed recording...
-
Page 222: Backlight (Backlight)
Backlight (Backlight) The recorder display backlight is On by default. The display will remain lit for about 10 seconds when a button on the recorder is pressed. While the recorder is stopped, press the MENU button for 1 second or longer. -
Page 223: Led(Led)
LED (LED) You can set it so the Record/Play indicator light does not turn on. While the recorder is stopped, press the MENU button for 1 second or longer. The menu opens (☞ P.91,93). – Press the button to choose “LED”. -
Page 224: Lcd Contrast Adjustment (Contrast)
LCD Contrast Adjustment (Contrast) Display contrast can be adjusted in 12 levels. While the recorder is stopped, press the MENU button for 1 second or longer. The menu opens (☞ P91,93). – Press the button to choose “Contrast”. Press the OK or 9 button. The contrast setup process begins. -
Page 225: Guidance (Voice Guide)
Guidance (Voice Guide) This feature gives audio announcements of recorder operating conditions. Adjust the speed and the volume of guidance announcements. While the recorder is stopped, press the MENU button for 1 second or longer. The menu opens (☞ P.91,93). –... - Page 226 Guidance (Voice Guide) “On/Off” setting – 1 Press the button to choose between “On” and “Off”. On: Guidance will be provided. Off: Guidance will be canceled. 2 Press the OK button to exit “On/Off” selection. “Speed”setting – 1 Press the button to choose from “Fast”, “Normal”, and “Slow”.
- Page 227 Guidance (Voice Guide) Press the OK button to complete the setup screen. If the 0 button is pressed, the setting will be canceled and it will return to the menu. Press the STOP button to close the menu..............................Note •...
-
Page 228: System Sounds (Beep)
System Sounds (Beep) The recorder beeps to alert you to button operations or warn you of errors. System sounds may be turned off. While the recorder is stopped, press the MENU button for 1 second or longer. The menu opens (☞ P91,93). –... -
Page 229: Menu Setting
Menu Setting Menu Setting Method Items in menus are categorized by tabs, so select a tab first and move to a desired item to quickly set it. You can set each menu item as follows. While the recorder is stopped, press the MENU button for 1 second or longer. - Page 230 Menu Setting Method Press the OK or 9 button. Moves to the setting of the selected item. – Press the button to change the setting. Press the OK button to complete the setup screen. If the 0 button is pressed, the setting will be canceled and it will return to the menu.
-
Page 231: Menu List
Menu List... - Page 232 Menu List P.84 P.85 P.86 P.87 P.90 P.88 P.72 P.70 P.74...
- Page 233 Menu List *“Play Mode” and “Skip Space” cannot be set in the Audible mode.
-
Page 234: Using The Recorder On Your Pc
Using the Recorder on Your PC Saving Files in Your PC By being connected to a PC, the recorder enables you to do the following: • Playback voice files on your PC. Audio files recorded using the recorder can be played using the DSS Player software included ☞... - Page 235 Saving Files in Your PC ● Data can be written or uploaded to the recorder even though the attribute of the recorder drive is shown as Read-only by the operating system of the PC. ● As the noise may cause adverse effects on electronics devices nearby the recorder, unplug the earphone when you connect the recorder to a PC.
-
Page 236: Using Dss Player Software
Using DSS Player Software Basic Operating Environment of DSS Player BM PC/AT compatible PC Operating Microsoft Windows 2000 Professional/XP Professional,Home Edition System: CPU: Intel Pentium II class 333 MHz processor or more (If recording to a hard disk directly with the WMA format, please use in the range of 500 MHz or more) RAM: 128 MB or more (256MB or more is recommended) - Page 237 Using DSS Player Software Notes • The support service will not cover if your PC has been updated from Windows 95/98/Me to Windows 2000/XP. • Any failure on a self-modified PC will not be covered under the operational warranty.
-
Page 238: Installing Software
Installing Software Before you connect the recorder to your PC and use it, you must first install the DSS player software from the included Software CD. Applications included with “DSS Player” • DSS Player: Recorded voice files can be downloaded to the PC for complete file management and playback solution. - Page 239 Installing Software Installing DSS Player Select a program menu folder. You may change the program menu Register user information. folder to another one, such as [Start Enter your name, company name and Up]. To accept the default folder, click serial number. For the serial number, [Next].
- Page 240 Installing Software Installing the Device Driver Connect the recorder to your PC, referring to “Connecting to ☞ Your PC” ( P105). When you connect the recorder to your PC for the first time after installing DSS Player, the recorder’s driver will be installed automatically.
-
Page 241: Uninstalling Software
Uninstalling Software To uninstall any of the software component of the DSS player software installed on your PC, follow the steps below. Exit DSS Player. Confirmation of Deleting the File. Click the [OK] button to start uninstalling. Select [Control Panel] from [start] An additional message may appear, if so, read it carefully and follow the menu. -
Page 242: Using Online Help
Using Online Help To open Online Help, you have the following options. • Click the [start] button, select [All Programs], then [Olympus DSS Player], then click [Help]. • While DSS Player is running, choose [Contents] from the [Olympus DSS Player Help] menu. -
Page 243: Connecting To Your Pc
Connecting to Your PC Be sure to finish installing DSS Player before connecting the recorder (☞ P100). Connecting to your PC using the USB cable Turn the recorder's power ON. Connect the USB connection cable to the USB port or the USB hub of the PC. - Page 244 Connecting to Your PC Disconnecting from Your PC Click the on the task bar located at the lower-right corner of the screen. Click [Safely Remove Hardware]. The drive letter will differ depending on the PC being used. Disconnect the USB cable..............................
-
Page 245: Running Dss Player
For automatic start, select and click DSS Player to reinstate again. Manual start Start Windows. Click the [start] button, select [All Programs], then [Olympus DSS Player]. Click [Olympus DSS Player]..............................Note • You cannot run more than one DSS Player program or multiple copies of the same program simultaneously. -
Page 246: Window Names (Dss Player)
Window Names (DSS Player) *Main screen displayed when DSS Player is started 1 Play Control Bar 3 Device Manager Window Control buttons to play and stop voice Will display the directory structure of the files. folders in the recorder. 2 Dictation Folder Window 4 Voice File List Box Will display the directory structure of the Will display the voice files in the folder... -
Page 247: Managing Files On Your Pc
Managing Files on Your PC Download Voice Files from the Recorder There are 3 download options to transfer voice files from the recorder to the PC: • Download Selected Files Download one or several voice files to your PC. • Download Folders Download all the voice files in one folder. - Page 248 Download Voice Files from the Recorder Download the voice file. From the [Download] menu, click [Download Selected Files]. Download complete. Do not disconnect the USB cable while the record/play indicator light on the recorder is flashing. Disconnecting the USB cable when the recorder lamp is flashing will result in data loss or corruption (☞...
-
Page 249: Play A Voice File
Play a Voice File Select the folder. Select the folder that contains the voice file you would like to play. Select the voice file. Select the voice file to play from the Voice File List Box. Play the voice file. Click the (play) button of the Play Control Bar. -
Page 250: Upload Voice Files To The Recorder
Upload Voice Files to the Recorder DSS Player has a feature to enable you to upload files from your PC to the recorder. Select the folder. Select the folder that contains the voice file to upload from the Dictation Folder window. Select the voice file. - Page 251 Upload Voice Files to the Recorder Upload complete. Once the transmission screen closes and the record/play indicator light on the recorder is OFF, upload is completed. You can also drag and drop files from the Voice File List Box to the Device Manager window..............................
-
Page 252: Send Voice Files With E-Mail
The Message folder location can be found from the [Tools] menu, [Options], and then “Download folder” tab. The file can be replayed with DSS Player-Lite even though the recipient does not have DSS Player. Free DSS Player-Lite can be downloaded from Olympus homepage. http://www.olympusamerica.com/cpg_section/cpg_downloads.asp http://olympus-europa.com/consumer/2590_software.cfm... -
Page 253: Changing A Folder Name
Changing a Folder Name Changing a folder name in the Voice Folder window You can change a folder name using the [Rename Folder] command from the [Edit] menu. A folder name can be up to 20 characters long and cannot use \ /:*?"<>|. Changing a folder name in the Device window Right-click the folder name to change, select the [Rename Folder] and input the new folder name. -
Page 254: Editing A Template
Editing a Template Templates of folder name that have been registered on the recorder can be changed on the “Edit & Upload Templates” screen. Select [Edit & Upload Templates] from [Download] to open the [Edit and Upload Template] window. The maximum number of characters that can be entered is 8 characters for a folder name. Transfer edited content to the recorder... -
Page 255: Copying Voice Guide Data
Copying Voice Guide Data If you format the recorder and erase data by mistake, you can copy the voice guide data from DSS Player to the recorder. Make sure that the recorder's voice guide is set to “On”. If the recorder's voice guide is set to “Off” the voice guide data cannot be copied. Connect the recorder to a PC. -
Page 256: Usb Microphone/Usb Speaker
USB Microphone/USB Speaker It is possible to use the recorder as a USB microphone or speaker with the DSS Player, to insert/add/overwrite recordings onto voice files downloaded onto a computer, or to save new recordings directly onto a computer. In addition, it is also possible to operate the DSS Player using buttons on the recorder. Audio set up In order to use this recorder as a USB speaker or a USB microphone in DSS Player, it is necessary to change to “Audio Class”... - Page 257 USB Microphone/USB Speaker Uses as a USB microphone When the recorder is used as a USB microphone, it can used to make recordings with the DSS Player, and can also be used to input data on a computer using voice recognition software or other applications. When using the recorder as a USB microphone, switch the recorder to the [Audio] mode in the [Audio Setup] described on the previous page, then perform the following setting.
-
Page 258: Dss Player Expanded Functions
DSS Player Expanded Functions Upgrade Function Plus The “DSS Player” enables upgrades (Options) to the “DSS Player Plus” which is equipped with more functions. In addition to the DSS Player functions, voice recognition using voice recognition software, joining of files, sharing of files and the menu setting of this recorder can be utilized. - Page 259 Upgrade Function Select [Upgrade to DSS Player Plus] from the [Help] menu. The “Upgrade to DSS Player Plus” dialog will be displayed. In the [Upgrade to DSS Player Plus] dialog, enter the license number of your purchase, and click the [OK] button.
-
Page 260: Using Voice Recognition Software
• IBM ViaVoice Pro USB Edition 10 • Dragon NaturallySpeaking 8/9 Please inquire to the Olympus Service Center regarding the situation for software to be released hereafter (☞ P159). Also, when you use such software in combination with this recorder, please confirm the software operation with the user’s computer and the maker. - Page 261 Voice]. The ViaVoice User Wizard window appears. From the [Device] list box, select [Olympus WMA File]. Select [Olympus WMA File] in the [Device] list box, then click the [Next] button. Click the [Next] button. The [Audio Setup Wizard] window appears.
- Page 262 Using Voice Recognition Software Select a sound card. When the [Selecting a Sound Card] window appears, select [USB Audio Device] for [Input] and follow the instructions on screen. (Select [Microphone Control (DVR)] for Windows XP.) Proceed with the AUDIO Setup according to the instruction on screen.
- Page 263 In this case, click the [New] button and display [New User Wizard]. Creating a User. Input a name into [Your name], and select [Olympus DVR DS-2/20/30/40/50/2300] from the [Dictation source] list box, then click the [Next] button. Description of Wizard.
- Page 264 P129) for recording tips. After the recording is finished, click the [Next] button. Transferring the Recorded Voice. Click [Olympus DSS Player] button displayed on the screen. The DSS Player Plus will startup and then follow the instructions displayed on the screen to execute the transfer of the recorded voice.
- Page 265 Using Voice Recognition Software Executing Voice Recognition DSS Player Plus can easily access ViaVoice and Dragon NaturallySpeaking from the menu, and it enables text conversion of the file in the Voice File List Box. Select the folder. From the Dictation Folder Window, select the folder in which the folder to be converted to text is stored.
- Page 266 Using Voice Recognition Software When Dragon NaturallySpeaking is Selected The [Open User] dialog will be displayed, and select the user created in procedure 3 on P125, then click the [Open] button. The [Transcription Options] dialog will be displayed, and select the option according to the purpose, then click the [Transcribe] button.
- Page 267 Using Voice Recognition Software Notes on Recording For Voice Recognition When recording voice to be processed • Speak normally. with voice recognition, set up your • When your voice is to be recorded, and recorder as follows to improve reduce the influence of the surrounding recognition accuracy.
-
Page 268: Joining Files
Joining Files Plus In DSS Player Plus, designated multiple voice files can be joined and one voice file can be created. Select the folder. From the Dictation Folder Window, select the folder which contains the files to be joined. Select the voice files. From the Voice File List Box, select more than one file to be joined. - Page 269 Joining Files Set the order of files. After joining, the playback order of the files can be changed. Select a file, and move the file to its appropriate position in the order using the [Up] and [Down] buttons. Input File Names. The file name is created automatically after joining and also, it enables input optionally.
-
Page 270: Splitting Files
Splitting Files Plus One designated voice file can be split into the two files in DSS Player Plus. Select the folder. Select the folder containing the file to be split from the Dictation Folder Window. Select the voice files. Select one file to split from the Voice File List Box. - Page 271 Splitting Files Input file name (File name before splitting.) Output file name (File name after splitting.) Split position (Time axis) Playback / Stop button The display will change whenever the button is pressed. Playback slider Shows the current playback position and split position.
-
Page 272: Menu Setting Of This Recorder
Menu Setting of this Recorder Plus The menu setting of this recorder can be changed in the “Configure recorder menu” screen in the computer. Select [Configure recorder menu] from the [Download] menu. The “Configure recorder menu” dialog will be displayed. Execute Menu Setting. -
Page 273: Importing Content For Listening On The Recorder
Importing Content for Listening on the Recorder Importing Content for Listening on the Recorder You can transfer language content and music files imported from language CDs and the Internet using Windows Media Player for playing on the recorder. You can also use DSS Player to import and enjoy Podcast content found on the Internet. The recorder is compatible with WMA and MP3 language content. -
Page 274: Using Windows Media Player
Using Windows Media Player By using Windows Media Player, music files from music CDs can be converted (ripped) ☞ P138) and music files that you have bought from any music distribution sites can ☞ be easily transferred to the recorder ( P139). -
Page 275: Window Names (Windows Media Player)
Window Names (Windows Media Player) Windows Media Player 10 Windows Media Player 9 1 Features taskbar 1 Features taskbar 2 Quick Access Panel button 2 Seek slider 3 Seek slider 3 Rewind button 4 Rewind button 4 Play button 5 Play button 5 Stop button 6 Stop button 6 Previous button... -
Page 276: Copying Music From Cd
Copying Music from CD Insert CD into the CD-ROM drive and start Windows Media Player. From the Features taskbar, click the [Rip] menu. For Windows Media Player 9 From the Features taskbar, click the [Copy from CD] menu. Click the [View Album Info]. Windows Media Player 10 If Internet connectivity is available, CD information is searched. -
Page 277: Transferring Music File To The Recorder
Transferring Music File to the Recorder You can transfer the music files saved in your PC to this recorder. For how to copy the music ☞ files from the CD to your PC, see “Copying Music from CD” ( P138). Windows Media Player 10 Connect the recorder to a PC and start Windows Media Player. - Page 278 Transferring Music File to the Recorder Click the [Start Sync]. The file is transferred to the recorder. The music file transferred to the recorder is displayed in Item on Device. Windows Media Player 9 Connect the recorder to a PC and start Windows Media Player.
- Page 279 Transferring Music File to the Recorder Select the destination folder. ☞ Please see “Folder” ( P.19) about the folder composition of this recorder. To transfer to “Root” folder The empty column part of the item on the device (Root of the drive) is selected.
-
Page 280: Importing Podcast Content
Importing Podcast Content By registering favorite programs in DSS Player, you can download the latest broadcasting content automatically. Also the new content can be transferred onto the recorder simply by connecting it to a computer. Register a Podcast program Start DSS Player. Open a web browser and go to a Drag and drop the Podcasting site. -
Page 281: Update A Program
Importing Podcast Content Update a program By default, programs registered in DSS Player will be automatically updated. To change update intervals, go to [Tools] then [Options], and change them in the Options dialog's Podcast ☞ tab. See the Online Help for details ( P104). -
Page 282: Download The Content
Importing Podcast Content Download the Content By default, if new content is found when a program is updated, the latest content will be automatically downloaded. This setting can be changed by selecting [Tools] then [Options] ☞ and going to the Options dialog's Podcast tab. See the Online Help for details ( P104). - Page 283 Importing Podcast Content Transfer Content to the Rrecorder In the default setting, the content automatically transferred into the “Podcast” folder on the recorder when the recorder connects to a computer. This setting can be changed by selecting [Options] under [Extras], and by selecting the “Podcast” tab displayed on the Option dialog box.
-
Page 284: Enjoy Audible Content
(United States) http://www.audible.co.uk (United Kingdom) http://www.audible.fr (France) http://www.audible.de (Germany) Start up the downloaded executable file. The AudibleManager Setup screen will be displayed. Select the name of the device in use (OLYMPUS DS-30, DS-40 or DS-50) and click the [Install] button. -
Page 285: Adding Device To Audiblemanager
Loading Audible Content When the “Audible Manager License Agreement” is displayed, click the [I Accept] button. Installation starts. Wait until process has been completed. Once the installation has been completed AudibleManager starts up automatically. Adding Device to AudibleManager If AudibleManager has already been installed, add a device in order to handle the recorder in the AudibleManager. -
Page 286: Purchasing Audible Content
Loading Audible Content When the dialog box is displayed, check the name of the device in use (DS-30, DS- 40 or DS-50) and click the [OK] button. Installation starts. Wait until the process has been completed. Once the installation has been completed, AudibleManager restarts. -
Page 287: Transferring Audible Content
Transferring Audible Content Audible content can be transferred into the “Audible” folder on the recorder by following the procedure described below. Connect the recorder to a computer. Select “Library” in the “Audible Folders” tree listing. A list of content stored in the “Library” displays on the right side. Select the content to be transferring to the recorder and click the [Add to Device] button. - Page 288 Transferring Audible Content The transfer begins. Wait until the transfer of the content has been completed. When it has been completed, the transferred content is displayed in the contents listing of the device. Also, the transferred content is displayed in the Library..............................
-
Page 289: Enjoy Audible Content With The Recorder
Enjoy Audible Content with the Recorder Audible content that has been transferred into the “Audible” folder on the recorder from a computer can be enjoyed with an exclusive mode optimally suited for the operation of Audible content. Audible Mode When you select the “Audible” folder on the recorder, the recorder automatically switches to the Audible mode.The Audible mode is an exclusive mode for enjoying Audible content ( modes 2, 3, and 4 formats*) transferred from a computer. -
Page 290: Playback Position And Section
Enjoy Audible Content with the Recorder Playback Position and Section In the Audible mode, the starting position can be moved easily by referring to the “Playback Position,” which is the positional information stored from previous stops for each file, and by referring to “Section” where the content distributor has preset the position. -
Page 291: Operating Recorder In Audible Mode
Enjoy Audible Content with Recorder Operating Recorder in Audible Mode The operating method on the recorder is different in the Audible mode when the “Audible” folder is selected, then while in the Normal mode. Forwarding Press and hold the 9 button while the recorder is stopped. ➥... - Page 292 Enjoy Audible Content with the Recorder File Skip and Section Skip Press the 9 button while the recorder is stopped. ➥ The recorder skips to a playback position or the starting position of a section, whichever is closer in the file, and stops. After a stop position, if there is no playback position, or a starting position of a section, the recorder will skip to a playback position in the next file and stop.
-
Page 293: Other Practical Use Methods
Other Practical Use Methods Using as External Memory of the Computer With the recorder connected to your PC, you can download data from the memory to your PC and upload data stored on your PC to the memory. Example: Copying Data from PC to Recorder using Explorer Start Windows. -
Page 294: Other Information
Error in the internal memory. This is a malfunction, so go to the store internal where you purchased the recorder or an memory Olympus service station for repair. Licence Illegally copied The music files copied Delete the file (☞ P63). -
Page 295: Troubleshooting
Troubleshooting Symptom Probable cause Action Nothing appears The batteries are not loaded properly. Verify polarity is correct. on the display The batteries are dead. Replace with new batteries (☞ P13). The power is off. Turn the power on.(☞ P15). The power is off. Turn the power on.(☞... - Page 296 Troubleshooting Symptom Probable cause Action Cannot find the Wrong folder. Switch to the right folder. recorded voice The clock has not been set properly. The recorder Verify the “Current Time” to reset the date does not start at (☞ and time if they are not properly set the set time with P18) “Timer Rec”...
-
Page 297: Accessories (Optional)
ME53SH which is the same color as (BR401) as a pack. This charger can quick charge the DS-30 model, the ME53SS which is the same Olympus AA or AAA Ni-MH rechargeable batteries. color as the DS-40 model, and the ME53SA which is the same color as the DS-50 model. -
Page 298: Specifications
Built-in flash memory SP mode: 138 hours 30 minutes DS-50: 1 GB LP mode: 275 hours 20 minutes DS-40: 512 MB DS-30: 256 MB DS-40: 512 MB STEREO XQ mode: 8 hours 40 minutes Speaker STEREO HQ mode: 17 hours 20 minutes Built-in ø23 mm round dynamic speaker... -
Page 299: Technical Assistance And Support
(without protrusions) and the conditions of use. Technical Assistance and Support The following are contact information for technical support for Olympus recorders and software only. ◆ Technical Hotline Number in the U.S. and Canada 1-888-553-4448 ◆ User Support E-mail address in the U.S. and Canada distec@olympus.com... - Page 300 Informieren Sie sich über das in Ihrem Land gültige Rücknahmesystem und nutzen dieses zur Entsorgung. in your country for the disposal of this product. Applicable Product : DS-30/40/50 Anwendbare Produkte : DS-30/40/50 Знак "CE" обозначает, что этот пpодукт L’indication “CE” signifie que ce produit est conforme соответствует...
- Page 301 P2-BZ8197-01 AP0611...
Need help?
Do you have a question about the DS-30 and is the answer not in the manual?
Questions and answers
инструкция на русском