Table of Contents
Advertisement
Advertisement
Table of Contents

Subscribe to Our Youtube Channel
Summary of Contents for Moffat turbofan E311
- Page 1 INSTALLATION / OPERATION MANUAL E311 / E311MS CONVECTION OVEN F23621-9...
- Page 2 Auckland (03) 3891-007 Fax: (03) 3891-276 Fax: AUSTRALIA Victoria New South Wales Moffat Pty Limited Moffat Pty Limited 740 Springvale Road 8/142 James Ruse Drive, Rose Hill Mulgrave, Melbourne P O Box 913, Smithfield Victoria 3171 Sydney, N.S.W. 2142 (03) 9518-3888...
-
Page 3: Table Of Contents
Introduction ...2 Installation ...3 Before Connection Location Double Units Electrical Connection Door Handle Water connection Before Use Specifications...5 Operation ...9 Description of Controls Baking Roast ‘n’ Hold Grilling / Broiling Cooking Guide ...13 Cooking Bake Off Roasting Roast ‘n’ Hold Cleaning and Maintenance...15 Trouble Shooting ...16 Oven... -
Page 4: Introduction
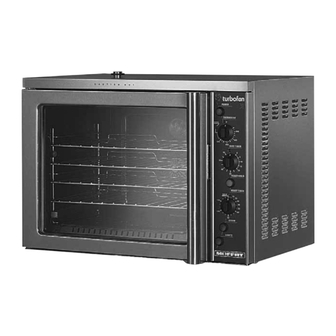
Model Options This manual covers models E311 and E311MS. The E311 models feature a vitreous enamel front exterior finish and full glass door. The E311MS models feature a stainless steel front exterior finish and a stainless steel exterior door with full viewing window. -
Page 5: Installation
Installation Requirements It is most important that this oven is installed correctly and that operation is correct before use. Installation shall comply with local electrical, health and safety requirements. Before Connection to Power Supply • Remove all packing. • Check equipment and parts for damage. Report any damage immediately to the carrier and distributor. -
Page 6: Electrical Connection
Installation Electrical Connection • Ensure unit is fitted with appropriate cord and plug. • To access the electrical connection terminal block, grounding lug (marked with green), and strain relief, remove the back panel (4 screws). WARNING - THIS APPLIANCE MUST BE GROUNDED Water Connection (Canada only) •... -
Page 7: Specifications
E311 ”) ”) Front Plan Electrical Connection Cold Water Connection (Canada only) WATER ENTRY ”) 208V AC 60Hz, 14.0A, 2.9kW @ 208V 220-240V AC 60Hz, 13.0A, 3.1kW @ 240V 208-220V AC 50Hz, 14.6A, 3.2kW @ 220V 230-240V AC 50Hz, 13.0A, 3.1kW @ 240V 1/2”... - Page 8 Specifications E311MS ”) ”) Front Plan Electrical Connection Cold Water Connection (Canada only) WATER ENTRY ”) 208V AC 60Hz, 14.0A, 2.9kW @ 208V 220-240V AC 60Hz, 13.0A, 3.1kW @ 240V 208-220V AC 50Hz, 14.6A, 3.2kW @ 220V 230-240V AC 50Hz, 13.0A, 3.1kW @ 240V 1/2”...
-
Page 9: Operation
Operation Guide Description of Controls Power Depress to switch power on or off (switch illuminates when power is on). Thermostat Temperature range 50 - 250°C (120 - 550°F). Indicator illuminates when the elements are cycling ON to maintain set temperature. Grill/Broil position - The grill/broil indicator will illuminate indicating that the grill/broil function has been set. - Page 10 Operation Baking 1. Turn power on Power switch illuminates when it is depressed and latched in the down position. 2. Set thermostat to desired temperature The heating indicator light will illuminate whenever the elements are cycling on to maintain the set temperature. 3.
- Page 11 Roast ‘n’ Hold 1. Turn power on Power switch illuminates when it is depressed and latched in the down position. 2. Set thermostat to desired temperature The heating indicator light will illuminate whenever the elements are cycling on to maintain the set temperature.
-
Page 12: Grilling / Broiling
Operation Grilling / Broiling 1. Grilling / Broiling Turn thermostat fully clockwise until the GRILL/BROIL position is reached. The GRILL/ BROIL indicator will illuminate indicating that the GRILL/BROIL function has been set. The heating indicator will also illuminate whenever the element is on. It is recommended that the GRILL/BROIL mode is only used with the oven door open as the oven fan is then automatically off. -
Page 13: Cooking Guide
This TURBOFAN oven will cook a greater quantity of food faster, at a lower temperature and more evenly than an ordinary oven. As many excellent recipe books are published, it is not our intention to list recipes, but to provide a temperature and time chart as a guide. When the door is opened the fan will switch off but elements will remain on to provide quick heat recovery. -
Page 14: Roast 'N' Hold
Cooking guide Roasting Set the oven temperature to 150-170°C (300°F-340°F). The hot air circulating in the oven reduces moisture loss and shrinkage. Roasting times are reduced by approximately 10 minutes per kg. MEAT Beef - Rare Beef - Medium Beef - Well Done Veal Lamb Duck... - Page 15 Cleaning Guidelines ALWAYS TURN OFF THE POWER SUPPLY BEFORE CLEANING. DO NOT USE WATER JET SPRAY TO CLEAN INTERIOR OR EXTERIOR OF THIS UNIT. Exterior Clean with a good quality stainless steel cleaning compound. Harsh abrasive cleaners may damage the surface. Interior Ensure that the oven chamber is cool.
-
Page 16: Trouble Shooting
Trouble-shooting Oven trouble-shooting Fault The oven does not operate / start. The mains isolating switch on the Bake timer does not time down. Roast timer does not time down Oven light not illuminating. No water injection / steam. (Canada only) Possible Cause wall, circuit breaker or fuses are “off”... - Page 17 Baking trouble-shooting Moist sticky crust Hump or cracks on top Heavy compact textures Undersized cake Uncooked streak at bottom Cake falling Mixture running over pan Dry cake Coarse Texture Uneven cooking Smoking or discoloration around door Oven steaming Trouble-shooting Too much sugar. Too much flour.
-
Page 18: Spare Parts
002990 Microswitch 003002 Oven lamp glass 003434 Silk gasket 013521 Oven lamp - 40W miniature Edison screw (E311) 014218 Oven lamp - 25W miniature Edison screw (E311MS) Motor & Elements 003113 Oven top element 208 volts 003114 Oven bottom element 208 volts... -
Page 19: Circuit Schematic
Circuit schematic...


Need help?
Do you have a question about the turbofan E311 and is the answer not in the manual?
Questions and answers