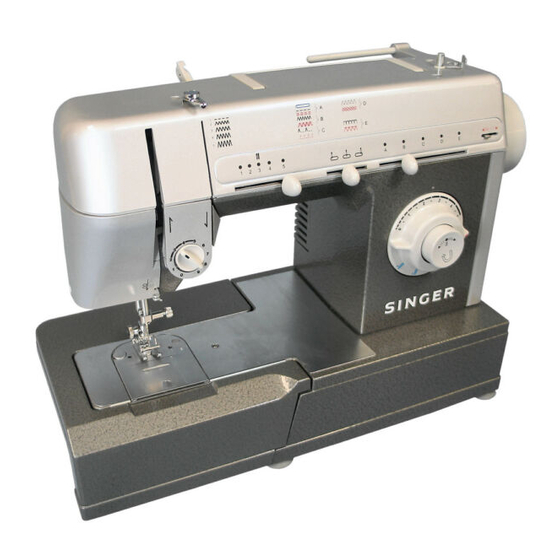
Singer CG-500 Instruction Book
Hide thumbs
Also See for CG-500:
- List of parts (48 pages) ,
- List of parts (48 pages) ,
- Workbook (50 pages)

Related Manuals for Singer CG-500


Summary of Contents for Singer CG-500
- Page 1 Instruction Book 5 & 10 Stitches 5 y 10 Puntos PrintedinBrazil/ImpresoenBrasil/ 5 et 10 Points PartNumber/Pieza Nº./PièceNº: 358456-001 ImpriméauBrésil- Eng./Spa./Fren.
- Page 2 Congratulations A s t h e o w n e r o f a n e w sewingmachine,youareabouttobeginanexcitingadventurein creativity.Fromthemomentyoufirstuseyourmachine,youwillknowyouaresewingononeofthe easiesttousesewingmachinesevermade. Maywerecommendthat, before you starttouseyoursewingmachine,youdiscover the many advantagesandtheeaseofoperationbygoingthroughthisinstructionbook,stepbystep,seated atyourmachine. To ensure that you are always provided with the most modern sewing capabilities, the manufacturerreservesthe right to change the appearance, design oraccessories o f t h e sewing machinewhenconsiderednecessary.
-
Page 3: Que Faire Si
DearCustomer: We recommend that for future reference you Que faire si... record the Serial Number of your Sewing Machineinthespaceprovided. RefertoillustrationatrightforlocationofSerial Sivouséprouvezquelquesdifficultéslors L'aiguillecasse Numberonyourmachine. del'utilisationdevotremachine,le L'aiguillen'est-ellepastordue? SerialNo. questionnaireci-dessousvouspermettra Lagrosseurdel'aiguilleconvient-elleàla dedéceleruneéventuellemauvaise naturedufissucousu? manoeuvre. Lessélecteurssont-ilsbienenplace? Lesaccessoiresutilisésconviennent-ils autravail? Si votre aiguillenebougepas Avez-vousbranchévotremachine? Confectiondelacanettedifficile Avez-vousmislamachinesoustensionà l'aidedel'interrupteur? Lefilsedéroule-t'ilfacilementdela Avez-vousbranchélerhéostat? -
Page 4: Table Of Contents
T a b l e o f c o n t e n t s 1.GettingToKnowYourMachine PrincipalParts Accessories ImportantSafetyInstructions 2.GettingReadyToSew OperatingtheMachine ChoosingandChangingNeedles ChangingP resserFeet Changing theNeedlePlate AttachingtheFeedCover R e m o v i n g a n d R e p l a c i n g t h e ExtensionTable Fabric,ThreadandNeedleTable... - Page 5 Table d e s m a t i è r e s 1.Faitesconnaissanceavecvotremachine Performance checklist Piècesprincipales ForEuropeanTerritories: Accessoires Important 2.Pourbiencoudre Whensewingdifficultiesoccur, lookback Upper threadbreaks Fonctionnementdelamachine ThisSingerSewingMachinewastested throughthismanualtomakesureyouare Choisiretchangerl’aiguille accordingtoEuropeanstandardsandmeets Ismachineproperlythreaded? Comment changer les pied presseurs à correctly following the instructions. Ifyou Isthreadfreelyunwindingfromspool? therequirementsregardingelectrical enclenchementdirect...
-
Page 6: Gettingtoknowyourmachine
Coudreunbouton Getting to know your machine Vous pouvez coudre rapidement tous les boutonsplatsaveclepointdezig-zag.Unpied spécial(H)estdisponibledansvotremagasin Réglagesrecommandés Sélecteur depoint:Pointzig-zag(B) Principal Pièces principales parts Positiond’aiguille: 1. Levolant 1. Handwheel Largeurdepoint:enfonctiondubouton 2. Devidoir 2. Bobbinwinder Piedpresseur:piedbouton(H) 3. Sélecteurdepoint Plaqueàaiguille:universelle(A) 3. Patternselectorlever 4. Porte-bobinehorizontal Plaqueàrepriser(F) Horizontalspoolpinand etétrier holder... - Page 7 Attachingabutton Pegadodebotones Flatbuttonscanbesewnonquicklyandeasily Los botones planos pueden coserse con using theplainzig-zagstitch.Aspecialbutton rapidez y facilidad, utilizando el punto de zig- sewing foot(H),maybepurchasedfromyour zag plano. El prensatelas especial paracoser retailer. botones (H)puedeadquirirloensucentrode costura. Recommendedsettings Posicionesrecomendadas StitchSelection:Zig-zagstitch(B) Selecciónpunto:Puntozig-zag(B) Needle Position: Posiciónaguja: StitchWidth:TosuitButton Anchurapunto:Apropiadaalbotón Foot:ButtonSewing(H) Prensatelas:Paracoserbotones(H) NeedlePlate:GeneralPurpose (A)
-
Page 8: Accessories
Accessories Pied Coud & Rogne Facultatif Thefollowingaccessoriesfurnishedwith your sewing machinearedesignedtosimplifyyour sewing and increase the versatility of your Le couteau latéral estunaccessoire facultatif quipermetdecouperl’excèsdetussutouten machine. cousant. Vous pouvez procurer cette Theletterinacircleadjacenttotheillustrated accessoirechezvotredétaillant partisreproducedonthepartitselftohelpyou select the correct attachment for the type of Préparationdelamachine workyouaredoing. -
Page 9: Accessoires
Accessoires Recorta-lados OptionalSew& SergeFoot Lesaccessoiressuivantssontfournisavecvotre El recorta-ladosesunaccesorioquerecorta machine pour faciliterlacoutureetaugmenter el excesso de material mientras cose. Los TheSideCutterisanoptionalattachmentthat accesoriosadicionalespuedeadquirirlosen lespossibilitésdevotremachine. 446492 willtrimtheexcessmaterialwhilesewing.This sucentrodecostura Lalettrequevousvoyezillustréesetrouvesurla 161927 accessory may be purchased from your pièceelle-mêmeetvouspermetdesélectionner retailer. Preparacióndelamáquina rapidement l’accessoire correspondant à vos besoins. MachinePreparation: Seleccioneunadalassiguientespuntadas: ZigZag,SobrepuestaLateraloSobrepuesta. -
Page 10: Importantsafetyinstructions
Important Safety Instructions Accessoires facultatifs HOWTOREDUCERISKOFFIRE,ELECTRICSHOCKORPERSONALDAMAGE. •Thismachinehasbeendesignedforcommercial,schoolanddomesticuse. Vous pouvez vous procurer les accessoires •This machine should never be plugged in while N O T i n u s e . A l w a y s unplug the complémentairesdansvotremagasinSINGER. machinefromtheelectricoutletbeforecleaningorafterusingit. •Beforeswitchingonthemachine,makesurethattheelectricvoltageofthesocket 1. -
Page 11: Important
Additional accessories Additional Accessories for your sewing machineareavailableforpurchasefromyour retailer. 1. Straight stitch presser foot (D) and needle plate (C) are used together when straightstitchinglightweightfabricsorwhen your fabric or sewing procedure requires closecontrol. 2. Buttonsewingfoot(H) isusedtoholdany two-hole or four-hole button securely for stitching. -
Page 12: Gettingreadytosew Operatingthemachine
Lubrificationdela Getting ready machine to sew La fréquence decette opération dépend d e l a fréquence d’utilisation. Les indications ci- Operatingthemachine dessous sont données pour une utilisation Connectingthemachine régulièreplusieursfoisparsemaine. Si vous utilisez votre machine chaque jour, Pushplug(1)intothereceptacle(2)attheright graissez-laplussouventqu’indiqué. endofthemachine. Thenconnectplug(3)to yoursocketoutlet. -
Page 13: Pourbiencoudre Fonctionnementdelamachine
Lubricatingthe Pour bien machine coudre Howoftenyouneedtolubricatethemachine dependsonhowoftenyouuseitandwhereyou Founctionnementde keep it. The following general guidelines lamachine assumethatyouwillbesewingseveraltimesa week. But if you use your machine more Branchementdelamachine frequently, lubricate it more often than the guidelinessuggest. Introduisezlafichedebranchementdurhéostat (1)danslaprise(2)àdroitedelamachine,puis brancherlamachineàl’aidedelaprise(3). PourL’AmeriqueduNord “Cet appareil a u n e p r i s e p o l a r i s é e ( u n e l a m e Approximatelyonceayear,lubricateallmoving pluslargequel’autre).Afinderéduirelerisque connections, as shown, to ensure freedom of... -
Page 14: Changingp Resserfeet
Changing snap-on Nettoyerlamachine presser feet (B), (E), Votre machine va vous rendre de nombreux (J), (L) services pendant de longues années. Pour garantir son fonctionnement, consacrez quelquesminutesàsonnettoyage. YourmachinecomeswiththeGeneralPurpose Presser Foot (B) already attached. You can easily changetoanyoneoftheotherpresser Lessurfacesextérieurespeuventêtrenettoyées feet, w h i c h snap onto a common shank, by avecdusavonetunchiffondoux. -
Page 15: Comment Changer Les Pied Presseurs À Enclenchementdirect
Cleaning the machine Comment changer les pieds presseurs à enclen- Your machine is designed to give you many years of dependable service. To ensure this chement direct (B, E, J, L) reliability, take a few minutes to keep the machineclean. Votre machine est livrée équipée du pied presseur universel (B). -
Page 16: Changing Theneedleplate
Changing the needle plate Changerl'ampoule (A), (C) Attention: avant d e changer l'ampoule, débranchezlamachine,retirezlaplaquedeface; cetteplaquedevraêtreremiseenplaqueaprès YourmachinecomeswiththeGeneralPurpose avoir changé l'ampoule, avant de mettre la NeedlePlate (A) attached. The Straight Stitch machineenmarche. NeedlePlate(C)maybepurchasedfrontyour sewingretailerandcanbeattachedasfollows: •Raiseneedleandpresserfoot. Pour cette machine, utilisez une ampoule à •... -
Page 17: Commentchangerlaplaqueàaiguille
Caution: Beforechanginglightbulb,makesure youhaveremovedplugfromsocketoutletand Votremachineestlivréeéquipéedelaplaqueà removefaceplatewhich coversthelightbulb. aiguilleuniverselle(A).Laplaqueàaiguillepoint Besuretoreplacethefaceplatewhichcovers droit(C)peutvousêtrevendueparvotremagasin thelightbulbbeforeoperatingthemachine. SINGER. •Relevezl’aiguilleetlepiedpresseur. This machine is designed to use a 15 watt •Ouvrezlaplaqueglissière. maximumlightbulbwithabayonetfitting. • Soulevezlaplaqueàaiguilleducôtedroitet dégagez-laversladroite. • Pour remettre la nouvelle plaque à aiguille, glissez-la sous la goupille (1). Poussez fermementverslagauche. -
Page 18: Fabric,Threadandneedletable
Fabric, thread Tableau desfils, Nettoyage de votre and needle table aiguillesettissus machine The needle and thread you C'est en fonction du tissu choosewilldependuponthe cousu que vous allez choisir Retireretreplacerle fabricbeingsewn. l’aiguilleetlefilàutiliser. supportdecanette Thetablebelowisapractical Le tableau ci-dessous vous guide to needle and thread guideradanslechoix. -
Page 19: Tableaudesfils,Aiguilles,Tissus
Caring for your machine Removing and replacing bobbincase Caution: Before cleaning or adjusting the machine,removeplugfromthesocketoutlet. •Raisepresserfootandneedle. • Openslideplate,removebobbinandremove needleplate(seeinstructiononpage14). Toremovebobbincase •Withasmallscrewdriver,turnbobbincase holder(1)totherearasfarasitwillgo. • Liftingtheleftsideofthebobbincase,slideit outfrommachine. Lacompositiondestissuspeutêtre:coton,lin,soie,laine,fibres Toreplacebobbincase synthétiques,rayonne,fibresmélangées.Lestissussontlistés Aiguilles ci-dessousenfonctiondeleursépaisseurs. • G u i d e f o r k e d e n d ( A ) o f b o b b i n c a s e u n d e r Tissus Fils Catégorie... -
Page 20: Windingabobbin
Winding a bobbin Couture à l’aiguille jumelée Windingabobbinisquickandeasywhenyoufollowthedirectionsbelow.Alwayswindthebobbin beforethreadingthemachineandneedle. Cetteaiguillepermetlacouturededeuxlignes parallèlesenuneoudeuxcouleursdefil. •Pushinindent(1)onhandwheeldisc.Thiswillstoptheneedlefrommoving. Votre boîte d’accessoires ne contient pas • Placespoolofthreadonspoolpin. d’aiguillejumelée ni de porte-bobine auxiliaire. •Slidespoolcap(2)firmlyoverrimofspooltopreventthreadtangling. Vous pourrez vous les procurer dans votre magasinSINGER. • Leadthreadfromspoolandsnapintothreadguidepost(3). •Windthreadclockwisearoundfrontofbobbinwindertensiondisc(4). • Pass threadend,frominside,throughsmallholeinrimofbobbin. Réglagesrecommandés Sélectiondepoint:auchoix •... -
Page 21: Remplissagedelacanette
Twin needle Costura con sewing aguja doble Twinneedlesewingproducestwoparallellines ofclosely-spaceddecorativestitching.Youcan sewwitheitheroneortwothreadcolors. Yourmachineisnotsupliedwiththetwinneedle orspoolpin.Thesemaybeobtainedfromyour local retailerasoptionalaccessories. Recommendedsettings StitchSelection:Desiredstitch NeedlePosition: StitchWidth: StitchLength: 2-5 Foot: GeneralPurpose(B) NeedlePlate: GeneralPurpose(A) •Turnthemachineoff. •Insertthetwinneedlewiththeflatsideofthe shanktowardstherearofthemachine. Remplissagedelacanette •Threadthemachineasyounormallywouldfor single needlestitching,andpassthe thread throughthelefteyeofthetwinneedle. Ensuivantlesconseilsci-dessous,ilestfacilederemplirunecanette.Confectionnez toujoursla •Insertasecondspoolpinintotheholeonthe canetteavantd’enfilerlamachine. topcoverofthemachine,asillustrated. • Appuyezsurlapentelurededébrayage(1)pourarrêterlemouvementdel’aiguille. •Threadthemachineintheusualway. -
Page 22: Insertingabobbin
Inserting a bobbin Couture avec le bras-libre Toinsertabobbin,followtheinstructionsbelow: (Machine Avec10points) •Raisepresserfoot. •Turnhandwheeltowardyouuntilneedleisin Votrecoutureserasimplifiéeenutilisantlebras- itshighestposition. libre de votre machine pour les ouvrages •Openslideplateandremoveemptybobbin. tubulaires. Manches 1.Pull4”(10cm)ofthreadfromreplacement bobbinandinsertbobbinintocase,as • Surpiquer des emmanchures, poser des shown. ceintures et terminer des bas de pantalons sont des travaux grandement facilités en utilisantlebras-libre. -
Page 23: Miseenplacedelacanette
Mise en place de la Free-arm canette sewing (10 StitchMachine) Pour mettre en placelacanette, faites comme suit: Fabrichandling,whensewingtubularandhard •Relevezlepiedpresseur. reach garment areas, is simplified and m a d e easierwhenyouusethefree-armfeatureofyour •Relevezl'aiguilleenpositionhaute. •Ouvrezlaplaqueglissièreetretirezlacanette sewingmachine. vide. Sleeves 1.Tirez10cmdefildenouvellecanetteet posez lacanettedanssonsupportcomme illustré. •Free-arm sewing takes the difficulty out of topstitching, sleeves, finishing waistbands and trouser legs. -
Page 24: Threadingthemachine
Threading the machine Étape3 • Relevezl'aiguille. 1. Place s p o o l o n s p o o l pin. Use the • Tournezlesélecteurdelongueurpouramener correct spool pin holder to hold lesymbole(3)faceaupoint(•). spoolfirmlyinplace. • Brodez (5). l´étape3 2. Lift the presser foot, and turn the hand wheel towards you until the take-up lever reaches its highest position. -
Page 25: Enfilagedelamachine
Enfilage de la Step 3 machine •Raiseneedleoutoffabric. • Turnbuttonholedialtothebuttonholesymbol 1. Placez la bobine ou la fusette sur le (3)forthethirdstep. • Stitchuptopoint(5). porte-bobine.Bloquez-la bobineàl'aide del'étrier. 2. Levez le pied presseur et tournez le volant vers vous jusqu'à c e que le releveurdefilatteignesapositionlaplus haute. - Page 26 Boutonnière 8. To pass the thread through the spiral threadguide,startfromtheleft,makinga 4 Étapes circular clockwise movement with your handtwice.Thethreadwillslideinsidethe centerofthespiral(illustration7). Trèsfacilementenquatreétapesvotremachine 9. Pass the thread through the last t h r e a d brode des boutonnières de n’importe quelle guideandturnhandwheeltowardyouuntil taille.
- Page 27 Four-step Ojales en 8. Pour passer le fil dans le guide-filspiral, commen-cez p a r l a g a u c h e , e n f a i s a n t u n buttonhole cuatro tiempos mouvement circulairede la main, dans le sens horaire, deux fois.
-
Page 28: Raisingthebobbinthread
Raising the bobbin thread Coutures surjetées (seulementpourmachineavec10points) Once the needle has been threaded and the Ilestpossibled’assemblerlescouturesdansles bobbinplacedinthebobbincase,thebobbin tricotsettissusextensiblestoutenleurdonnant threadmustbebroughtupthroughtheholein simultanément une finition. Deux méthodes theneedleplate. existent à cet effet. On recommande la 1 méthode pour les tissus fermes pourlesquels unevaleurdecouturede6mm(1/4pouce)est 1.Holdneedlethreadlooselywithlefthand. -
Page 29: Remonterlefildecanette
Overedged seams Remonter le fil (onlyformachinewith10stitches) de canette Seamsinknitandstretchfabriccanbejoined Lorsque l’aiguille est enfilée et la canette en and finished in one operation. Two different placedanssonsupport,lefildecanettedoitêtre methods may be used. Method Nº 1 is remontéàtraveersletroudelaplaqueàaiguille. recommended for firm fabrics where a 1/4” (6mm)seamallowanceisadequate.MethodNº... -
Page 30: Straightstitching
Point nid d’abeille Straight stitching Utilisez ce point pour faire dessmocks, pour Stitchwidthselector coudre et réparer des tissus extensibles. Les smockssontdespointsdécotatifsrégulièrement espacéspourmaintenirlesfroncesd’untissu. Before you move the selectors to set your machine for straight stiching, turn the hand wheeltowardyouuntilneedleisatitshighest Pourfroncerletissu point. •Surlasurfaceàfroncer,piquezdesrangéesde point droit à... -
Page 31: Lepointdroit
Le point Honeycomb stitch droit Use the Honeycomb Stitch for smocking, mendingandsewingstretchfabrics.Smocking Sélecteurdelargeur is decorative stitching across evenly spaced depoint gathersoffabric. Avant de bougerlesélecteur pour positionner Togatherfabric votremachinesurlepointdroit,tournezlevolant pourfaireremonterl’aiguille. •Slightlyloosenneedlethreadtension. •Sew rows of straight long (5) stitches, 1/4” Le sélecteur de largeur de point de votre (6mm)apart,acrossareatobesmocked. -
Page 32: Adjustingthreadtension
Adjusting thread tension Surjet (Machineavec10points) Whenanevenamountoftensionisexertedon Vouspouvezenuneseuleopérationcoudreet boththreads,asmoothevenstitch,knownasa surjeter les coutures des tissus extensibles, balancedstitch,isproduced. jerseysettricots. Correcttensionisimportantbecausetoomuch ortoolitlewillweakenyourseamsorcauseyour fabric to pucker. Makeatestsamplewiththe fabricandthreadyouplantouseandexamine • Batissez l’ouvragesur la lignedecoutureen laissantunevaleurcouturede1,5cm. Aperfect,wellbalancedstitch(1)willhavethe needleandbobbinthreadslockedbetweenthe two layers of fabric with no loops o n t o p o r bottomandnopuckering. -
Page 33: Règlagedelatension
Slant overedge stitch Réglagedelatension (10 StitchMachine) Lorsque la ten réglée, le point se noue dans l’épaisseurdutissu. Seams in knitted and stretch fabrics can be joinedandfinishedinoneoperationwhenyou Latensionestimporte;sielleesttroplâcheou usetheslantoveredgestitch. tropserrée, la couture plissera et sera moins solide. Faitesunessaisurunéchantillon,endouble,du tissuquevousallezcoudre.Contrôlezcetessai. Pourquevotrepointsoitbienréglé(1),lefilde • Bastethegarmenttogetherontheseamline l’aiguilleetceluidelacanettedoiventêtrenoués allowingfora5/8”seamallowanceandfitin dansl’épaisseurdutissusansbouclettesetsans... -
Page 34: Sewingaseam Startingaseam
Sewingaseam Point droit Extensible Youcansewseamseasilyandaccuratelywhen (Machineave10points) youfollowthesuggestionsbelow. Lorsquevousutilisezletriplepointdroitexten- siblepour lescouturesqui subissentdefortes tensions (tricot, jersey, tissus extensibles), la Placingfabricunderfoot conceptionmêmedupointrenforcelacouture. Mostfabricscanbeplacedunderthefoot by • Poursurpiquer,placezl’ouvragesouslepied raising the presser foot lifter (1) to its normal presseur,l’endroitduvêtementau-dessus. “Up”position(2). Whenusingbulkyfabric,multiplefabriclayers Réglagesrecommandés or an embroidery hoop, raise t h e l i f t e r t o t h e Sélectiondepoint:Droitextensible(A) highestposition(3),thusincreasingthespace betweenthefootandtheneedleplate. - Page 35 (10StitchMachine) Pour assemblerrapidementunecouture, nous When you use the straight stretch stitch for vousconseillonslaméthodesuivante: stress seamsortoseamknitted,stretchand elasticizedfabric,bothstretchandstrengthare Commentpositionnerletissu builtintotheseamasitisbeingsewn. • Placegarmentrightside up, underpresser souslepiedpresseur foot. Laplupartdestissuspeuventêtreplacéssousle piedpresseur en soulevantlereleveurdupied presseur(1)enposition2. Requiredsettings Quandvouscousezdutissuépaisouplusieurs StichSelection:Straightstretch(A) épaisseurs de tissus, ou encore au cercle à broder, relevez le pied en position 3.
-
Page 36: Starting A Seam
Starting a seam Sélecteurde largeurdepoint Placefabricunderpresserfoot½”(12mm)from rearoffabric.Aligntherightedgewithoneofthe Pourobtenirdespointsextensibles,lesélecteur seamguidelinesontheneedleplate.Lowerthe de largeur doit être positionné sur l’une des presserfoot. positionsdelargeur.Lapositionlaplusàdroite donneralepointlepluslarge. Backstitch to the edge of the fabric for reinforcementbypushinginthereversebutton, locatedthecenterofthestitchlengthdial.Hold buttoninuntilstitchingreachesedgeoffabric. Releasepushbuttonforforwardstitching. Sélecteurde Guidingand positiond’aiguille supportingfabric Lespointsextensiblespeuventêtrecoususdans Mostfabricsneedonlytobeguidedinfrontof touteslespositionsd’aiguillegauche( thepresserfoot.Somefabrics,however,require centrale( ) o u d r o i t ( ).Nousvous... -
Page 37: Débuterunecouture
Stitchwidthselector Débuter une couture ToproduceaFlexi-stitchpattern,thestitchwidth Positionnezletissusouslepiedpresseur. selector must be moved from straight stitch Alignezleborddroitlelongdelaligne-guide settingtoanyofitsotherpositions.Thefarright choisie,baissezl’aiguilledanslalignede positionwillproducethewideststitch. piqûreà1cmdubordsupérieur.Baissezle piedpresseur. Appuyezsurleboutondemarchearrièresituéau centredusélecteurdelongueurdepoint.Piquez jusqu’auborddutissuenmarchearrièrepour renforcerledépartdelacouture. Relâchezleboutondemarchearrièreetpiquez enavant. Guideretdirigerletissu Needlepositionselector Laplupartdestissusseguidentàl’avantdupied presseur. Certains tissus nécessitent quelques précautionspendantlacouture. Flexi-stitch patterns may be sewn in either left( ),center( )orright(... -
Page 38: Darning
Points Darning Wornortornspotsongarmentsandhousehold extensibles linens can be darned effortlessly andquickly with little practice. When greater control is needed, an embroidery hoop and a special Darning and Embroidery Foot, w h i c h m a y b e purchased atyour retailershouldbe Enplusdupointdroitetdupointdezig-zag,votre used. -
Page 39: Repriser
Flexi-stitch Repriser Avec un peu de pratique les trous dans les patterns vêtements d’enfant comme dans le linge de maisonpeuventêtrereprisésfacilementetsans effort.S’ils’agitdegrandesreprises,utilisezun cerceauàbroderetlepiedpresseuràrepriser quevouspourrezacheterdansvotremagasin Inadditiontostraightandzig-zagstitches,your machine can produce a variety of other Réglagesrecommandés patterns. Sélectiondepoint:Pointdroit(A) Flexi-stitches Positiond’aiguille: Thesestitchpatternsareusedforsewingknits Largeurdepoint: and otherstretch fabrics. Flexi-Stitchpatterns Longueurdepoint: 2-5 aremadebythesidetosidemovementofthe Piedpresseur:... -
Page 40: Baste Stitching
SewingInstructions: Positiond’aiguille: Largeurdepoint: After basting your seam, stitches can be removed easily by pulling on your bobbin Longueurdepoint: 1 à 2 thread.Donotforgettore-setyourtensionback Piedpresseur: ModèleSpécial(J) toyournormalsettingafterbastingiscomplete. Plaqueàaiguille: Universelle(A) •Adapterl’élastiqueauconfortdelapersonneet ménager 1 pouce (25mm) de recouvrement. Recouvrirlesdeuxextrémitésetlespiquer. Insertingazipper •Diviser l’élastique et le vêtement en quatre partieségales.Placerl’élastiquesurletissuet les épingler ensemble sur ces points e n l e s WerecommendusingtheZipperFoottoform... -
Page 41: Faufil
Stretchblindhem Faufil Préparationdelamachine: Point:Droit Thisstitchcanbeusedforstretchseams,and Largeurdepoint:Droit decorativestitching,and elasticapllication Longueurdepoint:5.0 Pied:Usagegénéral Elasticinsertion SélecteurdeTension:Réglerà1 RecommendedSettings ’emploie Mode D StitchSelection:Stretchblindhem(E) Suivantlefaufilagedevotrecouture,enleverlefil NeedlePosition: en tirantsurlefildebobine.N'oubliezpasde réglervotretensionàlasélectionnormaleaprès StitchWidth: votrefaufilage. StitchLength: 1-2 Foot: SpecialPurpose(J) Posed'unefermeture NeedlePlate: GeneralPurpose(A) glissière •Fitelasticforsnugnessandallow1inch(25 mm)forjoining.Lapthetwoendsandstitch. •Divide elastic and garment into equal Nous vous recommandons,pour ce travail, le quarters.Placeelasticoverthefabricandpin piedganseurafindepiquerleplusprèspossible... -
Page 42: Pointdezig-Zag
Zig-zagmultiple Decorative stitching Repriser,surjeter,renforcer,coudrebordàbord, sontdesutilisationspossiblesdecepoint. Stitchpatternselector Réglagesrecommandés Sélectiondepoint:Pointzig-zagmultiple(D) Raisetheneedletoitshighestposition. Positiond’aiguille: Largeurdepoint: •Set the stitch width selector to the straight position( ).(Thisallowsthepatternselector Longueurdepoint: 1-2 tobemovedeasily). Piedpresseur: Spécial(J) Plaqueàaiguille: Universelle(A) •Slidethepatternselectortothecenterofthe desiredpatterngroup(A-E). Reprised’unaccroc •Recoupezlesbordsdel’accroc. •Coupezunmorceaudetoilederenfort. •Juxtaposezlesbordsdel’accrocetbatissezle Needlepositionselector renfortsurl’enversdutissu. •Placezl’accrocsouslepiedpresseur. •Piquezsurla déchirure enraccourcissantla Before moving selector, make sure needle is longueur de point aux extrémités pour les fullyraised. -
Page 43: Couturedécoratif
Multi-stitchzig-zag Couture Décoratif Mending,overcasting,joiningorreinforcingcan allbedoneusingtheMulti-StitchZig-Zag. Sélecteurdepoint RecommendedSettings StitchSelection:Multi-stitchzig-zag(D) NeedlePosition: Remontezl’aiguilleenpositionhaute. StitchWidth: •Placezlesélecteurdelargeurdepointsurla positionpointdroit( ).Cettepositionpermet StitchLength: 1-2 ledéplacementfaciledusélecteurdepoint. Foot: SpecialPurpose(J) NeedlePlate: GeneralPurpose(A) •Glissez le sélecteur de point au centre du groupedepointsdésirés(A-E). Mendingatear •Trimraggededgesoftear. •Cutaliningforreinforcement. •Bringthe edgesofteartogetherandbaste liningtowrongsideoffabric. Sélecteurde •Placetear,rightsideup,underfoot. •Ifnecessary,sewovertearagain. positiond’aiguille •Trimawayliningclosetostitching. - Page 44 Adjustingstitchlength Coutureséchelles Anystitchlengthsettingfrom1to5willgiveyou anopenzig-zagstitch. Lacoutureéchelleréaliséeaveclepointcaché est enmêmetempsfonctionnelleetdécorative. The higher the number, the more open, or Cette couture permet l’assemblage de tissus furtherapart,yourstitcheswillbe. tricotetextensiblesetlesfinitionsdesbordsde Theareabetween0and1onthedialisusedfor col,encolures,poches dans les vêtements de sport. satinstitching,aseriesofcloselyspacedplain zig-zag stitches that form a smooth satin-like surface. Réglagesrecommandés Sélectiondepoint:Pointinvisible(C) Positiond’aiguille: Largeurdepoint:...
-
Page 45: Règlagedelalongueurdepoint
Ladderseams Réglagedela longueurdepoint Selon la longueurdepointchoisie,de1à5,le zig-zagseraplusoumoinsouvert. A ladder seam made with blindstitching is functional and decorative at the same time. Lechiffreleplusélevédonneralezig-zagleplus Appropriate for stretch and knitted fabrics, it ouvert. provides stretchable, decorativelyconstructed seams and edge finishes for collars,pockets Lapositiondusélecteurentre0et1serautilisée andnecklinesinsportwearandswimwear. - Page 46 Zig-zag stitch Pointinvisible TheZig-ZagStitch can be usedwhen sewing seams, appliqueing, monogramming or for decorativesewing. Le point caché vous permet de coudre les RecommendedSettings ourletsdetissusmoyensépaisetjersey.Coudre StitchSelection:Zig-zagstitch(B) au point caché requiert un peu de pratique. Faitesunexercice. NeedlePosition: Réglagesrecommandés StitchWidth: Sélectiondepoint:Pointinvisible(C) StitchLength: 2-5 Foot: GeneralPurpose(B) Positiond’aiguille:...
- Page 47 Blindstitch Pointzig-zag Cepointpeutêtreutilisépoursurfiler,appliquer, b r o d e r d e s m o n o g r a m m e s e t autres décorations. Blindstitchingprovidesadurablehemfinishthat can be used on a variety of different weight Réglagesrecommandés fabrics. Blindstitching takes a little practice, Sélectiondepoint:Pointzig-zag(B) however,somakeatestsamplefirst.
-
Page 48: Corded Satinstitching
Corded Satin Stitching Bourdon Galonné Acordonado de Satín Preparación delamáquina: MachinePreparation: PréparationdelaMachine: Puntada:Zigzag Pattern:Zigzag Anchodelapuntada:Variable.(De Stitchwidth:Variable(Setaccordingtowidth Point:Zigzag acuerdoconelanchodelcordón). ofcord) LargeurdePoint:Variable Largodelapuntada:1-2 Stitchlength:1-2 (Réglezàlalargeurducordonnet) Pie:Zigzag-PrensatelasdeusoEspecial Foot:SpecialPurpose“J” Longueurdepoint:1-2 “J” Pied:Piedbourdon“J” SewingInstructions: Instruccionesparacoser: ModeD’emploie: CordedSatinStitchingissimplythetechnique Esta técnica de acordonado de satín es LepointBourdonGalonnéesttoussimplement of zigzagging over a fine cord.
Need help?
Do you have a question about the CG-500 and is the answer not in the manual?
Questions and answers