Epson Stylus Photo R320 Series Manual
Color inkjet printer
Hide thumbs
Also See for Stylus Photo R320 Series:
- Service manual (114 pages) ,
- Printer basics manual (90 pages) ,
- Product information (13 pages)
Table of Contents
Advertisement
Where to Find Information
Setup
This guide will help you set up and begin using your printer. It
includes information on setting up your printer and installing the
printer software.
Standalone Operation Guide
This guide provides information for direct printing,
troubleshooting tips and customer support information.
Reference Guide
The Reference Guide contained on the CD-ROM provides
detailed information about printing with a computer,
maintenance, and problem solving.
1
Advertisement
Table of Contents

Related Manuals for Epson Stylus Photo R320 Series


Summary of Contents for Epson Stylus Photo R320 Series
-
Page 1: Where To Find Information
Where to Find Information Setup This guide will help you set up and begin using your printer. It includes information on setting up your printer and installing the printer software. Standalone Operation Guide This guide provides information for direct printing, troubleshooting tips and customer support information. - Page 2 Seiko Epson Corporation. The information contained herein is designed only for use with this Epson printer. Epson is not responsible for any use of this information as applied to other printers.
- Page 3 Card™ is a trademark of Fuji Photo Film Co.,Ltd. General Notice: Other product names used herein are for identification purposes only and may be trademarks of their respective owners. Epson disclaims any and all rights in those marks. Copyright © 2005 by Seiko Epson Corporation. All rights reserved.
-
Page 4: Table Of Contents
Contents Safety Instructions ......6 Important Safety Instructions ....... 6 Warnings, Cautions, and Notes . - Page 5 Improving Print Quality ......70 Checking the Print Head Nozzles ......70 Cleaning the Print Head .
-
Page 6: Safety Instructions
Safety Instructions Important Safety Instructions Read all of the instructions in this section before using your printer. Also, be sure to follow all warnings and instructions marked on the printer. When setting up your printer Observe the following when setting up the printer: ❏... - Page 7 ❏ Do not use a damaged or frayed power cord. ❏ If you use an extension cord with the printer, make sure that the total ampere rating of the devices plugged into the extension cord does not exceed the cord’s ampere rating. Also, make sure that the total ampere rating of all devices plugged into the wall outlet does not exceed the wall outlet’s ampere rating.
-
Page 8: When Choosing A Place For The Printer
When choosing a place for the printer Observe the following when choosing a place for the printer: ❏ Place the printer on a flat, stable surface that extends beyond the base of the printer in all directions. If you place the printer by the wall, leave more than 10 cm between the back of the printer and the wall. -
Page 9: When Using The Printer
When using the printer Observe the following when using the printer: ❏ Do not insert objects through the slots in the printer. ❏ Take care not to spill liquid on the printer. ❏ Do not put your hand inside the printer or touch the ink cartridges during printing. - Page 10 When using a memory card ❏ Do not remove the memory card or turn off the printer while the computer and the memory card are communicating (when the memory card lights is flashing.). ❏ The methods for using memory cards vary according to card type.
-
Page 11: When Handling The Ink Cartridges
When using the optional Bluetooth Photo Print Adapter Refer to the Bluetooth Photo Print Adapter's documentation for the safety instructions. When handling the ink cartridges Observe the following when handling the ink cartridges: ❏ Keep ink cartridges out of the reach of children. Do not allow children to drink from or otherwise handle the cartridges. - Page 12 ❏ After bringing an ink cartridge inside from a cold storage site, allow it to warm up at room temperature for at least three hours before using it. ❏ Store ink cartridges in a cool, dark place. ❏ Do not touch the green IC chip on the back of the cartridge. Doing so may prevent normal operation and printing.
-
Page 13: Warnings, Cautions, And Notes
® NERGY Compliance ® As an NERGY Partner, Epson has determined that this product meets the NERGY ® guidelines for energy efficiency. ® The International NERGY Office Equipment Program is a voluntary partnership with the computer and office equipment industry to promote the introduction of energy-efficient personal... -
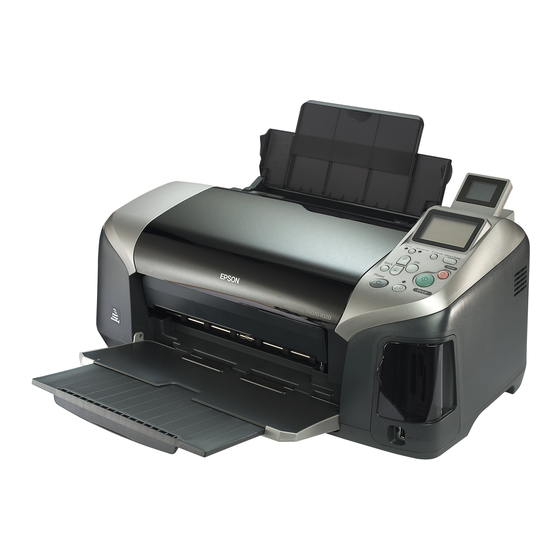
Page 14: Printer Parts And Control Panel Functions
Printer Parts and Control Panel Functions Printer Parts paper support sheet feeder printer cover preview monitor memory card slot cover external Device USB connector edge guides CD/DVD guide output tray output tray extension... - Page 15 Memory card slot (enlarged figure) Memory Stick/Memory Stick PRO/SD/MultiMediaCard memory card slot SmartMedia/xD-Picture Card memory card slot CompactFlash Type II memory card slot memory card light computer USB connector...
-
Page 16: Control Panel
cartridge cover LCD panel print head control panel Control Panel... - Page 17 Buttons a. LCD panel: Shows the items and settings you change with the buttons on the control panel. b. Direct Save button: Store the contents of memory card in an external storage device. c. Custom buttons: Store the current settings on the LCD panel when held down for more than two seconds.
- Page 18 Button Function Turns the printer on and off. power Displays instructions to resolve errors, or cleans the following errors: maintenance No ink No ink cartridge/abnormality No paper (cut sheet only) Paper jam Multi-page feed Starts the Ink Cartridge Replacement utility. Displays the Ink Cartridge Replacement menu when maintenance light is off and the button is pressed when in Advanced Mode.
-
Page 19: Direct Printing Basics
Direct Printing Basics Introduction This section provides information on how to print directly from a memory card using settings on the LCD panel and without the use of a computer. Note: ❏ Before printing large jobs, print a single sheet to confirm quality. ❏... - Page 20 ❏ Make sure the CD/DVD tray is not inserted in the printer and the CD/DVD guide is up. Media Type Loading Capacity EPSON Photo Paper Up to 20 sheets. EPSON Matte Paper-Heavyweight Up to 20 sheets. EPSON Premium Glossy Photo Paper Up to 20 sheets.
-
Page 21: Loading Memory Cards
EPSON Premium Semigloss Photo Up to 20 sheets. Paper EPSON Photo Stickers One sheet at a time. EPSON Iron-On Cool Peel Transfer One sheet at a time. Paper Loading Memory Cards Loadable storage media Digital photographs are stored either in the digital camera’s built-in memory or in loadable storage media called memory cards. - Page 22 Caution: The methods for using memory cards vary according to card type. Be sure to refer to the documentation packaged with your memory card for details. Note: See “Memory card data format” on page 22 for the specifications of memory cards that can be used with the printer. Memory card data format You can use image files that meet the following requirements.
-
Page 23: Inserting Memory Cards
Inserting memory cards Turn the printer on, open the memory card slot cover, then insert a memory card as shown in the illustration. When the memory card is inserted correctly, the memory card light will come on. CompactFlash/ Memory Stick/ SmartMedia/ Microdrive Memory Stick PRO/... -
Page 24: Basic Printing
Caution: ❏ Insert a memory card so that the top of the card faces the right side, as shown in the illustration. ❏ Loading a memory card in ways other than those shown here may damage the printer, memory card, or both. ❏... -
Page 25: Printing An Index
Printing an index You can print one or more copies of an index of all the photographs on a loaded memory card. An index can be helpful in selecting which photos you want to print. 1. Make sure that Basic Mode is selected. Note: When Advanced Mode is selected, press the Basic/Advanced mode switch button, then press the OK... -
Page 26: Single Photo Print
5. Press the Print button to print the index. Single photo print The example here is to print a single photo on the 10 × 15 cm size of Premium Glossy Photo Paper with Borderless and normal print quality. Index Photo Number 1. - Page 27 3. Press the u or d button to specify the photo number that you have selected from the Index, then press the OK button. 4. Select Copies, press the OK button to open the Copies counter, select the number you want to print, then press the OK button.
- Page 28 2. Select Copies, press the OK button to open the Copies counter, select the number you want to print, then press the OK button. 3. Press the Print button to start printing. Print multiple selected photographs Individual: Print selected photographs from the memory card. 1.
- Page 29 Note: To reset the number of copies, select the photo and press the OK button. The number of copies resets to 0 and the check box becomes unchecked. 5. When you have finished selecting photos, press the Back button, then press the OK button to confirm your selections. 6.
- Page 30 1. Load a memory card which contains DPOF data. Once a memory card has been loaded, the Select Photo value becomes DPOF and the Copies value becomes the number of copies you selected on your digital camera. 2. Press the Print button to start printing. Print a range of photographs Range: Print a range of selected photographs from the memory card.
-
Page 31: Printing On Cd/Dvd
Print P.I.F. Index Using P.I.F. Index is possible to print a list of the PRINT Image Framer frames stored in the memory card, when the memory card is in the printer. 1. Select P.I.F. Index from Select Photo, then press the OK button. - Page 32 ❏ Moisture on the printable surface may cause smearing. ❏ If the CD/DVD tray or the internal transparent compartment are accidentally printed on, immediately wipe off the ink. ❏ Reprinting on the same CD/DVD may not improve the print quality. Preparing to Print on CD/DVD 1.
- Page 33 You can select the following layout options when printing on a CD/DVD. One photo will be printed on the CD/DVD, centered on the hole in the middle of the disc. Four photos will be printed on the CD/DVD, with one image in each of four quarters.
- Page 34 3. Press the u button to specify the number of prints for each photo, if you selected the 4-photo or 12-photo option for the Layout setting. Note: ❏ To select more than one photo, repeat steps 2 and 3 to select other photos and the number of times to print them.
- Page 35 2. Insert the CD/DVD tray into the CD/DVD guide. Note: ❏ Align the arrow mark on the CD/DVD tray with the arrow mark on the CD/DVD guide. ❏ Insert the CD/DVD tray so that the CD/DVD tray passes under the small rollers on the both sides of the CD/DVD slot. 3.
-
Page 36: Adjusting The Print Position
Adjusting the Print Position Follow the steps below to adjust the print position, if necessary. 1. Press the u or d button to highlight CD Setting and press the OK button. 2. To move the image up or down; press the u button to select CD/DVD Print Position Adjustment Up/Down and press the OK button. -
Page 37: Adjusting The Print Density
5. Press the u or d button to select the direction and amount to move the image, then press the OK button. 6. Press the Back button to return to the Layout screen, then press the Print button to print the CD/DVD. Note: The printer remembers the print adjustment setting even after it has been turned off, so you do not need to adjust the position each time you use... -
Page 38: Canceling Printing Using The Control Panel
Canceling Printing Using the Control Panel To stop printing in progress, press the Stop button. The printer will cancel all print jobs, stop printing, and eject any pages or CD/DVD tray that were printing. Depending on the printer’s status, printing may not stop immediately. Ejecting Memory Cards After printing all of the jobs, eject the memory card. -
Page 39: Various Setting
Various Setting Advanced Printing Main settings Note: Press the Basic/Advanced mode button to select Advanced Mode if Basic Mode is selected. a. Select Photo On this menu, you can select how to print data stored on a memory card. Print all photographs on the memory card. Index Print an index of all photographs on the memory card. - Page 40 Photo Print on EPSON Photo Paper. Matte Print on EPSON Matte Paper Heavyweight. Plain Print on plain paper, EPSON Premium Ink Jet Plain Paper, or EPSON Bright White Ink Jet Paper. Stickers Print on EPSON Photo Stickers. Iron-on Print on EPSON Iron-On Cool Peel Transfer Paper.
- Page 41 e. Layout On this menu, the print layout can be specified. Borderless Prints without margins. Portrait layout. Single Prints with 3-mm margins on all sides. Portrait layout. Upper half Prints in the upper half without a border. Double Prints two images (landscape) on one page.
-
Page 42: More Options
❏ Because this setting enlarges the image to a size slightly larger than the paper size, the portion of the image that extends beyond the edges of the paper will not be printed. ❏ Print quality may decline in the top and bottom areas of the printout, or the area may be smeared when printing. - Page 43 The base point can be selected from nine options: Upper Left, Center Left, Lower Left, Upper Center, Center, Lower Center, Upper Right, Center Right, and Lower Right. You can select either 1.2 or 1.5 times magnification. The preview monitor shows the trimmed area with a yellow frame.
- Page 44 Automatic Correction This printer is able to correct the color of printouts automatically. There are two kinds of correction available. By default, the setting is P.I.M. For printing with PRINT Image Matching, see “Exif Print and PRINT Image Matching” on page 50. P.I.M.
- Page 45 Brightness This setting allows you to adjust the brightness of your printouts. The default setting is Standard. Saturation This setting allows you to adjust the vividness of your printouts. Then default setting is Standard. Sharpness This setting allows you to adjust the sharpness of your printouts. The default setting is Standard.
- Page 46 Time This setting is to print the time information contained in your photo data. The default setting is None. The following examples show the format options for setting the time. None Does not print the time. 12-hour system 10:00 24-hour system 22:00 Photo Information If your photo data contains the photo information conforms to...
-
Page 47: Fit To Frame
Fit to Frame This setting automatically trims the parts of an image that extend beyond the margins of the selected print size. Either the top and bottom areas or the left and right areas of the image will be trimmed, depending on the aspect ratio of the original photo and the selected print size. -
Page 48: Ink Cartridge Replacement
Sticker Adjustment: Up/Down This setting allows you to adjust the print position of the Photo Stickers by moving the image up or down. Sticker Adjustment: Left/Right This setting allows you to adjust the print position of the Photo Stickers by moving the image to the left or right. Ink Cartridge Replacement The ink cartridge can be replaced by selecting this option. -
Page 49: Print Head Alignment
Print Head Alignment The print head can be aligned by selecting this option. & See “Aligning the Print Head” on page 73 Color LCD Contrast The contrast of the preview monitor can be adjusted by selecting this option. LCD Contrast The contrast of the LCD panel can be adjusted by selecting this option. -
Page 50: Exif Print And Print Image Matching
Restore Factory Settings This resets all the settings to default. If you use this function, the setting values for each mode will be reset to the values which were preset at the factory. Language The language displayed on the LCD panel can be selected with this option. - Page 51 ✽ ✽ The Exif and P.I.M. icons appears when the first photograph in the memory card has PRINT Image Matching or Exif Print information and when All, Range, Photo number and Individual selected in Select Photo. Effectiveness Exif Print When taking photographs using an Exif Print compatible digital camera, information about camera settings and scene conditions when the photograph was taken is embedded in the photo data.
- Page 52 PRINT Image Matching PRINT Image Matching gives control of the printing process to the digital camera, allowing printed images to reflect the camera’s distinctive qualities. When taking photographs using a PRINT Image Matching compatible digital camera, print command information from the camera is embedded in the photo data. The print command then instructs the printer how to correct color and details based on information stored at the moment the photo was taken.
-
Page 53: Dpof Settings
Plain Paper/EPSON Premium Ink Jet Plain Paper/ EPSON Bright White Ink Jet Paper/EPSON Photo Paper/ EPSON Matte Paper-Heavyweight/ EPSON Premium Glossy Photo Paper/ EPSON Premium Semigloss Photo Paper/ EPSON Photo Stickers Note: Refer to the digital camera's documentation to find out whether the camera is Exif Print and/or PRINT Image Matching compatible. -
Page 54: Print Image Framer
Note: Be sure to save the PRINT Image Framer data to the memory card using the EPSON PRINT Image Framer Tool; otherwise the P.I.F. file name will not appear on the LCD panel. 2. Select All, Range, Photo number or Individual from the Select Photo menu. - Page 55 5. Select the desired PRINT Image Framer data from the Layout menu. The PRINT Image Framer data file is displayed. PRINT Image Framer data is located at the bottom of the Layout menu. Note: You can view PRINT Image Framer layout images on the preview monitor, but you cannot view photos images at this time.
-
Page 56: Digital Camera Direct Printing
Digital Camera Direct Printing You can use this feature with digital cameras which support the USB DIRECT-PRINT or PictBridge functions. For more details on the operation of the digital camera, refer to its manual. 1. Turn on the printer and load the paper. 2. -
Page 57: Storing And Loading The Settings
❏ Your printer has two USB connectors, one on the front and one on the rear. Although you can connect a USB cable to either, Epson recommends that you use the front USB connector for connecting the digital camera and the rear USB connector for connecting a portable computer or a desktop computer. - Page 58 ❏ Saturation in More Options ❏ Sharpness in More Options ❏ Contrast in More Options ❏ Automatic Correction in More Options * The DPOF and P.I.F. Index settings are not available. Note: ❏ This function is not available in Basic Mode. ❏...
-
Page 59: Backup
Backup Press the Direct Save button, it is possible to store the contents of a memory card in an external storage device, such as an MO ® (magneto-optical) drive, Zip drive, CD-R/RW drive, or USB Flash Drive by connecting it to the printer. Note: ❏... -
Page 60: Printing With An External Device
Connect the external storage device to the printer and operate according to the instructions displayed on the LCD panel. To learn more about connecting an external storage device, see “Connecting an external device” on page 60. Caution: Do not remove the storage media from the external storage device or disconnect the cable from the printer while backing up. - Page 61 ❏ Even if the printer is connected to a computer, the computer cannot recognize the external storage device. Insert the USB cable to the external device USB connector and insert the other connector into the external storage device.
-
Page 62: Printing From An External Device
Printing from an external device 1. Insert a medium that contains photo data into the external storage device. 2. If a memory card has been inserted in the memory card slot, remove it. Note: ❏ If a memory card is inserted in the memory card slot, the printer does not recognize the external storage device;... -
Page 63: Replacing Ink Cartridges
Replacing Ink Cartridges Checking the Ink Supply Using the LCD panel To check which cartridge requires replacing, check the LCD panel. Press the u or d buttons in Advanced mode to scroll the screen until More Options appears. The ink icons appear beneath More Options on the LCD panel. -
Page 64: Replacing An Ink Cartridge
If discomfort or vision problems remain after a thorough flushing, see a doctor immediately. Caution: ❏ Epson recommends the use of genuine Epson ink cartridges. Epson warranties do not cover damage to your printer caused by the use of ink cartridges not manufactured by Epson. - Page 65 Note: ❏ You cannot continue printing with one ink cartridge empty, even if the other cartridges still contains ink. Before printing, replace the empty cartridge. ❏ In addition to the ink used during document printing, ink is consumed during the print head cleaning operation, during the self-cleaning cycle which is performed when the printer is turned on, and during ink charging when the ink cartridge is installed in the printer.
- Page 66 3. Follow the instructions on the screen and press the OK button. The ink cartridge moves slowly to the ink replacement position. Caution: Do not move the print head by hand, as this may damage the printer. Always press the OK button to move it. 4.
- Page 67 Caution: ❏ Be careful not to break the hooks on the side of the ink cartridge when you remove it from the package. ❏ Do not remove or tear the label on the cartridge; otherwise, ink will leak. ❏ Do not touch the green IC chip on the front of the cartridge.
- Page 68 5. Open the cartridge cover. Pinch the sides of the ink cartridge that you want to replace. Lift the cartridge out of the printer and dispose of it properly. Do not take the used cartridge apart or try to refill it. The illustration shows replacement of the black ink cartridge.
- Page 69 8. Press the OK button. The print head will move and begins charging the ink delivery system. When the ink charging process is finished, the print head will return to its home position. Caution: The progress meter is displayed in the LCD panel while the ink is being charged.
-
Page 70: Improving Print Quality
Improving Print Quality Checking the Print Head Nozzles If you find that the printout is unexpectedly faint or that dots are missing, you may be able to identify the problem by checking the print head nozzles. Note: ❏ You cannot clean the print head if the message “ink out” is displayed or the ink icon flashes to show ink out or ink low on the LCD panel. -
Page 71: Cleaning The Print Head
6. The nozzle check pattern is printed out. See the following illustration. If it is necessary to clean the print head, press the OK button, then select Head Cleaning. The printer will print an operation check page that includes a nozzle check pattern. -
Page 72: Using The Control Panel Buttons
Note: ❏ Print head cleaning consumes some ink. To avoid wasting ink, clean the print head only if print quality declines; for example, if the printout is blurry or the color is incorrect or missing. ❏ Use the Nozzle Check utility first to confirm that the print head needs to be cleaned. -
Page 73: Aligning The Print Head
Note: ❏ If print quality has not improved after repeating this procedure four or five times, turn the printer off and leave it alone overnight. Then, do the nozzle check again, and repeat the head cleaning if necessary. ❏ If the print quality still has not improved, at least one of your ink cartridges may be old or damaged and may need to be replaced. - Page 74 3. Press d button to position the cursor at Print Head Alignment and press the OK button. 4. Follow the instructions displayed on the LCD panel and press the OK button. The following alignment sheet is printed. 5. From the alignment pattern in set #1 on the printed test sheet, choose the vertical line that is aligned best.
- Page 75 6. Repeat step 5 for the alignment patterns in sets #2, #3 and #4. 7. Press the OK button to finish.
-
Page 76: Cleaning The Printer
Cleaning the Printer To keep your printer operating at its best, clean it thoroughly several times a year as follows. 1. Unplug the printer’s power cord. 2. Remove any paper from the sheet feeder. 3. Use a soft brush to carefully clean away all dust and dirt from the sheet feeder. -
Page 77: Transporting The Printer
Caution: ❏ Do not apply grease to the metal parts under the print head carriage. ❏ Never use alcohol or thinner to clean the printer, as these chemicals can damage the components as well as the case. ❏ Be careful not to get water on the printer mechanism or electronic components. - Page 78 3. Remove the paper from the sheet feeder. 4. Open the printer cover again. Secure the ink cartridge holder to the printer with tape as shown below, then close the printer cover. 5. Close the CD/DVD guide if it is open. Raise the output tray, close the printer cover and the paper support.
-
Page 79: Troubleshooting
Magenta: T0483 new ones. Yellow: T0484 Light Cyan: T0485 Light Magenta: T0486 The genuine Epson ink cartridges listed above are recommended for replacement. Paper is not set correctly. Load paper in Set the paper correctly, then press the maintenance the sheet feeder, button. - Page 80 Cyan: T0482 Magenta: T0483 Yellow: T0484 Light Cyan: T0485 Light Magenta: T0486 The genuine Epson ink cartridges listed above are recommended for replacement. Service required. Contact your dealer. Parts inside your printer are at the end of their service life.
- Page 81 The inserted card cannot be used with this printer. Use a compatible and formatted memory card. Bluetooth Photo Print Adapter error. Disconnect the Disconnect the Adapter from the printer, then reconnect it. Adapter, then reconnect to the printer. System error. Simultaneously press and hold the Power Turn the printer and Stop button for 7 seconds to turn off the printer.
-
Page 82: Print Quality Problems
❏ Use up ink cartridges within six months after opening their packages. ❏ Use the genuine Epson ink cartridges. ❏ Check the LCD panel. If the ink icon is flashing or a message is displayed, replace the appropriate ink cartridge. -
Page 83: Incorrect Or Missing Colors
& See “Replacing an Ink Cartridge” on page 64 Blurry or smeared printout ❏ Use only paper recommended by Epson. & See “Paper” on page 98 ❏ Use genuine Epson ink cartridges. - Page 84 ❏ If the paper is curled toward the printable side, flatten it or curl it slightly in the opposite direction. ❏ Make sure that the Paper Type setting in your LCD panel is correct. ❏ Remove each sheet from the output tray as it is printed, especially if you are using transparencies.
-
Page 85: Printout Problems Not Related To Print Quality
Printout Problems Not Related to Print Quality Blank pages print ❏ Run the Head Cleaning utility to clear any clogged nozzles. & See “Cleaning the Print Head” on page 71 Printout has smears ❏ If the paper is curled toward the printable side, flatten it or curl it slightly in the opposite direction. -
Page 86: Multiple Pages Feed
❏ The paper is not loaded higher than the triangular load-limit mark on the edge guide. ❏ The paper stack fits under the tabs inside the edge guides. ❏ Paper is not jammed inside the printer. If it is, remove the jammed paper. -
Page 87: The Paper Jams
The paper jams Press the ( maintenance button to eject the jammed paper. If the error does not clear, turn the printer off, the printer cover and the CD/DVD guide. Remove all of the paper inside, including any torn pieces, then close the CD/DVD guide. Reload the paper, then press the ( maintenance button to resume printing. -
Page 88: Paper Is Not Ejected Fully Or Is Wrinkled
Paper improperly loaded If you have loaded the paper too far into the printer, the printer cannot feed the paper correctly. Turn the printer off and gently remove the paper. Then turn the printer on and reload the paper properly. Paper is not ejected fully or is wrinkled ❏... -
Page 89: Printer Does Not Print
Printer Does Not Print LCD panel is off ❏ Press the P power button to make sure that the printer is on. ❏ Turn off the printer and make sure that the power cord is securely plugged in. ❏ Make sure that your outlet works and is not controlled by a wall switch or timer. -
Page 90: Print Head Carriage Problem
❏ If the ( maintenance light is on and paper is jammed in the printer, remove the paper from the printer. ❏ If the ( maintenance light is on and no paper is loaded, load more paper in the sheet feeder. ❏... -
Page 91: Printing Problems When Using The Bluetooth Photo Print
Printing Problems when Using the Bluetooth Photo Print Adapter If you are having difficulties using your printer with the Bluetooth Photo Print Adapter, refer to the "Using the Bluetooth Photo Printer Adapter" in the online Reference Guide. Communication Error The power light does not turn on Cause What to do The power cord may not be... - Page 92 The power light is on but nothing prints Cause What to do Your computer may not be Perform the setup procedure described in properly connected to the the Setup sheet. printer. The interface cable may Check both ends of the interface cable not be plugged in securely.
-
Page 93: Canceling Printing
Canceling Printing If you encounter problems while printing, you may need to cancel printing. To stop printing in progress, press Stop button. The printer will cancel all print jobs and stop printing, and eject any pages or CD/DVD tray that were printing. Depending on the printer’s status, printing may not stop immediately. -
Page 94: Customer Support
Customer Support Contacting Customer Support If your Epson product is not operating properly and you cannot solve the problem using the troubleshooting information in your product documentation, contact customer support services for assistance. Check your Pan-European Warranty Document for information on how to contact EPSON Customer support. They... -
Page 95: Technical Support Web Site
Technical Support Web Site Go to http://www.epson.com and select the Support section of your local EPSON web site for the latest drivers, FAQs, manuals and other downloadables. Epson's Technical Support Web Site provides help with problems that cannot be solved using the troubleshooting information in... -
Page 96: Options And Consumable Products
The asterisk is a substitute for the last digit of the product number, which varies by location. Refer to the "Using the Bluetooth Photo Printer Adapter" in the online Reference Guide. Consumable products The following ink cartridges and Epson special media are available for your printer. -
Page 97: Ink Cartridges
T0486 Note: The product numbers of ink cartridges may vary by location. Media Types Epson offers specially designed media for ink jet printers to meet most high-quality printing needs. & See “Media type settings” on page 105 Note: ❏ The availability of special media varies by location. -
Page 98: Printer Specifications
Since the quality of any particular brand or type of paper may be changed by the manufacturer at any time, Epson cannot guarantee the quality of any non-Epson brand or type of paper. Always test a sample of paper stock before purchasing large quantities or printing large jobs. -
Page 99: Paper Specifications
20 × 25 cm (8 × 10 in) Letter 8 1/2 × 11 in Legal 8 1/2 × 14 in Paper types Plain bond paper, special paper distributed by Epson Thickness (for plain bond 0.08 to 0.11 mm (0.003 to 0.004 inch) paper) Weight (for plain bond 64 g/m²... - Page 100 Printable area Single sheets and index cards Normal Borderless Diagonal lines show printable area. The minimum top margin is 3.0 mm (0.12"). B-L: The minimum left margin is 3.0 mm (0.12"). B-R: The minimum right margin is 3.0 mm (0.12"). The minimum bottom margin is 3.0 mm (0.12").
- Page 101 * Ink thaws and is usable after approximately 3 hours at 25°C (77°F). Caution: ❏ Epson recommends the use of genuine Epson ink cartridges. Epson warranties do not cover damage to your printer caused by the use of ink cartridges not manufactured by Epson.
- Page 102 Mechanical Paper path Sheet feeder, rear entry Sheet feeder About 120 sheets at 90 g/m² (24 lb) paper capacity Dimensions Storage Width: 498 mm (19.6 inches) Depth: 264 mm (10.4 inches) Height: 225 mm (8.9 inches) Printing Width: 498 mm (19.6 inches) Depth: 476 mm (18.7 inches) Height: 289 mm (11.4 inches) Weight...
- Page 103 Note: Check the label on the back of the printer for the voltage of your printer. Environmental Temperature Operation: 10 to 35°C (50 to 95°F) Storage: -20 to 60°C (-4 to 140°F) 1 month at 40°C (104°F) Humidity Operation*: 20 to 80% RH Storage:* 5 to 85% RH * Without condensation...
- Page 104 Built-in card slots Card Slots CF Type II card slot Compatible with “CF+ and CompactFlash Specification 1.4” SmartMedia card Compatible with “SmartMedia slot Standard 2000” Memory Compatible with “Memory Stick Stick/MemoryStick Standard version 1.3” PRO card slot Compatible with “Memory Stick Standard Memory Stick PRO Format Specifications version 1.0”...
-
Page 105: Media Type Settings
Compatible CompactFlash memory SmartMedia* cards Memory Stick Memory Stick PRO Memory Stick Duo** Memory Stick PRO Duo** MagicGate Memory Stick MagicGate Memory Stick Duo** Microdrive SD (Secure Digital) Card MultiMediaCard miniSD card** xD-Picture Card Voltage 3.3 v Requirements Maximum current is 500 mA * Maximum capacity is 128 MB. - Page 106 EPSON Matte Paper Heavyweight (A4) S041256 Photo EPSON Photo Paper (A4) S041140 S041622 S041857 EPSON Photo Paper (10 × 15 cm/4 × 6 in) S041134 Glossy EPSON Premium Glossy Photo Paper (A4) S041287 S041624 EPSON Premium Glossy Photo Paper S041822 (10 ×...
-
Page 107: External Storage Devices
Stickers EPSON Photo Stickers 4 S041176 EPSON Photo Stickers 16 S041144 External Storage Devices Connectivity Universal Serial Bus* Bit rate: 12 Mbps (Full speed device) Connector type: USB Series A Recommended cable length: Less than 2 meters Power supply Maximum current is 500 mA. -
Page 108: Standards And Approvals
Standards and Approvals U.S. model: Safety UL 60950 CSA No.60950 FCC Part 15 Subpart B Class B CSA C108.8 Class B European model: Low Voltage EN 60950 Directive 73/23/EEC EMC Directive EN 55022 Class B 89/336/EEC EN 55024 EN 61000-3-2 EN 61000-3-3...
Need help?
Do you have a question about the Stylus Photo R320 Series and is the answer not in the manual?
Questions and answers