Advertisement
Quick Links
27995
Interference Information
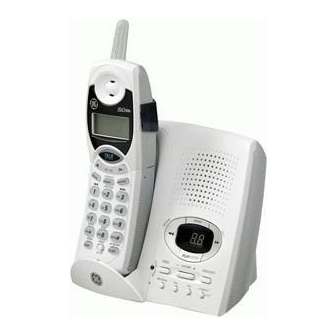
40 Channel 2.4 GHz Call Waiting
This equipment generates and uses radio frequency energy which may
Caller ID Cordless Telephone/
interfere with residential radio and television reception if not properly
installed and used in accordance with instructions contained in this
Answering System
manual. Reasonable protection against such interference is ensured,
User's Guide
although there is no guarantee this will not occur in a given installation.
If interference is suspected and verified by switching this equipment on
and off, the user is encouraged to try to correct the interference by one or
more of the following measures: Reorient the radio/television receiver's
antenna, relocate the equipment with respect to the receiver, plug the
equipment and receiver into separate circuit outlets.The user may also
wish to consult a qualified radio/television technician for additional
suggestions.This equipment has been fully tested and complies with
all limits for Class B computing devices pursuant to part 15 FCC Rules
and Regulations.This device complies with RSS-210 of Industry Canada.
Operation is subject to the following two conditions: (1)This device may
not cause interference, and (2)This device must accept any interference,
including interference that may cause undesired operation of the device.
Licensing
Licensed under US Patent 6,427,009.
Hearing Aid Compatibility (HAC)
This telephone system meets FCC standards for Hearing Aid
Compatibility.
REN NUMBER IS LOCATED ONTHE CABINET BOTTOM
Introduction
CAUTION: When using telephone equipment, there are basic
safety instructions that should always be followed. Refer to the
IMPORTANT SAFETY INSTRUCTIONS provided with this
product and save them for future reference.
Your cordless telephone/answering system with Caller ID and
Call Waiting is designed to give you flexibility in use and high quality
performance.To get the most from your new cordless telephone/
answering system, we suggest that you take a few minutes right now to
read through this instruction manual.This telephone is a multifunction
Important Information
product for use with the Call Waiting and Caller ID services available from
your local telephone company.Your Caller ID Call Waiting phone allows
NOTICE:This product meets the applicable Industry Canada
you to:
technical specifications.
• View the name and telephone number of a caller (Call Waiting Caller
The equipment must be installed using an acceptable method of
ID).
connection.The customer should be aware that compliance with the
above conditions may not prevent degradation of service in some
• Identify callers before you answer the phone.
situations.
• View the time and date of each incoming call.
Repairs to certified equipment should be made by an authorized
• Record up to 40 Caller ID messages sequentially.
Canadian maintenance facility designated by the supplier. Any repairs
• Know who called while you are on the other line or when
or alterations made by the user to this equipment, or equipment
you were away.
malfunctions, may give the telecommunications company cause to
request the user to disconnect the equipment.
• Screen unwanted calls, eliminate harassment from annoying calls, or
to get prepared before answering a call.
Users should ensure for their own protection that the electrical ground
connections of the power utility, telephone lines and internal metallic
IMPORTANT: In order to use all of the features of this telephone,
water pipe systems, if present, are connected together.This precaution
you must subscribe to two separate services available from your local
may be particularly important in rural areas.
telephone company: the standard Name/Number Caller ID Service
to know who is calling when the phone rings and Caller ID with Call
CAUTION: Users should not attempt to make such connections
Waiting Service to know who is calling while you are on the phone.
themselves, but should contact the appropriate electric inspection
Because cordless phones operate on electricity, you should have at
authority, or electrician, as appropriate.
least one phone in your home that isn't cordless, in case the power
NOTES:This equipment may not be used on coin service provided by the
in your home goes out.
telephone company.
Model 27995GF
ATLINKS Communications Canada Inc.
00003944 (Rev. 2 CAN E)
© 2005 ATLINKS Communications Canada Inc.
05-21
Trademark(s) ® Registered
Printed in China
Marque(s) ® déposée(s)
Before You Begin
5. Close the battery compartment by pushing the door up until it snaps
into place.
Parts Checklist
6. Place the handset in the charging cradle.
Make sure your package includes the items shown here.
Connecting the AC (Electrical) Power
_
AC Power
ERASE
+
ANNOUNCE
adaptor
Base
Plug the power adaptor cord into the power jack on the bottom of
the base and the other end into an electrical outlet.The in use/charge
Handset battery
indicator (on the base) turns on to indicate the battery is charging when
Handset
the handset is on the cradle.
Belt clip
Line cord
Allow the phone to charge for 16 hours prior to first use. If you don't
Telephone Jack Requirements
properly charge the phone, battery performance is compromised.
Wall plate
To use this phone, you need an RJ11C type modular
CAUTION: Use only the ATLINKS USA, Inc. power adaptor
telephone jack, which might look like the one pictured
5-2512 (black) or 5-2618 (gray) power adaptor that came with
here, installed in your home. If you don't have a
Modular
this unit. Using other power adaptors may damage the unit.
modular jack, call your local phone company to find
telephone
out how to get one installed.
line jack
Connecting the Telephone Line
Digital Security System
1. Plug one end of the telephone line cord into the jack on the bottom of
the base calledTEL LINE and the other end into your home's modular
Your cordless phone uses a digital security system to protect against
phone jack.
false ringing, unauthorized access, and charges to your phone line.
2. Set the ringer switch (on the handset) to ON, and place the handset in
When you place the handset in the base, the unit verifies its security
the cradle on the base.
code. After a power outage or battery replacement, you should place the
handset in the base for about 20 seconds to reset the code.
Wall Mounting
INSTALLATION NOTE: Some cordless telephones operate at
If you want to mount the phone on a wall, slip the mounting holes (on the
frequencies that may cause or receive interference with nearby
back of the base) over the wall plate posts, and slide the unit down into
TVs, microwave ovens, and VCRs. To minimize or prevent such
place. (Wall plate not included.)
interference, the base of the cordless telephone should not be
Handset Layout
placed near or on top of a TV, microwave oven, or VCR. If such
interference continues, move the cordless telephone farther away
from these appliances. Certain other communications devices may
also use the 2.4 GHz frequency for communication, and, if not
properly set, these devices may interfere with each other and/or
your new telephone. If you are concerned with interference, please
refer to the owner's manual for these devices on how to properly
set channels to avoid interference. Typical devices that may use
the 2.4 GHz frequency for communication include wireless audio/
TALK/call back
video senders, wireless computer networks, multi-handset cordless
(button)
telephone systems, and some long-range cordless telephone systems.
CID/VOL - or +
Important Installation Information
(button)
• Never install telephone wiring during a lightning storm.
REDIAL
• Never install telephone jacks in wet locations unless the jack is
(button)
specifically designed for wet locations.
review
• Never touch uninsulated telephone wires or terminals, unless the
(button)
telephone line has been disconnected at the network interface.
play/stop
• Use caution when installing or modifying telephone lines.
(button)
• Temporarily disconnect any equipment connected to the phone such as
TONE*/exit
faxes, other phones, or modems.
(button)
erase
Installing the Phone
(button)
Your cordless telephone/answering system should be placed on a level
CHAN/delete
surface such as a desk or table top, or you can mount it on a wall.
(button)
Installing the Handset Battery
NOTE: You must connect the handset battery before use.
Base Layout
1. Locate battery and battery door which are packaged together inside a
plastic bag and are separate from the handset.
2. Locate the battery compartment on the back of the handset.
3. Plug the battery pack cord into the jack inside the compartment.
NOTE: It is important to maintain the polarity (black and red
wires) to the jack inside the compartment. To ensure proper battery
installation, the connector is keyed and can be inserted only one way.
BATTERY
ERASE
_
RED WIRE
PRESS DOWN
REVIEW
ERASE
FIRMLY
(button)
BLACK WIRE
(button)
in use/charge
day/check
4. Insert the battery pack.
(indicator)
(button)
Telephone Setup
In Use Indicator
When the in use/charge indicator on the base is lit, the handset is either
Programmable Menus
in use or charging.The in use/charge indicator on the base flashes when
There are five programmable menus available: Language, Local Area
you receive a call.
Code, RingerTone,Tone/Pulse and Factory Default. When you program
Flash
these settings, make sure the phone is OFF (not in talk mode). Pressing
theTONE/exit button will remove you from the menu selection process
If you subscribe to the combined Call Waiting Caller ID service from
without changing the feature you are in.
your local telephone company you will receive Caller ID information (if
available) on Call Waiting calls. During a phone call, you will hear a beep
Display Language
to indicate another call is waiting on the line and Caller ID information for
1. Press the FLASH/program button until 1ENG 2FRA 3ESP shows in the
the waiting call shows on the handset display.To connect the waiting call,
display.
press the FLASH/program button on the handset and your original call
is put on hold.You may switch back and forth between the two calls by
2. Use the CID/VOL (left or right arrow) button or the handset number pad
to select 1 (English), 2 (French), or 3 (Spanish).The default setting is
pressing the FLASH/program button.
"1ENG" .
TIP: Do not use the TALK/call back button to activate custom
3. Press the FLASH/program button to confirm and to advance to the next
calling services such as call waiting, or you'll hang up the phone.
menu feature.
Volume
Local Area Code
When the phone is ON, press the CID/VOL (left or right arrow) on the
If you enter your local 3-digit area code in the area code menu, your local
handset to adjust the volume of the handset's earpiece.There are four
area code does not display on the Caller ID (CID) list. Instead, you only
settings. Press the right arrow to increase the volume and left arrow to
see the local 7-digit number. Calls received from outside your local area
decrease the volume.You will see the volume setting on the handset
code will display the full 10-digit number.
display. VOL 4 is the maximum and VOL 1 is the minimum.
1. Press the FLASH/program button until AREA CODE - - - shows in the
Channel Button
display.The default setting is "- - -" .
While talking on the phone, you might need to manually change the
2. Use the handset number pad to enter your 3-digit area code.
channel in order to reduce static caused by applicances, such as baby
monitors, garage door openers, microwave ovens, or other cordless
NOTE: If you make a mistake, press the CHAN/delete button to
phones. Press and release the CHAN/delete button to move to the next
erase the incorrect area code and repeat step 2.
clear channel.
3. Press the FLASH/program button to confirm and to advance to the next
menu feature.
Temporary Tone
This feature is useful only if you have pulse (rotary) service.Temporary
Ringer Tone
Tone Dialing enables pulse (rotary) service phone users to access
1. Press the FLASH/program button until RINGERTONE shows in the
touchtone services offered by banks, credit card companies, etc. For
display.
example, when you call your bank you may need to enter your bank
2. Use the CID/VOL (left or right arrow) button or the handset number pad
account number.Temporarily switching to touchtone mode allows you to
(1-3) to enter your selection from RingerTone 1, 2, or 3.The default
send your number.
setting is "RINGERTONE 1" .
1. Dial the telephone number and wait for the line to connect.
3. Press the FLASH/program button to confirm and to advance to the next
2. When your call is answered, press the TONE*/exit button on the
menu feature.
handset to temporarily change from pulse dialing to tone dialing.
Tone/Pulse
3. Follow the automated instructions to get the information you need.
1. Press the FLASH/program button until 1TONE 2 PULSE shows in the
4. Hang up the handset and the phone automatically returns to pulse
display.
(rotary) dialing mode.
display
2. Use the CID/VOL (left or right arrow) button or the handset number
Exit
pad to enter your selection.The default setting is "1TONE" .
FORMAT/answerer
Press the TONE*/exit button to cancel any command you initiated.
3. Press the FLASH/program button to confirm and to advance to the next
(button)
menu feature.
Ringer Switch
The RINGER switch must be ON for the handset to ring during incoming
Factory Default
MEMORY
calls.
(button)
This feature allows you to restore the unit's original features.
Paging the Handset
skip
1. Press the FLASH/program button until DEFAULT shows in the display.
(button)
This feature helps to locate a misplaced handset.
2. Use the CID/VOL (left or right arrow) button to scroll toYES.The default
PAUSE#
setting is "NO" .
Press the page button on the base.The handset will beep for about two
(button)
minutes or until you pressTALK/call back on the handset or press the
3. Press FLASH/program to confirm.You will hear a confirmation tone.
page button on the base.
FLASH/program
Cordless Phone Basics
(button)
NOTE: You can still page the handset if the ringer is turned off. If
the batttery is dead, the Paging feature will not work.
Making a Call
ringer/on-off
(switch)
1. Press the TALK/call back button and dial the desired number.
Caller ID Features
-OR-
Caller ID (CID) is a service available from your local telephone company.
To perform preview dial, dial the number first then press theTALK/
For Caller ID to work on this system, you must subscribe to Caller ID
call back button.
service.To receive Caller ID information for a Call Waiting call, you must
subscribe to the combined Caller ID Call Waiting service.The unit can
2. To hang up, press theTALK/call back button or place the handset in the
store up to 40 calls for later review.
MEMO (button)
base cradle.
IMPORTANT: Because cordless phones operate on electricity, you
should have at least one phone in your home that isn't cordless, in
SKIP (button)
case the power in your home goes out.
display
Redial
Press the REDIAL button to quickly dial the last number you called (up to
PLAY/STOP
32 digits).
(button)
If you get a busy signal, and want to keep dialing the number, press
VOL - or +
+
ANNOUNCE
redial to dial the number again.
(button)
When your telephone rings, and you are subscribed to Caller ID Call
Receiving a Call
ANNOUNCE
Waiting service, you will receive information (if available) transmitted by
(button)
1. To answer a call press theTALK/call back button on the handset before
your local telephone company.You will also receive Caller ID information
answerer
you begin speaking.
from Call Waiting calls. If you receive an incoming call and you are
min
(button)
2. To hang up, press theTALK/call back button or place the handset in the
hour
(button)
already on the phone, a beep indicates the presence of a Call Waiting Call
(button)
base cradle.
on the line, and Caller ID information for the Call Waiting call shows on
the display.This information may include the phone number, date and
time; or the name, phone number, and date and time.
Receiving and Storing Calls
When you receive a call, the information is transmitted by the phone
company to your Caller ID telephone between the first and second ring.
VERY IMPORTANT: The Caller ID feature of this product requires
a subscription to Caller ID service from your telephone company.
When the phone's memory is full, a new call automatically replaces the
oldest call in memory. NEW appears in the display for calls received that
have not been reviewed.
NOTE: Check with your local phone company regarding name
service availability.
Reviewing Caller ID Records
As calls are received and stored, the display is updated to let you know
how many calls have been received.
• Make sure the phone is OFF (not inTALK mode).
• Press the CID/VOL (left arrow) button to scroll through the call records
from the most recent to the oldest.
• Press the CID/VOL (right arrow) button to scroll through the call records
from the oldest to the newest.
Deleting the Current Record
1. When the Caller ID record shows in the display, press and release the
CHAN/delete button.The display shows DELETE CALL ID?
2. Press CHAN/delete button again to confirm.You will hear a
confirmation tone, the display shows DELETED, then the next Caller ID
record appears in the display.
Deleting All Records
1. Press the CID/VOL (left or right arrow) button until a Caller ID record is
displayed.
2. Press and hold CHAN/delete until unit beeps.The display shows
DELETE ALL?
3. Press CHAN/delete again to erase all records.You will hear a
confirmation tone, and the display shows NO CALLS.
Storing Caller ID Records in Memory
NOTE: Caller ID record should be in correct format for dialing as
record cannot be changed once it is stored in memory location.
1. Press the CID/VOL (left or right arrow) button until the desired Caller ID
record is displayed.
2. Press the MEMORY button.
3. Press a number (0-9) to store the dialed number in that memory
location. You will hear a confirmation tone. Example, press the
number 1 key to store the record in memory location 1.
To Replace an Old Memory with a New Caller ID
Record:
1. Repeat steps 1 through 3 inTransferring Caller ID Records to Memory.
After entering the memory location, REPLACE MEMO? shows in the
display.
2. Press the MEMORY button again, and the new Caller ID record
replaces the old memory in that location.You will hear a confirmation
tone.
Dialing a Caller ID Number
1. Make sure the phone is OFF (not inTALK mode).
2. Use the CID/VOL (left or right arrow) button to display the desired
Caller ID record.
3. Press theTALK/call back button to dial the number.
Changing the Number Format
Time
Date
Number of Calls
The FORMAT/answerer button lets you change the format of the
displayed number. The available formats are as follows.
7-digit
7-digit telephone number.
10-digit 3-digit area code + 7-digit telephone number.
11-digit long distance code "1" + 3-digit area code + 7-digit telephone
number.
1. Use the CID/VOL (left or right arrow) button to scroll to the number you
Caller ID phone number
Caller ID name
want to call back.
2. If the number does not dial as shown, press the FORMAT/answerer
button. Repeat if necessary, until the correct number of digits shows in
the display.
3. Press theTALK/call back button.
Memory
Store up to ten 24-digit numbers in memory for quick dialing.This
memory feature is in addition to the 40 Caller ID records that can be
stored in memory.
Storing a Name and Number in Memory
1. Make sure the phone is OFF (not inTALK mode).
2. Press the MEMORY button.
3. Press a number (0-9) to store the dialed number in that memory
location. If the memory location is occupied, the memory location and
stored name and number appear on the screen.
NOTE: If the memory location is empty, "EMPTY" appears in the
display.
4. Press the MEMORY button again.The display shows ENTER NAME.
NOTE: If you don't want to enter the name, skip step 5.
5. Use the handset number keypad to enter a name (up to 15 characters).
More than one letter is stored in each of the number keys. For
example, to enter Bill Smith, press the 2 key twice for the letter B.
Press the 4 key 3 times for the letter I. Press the 5 key 3 times for the
letter L, and wait for 1 second. Press the 5 key 3 times for the second
letter L, and press the 1 key to insert a space between the first and last
name. Press the 7 key 4 times for the letter S; press the 6 key once for
the letter M; press the 4 key 3 times for the letter I; press the 8 key for
the letterT; press the 4 key twice for the letter H.
6. Press the MEMORY button again to save the name.The display shows
ENTERTEL NUMBR.
7. Use the handset number keypad to enter the telephone number (up to
24 digits, including pauses) and press the MEMORY button again to
save the number.The unit beeps to confirm.
8. To enter another name and number in a different memory location,
return to step 1 and repeat the process.
Storing a Redial Number
1. Repeat steps 1 through 6 in Storing a Name and Number in Memory.
2. Press the REDIAL button.
3. Press the MEMORY button to store the number.You will hear a
confirmation tone.
To Replace an Old Memory with a New Redial Number
1. Repeat steps 1 through 6 in Storing a Name and Number in Memory.
2. Press the REDIAL button.
3. Press the MEMORY button, and REPLACE MEMO? shows in the
display.
4. Press the MEMORY button to replace the old memory with the new
redial number.You will hear a confirmation tone.
Changing a Stored Number
1. Repeat steps 1 through 7 in Storing a Name and Number in Memory.
REPLACE MEMO? shows in the display.
2. Press the MEMORY button to store the number.You will hear a
confirmation tone.
Dialing a Stored Number
1. Make sure the phone is ON by pressing theTALK/call back button.
2. Press the MEMORY button.
3. Press the number (0-9) for the desired memory location.The number
dials automatically.
OR
1. Make sure the phone is OFF (not inTALK mode).
2. Press the MEMORY button.
3. Use the CID/VOL (left or right arrow) button to scroll through the
numbers stored in memory until the desired number is shown.
4. PressTALK/call back.The number dials automatically.
Chain Dialing from Memory
Use this feature to make calls which require a sequence of numbers,
such as using a calling card for a frequently called long distance number.
You simply dial each part of the number sequence from memory.The
following example shows how you can use chain dialing to make a call
through a long distance service:
The Number For
Memory Location
Long distance access number
7
Authorization code
8
Frequently called long distance number
9
Advertisement

Related Manuals for GE 27995


Summary of Contents for GE 27995
-
Page 1: Parts Checklist
27995 Interference Information Before You Begin 5. Close the battery compartment by pushing the door up until it snaps Telephone Setup In Use Indicator the display.This information may include the phone number, date and Memory 40 Channel 2.4 GHz Call Waiting into place. -
Page 2: Answering System Operation
1. Make sure the phone is ON by pressing theTALK/call back button. Sample Outgoing Announcement Voice Menu System Headset and Belt Clip Operation Display and Caller ID Messages Handset does not ring Causes of Poor Reception Service 2. Press the MEMORY button and then press the 7 key. Hi, this is (use your name here), I can’t answer the phone right now, so please leave your Press this Button •...
Need help?
Do you have a question about the 27995 and is the answer not in the manual?
Questions and answers