Table of Contents
Advertisement
Advertisement
Table of Contents

Related Manuals for Kaiser Baas KBA15007


Summary of Contents for Kaiser Baas KBA15007
- Page 1 DELTA DRONE USER GUIDE...
- Page 2 /kaiserbaas Tag us & share the love. Need help? www.kaiserbaas.com/support For the full Kaiser Baas product range visit www.kaiserbaas.com...
-
Page 3: Table Of Contents
TABLE OF CONTENTS Delta Drone User Guide DISCLAIMERS AND WARNINGS Safety Warnings and Operating Guidelines Included Equipment Optional Accessories – sold separately Drone Specifications Low Voltage Alert Failsafe Mode Transmitter Specifications Gimbal Dial Gyro Calibration Battery Charging Battery Safety Warnings Rotor Blades Rotor Guards Pre-Flight and Flight Planning... -
Page 4: Delta Drone User Guide
This page is updated regularly with product information, updates and manual User Guide edits and can be accessed from the main menu. Kaiser Baas reserves the right to make changes to this User Guide if required. This User Guide is subject to change without notice. - Page 5 • Damage(s) or injuries caused by flying in areas such as those with: a) magnetic interference b) radio interference c) government regulated no-fly zones or airports • Any other losses that are not covered by the scope of Kaiser Baas liability. •...
-
Page 6: Safety Warnings And Operating Guidelines
SAFETY WARNINGS AND OPERATING GUIDELINES This Product is not intended for use by persons (including children) with reduced physical, sensory or mental capabilities or lack of experience and knowledge, unless they have been given supervision or instruction concerning use of the Product by a person responsible for their safety. Children should be supervised to ensure that they do not have access to the Product. - Page 7 • Never operate your Drone when intoxicated or when you are incapacitated in any other way. Delta Drone Features. The Delta Drone is an easy to fly, GPS enabled Quadcopter. Suitable for both new Pilot’s and experienced Drone flyers, alike. If you are new to the fun of flying Drones, you can expect to be up and flying in a short time.
-
Page 8: Included Equipment
The Delta Drone has removable Rotor Blades for easy transport, storage and most of all, increased safety. You can mount any GoPro™ or Kaiser Baas Action Camera to the bottom of the Delta Drone, to record your flight and capture aerial footage. -
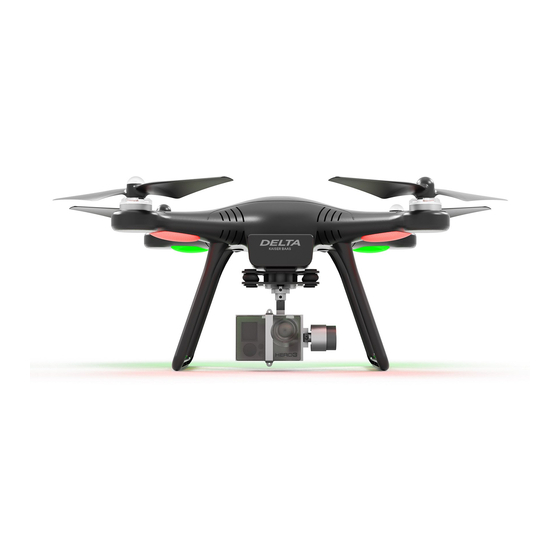
Page 9: Drone Specifications
DRONE SPECIFICATIONS Delta Drone Diagram: DELTA DRONE GPS QUADCOPTER Motor Rotor Blade Landing Gear Gimbal Mount LED Status Display LED Lights Delta Drone Lighting The Delta Drone features LED lights under each arm. These are the best way of telling which way the Delta Drone is oriented. SYSTEM STATUS LED FLASHING System self-checking (No GPS) -
Page 10: Low Voltage Alert
LOW VOLTAGE ALERT The Low Voltage Alert is trigged when the battery has less than 2 minutes of flight time left. When the LVA is triggered, the Drone should be landed as soon as possible to prevent an unexpected loss in power. If the Drone loses power completely, the Drone will hard-land which can damage the Drone and its components. -
Page 11: Transmitter Specifications
TRANSMITTER SPECIFICATIONS Transmitter Diagram: 1. START/TAKE OFF 2. GPS HOVER MODE GIMBAL 3. SMART ORIENTATION MODE HOLD HERE TO LOCK GPS DELTA DRONE GPS QUADCOPTER Power Button Lanyard Attachment Speaker Gimbal Dial Battery Indicator Flight Mode Switch Return to Home Battery Compartment The Transmitter features a number of different modes to control the Drone. - Page 12 Position 2 GPS Position Hold. GPS Position Hold does not change the way the Drone is oriented. It simply locks the position of the aircraft in place – in a hover. The altitude is fixed when the Throttle is at 50%. It will only increase or decrease in altitude when the Throttle is pushed repectively to the 70% or 30% position.
- Page 13 If the Pilot holds full Right Roll, the Drone will fly in a circle, clockwise around the Pilot (although the circle’s radius may tend to grow slightly with each orbit due to “lag”) Also, remember that GPS is only accurate to around 10 metres, so close fly- bys of the Take-off Location should be avoided.
- Page 14 Left Stick The Left Stick is known as the Throttle. This controls the Drone’s Elevation and Yaw. Elevation To engage the Throttle and control the Drone’s elevation and power, the Left Stick uses a North/South movement. North to ascend and South to descend.
- Page 15 [WARNING] Unless using SOM, take special note when changing the Drone’s Yaw (heading) as this will affect how the Drone reacts when using the Right Stick. Right Stick The Right Stick is also known as the Elevator/Aileron. This controls the Pitch and Roll of the Drone. Pitch Roll The Elevator/Aileron controls the forwards and backwards (Pitch)
-
Page 16: Gimbal Dial
GIMBAL DIAL The left side of the Transmitter features a Gimbal Control Dial. [Important] The Gimbal is an optional accessory, purchased separately (KBA15008) The Gimbal Dial only functions when a Gimbal is attached and connected to the Drone. See Gimbal User Guide. When connected, the Gimbal Dial allows the Pilot to control the tilt of the attached camera. -
Page 17: Gyro Calibration
GYRO CALIBRATION The Drone may need its Gyroscope to be re-calibrated if it has become misaligned after a flight or error. This is usually most beneficial when the Drone is starting to fly strangely or is behaving erratically. To reset the Gyro: Place the Delta Drone on flat, stable ground and disconnect the battery. -
Page 18: Battery
BATTERY It is imperative that only a Kaiser Baas Delta Drone Battery is used inside the Delta Drone. DO NOT use any third-party or unknown accessories or batteries. Always ensure your Delta Drone battery is charged before flight. CHARGING Connect the Delta Drone charger to the wall using the supplied power cable. - Page 19 Charge Time The Delta Drone battery should take approximately 3 hours to charge. Battery Life To ensure the longevity of your Delta Drone battery, never run the battery too low as this will impact the battery health and future flight time. Your Delta Drone battery should have a life of over 400 cycles, provided proper charging and maintenance is employed.
-
Page 20: Battery Safety Warnings
BATTERY SAFETY WARNINGS DO NOT disassemble the battery. DO NOT short-circuit the battery. DO NOT ever poke or puncture the battery with any blunt or sharp implement [WARNING] There is a high risk of it igniting! DO NOT ever leave the battery near an open flame or heat source. DO NOT immerse the battery in water, unless performing the discard process DO NOT charge the battery in direct sunlight. -
Page 21: Rotor Blades
ROTOR BLADES It is important that only Kaiser Baas Delta Drone Rotor Blades are fitted to the Delta Drone. Never use any third party accessories or tools. The Delta Drone has two types of Rotor Blade. The first has a Silver Nut and the second features a Black Nut. These colours are to signify which motor each Rotor Blade should be fitted to. - Page 22 Refer to the icon on the Rotor Blade to determine which direction to tighten the blade in. Rotor Blades should be tightened by hand only. [WARNING] Never use the Rotor Blade Removal Tool to tighten the blades. The Blades are self-tightening and do not require much force to install.
-
Page 23: Rotor Guards
Rotor Blade Warning Never use Rotor Blades with any signs of damage or wear and tear. This includes chips, scratches and cracks. Damaged Rotor Blades can cause the Drone to fail in-flight and may result in damage to persons or property. ALWAYS ENSURE that the correct Rotor Blade is matched to the correct motor, using the nut colour as a guide. - Page 24 Step 2. Place the Rotor Guards in the designated slots Step 3. Use the larger screws provided to fix the Rotor Guards in place...
-
Page 25: Pre-Flight And Flight Planning
Step 4. Attach the Safety Line through the allocated points to add another level of protection and structural stability to the Drone. PRE-FLIGHT AND FLIGHT PLANNING Please consult the Pre-Flight Checklist before EVERY flight. At a minimum: • Ensure that you are at least 5.5kms from any airfield and you are adhering to any regulations and laws laid out by your local aviation authority. -
Page 26: Powering-On The Drone
POWERING-ON THE DRONE Open the battery compartment and insert the Delta Drone battery all the way, with the Yellow and White battery connections facing outwards. Connect the Yellow battery power lead to the Drone. You will hear a beep, signalling the battery has been connected successfully. Neatly and carefully push the all connections into the compartment and close the cover. -
Page 27: Arm The Motors
ARM THE MOTORS The Drone must first be armed and the motors unlocked prior to take-off. To arm the motors, move the Throttle to the far bottom right (see markings on the Transmitter) and hold for 5 seconds. The LED indicator will flash and change to solid Yellow –... - Page 28 You are strongly encouraged to wait for GPS Lock before take-off. Failure to lock satellites will prevent Mode 2 and Mode 3 from being able to be used and will also prohibit the Drone from determining a Take-off Location. This may result in the loss of your Drone, should it venture out of Visual-Line-of-Sight (VLOS).
-
Page 29: Flight Conditions
FLIGHT CONDITIONS Always follow legislation set by local authorities on the rules and regulations surrounding where you are permitted to operate your Drone. Never fly your Drone in adverse weather conditions including rain, snow, fog or winds exceeding 10 knots. Never fly your Drone near large crowds or above unwilling spectators. -
Page 30: Post-Flight
POST-FLIGHT Disarm the Motors. To disarm the motors, push the Throttle to its lowest position and then push it to the far bottom left and hold for approximately 5 seconds. 1. START/TAKE OFF 2. GPS HOVER MODE Throttle Up GIMBAL 3. -
Page 31: Camera Mounts
The Delta Drone comes with three options for mounting a camera (like a GoPro™ or Kaiser Baas X-Series Action Camera). Option one: GoPro™ Mount. Affix a GoPro™ or Kaiser Baas Action Camera to the standard mount (included). Exo-Shells or Skeleton Mounts are sometimes used to save weight. -
Page 32: Development
Option 3: Gimbal Mount – purchased separately Please refer to the Kaiser Baas website for more information on the Gimbal Accessory. DEVELOPMENT We are always developing new and exciting accessories and upgrades for your Delta Drone. Check with the Kaiser Baas website regularly, to see any new exciting... -
Page 33: Product Specifications
PRODUCT SPECIFICATIONS Delta Drone Specification Max Ascent Speed: 6m per sec Hover Accuracy: 0.8m Max Flight Speed: 15m per sec Motors: 920 KV brushless Battery 3S LiPo, 11.1 V/2200 mAh Flying Weight: 810g Flight Time: Up to 17 minutes Size 290 x 290 x 185 mm Rotor Blades: 9043 Self Tightening... -
Page 34: Faq
Q1. My Drone does not take-off? A1. Make sure that your Delta Drone is powered-on and the motors are armed, as per the User Guide instructions. Refer to the User Guide for detailed information on how to operate the Drone safely. A2. - Page 35 Q5. My Drone is not stable in the air. A1. Always arm the motors after the Drone has acquired GPS Lock. Be sure to place the Drone on level ground before you connect the Drone battery. Make sure you are using GPS Position Hold or Smart Orientation Mode (SOM) once in the air.
-
Page 36: Contact Us
Q9. Can I attach other cameras to my Drone? A1. The Delta Drone is designed to support either GoPro™ or Kaiser Baas Action Cameras. We do not recommend that you attempt to attach any other camera type to this Drone, as it may seriously affect the balance or load-bearing ability of your Drone, possibly causing damage to components, property or people.
Need help?
Do you have a question about the KBA15007 and is the answer not in the manual?
Questions and answers