Advertisement

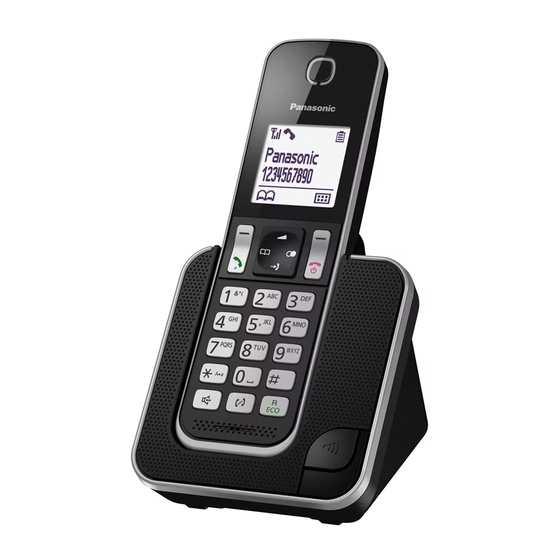
Model shown is KX-TGD310.
Before initial use, see "Getting Started"
on page 9.
Thank you for purchasing a Panasonic product.
Please read these operating instructions before using the unit and save them for
future reference.
0303_TGD3xxNZ(en-en)_ver002.pdf 1

Operating Instructions

Digital Cordless Phone
Model No.
Digital Cordless Answering System
Model No.
KX-TGD310NZ
KX-TGD312NZ
KX-TGD320NZ
KX-TGD322NZ
2015/03/03 10:28:02

Advertisement

Table of Contents
loading

Summary of Contents for Panasonic KX-TGD310NZ

  • Page 1: Operating Instructions

    KX-TGD322NZ Model shown is KX-TGD310. Before initial use, see “Getting Started” on page 9. Thank you for purchasing a Panasonic product. Please read these operating instructions before using the unit and save them for future reference. 0303_TGD3xxNZ(en-en)_ver002.pdf 1 2015/03/03 10:28:02...
  • Page 2: Table Of Contents

    Table of Contents Introduction Greeting message ........38 Listening to messages .......39 Model composition ........3 Advanced new message alerting Accessory information ........3 features ............40 Important Information Remote operation ........42 For your safety ..........5 Answering system settings ......43 Important safety instructions ......6 Useful Information For best performance ........7 Voicemail service ........45...
  • Page 3: Introduction

    Introduction Model composition n KX-TGD310 series n KX-TGD320 series R Model shown is KX-TGD312. R Model shown is KX-TGD322. Base unit Handset Series Model No. Part No. Part No. Quantity KX-TGD310 KX-TGD310 KX-TGD310 KX-TGDA30 series KX-TGD312 KX-TGD310 KX-TGDA30 KX-TGD320 KX-TGD320 KX-TGD320 KX-TGDA30 series...
  • Page 4: Expanding Your Phone System

    We recommend using Panasonic rechargeable batteries. By registering the key finder (4 max.) to a Panasonic Digital Cordless Phone and attaching it to an easy-to-lose item in advance, you can locate and find the mislaid item to which the key finder is attached.
  • Page 5: Important Information

    Important Information R Do not allow the AC adaptor or telephone line cord to be excessively pulled, bent or For your safety placed under heavy objects. To prevent severe injury and loss of life/ Operating safeguards property, read this section carefully before using the product to ensure proper and safe R Unplug the product from power outlets operation of your product.
  • Page 6: Important Safety Instructions

    Important Information R This product is unable to make calls when: R To minimise the possibility of lightning – the handset batteries need recharging or damage, when you know that a have failed. thunderstorm is coming, we recommend – there is a power failure. that you: –...
  • Page 7: For Best Performance

    R Operating the product near electrical Base unit location/avoiding noise appliances may cause interference. Move away from the electrical appliances. The base unit and other compatible Panasonic units use radio waves to communicate with Routine care each other. R For maximum coverage and noise-free...
  • Page 8: Specifications

    Important Information Information on Disposal in other Countries outside the European Union These symbols are only valid in the European Union. If you wish to discard these items, please contact your local authorities or dealer and ask for the correct method of disposal. Note for the battery removal procedure Refer to “Battery installation”...
  • Page 9: Getting Started

    Connect the telephone line cord to the Note: unit, then to the telephone line socket R Use only the supplied Panasonic AC until you hear a click. adaptor PNLV233AL. A DSL/ADSL filter (not supplied) is required if you have a DSL/ADSL service.
  • Page 10: Battery Charging

    (KX-TGD320 series: page 3) Note for battery installation R Use the supplied rechargeable batteries. For replacement, we recommend using the Panasonic rechargeable batteries noted on page 4, 6. Note for battery charging R It is normal for the handset to feel warm during charging.
  • Page 11: Controls

    Getting Started n Control type Soft keys Controls By pressing a soft key, you can select the feature shown directly above it on the Handset display. (Example: MENU, OK, etc.) Navigator key Navigator keys functions as follows. – MDN, MCN, MFN, or MEN: Scroll through various lists and items.
  • Page 12: Display Icons

    Getting Started n KX-TGD320 series: page 3 Item Meaning Security for phone calls is set to “Enhanced”. (page 33) Paging, intercom mode Speakerphone is on. (page 15) The line is in use. C D E R When flashing slowly: The call is put on hold.
  • Page 13: Turning The Power On/Off

    Getting Started Item Meaning Icon Action Line in Someone is using the line. Erases a number/character. Puts the call on mute. IN USE Answering system is being KX-TGD320 series: page 3 used by another handset or the base unit. Caller ID subscribers only Turning the power on/off KX-TGD320 series: page 3 Voicemail subscribers only...
  • Page 14: Recording Your Greeting Message

    Getting Started Recording your greeting message Available for: KX-TGD320 series (page 3) You can record your own greeting message instead of using a pre-recorded greeting message. See page 38 for details. MMENUN#302 MbN: “Yes” a MOKN Record a greeting message. a MSTOPN a MOFFN Other settings Eco mode setting...
  • Page 15: Making/Answering Calls

    Making/Answering Calls Example: If you need to dial the line access number “0” when making outside calls with a Making calls PBX: 0 a MDN (Pause) Lift the handset and dial the phone number. Dial the phone number. a M R To correct a digit, press MCLEARN.
  • Page 16: Call Share

    Making/Answering Calls To release hold, press M Handset equalizer Note: This feature clarifies the voice of the person R After holding for 10 minutes, the call is you are talking to, producing a more disconnected. natural-sounding voice that is easier to hear and understand.
  • Page 17: Intercom

    Making/Answering Calls MMENUN a MbN: “Conference” a also answer baby monitor calls automatically. The default setting is “Off”. MOKN R To leave the conference, press MOFFN. MMENUN#273 The other 2 parties can continue the MbN: Select the desired setting. a MOKN conversation.
  • Page 18 Making/Answering Calls Panasonic Ni-MH battery performance (supplied batteries) during power backup mode When the batteries are fully charged, operating time of the handset in power backup mode varies depending on usage. – Continuous use of the handset in power backup mode: 2 hours max.
  • Page 19: Phonebook

    Phonebook Categories Phonebook Categories can help you find entries in the You can add 120 names (16 characters max.) phonebook quickly and easily. You can and phone numbers (24 digits max.) to the change the names of categories (“Friends”, phonebook, and assign each phonebook entry “Family”, etc.).
  • Page 20: Speed Dial

    Phonebook Editing entries Speed dial Find the desired entry (page 19). a You can assign 1 phone number to each of MMENUN the dial keys (1 to 9) on the handset. MbN: “Edit” a MOKN Edit the name if necessary. a MOKN Adding phone numbers to speed Edit the phone number if necessary.
  • Page 21 Phonebook Erasing an entry Press and hold the desired speed dial key (1 to 9). a MMENUN MbN: “Erase” a MOKN MbN: “Yes” a MOKN a MOFFN Viewing an entry/Making a call Press and hold the desired speed dial key (1 to 9).
  • Page 22: Programming

    Programming Menu list To access the features, there are 2 methods. n Scrolling through the display menus MMENUN Press MCN, MDN, MEN, or MFN to select the desired main menu. a MOKN Press MCN or MDN to select the desired item from the next sub-menus. a MOKN Press MCN or MDN to select the desired setting.
  • Page 23 Programming Sub-menu 1 Sub-menu 2 Settings Code Settings 2-9 Rings #211 Number of Rings <5 Rings> Auto 1 Minute #305 Recording Time <3 Minutes> Greeting Only – #306 Remote Code Call Screening <On> #310 – – #327 Answer On – –...
  • Page 24 Programming Main menu: “Initial Setup” Sub-menu 1 Sub-menu 2 Settings Code Ringer Setup Off-6 <6> #160 – Ringer Volume – Handset Off-6 <3> #G160 – Ringer Volume – Base Unit *1, *2 <Ringtone 1> #161 – Ringtone (Handset) Do Not Disturb #238 Mode <Off>...
  • Page 25 Programming Sub-menu 1 Sub-menu 2 Settings Code Finder1 #6561 – Key Finder Setup Change Name – 1:Add New Device #6562 Finder2 (for Finder1) #6563 Finder3 – 2:Add New Device (for Finder2) #6564 Finder4 – 3:Add New Device Register – #6571 –...
  • Page 26 Programming Sub-menu 1 Sub-menu 2 Settings Code Line Setup *2, *12 900 msec. #121 Recall/Flash 700 msec. <600 msec.> 400 msec. 300 msec. 250 msec. 200 msec. 160 msec. 110 msec. 100 msec. 90 msec. 80 msec. *2, *13 – #194 –...
  • Page 27 Programming Main menu: “Ringer Setup” *14, *15 Sub-menu 1 Sub-menu 2 Settings Code Ringer Volume Handset Off-6 <6> #160 – *1, *2 Off-6 <3> #G160 – Base Unit – <Ringtone 1> #161 – Ringtone (Handset) Do Not Disturb On/Off #238 Mode <Off>...
  • Page 28: Alarm

    Programming If you register 2 or more key finders. *10 This menu is not displayed when repeater mode is set to “On”. *11 If you subscribe to a Caller ID service and want to view the caller’s information after lifting up the handset to answer a call, turn off this feature.
  • Page 29: Nuisance Call Block

    Programming disturb mode can be set for each handset. Note: Using the phonebook’s category feature R When the answering system answers the (page 19), you can also select categories of call, this feature does not work. callers whose calls override do not disturb (KX-TGD320 series: page 3) mode and ring the handset (Caller ID subscribers only).
  • Page 30: Baby Monitor

    Programming n From the caller list: To edit a number: MEDITN a Edit the number. a MOKN a MCN CID MOFFN MbN: Select the entry to be blocked. a To erase a number: MMENUN MERASEN a MbN: “Yes” a MOKN a MbN: “Save Call Block”...
  • Page 31 Programming order to use the baby monitor feature MbN: Select “External” to monitor (page 34). from an outside line. a MEDITN a R If the unit is connected to a PBX system, MADDN you cannot set the baby monitor. MbN: “Phonebook” a MOKN R During the monitoring mode, battery consumption is faster than usual.
  • Page 32: Other Programming

    Programming You can turn off the baby monitor feature Edit the phone number if necessary. a by pressing #0. MOKN 2 times Note: Erasing an outside monitoring R The unit disconnects the call automatically after 2 minutes. number Press MMENUN on the handset being monitored.
  • Page 33: Registering A Unit

    Programming Enter an area code (5 digits max.). a MOFFN MOKN a MOFFN Note: Note: R If you set repeater mode to “On” R The use of this feature can prevent a (page 34): National Call from being dialled. E.g., in the –...
  • Page 34 You can increase the signal range of the base R If you forget your PIN, contact an unit by using a DECT repeater. Please use authorised service centre. only the Panasonic DECT repeater noted on page 4. Contact your Panasonic dealer for Selecting a base unit details.
  • Page 35 Programming Registering the DECT repeater (KX-A405/KX-A406) to the base unit Note: R Please use a repeater that has not yet been registered to another unit. If the repeater is registered to another unit, deregister it first, referring to the Installation Guide for the DECT repeater.
  • Page 36: Caller Id Service

    Caller ID Service R If the unit is connected to a PBX system, caller information may not be properly Using Caller ID service received. Contact your PBX supplier. Important: R This unit is Caller ID compatible. To use Missed calls Caller ID features, you must subscribe to a If a call is not answered, the unit treats it as a Caller ID service.
  • Page 37 Caller ID Service Note: R If is displayed in step 2, not all of the information is shown. To see the remaining information, press MEN. To return to the previous screen, press MFN. R If the entry has already been viewed or answered, “...
  • Page 38: Answering System

    Answering System Answering system Turning the answering system on/off Available for: The answering system is preset to on. KX-TGD320 series (page 3) Base unit The answering system can answer and record Press MANSWER ON/OFFN to turn on/off the calls for you when you are unavailable to answering system.
  • Page 39: Listening To Messages

    Answering System – If you erase or do not record your own R If new messages have been recorded, the greeting message, the unit plays a base unit plays back new messages. pre-recorded greeting asking callers to R If there are no new messages, the base leave a message.
  • Page 40: Advanced New Message Alerting Features

    Answering System MbN: “Play” a MOKN Using the handset You can also erase as follows: MMENUN a MbN: “Erase” a MOKN a When new messages have been recorded, MbN: “Yes” a MOKN is displayed on the handset with the total number of new messages.
  • Page 41 Answering System – store a phone number to which the unit Edit the name if necessary (16 characters makes the call to. max.). a MOKN – turn on the new message alert setting. Edit the phone number if necessary (24 After you answer the new message alert call, digits max.).
  • Page 42: Remote Operation

    Answering System Press 4 to play the new message. After the greeting message starts, enter your remote access code. Note: Follow the voice guidance prompts as R Within 10 seconds after listening to new necessary or control the unit using messages, you can press #9 during the remote commands (page 42).
  • Page 43: Answering System Settings

    Answering System If pressed within the first 5 seconds of a know that there are no new messages when message, the previous message is the phone rings for the 3rd time. You can then played. hang up without being charged for the call. MMENUN#211 Turning on the answering system MbN: Select the desired setting.
  • Page 44 Answering System that you have messages. To use this service you will be required to leave your answering machine off on your unit (page 38). This will allow the service to receive any messages. R To use the unit’s answering machine rather than the service provided by your phone service provider, please contact your phone service provider to have it removed or...
  • Page 45: Useful Information

    Useful Information Voicemail service To receive Call Minder or Message Mailbox messages, please note the following: “Call Minder” and “Message Mailbox” are automatic answering services offered by your phone service provider. After you subscribe to this service, your phone service provider’s voicemail system answers calls for you when you are unavailable to answer the phone or when your line is busy.
  • Page 46 Useful Information Alphabet character table (ABC) Numeric entry table (0-9) Greek character table ( Extended 1 character table ( R The following are used for both uppercase and lowercase: Extended 2 character table ( 0303_TGD3xxNZ(en-en)_ver002.pdf 46 2015/03/03 10:28:06...
  • Page 47: Error Messages

    Useful Information R The following are used for both uppercase and lowercase: Cyrillic character table ( Error messages Display message Cause/solution Base no power R Confirm the base unit’s AC adaptor is connected to the unit and the power outlet correctly. No link.
  • Page 48: Troubleshooting

    Useful Information Troubleshooting If you still have difficulties after following the instructions in this section, disconnect the base unit’s AC adaptor and turn off the handset, then reconnect the base unit’s AC adaptor and turn on the handset. General use Problem Cause/solution The handset does not turn...
  • Page 49: Battery Recharge

    Useful Information Problem Cause/solution I cannot register a handset R The maximum number of base units (4) is already registered to to a base unit. the handset. Cancel unused base unit registrations from the handset (page 34). R The maximum number of handsets (6) is already registered to the base unit.
  • Page 50 Useful Information Problem Cause/solution The base unit does not R The ringer volume is turned off. Adjust ringer volume (page 15, ring. 24). I cannot make a call. R If you are using a BT double adaptor to connect the unit, remove the adaptor and connect the unit to the phone wall socket directly.
  • Page 51: Liquid Damage

    Useful Information Answering system Problem Cause/solution The unit does not record R The answering system is turned off. Turn it on (page 38). new messages. R The message memory is full. Erase unwanted messages (page 39). R The recording time is set to “Greeting Only”. Change the setting (page 44).
  • Page 52: Warranty

    6) Damage to the product caused by accident, misuse or Act of God. 7) Repairs when the product has been dismantled, repaired, modified or serviced by other than a Panasonic Authorised Dealer authorised to service that type of product. IF YOUR PANASONIC PRODUCT FAILS WITHIN THE...
  • Page 53: Index

    Index Handset Deregistration: 34 Index Locator: 11 Name: 32 Additional base units: 33 Registration: 34 Additional handsets: 33 Hold: 15 Alarm: 28 Intercom: 17 Answering calls: 15 Key finder: 25, 26 Answering system: 38 Key lock: 17 Call screening: 43 Keytones: 25 Erasing messages: 39, 40, 42 Greeting message: 38...
  • Page 54 Notes 0303_TGD3xxNZ(en-en)_ver002.pdf 54 2015/03/03 10:28:06...
  • Page 55 Notes 0303_TGD3xxNZ(en-en)_ver002.pdf 55 2015/03/03 10:28:06...
  • Page 56 (found on the bottom of the base unit) Name and address of dealer Attach your purchase receipt here. Customer Care Centre Tel. No.: (09) 272 0178 or website www.panasonic.co.nz Sales Department: 18 Sir Woolf Fisher Drive, Highbrook, East Tamaki, Auckland,...

This manual is also suitable for:

Kx-tgd312nzKx-tgd320nzKx-tgd322nz

Table of Contents